Muckin_Slusher
Well-known member
Newfangled floating horse!

Newfangled floating horse!
Not really. Eadweard Muybridge did a chronophotographic study that proved that there are times all four feet of a horse are off the ground. And he did it in the late 1800's.Newfangled floating horse!

A lot of people trailer stuff with rear SMV signs backwards, for what it's worth.Ah. My intention was that the vehicle he's putting it on, the kayak, will be being transported by his legally lighted trailer. No different than having one on a combine that's being trailered between distant farms behind a semi.
Sad, but true.A red shop rag will usually do the trick.


DOT still doesn’t like it, or so the drivers told me back when I loaded/shipped farm equipment for a living.No different than having one on a combine that's being trailered between distant farms behind a semi.
Where I live, a red flag denotes an over-length load--anything that projects farther than five feet behind the bumper of the rig doing the hauling. Lumber stores were always happy to staple a red shop rag to the end of a load--until they cheaped out and went to red plastic flags.A red shop rag will usually do the trick.


On our 24' stock trailer they run lengthwise.Nice work on the trailer floor. Hadn't really thought about it before but it makes sense the boards would go in crossways instead of in the long direction like a utility trailer.
I was thinking about traction for the horses during loading and transport.On our 24' stock trailer they run lengthwise.
I’ve seen them both ways, by far the majority of them around here are crossways. We gap them about 3/4 of an inch to allow the manure to fall through and to give the cattle a chance to have a little grip. These things get way slippery when they’re covered in liquid manure. Other options are cleated floors which are usually synthetic material and are very expensive, or attaching a welded wire cattle panel to the floor with fence staples. With the panel you risk a foot injury if the staple works itself out or wires of the panel get bent upward.Nice work on the trailer floor. Hadn't really thought about it before but it makes sense the boards would go in crossways instead of in the long direction like a utility trailer.


Footrests! Inset a bit from the front edge so the stools can be pushed into the bar.First off pardon the mess. Have about 5 projects going on at once and this is just one of them.
Been working on a bar height table for under my shop porch. If you are asking "why the horrendously complicated middle section?", it's related to the design. I am trying to build 2 removable 24" troughs for the center section for storing drinks. The center section would have removable sections in the top for when you want to use one or both.
I still haven't figured if or how I am going to manage fabricating those, so almost hopeful for suggestions on that. I'd love a magnetic brake to get it done but thats not a viable option long term
Here I have it mocked up and making sure my composite boards fit. Trying to decide if I want to get fancy with footrests or just leave it open.

Welded this up a few weeks back, now it has its forever home
It's over 7' tall


Cam, I have a Hobart spot welder that would be perfect for that. (Thanks to my trip to Durango / tool trade with @readhead)Well this wasn’t much of a welding project but I’m posting it anyhow. Needed a utility shroud that covers conduit going vertical from a 12” x 12” x 8” junction box in an inmate accessible area. So this needed to fit deadass square and flush to the top and extend up 57”.
The sucky part is it’s 16ga and my brake just barely handles 2ft width let alone trying to do 4ft. So two 2ftr’s and a 9” piece it was.
I didn’t remotely feel like **** welding it so I made some splices to plug weld it together.
Primed n ready to install Monday morning.
OH NOW YA TELL MECam, I have a Hobart spot welder that would be perfect for that. (Thanks to my trip to Durango / tool trade with @readhead)
You're welcome to borrow it any time.


It has both the long shallow arms and the short deep box arms..OH NOW YA TELL ME
I’ve got to make another one in the next couple of weeks. I might just take you up on that offer. Thank ya


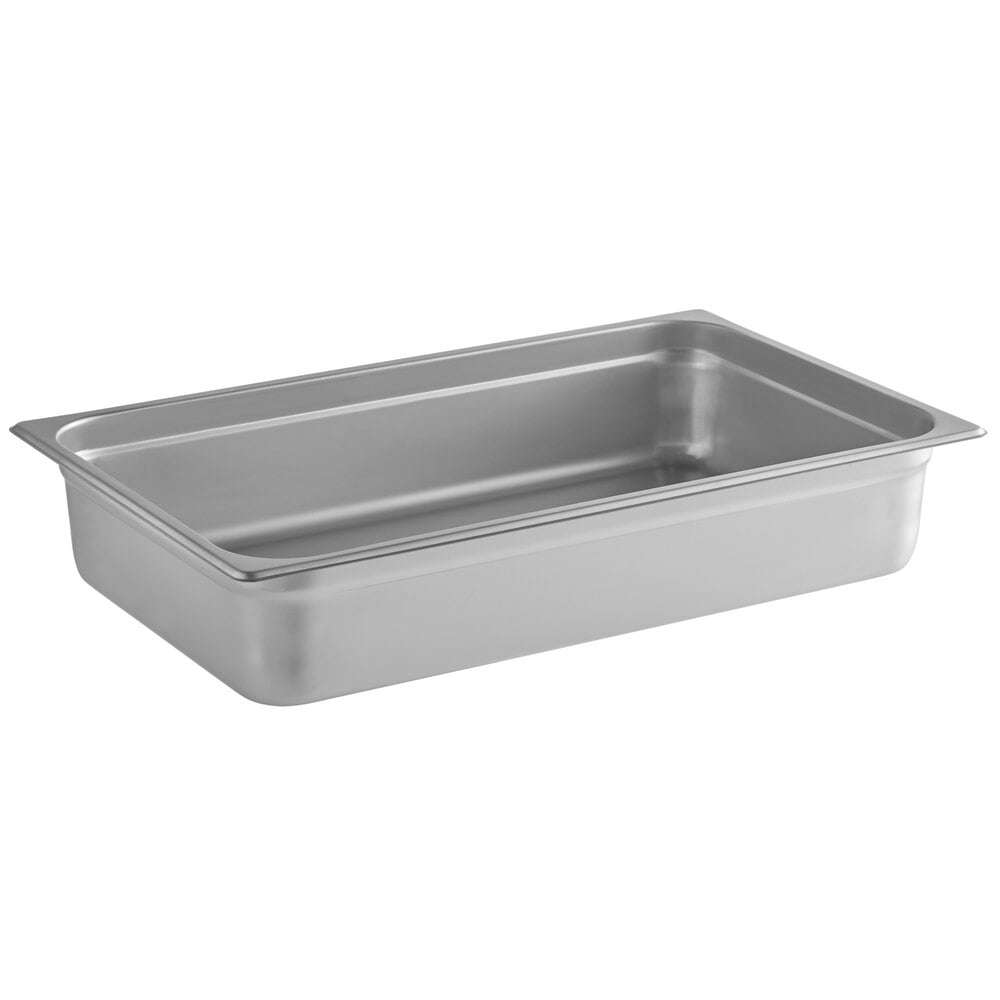
@jcarapet, have you considered restaurant steam table trays? I did a quick Google and found this 24-gauge stainless one.First off pardon the mess. Have about 5 projects going on at once and this is just one of them.
Been working on a bar height table for under my shop porch. If you are asking "why the horrendously complicated middle section?", it's related to the design. I am trying to build 2 removable 24" troughs for the center section for storing drinks. The center section would have removable sections in the top for when you want to use one or both.
I still haven't figured if or how I am going to manage fabricating those, so almost hopeful for suggestions on that. I'd love a magnetic brake to get it done but thats not a viable option long term

 Works alot better than I thought it would. Gets at least 3/4 of the load out of the truck. Each load is 2 tons of 3/4". I thought I would just try it and see if I need to modify it (make it taller), but I don't think I need to at all. the parts that it doesn't get is because of the wheel wells being narrower than the bed, so the blade has to fit between the wheel wells. But, it's only an easy 4-5 minutes of shoveling/racking to get the rest out of the bed. Much faster than without the blade
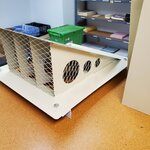
I made 4 snow and ice diverters for our building in Anchorage. Basically these protect the outside camera system from falling ice that knock the cameras off the wall. So far, so good.
Cheers
what's the holes and wire mesh for?I made 4 snow and ice diverters for our building in Anchorage. Basically these protect the outside camera system from falling ice that knock the cameras off the wall. So far, so good.
Cheers
The holes were just an attempt to lighten them up the expanded metal hopefully will keep the birds out.what's the holes and wire mesh for?
what's the holes ... for?
what's the ... wire mesh for?

ah, right on. I was trying to think of what they would do to maybe melt ice quicker or something like thatThe holes were just an attempt to lighten them up the expanded metal hopefully will keep the birds out.
Speed holes always look cool though I believe these are for deflecting ice and snow sliding off the eve of a roof--which should have been wider to begin with. When the ice/snow hits them, it'll be going about 30 mph.ah, right on. I was trying to think of what they would do to maybe melt ice quicker or something like that
Nice job Cap. I just walked a camera project at a shooting range today. It’s a 300yrd range split in two by a 8ft tall block wall. Each range is roughly 100yd wide. And they want cameras at the 24yd mark.I made 4 snow and ice diverters for our building in Anchorage. Basically these protect the outside camera system from falling ice that knock the cameras off the wall. So far, so good.
Cheers

I may not be a smart man but I don't think that'll roll well.Made some blocks for raising the 42" HF box up level to the 56" box.
Great job.welded up this blade thing last night to help unloading rocks from my truck. Made it from free scrap metal.