zmotorsports
ALLIANCE MEMBER
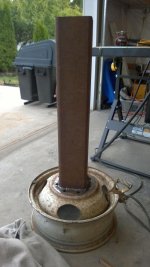
My first real project is basically complete, less paint ... but my leave it raw.
Replaced a wooden outboard test stand with one made from 1x2" and 1x1.5" tubing. More of a learning experience, to get back into the fabrication mind set. It was fun doing it, and learned a lot.
Took some advice on the casters and welded on mounting pads, then bolted the casters to them. Solid as a rock, way overbuilt, and pretty neat to boot.
Project topic is here.
Nice job.
 Looks very sturdy.
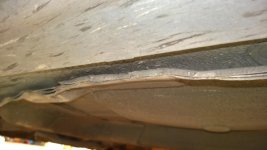
 If I could just give one bit of advice, on your second picture where you joined the tube perpendicular to the other, if you put a chamfer on the mating tube it will create a little more of a channel(where it meets the rolled edge of the square tubing) for you to fill in with weld. This is especially helpful if you plan on grinding down the weld flush for asthetics like you did.
Mike.