bmxdad
Well-known member
Not a new project .. but new equipment. Picked up an almost new Eastwood TIG 200. The guy bought it for a restoration project, but had to much trouble with warpage, so having a pro do the patching. He was restoring a 65' Austin Healey, which has an aluminum body, with steel fenders, doors, and hoods.
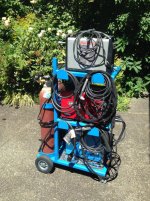
It came with an owner owned argon bottle, cases of consumables, cart, gas lens kit, all for $500, which to me seems a good deal. Even has two years left on the warranty. Most boxes in my area are going for over $1200 for just the box. I bought it for some sheet metal and tubing projects I'd like to do. Tried dialing down my Hobart 187 when repairing some lawn furniture, but kept blowing through the metal. Hoping a Tig will give me more control.
It came with an owner owned argon bottle, cases of consumables, cart, gas lens kit, all for $500, which to me seems a good deal. Even has two years left on the warranty. Most boxes in my area are going for over $1200 for just the box. I bought it for some sheet metal and tubing projects I'd like to do. Tried dialing down my Hobart 187 when repairing some lawn furniture, but kept blowing through the metal. Hoping a Tig will give me more control.


") As for blowing holes, I deal with it quite a bit and is due to poor fit up but sometimes that's the best you could get it to fit in which case some sort of backing (aluminum, copper etc) material helps to minimize burning holes. When all else fails...it's Bondo time.
As for blowing holes, I deal with it quite a bit and is due to poor fit up but sometimes that's the best you could get it to fit in which case some sort of backing (aluminum, copper etc) material helps to minimize burning holes. When all else fails...it's Bondo time.