To avoid these ads, REGISTER NOW!

Show us your welding projects

Deerediesel

Well-known member
Joined
Apr 19, 2015
Messages
52
Location
Columbia Falls, Maine
I almost had to make one of those last week for a boat I've been doing the metal work on for a buddy. The exhaust tip was only a few inches lower than the turbo. There's no room above the turbo to make a riser, so he ended up dropping the exhaust tip quite a bit and fiberglassing it back in.


The rule is 12” drop from where water can enter turbo to loaded water line.


Sent from my iPhone using The Garage Journal mobile app
 
To avoid these ads, REGISTER NOW!

Dragoonmc

Well-known member
Joined
Feb 5, 2015
Messages
60
I have not done any metal work in a long time.

Always liked the combination of wood and metal.

Frame is made out of 1” square black painted tubing

and the wood is some pine ply finished with oil modified poly.


This looks amazing,
How did you attach the wood to the frame? Did you leave a gap between the wood and steel?


Sent from my iPhone using Tapatalk
 

acer66

Well-known member
Joined
Dec 4, 2010
Messages
4,418
Location
Western North Carolina
This looks amazing,
How did you attach the wood to the frame? Did you leave a gap between the wood and steel?


Sent from my iPhone using Tapatalk

Thank you very much.
I tried to have no gap between ply and frame
and I just welded some spring washers flush at the back of the frame
and secured the ply with screws so the ply was recessed about an 1/8”.
 

mxdev

Well-known member
Joined
Aug 28, 2019
Messages
97
Location
SW Ontario
Offset smoker I put together last winter out of a couple 100lb (25 gallon) propane tanks I picked up on the cheap.

Winged most of the design, and just started putting lines and cutting where it seemed to make sense based on other smokers I have seen.

Added a 1/4" flat cooktop to the firebox for some cast iron cooking, base of cook chamber is sealed to be a full water pan with drain. Damper between firebox and cook chamber had to be added for to be able to manage heat.

Had to fabricate a box in the cook chamber was well to push the smoke down lower so it could hit some tuning plates so I could get the heat where I needed it.

If I were doing it again, I would of started with a 60 gallon or bigger tank. Have to keep the fire a bit small to keep heat down, but that means I have to poke the fire every hour or so.

Still makes the best bbq I have ever done, and planning on building a charcoal/wood grill in the future.
 

Attachments

  • 20190520_171536.jpg
    20190520_171536.jpg
    151 KB · Views: 168
  • 20190419_180440.jpg
    20190419_180440.jpg
    60.5 KB · Views: 133
  • 20190316_161708.jpg
    20190316_161708.jpg
    54.2 KB · Views: 139
  • 20190302_164223.jpg
    20190302_164223.jpg
    132.1 KB · Views: 143
  • 20190202_170324.jpg
    20190202_170324.jpg
    78.3 KB · Views: 143
  • 20190110_000418.jpg
    20190110_000418.jpg
    112.2 KB · Views: 148
  • 20190520_171604.jpg
    20190520_171604.jpg
    150.4 KB · Views: 149

mxdev

Well-known member
Joined
Aug 28, 2019
Messages
97
Location
SW Ontario
Picked up an import floor standing drill press with a custom table for cheap at an auction, and the table in a separate lot.

After bringing it home, I realized that the custom table wasn't flat in any direction. It was sloped down and twisted. I screwed a piece of wood with wedges to manage for a bit, but decided to fab up a new knuckle.

Took a piece of pipe and cut out the middle. Made some tabs to clamp onto the existing table mount. Turned down a piece of pine on my wood lathe and drilled a hole to be a solid jig to make it square to the chuck.

Made some arms, and a piece of angle to mount to the pillar, and tacked it up and welded it out.

Amazingly, it was as square as I need it once I mounted the table and locked it all down.
 

Attachments

  • 20181208_152410.jpg
    20181208_152410.jpg
    60.8 KB · Views: 141
  • 20181208_145801.jpg
    20181208_145801.jpg
    51.3 KB · Views: 148
  • 20181208_145757.jpg
    20181208_145757.jpg
    60.6 KB · Views: 150
  • 20181203_225637.jpg
    20181203_225637.jpg
    49.2 KB · Views: 147
  • 20181203_204715.jpg
    20181203_204715.jpg
    54.9 KB · Views: 147
  • 20181201_174927.jpg
    20181201_174927.jpg
    63.4 KB · Views: 151
  • 20190107_163453.jpg
    20190107_163453.jpg
    42.8 KB · Views: 157

TTMotorsports

Well-known member
Joined
Jan 8, 2019
Messages
1,107
Location
Lucerne Valley, CA
9inch truss and tab.

Video here.


Will be posting videos every week. Please subscribe to help support the channel. Thanks guys.8a26e072e81addef8c59a45690d0bd8b.jpg
 

Attachments

  • 8a26e072e81addef8c59a45690d0bd8b.jpg
    8a26e072e81addef8c59a45690d0bd8b.jpg
    204.5 KB · Views: 10

LeeG

Well-known member
Joined
Nov 29, 2012
Messages
1,526
Location
Phoenix, AZ
Air Nozzle holder

This was inspired by an earlier post on here for air tool storage. My hose reel is near the garage door, and I have a variety of different nozzles I use, so I wanted a convenient place to store them. Tractor Supply had their cheap female couplings on clearance, so I grabbed a few. I finally got to use some of the tools I had bought from SWAG Offroad.

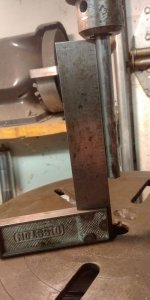
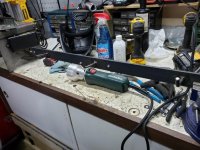
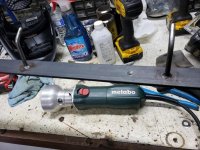
First I notched some 1x1x1/8" angle. I just used my portaband in a table to do the cuts (2 of these).
View media item 98119
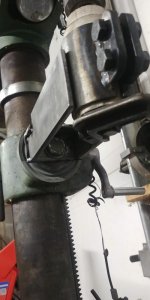
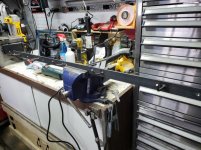
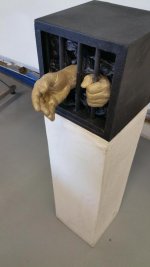
Next, I used my finger brake to bend the angle.
View media item 98120
Angle all bent. I had never been able to do this prior to getting the brake. It will be a nice capability to have for future projects.
View media item 98121
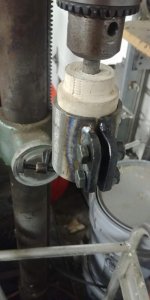
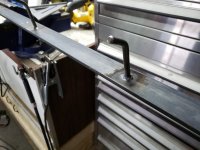
Next I took a piece of 1" x 1/8" flat bar and drilled and tapped it for 3/8" NPT and screwed in the couplers.
View media item 98122
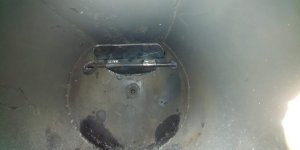
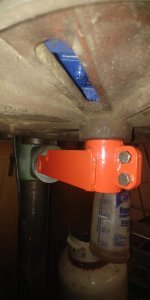
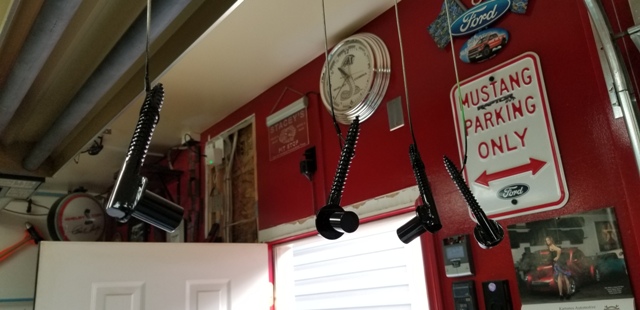
Here it is all welded up, painted, and installed below my air reel. It is mounted to the wall and sits right behind the door track.
View media item 98123
I've had this finished for a few weeks now and it has been nice having the various nozzles all in one place. I'd like to do something similar for my pneumatic tools, but I really don't use them that much any more, and I don't have the space.

Lee
 

OCD

Well-known member
Joined
Dec 30, 2014
Messages
1,316
Location
Edmonton, Ab. Canada
Little project for my Dad's neighbor. He was helping them hang two gates, but couldn't find hinges that would work the way he wanted. I came up with these,

20190929_161043.jpg


20191004_184948.jpg


20191004_185320.jpg


20191004_192024.jpg


20191005_104116.jpg
 

welder4956

Well-known member
Joined
Apr 8, 2010
Messages
3,059
Location
Birmingham, AL USA
Just a quick project to hang my welding helmets and face shields on. I used a 4 ft. length of 1/4" x 1-1/2" steel flat bar and drilled 3/16" countersunk holes on 16" centers to mount to the wall studs. I made 5 pegs 3" long from 1/4" diameter steel rod salvaged from an old garden trellis. Lined up all 5 in the bench vise with 1" sticking out above the jaws and hammered them over to about 45 degrees with a ball peen hammer. Stuck each peg in a 5/16" hole drilled on 10" centers and tack welded from the back side. After they were all tack welded, I squared them up and welded front and back solid. Still need to prime and paint, then hang it on the wall.
 

Attachments

  • 20191103_081635.jpg
    20191103_081635.jpg
    90.8 KB · Views: 230
  • 20191103_081827.jpg
    20191103_081827.jpg
    93.7 KB · Views: 238
  • 20191103_081817.jpg
    20191103_081817.jpg
    81.9 KB · Views: 231
  • 20191103_081734.jpg
    20191103_081734.jpg
    91 KB · Views: 273
Last edited:
To avoid these ads, REGISTER NOW!

tarmy

Well-known member
Joined
May 28, 2014
Messages
4,662
Location
Nor Cal
Just a quick project to hang my welding helmets and face shields on. I used a 4 ft. length of 1/4" x 1-1/2" steel flat bar and drilled 3/16" countersunk holes on 16" centers to mount to the wall studs. I made 5 pegs 3" long from 1/4" diameter steel rod salvaged from an old garden trellis. Lined up all 5 in the bench vise with 1" sticking out above the jaws and hammered them over to about 45 degrees with a ball peen hammer. Stuck each peg in a 5/16" hole drilled on 10" centers and tack welded from the back side. After they were all tack welded, I squared them up and welded front and back solid. Still need to prime and paint, then hang it on the wall.

What is that metabo used for...what is the head on it?
 

sqznby

Well-known member
Joined
Oct 26, 2013
Messages
981
Location
Coastal NC
What is that metabo used for...what is the head on it?

I was curious about that myself. Looks like the compact die grinder but, I'm unsure about the attachment on it.
Maybe a router attachment?
 
Last edited:

tarmy

Well-known member
Joined
May 28, 2014
Messages
4,662
Location
Nor Cal
Well...I need that...

Hell, until you guys told me what it was...I didn’t even know I needed it...

Ummm....what is it used for? :lol_hitti
 

sqznby

Well-known member
Joined
Oct 26, 2013
Messages
981
Location
Coastal NC
Well...I need that...

Hell, until you guys told me what it was...I didn’t even know I needed it...

Ummm....what is it used for? :lol_hitti

Not sure if you're serious or joking.
Simple answer = It grinds your tungsten for tig welding. I'm sure someone else will chime in with a more elaborate answer.
 

checkthisout

Well-known member
Joined
Sep 5, 2008
Messages
5,232
Shipping container cabin.

View media item 98211
At least 500' feet of weld bead thus far.

Started out with a 120V lincoln and quickly upgraded to an engine-driven Trailblazer. All flux core .045 and now 5/64ths wire.
 

welder4956

Well-known member
Joined
Apr 8, 2010
Messages
3,059
Location
Birmingham, AL USA
Maybe if he used it right lol.

I think he is showing how it does not bog down like the Dremel style tungsten sharpeners. Mine will easily chew through a piece of tungsten without slowing down a bit. Not that I want to waste money on tungsten demonstrating it. It does a great job of sharpening though and I am pleased with it.
 
To avoid these ads, REGISTER NOW!
Top Bottom