pepi
Well-known member
Best and only thread, to stop by and check things out..

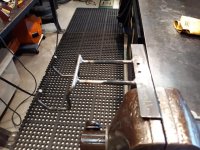
Had to make an extension for crowfoot to torque some turbo flange bolts that were in a super tight area. Cut a harbor freight serpentine belt tool to length and welded it.

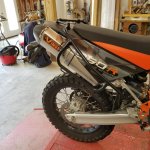
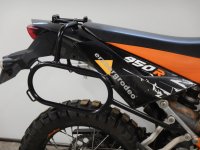
How are you going to drain it?


")
Nice, a working Aerowave, yea that machine was cutting edge when it came out!I have a Miller Aerowave I got from a school auction, its more machine than I needed but the price was right. I have taken a tig class at the local trade school, but no other training. I left that class with little more than the basics. We had Dynasty's at the school, so they kinda set themselves up. I believe the Aerowave is the predecessor to the dynasty. I can set most anything individually.
I think your weld looks good. It's hard to tell but I think it looks a little dirty in the picture.
A simple project from a couple months ago.
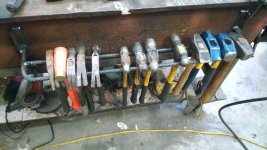
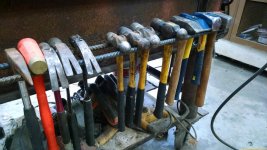
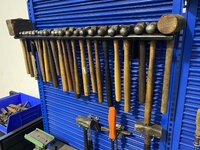
A Hammer Rack:


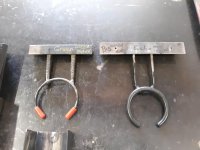
I don’t know what is is about these silverware frogs but I just can’t stop making them. I think this is the 6th one in a year. Even in my 30’s I’m still hand making gifts for my Mom’s Birthday. Hopefully they have gotten better since kindergarten.
Sent from my iPhone using Garage Journal
A simple project from a couple months ago.
A Hammer Rack:


Sent from my iPhone using The Garage Journal mobile app
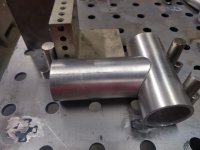
A recent project I finish up for a guy. 408 stroker with turbo 400. Twin 67mm turbos. I did the hot and cold side as well as the tubular front end.
Nice work, did you make the manifolds as well? Any shots of your work before the installation?


No the customer already had a set of headers. I just modified them to work a little better for the setup.
Sent from my iPhone using The Garage Journal mobile app

No the customer already had a set of headers. I just modified them to work a little better for the setup.
Sent from my iPhone using The Garage Journal mobile app
A small but needed hanger for the blower.
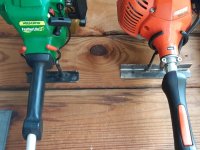
I fabbed up two new hangers for the weed eaters. These hangers will not let the weed eater come off the wall. You have to push the weed eater up to take it out.
Very nice job on the hangers. That was one of the first projects that I completed once I got my shop up and running at the new place. I hated having my lawn tools sitting on the floor in the house garage.
made some clamps
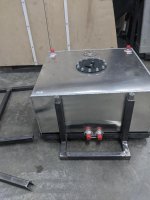
I've been less than satisfied with the plastic fuel cell I have in my 79 Mustang and decided to upgrade it to an aluminum one with a better mounting setup. I want to drop the tank lower in the trunk, partly to bring the weight lower in the rear and partly to allow for a little usable space in the trunk for an occasional bag or something.
I welded up the mounting framework over the past couple days. The top frame will get welded into the trunk floor and will span the frame rails. The lower cage I made separate as I was unsure the whole thing would maneuver into place past the rear roll cage bars. I machined the locating studs to ensure a solid connection of the lower frame to the support. I considered welding the top bars in place on the support, but left them separate for now - they will bolt down with the same bolts 3/8" bolts that secure the lower cage. I added an extension out the back to add a bit of protection for the fuel lines.
Now it just needs some cleaning up and paint before the work of getting it into the car. I have some adhesive rubber stripping that will be applied to the framework to insulate and cushion the tank from chaffing.
Looks good from the north central part of town here. What’s the car’s intention? Drag racing? Rally? SCCA?