To avoid these ads, REGISTER NOW!

Show us your welding projects

zmotorsports

ALLIANCE MEMBER
Joined
Oct 20, 2009
Messages
21,333
Location
Northern Utah
Thank you. Headed to my LWS for the 70S-2 who carries Pinnacle so was just curious. Figure it can't be too much different since it has to meet some content spec to qualify for each variety.

I haven't used the Pinnacle brand TIG rods but I've been using Pinnacle ER70s-6 MIG wire in .030" for about 10+ years now with great success.
 
To avoid these ads, REGISTER NOW!

MongoTA

Well-known member
Joined
Mar 10, 2018
Messages
993
Location
CT
Going through hard drives and cleaning up photos, I thought I'd post these. Nothign fancy, but it is functional.

My wife has a home based business, she needed some shallow racks for storage.

I have a bunch of epoxy coated wire shelving from my son's old mushroom business. Add in some steel angle and a bunch of drawer slides that were throw-ins from an auction lot, and here we go.

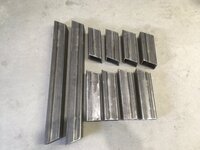
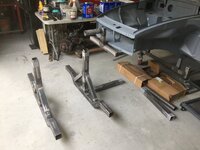
Used a piece of plywood as a spacer to hold a couple of pieces of angle the desired distance apart. Then started tack welding the slides to the angle. There were a couple different types of slides. All the same length, just different manufacturers.

20210329_192028.jpg

20210329_174738.jpg

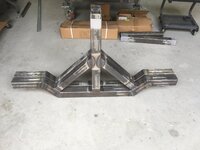
One side down, one to go...

20210329_174743.jpg

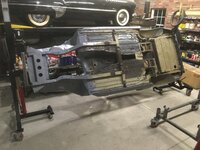
The angle iron friction fits between the vertical poles on the shelving units.

20210329_192058.jpg

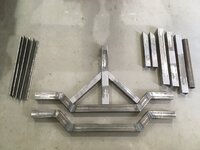
Short pieces of angle iron were tack welded to the other piece of the slide, then inserted in place. Used an angle grinder to trim an inch or so off the end of each wire shelf. Then with the wire shelf nested on the angle iron, in a few spots I tack welded the shelf wire to the angle iron. And yes, the shelving is intentionally installed upside-down!

20210329_211544.jpg

DUN! Mamma's happy, so yup. the whole house is happy.

20210402_120705.jpg
 
Last edited:

Swervyjoe

Well-known member
Joined
Jan 21, 2019
Messages
477
Location
SC
When I get into more specialized such as ER80S-D2, 4943, Ni99, 309L and several others I have been purchasing them from Arc Zone and have been pleased with the price as well as timely delivery.
How do you like 4943? I haven't tried it yet.


I didnt like ER70S-2. I much prefer -6
 

zmotorsports

ALLIANCE MEMBER
Joined
Oct 20, 2009
Messages
21,333
Location
Northern Utah
How do you like 4943? I haven't tried it yet.


I didnt like ER70S-2. I much prefer -6

I like the 4943 and actually use it more than 4043 nowadays.

I tried the s-6 but I pefer the -2 for TIG welding. I do however, use the ER70s-6 for MIG wire as I feel the toes wet out better.
 

Gerald O

Well-known member
Joined
Mar 5, 2013
Messages
1,884
Location
NC
Accidentally grabbed a pound of RG45 rod at the welding shop and tried to TIG some steel with it. It was a bubbly, spattering, messy, disaster! Couldn't figure out what was wrong, bad steel? Bad argon? Something wrong with my equipment? Looked at the package label and it said mild steel etc, bla bla, gas torch... what?!
Stuff looks exactly like ER70S2 but is only for oxy-acetylene welding. Went back and got the right rod and all the problems went away.
Lesson = do not try to TIG with RG45!
 

Gerald O

Well-known member
Joined
Mar 5, 2013
Messages
1,884
Location
NC
Starting on a new auto restoration rotisserie. Steel prices are insane right now but so is everything.
 

Attachments

  • rotisserie v22.png
    rotisserie v22.png
    188.2 KB · Views: 182
  • IMG_9732.JPG
    IMG_9732.JPG
    241 KB · Views: 131
  • IMG_9737.JPG
    IMG_9737.JPG
    249.1 KB · Views: 102
  • IMG_9746.JPG
    IMG_9746.JPG
    294.2 KB · Views: 96
  • IMG_9785.JPG
    IMG_9785.JPG
    258.6 KB · Views: 101
  • IMG_9795.JPG
    IMG_9795.JPG
    284.7 KB · Views: 109
  • IMG_9803.JPG
    IMG_9803.JPG
    264.6 KB · Views: 110
  • IMG_9806.JPG
    IMG_9806.JPG
    278.5 KB · Views: 105
  • IMG_9750.JPG
    IMG_9750.JPG
    240.3 KB · Views: 158

Cap'n Coldeye

Well-known member
Joined
May 23, 2016
Messages
46
Location
Western Washington
My wife and I wanted some shade over the back patio, we decided on some shade sails. We thought that we incorporate some hanging basket holders also. I made the 2 piece removable posts three of them.

Son of a gun, the first hole I ran into an abandoned septic vault. I was not about to dig it out. So I made a saddle and bolted to it. We are happy with the project and it keeps the back of the house cooler.

Cheers.
 

Attachments

  • 20210523_171422.jpg
    20210523_171422.jpg
    396.2 KB · Views: 170
  • 20210529_164118.jpg
    20210529_164118.jpg
    1 MB · Views: 180
  • 20210530_202146.jpg
    20210530_202146.jpg
    787.1 KB · Views: 199

Gerald O

Well-known member
Joined
Mar 5, 2013
Messages
1,884
Location
NC
Yeah, still working on the rotisserie, but just about done.
Had to wait for a bunch of parts to get laser cut, then back to welding. Made a few changes to the design, mostly to get a decent size caster under the front.

After the first trial fitup it had an off-level tilt. Turns out the height of the casters wasn't exactly as advertised. Fix was to notch the front mounting up by 1/2"

Now all welding is done. Disassembled and sand blasted - ready for paint. It'll get a couple coats of black epoxy primer tomorrow.IMG_9820.JPGIMG_9822.JPGIMG_9827.JPGIMG_9838.JPGIMG_9847.JPGIMG_9853.JPGIMG_9861.JPG
 

fordkid88

Well-known member
Joined
Nov 10, 2013
Messages
680
Yeah, still working on the rotisserie, but just about done.
Had to wait for a bunch of parts to get laser cut, then back to welding. Made a few changes to the design, mostly to get a decent size caster under the front.

After the first trial fitup it had an off-level tilt. Turns out the height of the casters wasn't exactly as advertised. Fix was to notch the front mounting up by 1/2"

Now all welding is done. Disassembled and sand blasted - ready for paint. It'll get a couple coats of black epoxy primer tomorrow.IMG_9820.JPGIMG_9822.JPGIMG_9827.JPGIMG_9838.JPGIMG_9847.JPGIMG_9853.JPGIMG_9861.JPG
Looks good, lower your heat a bit though.
 

Gerald O

Well-known member
Joined
Mar 5, 2013
Messages
1,884
Location
NC
Looks good, lower your heat a bit though.
Thanks. Working on it, but unsteady old hands tend to move slow. I’m wondering if my amperage display is lying to me - set at 125 which should be right for this thickness, but I notice the filler likes to stick a lot, so probably should try cranking up the amps a bit.
 

fordkid88

Well-known member
Joined
Nov 10, 2013
Messages
680
Try smaller filler. If I had to guess your using 3/32 if not 1/8 filler. You could really drop to 105 and do 1/16th. I'm not trying to knock you, I just do that for a living and I know there is a learning curve and I definitely road the struggle bus.
 

Gerald O

Well-known member
Joined
Mar 5, 2013
Messages
1,884
Location
NC
Used both 1/16 and 3/32 on this project. But you can see that the HAZ was pretty consistent throughout regardless.
 

Attachments

  • IMG_9885.JPG
    IMG_9885.JPG
    248.8 KB · Views: 132
  • IMG_9887.JPG
    IMG_9887.JPG
    254.7 KB · Views: 146
  • IMG_9888.JPG
    IMG_9888.JPG
    300.8 KB · Views: 141
  • IMG_9883.JPG
    IMG_9883.JPG
    310.8 KB · Views: 134
  • IMG_9881.JPG
    IMG_9881.JPG
    286.8 KB · Views: 178
Last edited:
To avoid these ads, REGISTER NOW!

rockinacummins

Well-known member
Joined
Oct 27, 2013
Messages
1,706
Location
Wapanucka, OK
Not much fab going on at the farm. Due to the burn ban we’re under (my own doing) I’m limited to indoor welding, so all fencing operations have been put on hold. I have, however, been able to tackle a couple small projects in the carport. I didn’t get any pics of the process, but I removed the vertical mounting brackets from this 109 gallon propane tank and fabbed new, horizontal brackets for the tank to sit in the back of our truck. After all that, I decided to go with a slightly smaller tank due to lack of clearance between the valves and any gooseneck trailer we would would potentially pull. It also just looked HUGE in the truck and stuck up about 5” over the bedsides. The 80 gallon tank I found will sit about level with the bedsides and allow plenty of room for gooseneck trailers.

A61EED30-7AF5-45AE-A8CD-3CE70071953D.jpeg
 
Last edited:

Trm303

Well-known member
Joined
Aug 4, 2020
Messages
160
Location
Cape May
I have a customer who runs a shipping container storage yard and has a rear dolly with wheels but no way to move the front end other than trying drag it around with a machine so I just finished up this for him to hitch up to a truck/machine
44A9C476-402C-4C9A-9553-F9814D023E00.jpeg
E15A3EE7-BFB6-46BA-A75E-93D4C39AF7AE.jpeg
39CBD00C-4103-4B07-BB0F-AB8C406603B3.jpeg
Turns out some of the containers he wants to move are 40’ with multiple full size doors all along the sides so it needed a ‘few’ reinforcements to prevent the torsion of I beam

953BCFCB-25BF-4F96-ACAF-99ED022280C5.jpeg
 

BD55

Well-known member
Joined
Aug 15, 2011
Messages
214
Location
Northern Utah
Started making some trophies for my church primary and youth groups' pinewood derbies that will happen next month. I'm making 1st, 2nd, and 3rd place trophies for both groups and maybe some smaller runner up ones or something - ideas welcome! I was prepared the metal was going to be dirty and had cleaned with acetone as much as I could but it was still amazing how much oil sweated out of the cam sprocket while welding the camshaft chunk to it. It was pretty funny - after welding, the oil oozed out of the sprocket like it was a sponge, which I guess it basically is since I'm guessing it's cast steel? The camshaft and valves didn't weld like that; they welded clean. trophy.jpg
 
Last edited:

Monza Harry

Well-known member
Joined
Dec 29, 2018
Messages
1,433
Location
Windsor ON
Way to STEP WAY UP! Very creative, again way to go Man! (y) As for idea's these aren't my strongest suit, but maybe some parts resembling an engine or the cars themselves or even a motorcycle . I'm very impressed with some boardmembers commitment to these very worthy causes. Proud to be even remotely associated with the group of you! Harry
 

welder4956

Well-known member
Joined
Apr 8, 2010
Messages
3,059
Location
Birmingham, AL USA
I was prepared the metal was going to be dirty and had cleaned with acetone as much as I could but it was still amazing how much oil sweated out of the cam sprocket while welding the camshaft chunk to it. It was pretty funny - after welding, the oil oozed out of the sprocket like it was a sponge, which I guess it basically is since I'm guessing it's cast steel? The camshaft and valves didn't weld like that; they welded clean.
Nice work on the trophy! Very likely to be a powdered metal timing gear. They are a lot more porous than castings and will get saturated with oil.
 
Last edited:

Farmall450

Well-known member
Joined
Dec 23, 2011
Messages
13,355
Location
Marengo, Illinois
Started making some trophies for my church primary and youth groups' pinewood derbies that will happen next month. I'm making 1st, 2nd, and 3rd place trophies for both groups and maybe some smaller runner up ones or something - ideas welcome! I was prepared the metal was going to be dirty and had cleaned with acetone as much as I could but it was still amazing how much oil sweated out of the cam sprocket while welding the camshaft chunk to it. It was pretty funny - after welding, the oil oozed out of the sprocket like it was a sponge, which I guess it basically is since I'm guessing it's cast steel? The camshaft and valves didn't weld like that; they welded clean. trophy.jpg
Neato
 

jblnut

ALLIANCE MEMBER
Joined
Jan 17, 2015
Messages
6,972
Location
In the Middle of MN
I needed a longer socket so I used my socket stretcher on an 1-1/16" SnapOn impact socket. It turned out decent so far. Needs paint and the "SnapOn" stamped back into it. It got all melty when I welded it together :lol_hitti
52342181058_3e998bfff9_b.jpg

These 5/8-18 threaded rods are both lug studs and lug nuts. There is a 3/4" nut welded onto the end of each of them to drive them in and the 1-1/16" nut will act as a lug nut to hold the duals on my round baler.
52342180963_6b5298a6ff_b.jpg

They are mocked up here before welding the nuts on the end of the rods. I trimmed them down a bit but the need for a longer socket stems from not knowing which way will work best to have the dual on the baler. I can take the center spacer out and flip the dual around and it'll stick out around 4" more.
52340982842_1aae25d25e_b.jpg

They thread into dual adapters that stay on the baler when the duals are off. I'm pretty stoked to use these things in a few days !!
52341939726_0df4c40c51_b.jpg

One side mounted and ready to go in the meadow !! The dual will ride 2" or so off the ground when the ground is hard to help eliminate stress on the axle when floatation isn't needed.
52294686189_e9583925e4_b.jpg
 

BD55

Well-known member
Joined
Aug 15, 2011
Messages
214
Location
Northern Utah
Todays project; a lamp for the hall table i made last week. Different parts from the scrap pile, a bit of cleaning and a new cable for the bulb. Weighs enough.. :D

IMG_20220907_181832 (1).jpg
This is one of the coolest lamps I've seen - what's the gear from?
 

JoniH

Well-known member
Joined
Oct 23, 2012
Messages
236
Location
Finland
This is one of the coolest lamps I've seen - what's the gear from?
Thanks, turned out way better than i expected. Actually no idea, i visited a long time ago abandoned factory, those were left laying there so i grabbed them with me. Lots of stuff going to trash eventually, maybe i gave them a new life? :D
 

y'sguy

Well-known member
Joined
May 1, 2010
Messages
1,309
Location
Tulsa, Oklahoma
here goes, I'm pretty reluctant to show this but I posted earlier on GJ about taking a local basics class at our community school. Not hardly up to the level that most of you work at but at 70 years old I have to get started,
This is my idea for an awning to be used on or side door entry to our Garage/Art studio. I had seen a couple of photos of this style in use and drew up my own design.
Mage a full-size template from my initial drawing and ordered the materials. A good friend gave me an old Lincoln 225 crackerbox and I am using 7018 rods. Normal, beginner ugly welds but getting slightly better. Luckily I have excellent grinding skills! I do know that the welds are strong enough though. All the bends on the scrolling are cold-bent 7/16" rod with a jig and a pipe tool I made. So far I'm learning more and am pleased with the way it's coming along. It's okay by me that it is primitive in style as it suits the application. I realize I need to up my game when I build my next F1 chassis.
I'll try to update as I get some more done. FYI, this is one of the side brackets.
okay, I don't have to tell you folks it's been hot. Too hot to install this for me anyway. This includes any unwilling friends I can con into an assit on this project. Even though I think I have designed it so I could possibly do it myself.
What I did do a month or so ago was prefab the installation on the inside of my studio wall. This was to predrill and measure anything I may run up against whenever the day comes. Also, I sanded it some and cleaned up a few areas, and gave it a coat of Rustoleum black satin.
I still have to get glass panes cut for it. I've been searching locally for some used panels to cut myself but so far most folks think their glass panels are the same as new prices. I plan to use 3M strip-caulk to bed the panels in. I am also considering cutting them in several sections instead of one 4' piece to help with replacing them in the event they get broken in hail storms or such. We will see how that whole idea works out, haha? I'm confident that no on one would ever step up to say "hey!, I told you so!" ;)

Also not shown here is a piece of galvanized roll flashing that will slide under the siding and curve over the top of the whole thing. Plus several more eye hooks. All drilled and screwed into either the header or studs, Fingers crossed.

IMG_1099.jpg
 
Last edited:

Jehannum

Well-known member
Joined
May 3, 2012
Messages
1,350
Location
Albuquerque, NM
The boy broke the tool rest on his benchtop wood lathe, so I asked him to try and weld it back together before we went to look for another one.

He left the ugliest booger welds I'd ever seen, looked like he'd forgotten to even turn the gas on.

I hit it with a hammer and it failed immediately.

So I ground his awful welds back, ground out a little more to give myself a spot to fill up, set the speed way lower, actually turned the gas on, and the voltage all the way high, and actually got good penetration and strength. Showed him my settings and let him feel how it felt when the welds are going in well.

So now he's got a tool rest again.
 

PCustoms

Well-known member
Joined
Jul 23, 2011
Messages
22,384
Location
VT
So I ground his awful welds back, ground out a little more to give myself a spot to fill up, set the speed way lower, actually turned the gas on, and the voltage all the way high, and actually got good penetration and strength. Showed him my settings and let him feel how it felt when the welds are going in well.

So now he's got a tool rest again.
Got a pic?

I'm assuming it was a cast iron rest.
 

Muckin_Slusher

Well-known member
Joined
Apr 1, 2017
Messages
465
Location
Abitibi
I'm camputer retarded and don't know how to make this video just play in the window. If somebody else can, thanks.
 

Attachments

  • ratshit mechanism.zip
    2.1 MB · Views: 33
To avoid these ads, REGISTER NOW!
Top Bottom