To avoid these ads, REGISTER NOW!

Small space, big ambition!

jonb_5

Well-known member
Joined
Jan 2, 2015
Messages
50
Hi,

I thought I would post my own garage build thread having looked at 100's of garages from across the pond, I definitely have garage envy.

I race a 205 GTi in local hill climb events so I need space to work on the car and store my motorbike as well, I would love to install a scissor lift in the floor if finances permit to work on the car.

Construction wise will be a small brick wall with timber frame on top and a slightly sloping roof from the house away to give a small amount of roof storage.

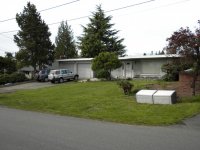
The planning approved is for roughly 7m x 4m attached to the side of my house.


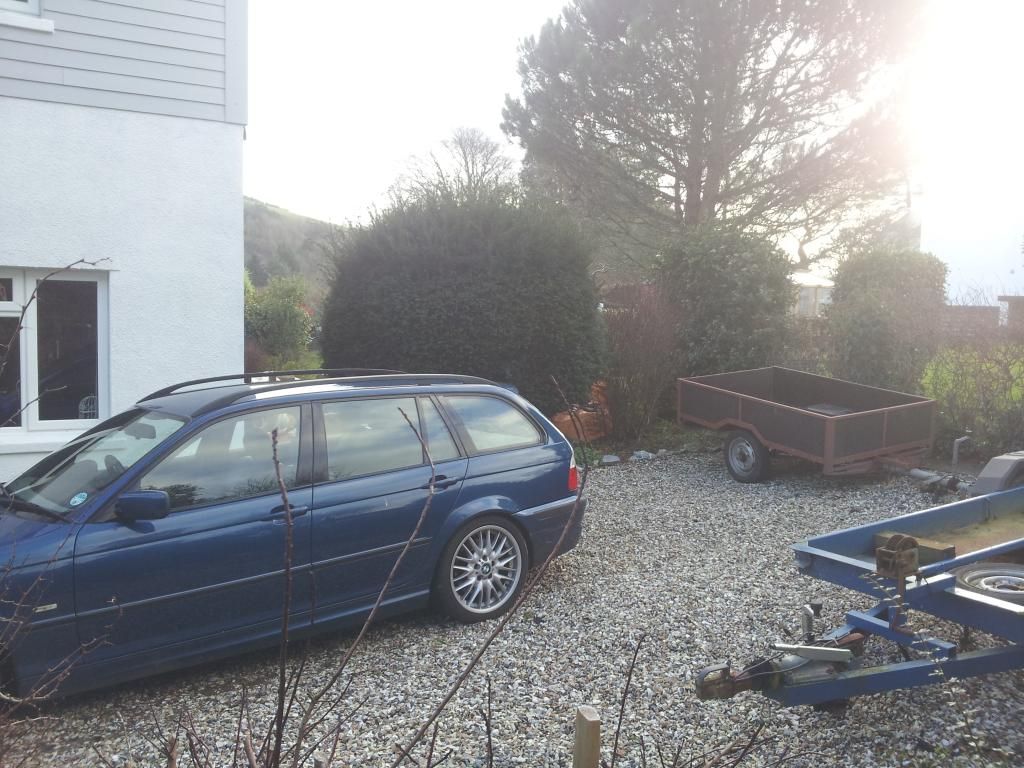
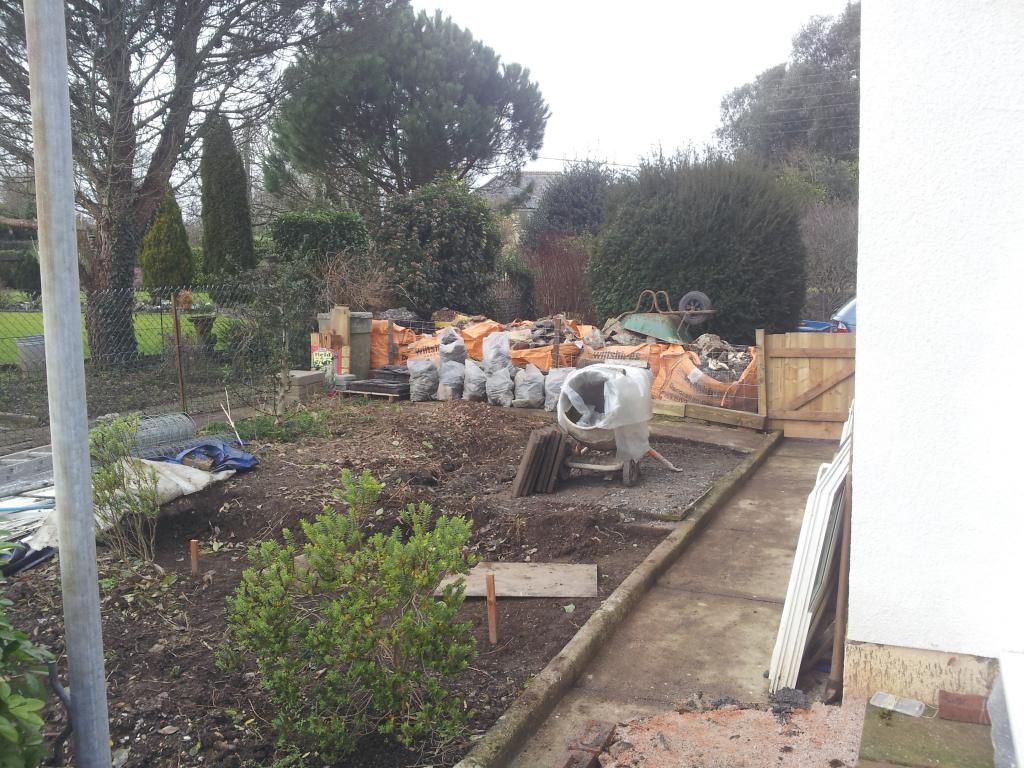
I have started site clearance, removing trees and an old shed and over the past couple of days started digging.


To avoid these ads, REGISTER NOW!

drivesitfar

Well-known member
Joined
Oct 23, 2013
Messages
35,997
Location
Pacific Northwest
Jon: it looks like you are definitely going to be stronger after your build if you are digging the foundation footings by hand. looks like a great start.

your picture posting is great for a new member too so don't forget to take your camera out to the garage when you plan on working on it because you know we all like those pictures. plus we or you might catch something you didn't see while you had your head down working on it.

cheers
 
OP
J

jonb_5

Well-known member
Joined
Jan 2, 2015
Messages
50
Yeah will be digging completely by hand, it beats going to the gym but does add a bit of time to the process.

Yeah from South Devon. I will post some pictures of the 205 up, no problem. It is still a work in progress after stripping it apart and respraying it last year.
 

drivesitfar

Well-known member
Joined
Oct 23, 2013
Messages
35,997
Location
Pacific Northwest
Jon: i agree that working by hand instead of with machines is way better exercise than working out in a gym. can i recommend getting an inversion table and build up to just hanging 5 minutes per day. i'm almost 60 and haven't taken an advil for almost 7 years now since using my inversion table.

i'm curious where you found those huge orange bags to put your dirt and debris in? are you planning on re using the dirt since you are bagging it up or just taking a few bags at a time to friends and neighbors for their gardens or yards?

i re did my front yard a couple summers ago by hand without a cement mixer and only a roto tiller.

keep up the good work and i like your progress so far.
 

Attachments

  • Front before 3.jpg
    Front before 3.jpg
    143.8 KB · Views: 258
  • August 15th progress dirt parking strip.jpg
    August 15th progress dirt parking strip.jpg
    153 KB · Views: 266
  • from street southwest.jpg
    from street southwest.jpg
    156.2 KB · Views: 293
OP
J

jonb_5

Well-known member
Joined
Jan 2, 2015
Messages
50
I had never heard of an inversion table before but I have just had a look and a lot of people seem to say there are many benefits to them. I am sure it is something I could weld up.

The bags are what a lot of material are delivered in over here, they will hold roughly 1 tonne in weight. In the bags is a lot of rubble which I have from other areas around the house. I kept this to give me a base under the concrete slab.

The soil is being lost in various places around the garden and I am now bagging up in the hope of someone might want some locally in their garden.

The last resort it to get a skip in but they are very expensive and soon fill up.

That is an amazing transformation to your yard, I considered a 'chunky' oak frame on the garage like your structure but decided against this.
 

drivesitfar

Well-known member
Joined
Oct 23, 2013
Messages
35,997
Location
Pacific Northwest
Jon: it sounds like you have a good plan. i'm not sure how you lift a 2 ton orange bag if you ever need to move them unless you own a fork lift. they look like great storage though and nice idea.

the inversion table i bought years ago after trying almost all of them only cost $200 US so might be worth buying one and using your steel and welding time to build a car because the ones you can buy have minor adjustments to make them easy to use.

actually my Pergola is made of cedar, but thank you very much for the compliment. this summer is the huge fence project along the sides and backyard.
 
OP
J

jonb_5

Well-known member
Joined
Jan 2, 2015
Messages
50
Work in progress picture, am hoping to be racing again about April time.

 
OP
J

jonb_5

Well-known member
Joined
Jan 2, 2015
Messages
50
Seems like progress is slow only being able to work weekends, especially with the weather being appalling.

More digging today, I hope to have the footings dug complete by the end of tomorrow, they need a bit more depth and squaring up on the bits I have already dug out.

I have had a few request from neighbours for soil so should be able to get rid of all of it for free which will save me a fair bit of money, more to put towards kitting the garage out.

I am thinking I may do a stepped foundation towards the front of the garage so I might get away with pouring it in 2 parts so if I can the first part should be going in next weekend.


drivesitfar

Well-known member
Joined
Oct 23, 2013
Messages
35,997
Location
Pacific Northwest
Jon: it's looking good so far and i know progress may seem slow, but it is progress. can you give us a wider shot of the side yard so we can maybe give input or see where your access and where the rest of your foundation is going to be?

is the access where the orange bags are or from the other side? i'm just guessing the one side is next to the sidewalk or is the sidewalk coming out?

you are doing great with the progress and your posts.
 
OP
J

jonb_5

Well-known member
Joined
Jan 2, 2015
Messages
50
The access is the other side of the orange bags so that big tree is coming out when the main structure is up.

The foundations will carry on running parallel to the house until they are almost level with the front wall of the house.

You can see the drive in the photo below, the new garage being built on the right hand side. The rest of the drive will be block paved once the old garage has been converted. Just a little job to add to my list. I did the front part as I have widened the entrance by about 1 meter to make it easier to back the trailer in. A lot easier to do than I thought it would be, all in the preparation.

 
OP
J

jonb_5

Well-known member
Joined
Jan 2, 2015
Messages
50
It's Hill Climb racing, there are several places local to me that I can take part and fairly budget friendly compared to circuit racing.

These are pictures before we sprayed the car and made the suspension and wheel modifications etc.


OP
J

jonb_5

Well-known member
Joined
Jan 2, 2015
Messages
50
Yeah its a 954.

I have always have Ninja's but just fancied a change an I am glad that I did.
 
OP
J

jonb_5

Well-known member
Joined
Jan 2, 2015
Messages
50
Put footings in today and managed to get rid of a load of soil.

The plan is to build the dwarf wall and get the rest of the site cleared by the end of next weekend.

Can anyone advise of how to pour the floor slab. I have ******** down but I need something smaller to fill the gaps, what type of stuff should I buy? Also, is it worth putting rebar in the concrete, slab thickness is 4-5 inches.


Made a new home for the new puppy when I got bored with digging as well.

 
Last edited:
To avoid these ads, REGISTER NOW!

drivesitfar

Well-known member
Joined
Oct 23, 2013
Messages
35,997
Location
Pacific Northwest
Jon: i'm not a builder, but i was a Realtor for 30 years so i saw my share of building. over here we put J bolts in the footings so we have something to bolt to. i didn't see any in your footings, but since it's a fairly small garage you probably have a better plan.

i would always put some steel in your cement pads especially if your plans are less than 6 inches thick. on my sidewalks my cement was full of steel and probably ended up more like 4-5 inches thick since the forms were 6 inches, but they have yet to crack. of course i'm not rolling cars over them daily.

i'd go with minimum 6 inch floor and if you are using a lift and might know the location i might even pour that area 8 inch or so and have some bolts set in it if you know the positioning.

since i don't have all your answers and you are definitely on your way to building your garage i also wanted to push your thread up in front of the guys that might have more answers today by posting my thoughts.

by the way what kind of dog is your new puppy? English or dare i say Irish setter? he (or she) looks like a great addition to your family.

good luck
 
OP
J

jonb_5

Well-known member
Joined
Jan 2, 2015
Messages
50
To fix frame down I am building a dwarf wall, just a couple of blocks high to keep the framework off of the ground. I will drill down through the timber work with bolts to anchor down to block work.

I will make sure I stick to 6" thick floor with steel. Have found a supplier locally that I can pick up sheets at a good price, unfortunately no lift so I don't have to worry about this.

Puppy is a Springer Spaniel.

I should be finished up with the footing and site clearance this weekend, have been very lucky and have managed to give away all of my soil/rubble so have saved a lot.

Guy at work wants all the rubble and is picking up in his tipper trailer, very handy indeed.


drivesitfar

Well-known member
Joined
Oct 23, 2013
Messages
35,997
Location
Pacific Northwest
Jon: sounds like you have a good plan. also nice that your friend (co-worker) took all the debris and had his own trailer. very cool. so i bet you are going to keep the trees up until you get the garage built or do you need to cut them to get material back there?

keep up the good work and even though you are probably beat at night you will be better off for it because you'll be strong as an ox.

cheers
 
OP
J

jonb_5

Well-known member
Joined
Jan 2, 2015
Messages
50
The trees at the front will come out to give access, just leaving them in as long as I can really.

Started to get out of the ground today...


I have also bought a set of doors for the garage, will be cutting out the rot and painting black to match doors/windows on the porch.

 
OP
J

jonb_5

Well-known member
Joined
Jan 2, 2015
Messages
50
Had a bit of help this week with my dad finishing off the block work and I have started playing with the framing.

I am hoping to get all the frame up tomorrow so it should start to really take shape now.


drivesitfar

Well-known member
Joined
Oct 23, 2013
Messages
35,997
Location
Pacific Northwest
Jon: it is taking shape. I'm looking forward to seeing those old garage doors you saved on your new garage.

i'm sure you've worked out how to keep water from running down your house and into your garage so I'll leave that subject alone for now and let you deal with that and how to work around the pipes.

i just want you to make sure to take down the ground level on the side there so it's a good 6 inches below the wood you put on your foundation wall. also don't have any grass or plants growing within a foot of the garage so you can avoid bugs that like to eat your wood.

if the base plates are not treated you might want to put some on them before you start closing up the wall as a precautionary. if they are treated boards then just paint the cut ends.

good luck
 
OP
J

jonb_5

Well-known member
Joined
Jan 2, 2015
Messages
50
When we had the house rendered we put in lead flashing which will direct water onto the garage roof down to the guttering on the garage.

All of the pipes except 1 fall inside the garage, and the down pipe will go onto the garage roof and out that way.

Good advice with ground level, I was keeping it down but probably not as much as 6 inches so will take the level down to this. I want to make it last as long as possible. Its all pressure treated C 24 structural grade timber and all the cuts are being dipped or painted afterwards.

My dad and I had a busy day today finishing up the walling and started on the roof. I am away for the next couple of weeks so there won't be too much progress but when I return I am hoping to get the roof and cladding on fairly quickly.


Jon
 

drivesitfar

Well-known member
Joined
Oct 23, 2013
Messages
35,997
Location
Pacific Northwest
Jon: nice work and you better give your Dad a big THANK YOU for his help because i couldn't imagine how hard that would be to do by yourself. it's really taking shape now and i bet in a 2 or 3 weeks you'll have it enclosed and weatherproof.

your trailer looks like a tank builder built it. very impressive.
 
OP
J

jonb_5

Well-known member
Joined
Jan 2, 2015
Messages
50
Started cutting the tree down at the front of the garage after work today, that's the easy bit done. The roots are huge so I will try digging it out but will get a stump grinder if all else fails.

Gives a much better idea of space/access now.

 
OP
J

jonb_5

Well-known member
Joined
Jan 2, 2015
Messages
50
Ended up taking me 2 evening to get the tree out. Even digging all around it and cutting a lot of roots it was solid, so I have up and tied it to the back of the car. Came straight out.

Borrowed a neighbours chainsaw and cut as much wood off as I could. Just waiting for the soil to dry out now so I can take some out of the root ball and lift into trailer.


eikimart

Member
Joined
Jun 21, 2013
Messages
22
Location
Florida
Ugh, I know what that's like! I pulled 7 juniper stumps of various sizes by hand last May, out of New England's stony ground. Hard work! Good idea with the car there.
 

Flange

Well-known member
Joined
Jun 9, 2010
Messages
424
Location
Northern England
Can anyone advise of how to pour the floor slab. I have ******** down but I need something smaller to fill the gaps, what type of stuff should I buy? Also, is it worth putting rebar in the concrete, slab thickness is 4-5 inches.

The best advice if you have zero experience is to find someone who knows what they are doing and ask/pay them to help.

In answer to your questions:

Q. Can anyone advise of how to pour the floor slab. A. See above.

Q. I have ******** down but I need something smaller to fill the gaps, what type of stuff should I buy? A. You need a meterial that is graded from large lumps down to dust. The cheapest is "Crusher Run" but it is not always of a good quality. The most reliable stuff would be "MOT Type 1" which is a Highway spec (MOT relates back many decades to the "Ministry of Transport" a bit like people still refer to MOT Tests.) All building supplies places sell it. There are other options but for your small quantities the safest bet is just go with the Type 1.

Also, cover the top of your stone with a layer of sand. People normally allow for up to 50mm layer of sand.. Washed/Grit sand is easiest to work with. This will help prevent your membrane getting punctured by the stone.

Q. Also, is it worth putting rebar in the concrete, slab thickness is 4-5 inches. A. If the sub base is prepared properly then on this small slab then in theory it will be fine without it but my advice is that it will cost very little to add it now and it will then be stronger and less prone to cracking so if it were mine I would put it in. However that is just my opinion.

Lastly, Get someone who knows what they are doing to both advise you in detail and better still help you lay it because whilst it is not a difficult job, it is easy to screw up and once the concrete has gone off it will be a ***** to fix if its not right.
 

drivesitfar

Well-known member
Joined
Oct 23, 2013
Messages
35,997
Location
Pacific Northwest
Jon: i agree to either hire a pro or get his advice about how to set up and install your new cement floor. since you are pretty handy you might be able to do it and happy to hear you are going for maybe 5 inch floor, but rebar or wire mesh is still a good idea and i'd even go with 6 inch thick if you can afford it. a cracked floor is a pain so with the extra cement it might not crack with good prep and installation.

good luck and nice work on the bush. i would've mentioned that exact thing you did, but i think i ruined our van's transmission pulling out a few of ours that way years ago.
 
OP
J

jonb_5

Well-known member
Joined
Jan 2, 2015
Messages
50
Thanks for the advice. I am definitely looking to do it right but have no doubt I will be able to do it properly. I am just asking round for the best way to do it.

I am going to put a layer of MOT type 1 down and compact. Followed by a layer of sand and compact this, with the membrane on top. That should leave me with 5 inches, so I will set the wire mesh out in the centre and space up 2.5 inches and pour the floor. I plan to pour in 2 halves with an expansion joint running through the centre. It will give me time to get one half perfect and even do on separate days. I will just keep floating to get the finish nice and smooth for the floor paint.

The roof timbers are up now and the entrance way formed. I am hoping to test hand the doors this weekend and get the whole of the outside clad.


OP
J

jonb_5

Well-known member
Joined
Jan 2, 2015
Messages
50
We have been working all day getting the side and rear cladding up, it makes it look so much tidier now.

Also been playing with the door, they still need a bit adjustment and painting etc but it gives an idea of the space available.

Next job is to board and mesh the front as this will be rendered to match in with the house.

Have been looking through my photo-bucket account at old cars and I have included one of my mini I built from scratch a few years ago. Loved that car!


drivesitfar

Well-known member
Joined
Oct 23, 2013
Messages
35,997
Location
Pacific Northwest
Jon: your siding and old garage doors are very cool looking. i usually see other garage builds pour the cement floor and put on the roof first, but i have to say i am enjoying watching your build doing it a bit differently. also that you are doing it mostly by hand and with your Dad.

keep up the good work and always looking forward to seeing more pictures of any progress or of your area and cars.

cheers and best of luck with the garage floor pour and the roof.
 
OP
J

jonb_5

Well-known member
Joined
Jan 2, 2015
Messages
50
Thanks for the comments.

The order I agree is a bit backwards but we needed to keep the area dog proofed so he can not escape, hence the walls going up first, as well as cost as I needed to wait until pay day for the roofing.

But, I now have the roof on as well and literally finished putting the EPDM membrane this evening. It might not last as long as felt or tiles etc but is very cheap and very easy to apply.

I have also been building the dog pen at the back of the garage, the soil needs levelling off and then we are going to put astro-turf down which wraps around the side of the garage.

Have started some sketches for the interior so will put these up at some point as well.


drivesitfar

Well-known member
Joined
Oct 23, 2013
Messages
35,997
Location
Pacific Northwest
Jon: i do like your siding, fence, garage doors and small back door. your little garage has some serious style points. keep up the great work. some guys go to the gym for exercise, but i really like your workouts a lot better.

so some of my English friends say it rains every day and almost every picture you post has clear skies. are you on the dry side of England or are my friends exaggerating?

good luck with the roof and post a few pictures of the inside as you get time.
 

2fat2fly

Well-known member
Joined
Mar 5, 2011
Messages
519
Location
Wilmington, Ohio
I really like your attention to detail on the outside of the garage and I'm looking forward to seeing how the inside turns out as it's a beautiful job so far.
 
To avoid these ads, REGISTER NOW!
Top Bottom