To avoid these ads, REGISTER NOW!

Speed Fetish Garage.

OP
O

orange02ss

Well-known member
Joined
Oct 6, 2009
Messages
210
Location
Guam/Houston
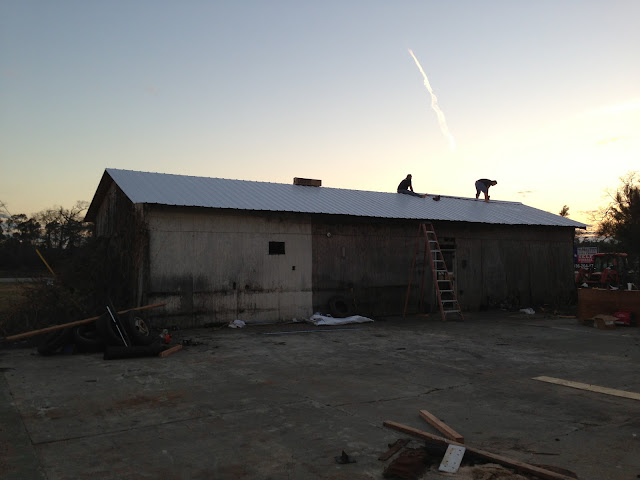
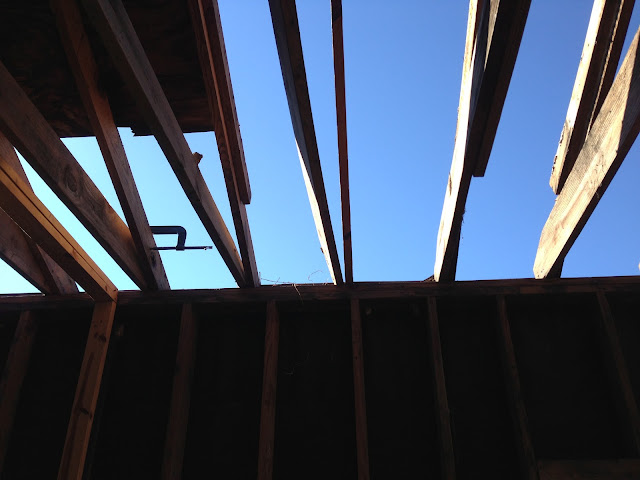
We decided to start on the roof, I talked to the manufacturer and asked if it would be ok to install the metal roof over the existing plywood. They said its fine as long as there is a moisture barrier between the two. After pulling all the old shingles off we found that most of the plywood on the front needed to be replaced.

My nephew and I tearing off the old shingles.
IMG_4485.jpg


IMG_4489.jpg


After tearing off the rotted plywood, I had to repair some of the rafters that were rotted. I also had to repair some of the 2X10 tie beams. After sitting abandoned in the hot humid weather and cold during winter the tie beams twisted and pulled away from the rafters. (I am not sure if I am using the right names, correct me if I am not). I had to pull the beams back into place and secure them. The left side of the building needed about 6-7 done on each side.

IMG_4492.jpg


IMG_4496.JPG


IMG_4495.jpg


The new plywood going on.
IMG_4497.JPG


IMG_4498.JPG
 
To avoid these ads, REGISTER NOW!
OP
O

orange02ss

Well-known member
Joined
Oct 6, 2009
Messages
210
Location
Guam/Houston
I decided to put down some felt paper and also install some furring(?) strips to make a small air gap. I also ordered up some insulation, its 1/2" thick with a foil reflective front and white back. It has a R10-12 rating. I installed this over the furring strips so I would have the insulation and the small air gap.

IMG_4501.jpg


IMG_4502.jpg


Front of the roof finished, except for the screws on the very front on the metal.

photo.JPG
 
OP
O

orange02ss

Well-known member
Joined
Oct 6, 2009
Messages
210
Location
Guam/Houston
The next day was spent on the roof again, trying to finish up before rainstorms came the next day. Didn't take any pictures except toward the end of the day as we were finishing putting up the ridge cap. It was getting pretty difficult towards the last couple panels as everything was very slippery.

With the installation of the ridge cap, I purchased some weather seals that will allow the air to escape up through the roof but keep it water tight. I will try to find a pic of it.

In the end it was so slippery that were not able to get off the roof with the ladder. We actually had them pull the tractor up to the building and raise the front loader so we could slide in, not too much fun! I have fallen through a roof once, don't want it to happen again.

IMG_4506.JPG
 
OP
O

orange02ss

Well-known member
Joined
Oct 6, 2009
Messages
210
Location
Guam/Houston
As the roof was getting worked on, I had some friends tearing out some walls! The end wall on the left side of the building was the first to go.

In the first picture you can see the remnants of the outside wall and the first inner wall.
IMG_4491.jpg


This is the second wall.
IMG_4487.jpg
 
OP
O

orange02ss

Well-known member
Joined
Oct 6, 2009
Messages
210
Location
Guam/Houston
As it started raining the next day we decided to try to get some stuff done inside. We tore out the remaining walls and old bathroom. This gave us access to all the rest of the trash in the other two rooms. Another 12 yards of trash! So far we are about full on our 20 yard dumpster, and we didn't put any wood in there at all. Its just trash from the floor, drywall which there wasn't much of, and a little old insulation.

IMG_4511.jpg


IMG_4512.jpg


IMG_4513.jpg


IMG_4515.jpg
 
OP
O

orange02ss

Well-known member
Joined
Oct 6, 2009
Messages
210
Location
Guam/Houston
The next day the sun was out so we decided to start putting up some of the siding.

IMG_4519.jpg


Laying out the insulation to cut.
IMG_4518.jpg


Siding installed on the left side of the building. It shows brown in the picture, but it is actually a light grey.
IMG_4520.jpg
 
OP
O

orange02ss

Well-known member
Joined
Oct 6, 2009
Messages
210
Location
Guam/Houston
The following day we started work on the back of the building. We had to level some of the dirt with the tractor. We then started pulling off all the rotten plywood. I had to repair some rotted studs but the sill plate was in good shape.

IMG_4522.jpg


IMG_4523.jpg


IMG_4524.jpg


The corner finished up. I still need to screw down the edge of the roof, thats why its a little wavy. I couldn't reach it while I was up there so I will need to use the ladder.
IMG_4526.jpg
 
OP
O

orange02ss

Well-known member
Joined
Oct 6, 2009
Messages
210
Location
Guam/Houston
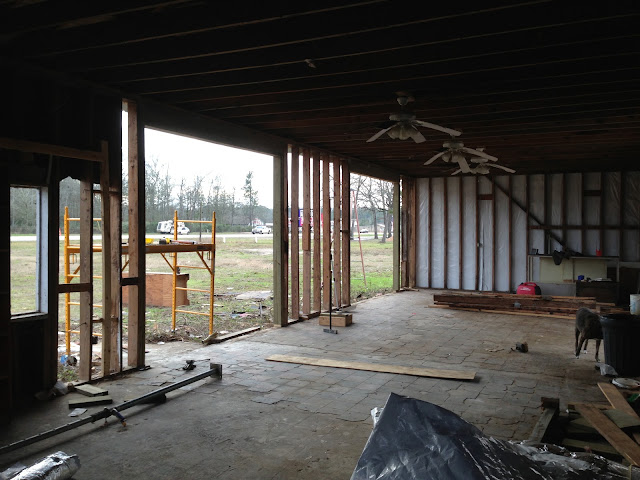
The following day was rainy again. Decided to try to get the opening for the rear 10X10 roll up door framed in. We started with tearing the last of the interior wall board on the back wall out. It was covered in peg board over some press board. Underneath was a bunch of nasty old insulation. Wood went to our burn pile, insulation to the trash bin.

IMG_4527.jpg


Interior back wall. Still need to pull the exterior plywood of as it is rotted.
IMG_4530.jpg
 
OP
O

orange02ss

Well-known member
Joined
Oct 6, 2009
Messages
210
Location
Guam/Houston
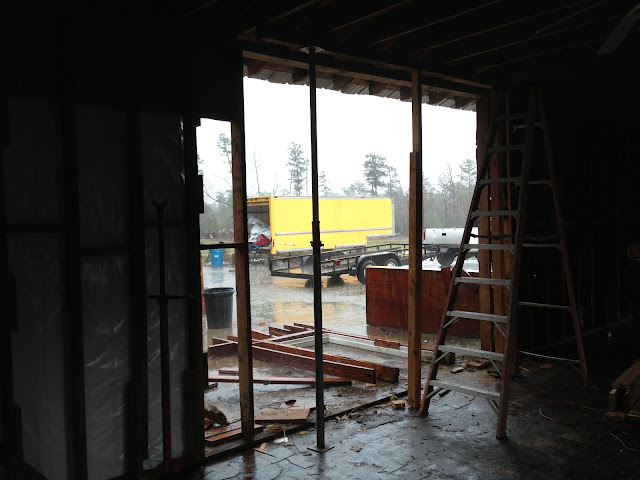
I needed some shoring jacks to brace everything when the wall was removed. I checked all the local tool rentals and there was only one in the area. I figured I would use the rented shoring jack and an auto screw jack on the other side. I used a couple 2X4s, screwed them together and placed them on top of the screw jack. I then realized that the shoring jack was broken but I found a way to make it work. I also wedged in another couple 2x4s for some added strength.

Once everything was in place, the studs were cut out.

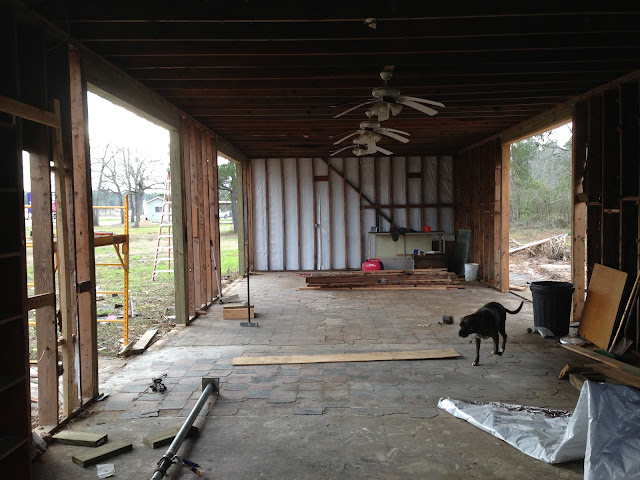
You can see some of the stands used when I am working on cars on the two post lift in the picture (left side in front of the white insulation). I tried to use them and some 2x6s but, once there was weight on them it would buckle in the middle.
IMG_4534.JPG


IMG_4535.JPG
 
Last edited:
OP
O

orange02ss

Well-known member
Joined
Oct 6, 2009
Messages
210
Location
Guam/Houston
I decided to build a box beam for the header. I used two 2x6 cripples on both sides. After the beam was in place I secured it with additional metal plates.

IMG_4537.jpg


IMG_4539.JPG
 
OP
O

orange02ss

Well-known member
Joined
Oct 6, 2009
Messages
210
Location
Guam/Houston
Today is one week we have been working on the building. It has been a long hard week of work! We have gotten allot accomplished though. Finished up the other two door openings on the front of the building today. The box beams were too heavy to handle with just two of us, so we got some help for a couple hours to lift and set everything.

IMG_4541.JPG


IMG_4543.jpg


IMG_4545.JPG


IMG_4546.JPG
 

ConCretin

Well-known member
Joined
Jan 20, 2011
Messages
3,379
Location
Central Maine
Great save. I'm not sure I would have tackled it but your going to end with with a very serviceable building for short money. Very smart.
 
OP
O

orange02ss

Well-known member
Joined
Oct 6, 2009
Messages
210
Location
Guam/Houston
Great save. I'm not sure I would have tackled it but your going to end with with a very serviceable building for short money. Very smart.

Thanks! I was ready to tear it down and a friend changed my mind. I am glad he did. It is a ton of work, but since we are doing everything, I am getting away with the cost of materials.

I love your build by the way! I am from Guam and we build everything out of concrete! I don't see it done much out here.

Robert
 
OP
O

orange02ss

Well-known member
Joined
Oct 6, 2009
Messages
210
Location
Guam/Houston
We didn't do too much today, cleaned up the storage shed so it was easier to store stuff, then did a little work on the walls.

IMG_4553.jpg
 
OP
O

orange02ss

Well-known member
Joined
Oct 6, 2009
Messages
210
Location
Guam/Houston
Started the week by finishing up the the back of the building. You can see the right side of the building in the picture. That side is a real mess with so many vines and trash, the septic system is under there somewhere also.

IMG_4559.JPG

IMG_4552.jpg

After we finished up the back we started framing out the new office door.
I purchased a steel door and frame from the same supplier I purchased the roof and siding from.

The window framed out in the picture is the old one. I noticed that the header was rotted, and not holding anything. We tore it all out as we are moving the location of the window for the new office area.

IMG_4558.jpg
 
Last edited:
OP
O

orange02ss

Well-known member
Joined
Oct 6, 2009
Messages
210
Location
Guam/Houston
I hired a helper for the next day so he could clean up while we worked on the building. A friend volunteered to run the tractor while the hired help shoveled all the trash into the bucket. They did a great job and really cleaned up the area. Here is the right side of the building cleaned and the old siding ripped out.

IMG_4561.jpg


New siding going on. You can just make out the fiberglass septic cover in front of the wall. I was scared of falling in the whole day!

IMG_4563.jpg
 
OP
O

orange02ss

Well-known member
Joined
Oct 6, 2009
Messages
210
Location
Guam/Houston
I had the helper for another day and he continued the cleaning while we worked on the building. This is the slab getting cleaned up!

IMG_4564.jpg


IMG_4565.jpg
 
To avoid these ads, REGISTER NOW!
OP
O

orange02ss

Well-known member
Joined
Oct 6, 2009
Messages
210
Location
Guam/Houston
We also picked up the roll up doors this morning and my cousin stopped by to help us install them. We needed four people as they are heavy! They set it, while I secured it in place.

IMG_4567.jpg


Rear door.
IMG_4570.jpg


Front doors installed.
IMG_4568.jpg


Office door framed in and the window framed in. Hopefully we finish up the last of the siding, door and window tomorrow. I also have to finish putting the last row of screws in the roof.

IMG_4571.jpg
 

CNGsaves

Well-known member
Joined
Sep 26, 2012
Messages
13,233
Location
KS and OK
Wow, incredible save and transformation on old building.

Curious while everything is open if you have to put in hurricane straps to tie rafters to walls?? Any other local specific requirements for Houston/Guam??

Keep pics coming . . . . great work!!
 
OP
O

orange02ss

Well-known member
Joined
Oct 6, 2009
Messages
210
Location
Guam/Houston
Thanks!

This building is in Houston, I did put some hurricane clips on the rafters I replaced, but it would have been really difficult to retrofit them onto the existing stuff.

On Guam we build everything out of concrete, walls, roof etc...
 
OP
O

orange02ss

Well-known member
Joined
Oct 6, 2009
Messages
210
Location
Guam/Houston
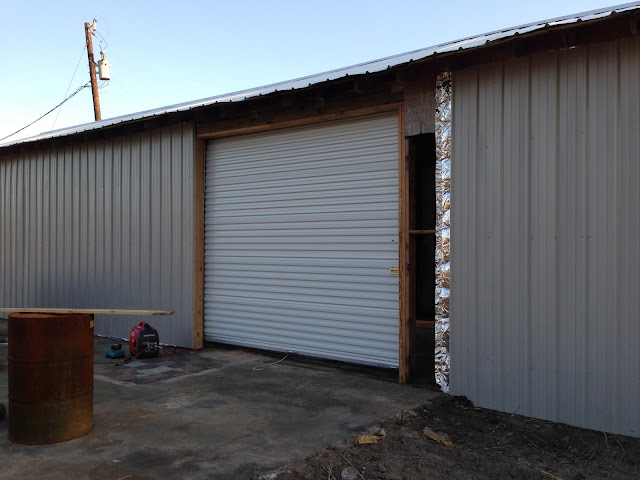
Got the building close to being done outside, I still need to do the trim. Thirteen days of work into this place! There was 2 of us all the time and we had some help a couple days.

IMG_4573.jpg


IMG_4588.jpg


IMG_4590.jpg


IMG_4592.jpg
 
OP
O

orange02ss

Well-known member
Joined
Oct 6, 2009
Messages
210
Location
Guam/Houston
Working on the shop again. We started on the interior walls.

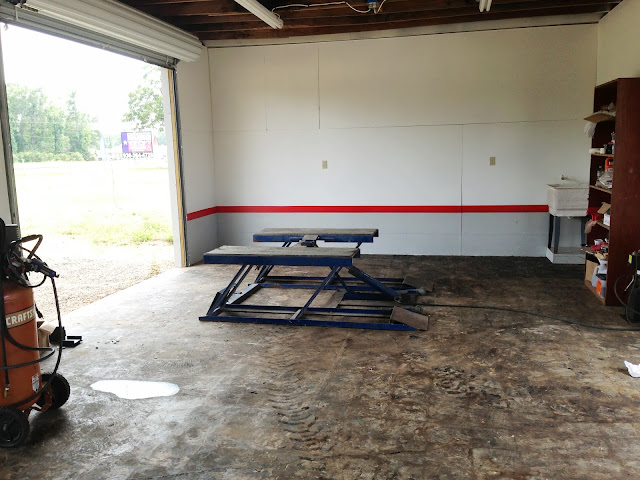
I didnt want to run drywall all the way to the floor, because I wanted to be able to pressure wash the shop out frequently. I decided to use hardi plank on the bottom 2'. Its a cement board that is usually used for exterior applications.

IMG_4831.jpg


IMG_4859.jpg


IMG_4860.jpg
 
OP
O

orange02ss

Well-known member
Joined
Oct 6, 2009
Messages
210
Location
Guam/Houston
Plumbing is going in also. Its pretty simple with a single bathroom with toilet and sink, and a couple outside faucets. We cleaned out the old septic and replaced all the PVC lines going to it. I also installed a separate shop sink for washing hands etc... that wont drain into the septic.

I still have to run the main line to the septic.

IMG_4864.jpg


IMG_4856.jpg
 
OP
O

orange02ss

Well-known member
Joined
Oct 6, 2009
Messages
210
Location
Guam/Houston
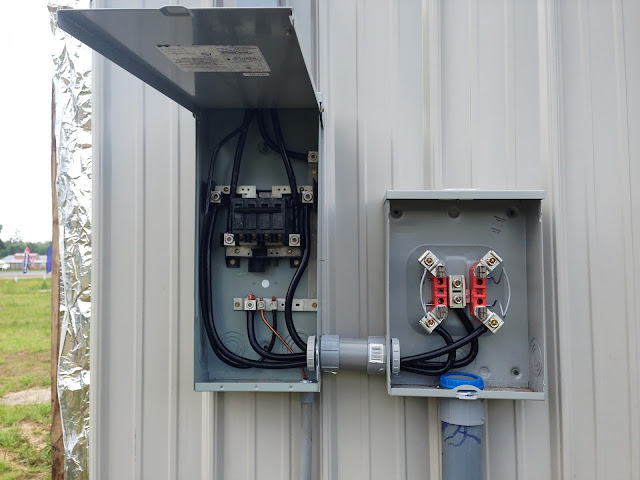
Electrical is going in also. I installed a 200 amp breaker box in the building. I also installed the 200amp service disconnect and meter box. Some guys helped me out on the electrical forum and I got everything installed correctly.


IMG_4802.jpg


IMG_4855.jpg


IMG_4932.JPG
 
OP
O

orange02ss

Well-known member
Joined
Oct 6, 2009
Messages
210
Location
Guam/Houston
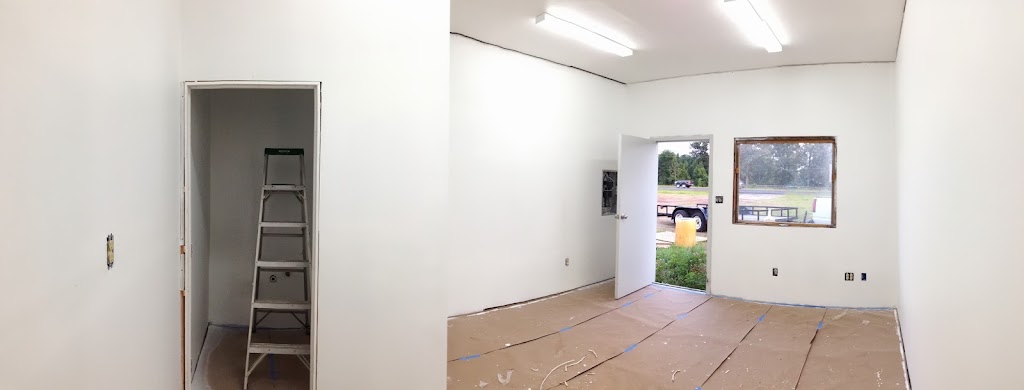
I got really tired of rolling paint on the walls, so I decided to buy an airless sprayer. I noticed that Harbor freight had a coupon on theirs for $169, checked out some reviews and decided to pick it up today. I am very pleased with it! We unpacked it and put it to work right away on the third coat of primer in the office, took about 10-15 min. I then finished more than half the shop, with 2 coats, in about 30 min. I sprayed until we were out of paint. If I had more paint, it would have been finished today. I cant believe how much time that saved us! It worked flawlessly!

When we ran out of paint, we installed the office and bathroom lights.

IMG_5084.JPG


IMG_5082.jpg
 
OP
O

orange02ss

Well-known member
Joined
Oct 6, 2009
Messages
210
Location
Guam/Houston
Decided on final colors and picked up the paint. Decided to do a light gray on the bottom with a red stripe.

I started by making small marks about 3' up from the floor, I then used a level to draw a line around the office, roughly using the marks as a guide. I then taped it off and masked the upper white portion off with some brown paper.

IMG_5102.JPG


IMG_5104.JPG
 
OP
O

orange02ss

Well-known member
Joined
Oct 6, 2009
Messages
210
Location
Guam/Houston
I pulled the paper off, (used the same tape I just pulled off) and taped the lower line for the stripe. I measured up 4" from that line and taped that off. I then hand painted the red stripe on.

IMG_5107.JPG


You can see my helper working hard in the pic.
IMG_5108.JPG
 
OP
O

orange02ss

Well-known member
Joined
Oct 6, 2009
Messages
210
Location
Guam/Houston
It took me a long time to put up the brown paper to cover the white, so I decided to try it a different way in the shop area. The lower portion of the wall in the shop is hardi plank. so I could wash the shop down. I used the joint between the drywall and hardi plank as the line. I figured I could spray the gray on without too much over-spray, so I prayed it and protected the floor with an scrap piece of hardi.

IMG_5106.JPG
 
OP
O

orange02ss

Well-known member
Joined
Oct 6, 2009
Messages
210
Location
Guam/Houston
Been a little while since I updated the pics.

This is after pressure washing the floor. You can see the new two post that was delivered.
IMG_5347.jpg


Office coming together.
IMG_5430.JPG


IMG_5359.JPG
 
To avoid these ads, REGISTER NOW!
Top Bottom