To avoid these ads, REGISTER NOW!

Stooge's Longer term car projects, Part 2

OP
S

Stooge

Well-known member
Joined
Mar 24, 2013
Messages
3,533
Location
South Shore, MA
I heard about Accuair as well, lots of sour grapes. Did I miss a post about the sanders? The headlights look great.

I was pretty surprised, but I follow a few of their distributors on IG, and heard some stuff about how any orders had to be paid in full via bank transfer before they would start building,, several month leadtimes without fulfillment, etc. AVS was saying they had close to $100k in open orders still open with them, that they'll have to chase through the courts. Fortunately, the Air Lift version uses the same armatures for ride heights, and you would have to imagine the electrical requirements would be about the same, so if I have to think about it, it would mostly just be swapping the manifold and ecu. but still not a great feeling that I cant just order a replacement piece if the need arrives.


didn't miss anything interesting about sanders, the saw horses im going to use to support the body when I take it off the frame, has a truck sander on it now, where it was supposed to be on a different one. I have enough to keep me busy until its free again

20200222_162235 by Dan Haas, on Flickr
 
To avoid these ads, REGISTER NOW!

stinkity stoink

Well-known member
Joined
Apr 8, 2007
Messages
734
Location
New Jersey
Nice job on the headlights... Are you shooting primer in the colder weather? I’m trying to put primer on my project and it says the body needs to be 60 something degrees ( spi epoxy) . Just curious..keep up the great work!
 
OP
S

Stooge

Well-known member
Joined
Mar 24, 2013
Messages
3,533
Location
South Shore, MA
Nice job on the headlights... Are you shooting primer in the colder weather? I’m trying to put primer on my project and it says the body needs to be 60 something degrees ( spi epoxy) . Just curious..keep up the great work!

Thanks! It was a little chilly over the weekend, but fortunately, theres an oil furnace running several ceiling mounted forced hot air heaters in there, so I had those running for a bit before I sprayed anything to get it warmed up. I would imagine most of the primers are going to have similar temperature requirements, i think the U-Pol stuff i use, states it wants at least 60degrees as the minimum.
 
OP
S

Stooge

Well-known member
Joined
Mar 24, 2013
Messages
3,533
Location
South Shore, MA
Took it easy this weekend, started taking the rotted core support out of the '58 Edsel, but I needed to bring home a die grinder to get it freed, and since I was feeling Edsel'ish, decided it was finally time to stop tripping over the control arms and get those stripped down to replace the ball joints and bushings. Unfortunately, looks like of the 4 lower control arm bushings, 2 are incorrect and have a smaller inner diameter, but the other 2 are correct so atleast I had the right thing to compare it to and I shot Kanter's an email this morning, so hopefully they can send the correct ones. Originally, we were planning on doing front disc brakes, from Scarebird most likely, but then realized the wheels and brand new tires the car came with, are only a 14" wheel and 15" is the minimum size for all of the kits, so we can either stick with drums and just rebuild them and use the wheels and tires he has, or disc brakes and new wheels and tires. He wanted to use the stock hubcaps, but the car is also getting a slightly warmed up 460 big block and wants to drive it semi regularly with his kids, so some safety concessions should be made.

off the road since 1968, on the factory bushings and riveted in ball joints, which put up a good fight
20200411_132707 by Dan Haas, on Flickr

cleaned up and spray bombed
20200411_144132 by Dan Haas, on Flickr

Looks like atleast Mac's have the correct bushings in stock, as well as the correct sway bar bushings if Kanter's doesn't have the replacements. Theyre cheap enough to just buy them, but see what Kanter's says first.

20200413_071000 by Dan Haas, on Flickr

Also, cleaned up the headlight bezels and lenses a bit just to have something shiny to look at. I found a good article in the old Torque Tube articles, (a long running quarterly dealing with old buick's, and someone put them all up as pdf's) so i'll have to go over what I have and see what im missing, how they go back together. Also, having the reflector's replated seems to be a necessity on these cars, so I guess i'll need to look into that. Uvira seems to be a company that does some sort of glass coated aluminum plating that is supposed to work well, but needs to be sent for nickel plating before they can do their coating.

20200411_111000 by Dan Haas, on Flickr

I've had the buick transmission in my living room for months now, while I've looked for things and it's just easier to have it there to compare. I've been planning on adapting a dual reservoir master cylinder to the stock transmission side mountings for the stock master cylinder, was looking for a bolt, and ended up mock up building the transmission on the kitchen floor while I had everything spread out. Good news is I was only missing one major piece, the counter cluster support shaft, which I found and bough an original on Thursday or Friday and will be tomorrow. Also missing detent spring for one of the selector shafts that is held in place by the shifter/ top cover so i'll need to track that down.

20200407_200708 by Dan Haas, on Flickr

I'll also need to finally buy some pliers to do safety wire since apparently the retaining bolts for the selector shafts/ forks, don't stay tight and were safety wired from the factory

2020-04-13_08-29-04 by Dan Haas, on Flickr


and got a new container of white paint in the mail that I wanted to play with last night :lol_hitti

2020-04-13_08-21-54 by Dan Haas, on Flickr

...aannd, spotted this handsome little '37'ish Plymouth on my way home from the garage Saturday that I had to pull over and get a closer look at

20200411_152929 by Dan Haas, on Flickr
 
Last edited:

Kev442

Well-known member
Joined
Jan 15, 2009
Messages
5,386
Location
Wi
You take it easy at about twice the rate I "give 'er". It's nice to switch things up while still making progress. That's very good news on the transmission, I thought finding parts to get it operational was going to be a major sticking point.

I wrenched on a DD type all week, got it out and about after sitting for a few months. Then I finished fitting the floor pans in a project and used panel adhesive and screws for an overlap patch. Car will never be worth big bucks and grinding the undercoat off to weld just isn't going to happen. I will grind the screw threads flush when I seal it again from the bottom and undercoat the patches.
It sure was a change of pace to spend Easter Sunday in the Garage instead of bored out of my gourd at the in-laws.
 

red94chev

Well-known member
Joined
Jan 29, 2015
Messages
556
Location
Northeastern MD
Yeah, this Accuair stuff is making me sick. My CVT tank is there for warranty and I have the feeling I won't be getting it back, at least not in working order or any time soon.

Work is looking good on the car!
 
OP
S

Stooge

Well-known member
Joined
Mar 24, 2013
Messages
3,533
Location
South Shore, MA
You take it easy at about twice the rate I "give 'er". It's nice to switch things up while still making progress. That's very good news on the transmission, I thought finding parts to get it operational was going to be a major sticking point.

I wrenched on a DD type all week, got it out and about after sitting for a few months. Then I finished fitting the floor pans in a project and used panel adhesive and screws for an overlap patch. Car will never be worth big bucks and grinding the undercoat off to weld just isn't going to happen. I will grind the screw threads flush when I seal it again from the bottom and undercoat the patches.
It sure was a change of pace to spend Easter Sunday in the Garage instead of bored out of my gourd at the in-laws.

I don't know if its the big lack of traffic driving home that's putting me in a good mood, or that theres visible buick progress, but ive been feeling pretty motivated lately! Though im still being a real lazy ******* doing a handful of things with the truck that I had planned for the winter months, along with that new starter I bought back in February or something. Finding the support shaft for the transmission, I think was just luck that I found it on an buick parts site that also carries used and NOS stuff as well as mostly new reproduction and wear parts, as they were the only ones that had one. None on ebay, or any of the other sites, and of the basically 3 sets of transmission innards I've ended up with, none of them had this shaft. $40, plus $15 shipping for a 9" long metal rod with a hole drilled in it and a provision for a drag link socket on one end, and I had to jump on it, should be here today! Whats this other project?


Yeah, this Accuair stuff is making me sick. My CVT tank is there for warranty and I have the feeling I won't be getting it back, at least not in working order or any time soon.

Work is looking good on the car!

Reno posted a thing on the accuair facebook that I saw last night, with a few explanations of some of the major gossip surrounding their demise https://www.facebook.com/AccuAir/posts/10158651612757971?__tn__=K-R I don't envy you having your cvt tank there, as it sounds like with all of the staff gone, any warranty RMA stuff is going to be handled by the bankruptcy court. I did just find a facebook group for Accuair Owners that could be helpful if an issue arises https://www.facebook.com/groups/218656108686449/ . I think I remember having a voltage signal issue with one of the height sensors before the winter, though it didn't appear the other day when I had the suspension cycling, but those atleast seem to be relatively universal. If I had to replace the whole brain and stuff, it would be a hard for me to not think about switching to coilovers and changing things a bit instead of investing in an Air Lift brand system, but I wouldnt be that surprised if AVS or something came out with a harness or something to adapt the accuair stuff to air lift

Big storm last night and lost power at home, so I took off to the garage since its the next town over. I didn't have anything planned but took the few body bolts out to get the buick ready to come off the frame this weekend, and seems like it should move pretty easily, just need to recruit an extra set of hands. Also threw the new balljoints and bushings in the cleaned up edsel arms, and started cleaning up the spindle since I forgot to include that the other day when I was stripping the arms down. i'll order some shocks for it this week and put it back together atleast to the spindle, and figure out brakes later.

Before
20200118_171903 by Dan Haas, on Flickr

a little cleaning and paint later. I think i'll end up replacing the hardware before they go in, but this came with the kit and let me make sure that everything was going to fit.
20200413_192008 by Dan Haas, on Flickr
 
Last edited:

red94chev

Well-known member
Joined
Jan 29, 2015
Messages
556
Location
Northeastern MD
Yeah, we'll see what I happens in time I guess. If you haven't heard of them already, check out Level Ride air suspension. The dude used to be Australia's Accuair distributor but had issues with their system and ended up designing his own. It's pretty similar to Accuair but it sounds like he has the algorithms for the ride height down a little better. Plus side is it works with Accuair's ride height sensors and their wiring so that's one thing you could salvage.
 
OP
S

Stooge

Well-known member
Joined
Mar 24, 2013
Messages
3,533
Location
South Shore, MA
Yeah, we'll see what I happens in time I guess. If you haven't heard of them already, check out Level Ride air suspension. The dude used to be Australia's Accuair distributor but had issues with their system and ended up designing his own. It's pretty similar to Accuair but it sounds like he has the algorithms for the ride height down a little better. Plus side is it works with Accuair's ride height sensors and their wiring so that's one thing you could salvage.

Level Ride sounds familiar but I have to admit I haven't been keeping up on the new stuff too much lately. fortunately, my voltage issue that displays by that corner of the hand controller blinking, seems to be the armature it self, which is a universal piece that can be sourced from people other than accuair, rather than an ecu issue so hopefully I can replace that and be alright. I was planning on getting some billet arms to replace the plastic ones, after finding that the plastic ones doesn't seem to like the cold and had one crack.

Good luck getting your stuff back, hopefully it doesn't get too frustrating or costly!
 

xtremek

Well-known member
Joined
Apr 13, 2012
Messages
11,603
Location
St. Johns, Mi
Looks like you've been busy. On the subject of air ride, have you heard anything bad about AirLift? Since they're local to me, I've been leaning that way.
 
OP
S

Stooge

Well-known member
Joined
Mar 24, 2013
Messages
3,533
Location
South Shore, MA
Looks like you've been busy. On the subject of air ride, have you heard anything bad about AirLift? Since they're local to me, I've been leaning that way.

I've only ever heard good things about the air lift air management systems, and are basically the same as accuair, but accuair just beat them to market for leveling suspension. Air lift Dominator air bags also seem to be one of the go-to's for bags, I have their Dominator 2600's on the white truck. Air lift seems to have some cool things built into their system, (auto draining water trap?)and lets you see the air pressure, though I don't really see the point in needing to know the air pressure if the heights are set. if people are setting it up to really handle or something in a sporty car and want to really dial it in, that makes sense, but for a cruiser truck, where it rides comfortable, being able to hit one button and have the ecu raise it all up at once if theres a big pot hole or something, works for me. all this air ride talk makes me want to get the truck out! :beer:

Saw horses are all freed up, but as not to want to tie up someone else's stuff, and to make me move a little faster, Im going to try and get it knocked out fairly quick.

20200411_110521 by Dan Haas, on Flickr

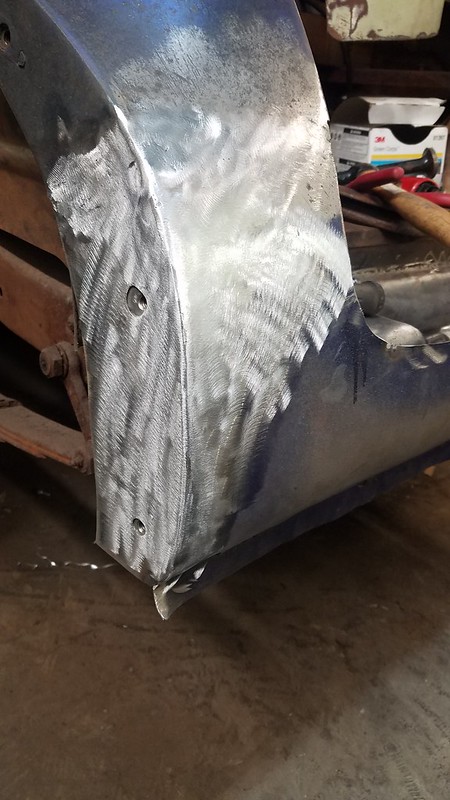
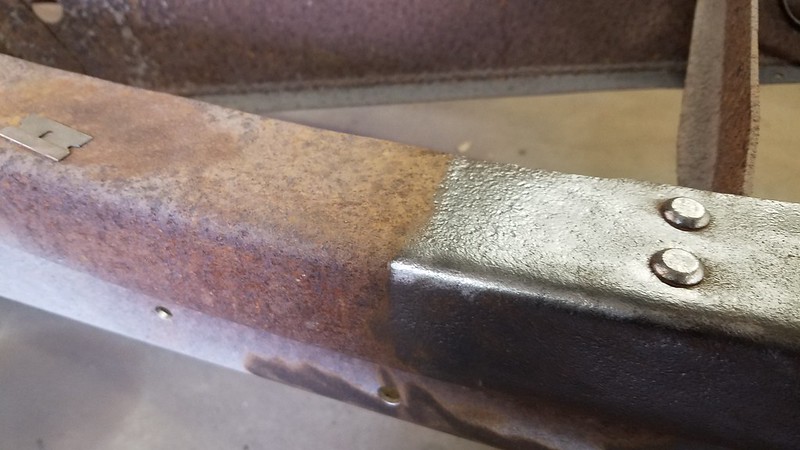
first I wanted to get the majority of the tailpan welded in so theres no big floppy body panels when I pick it up. The side edges of it don't line up because of some changes made, poor planning rather than poor cutting :lol_hitti

20200415_175655 by Dan Haas, on Flickr

A first pass with a roloc just so it didn't bother me having to look at a welded seam while leaving it for a while. Still needs work, but not a million miles off. the tiny little filler piece I made was giving me a hard time since there was some undiscovered old brazing on the backside that just happened to be where I was joining the 3 new pieces to the body, so I called it a night :lol_hitti

20200415_195458 by Dan Haas, on Flickr

and nice to see it looking a little more complete

20200415_201651 by Dan Haas, on Flickr

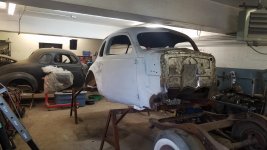
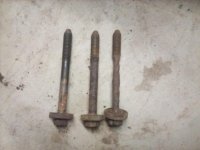
Dug out some eye bolts that fit into the body and fender mounts. Shouldn't be too bad, I recruited a buddy for Friday or Saturday and we'll use an engine hoist since this is a big body and after all the back issues ive had and its feeling great the last 6months, I dont want anyone to jack their back up trying to pick it up by hand

20200415_201437 by Dan Haas, on Flickr

20200415_201432 by Dan Haas, on Flickr

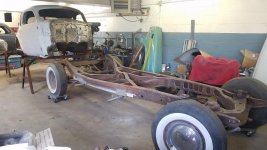
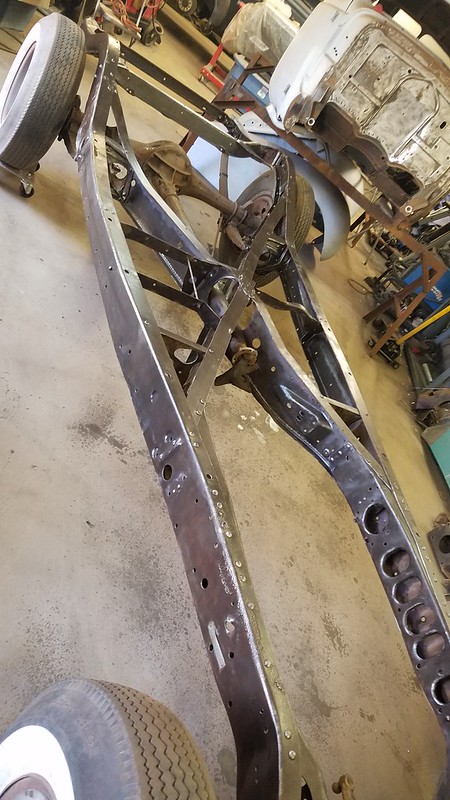
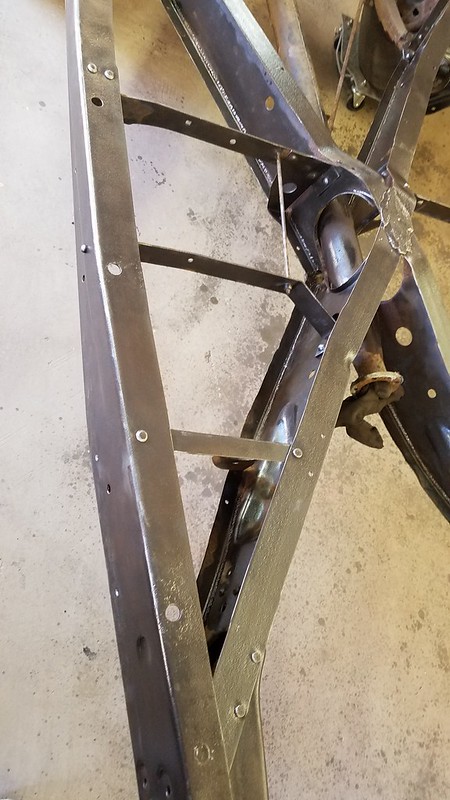
While I love working on cars, I hate working under them, so while the body's off and the frame is getting cleaned up and painted, I'm going to try and get a gas tank in, run a fuel line up to the firewall, and atleast the brake line going to the rear, maybe even make some exhaust hangers in the places I know the exhaust is going, so when I get to the point of exhaust, it will make life a little easier

Since I dont have a gas tank, and no one repops them, someone sent me a print of the stock tank measurements. Tanks inc makes a handful of 30's chevy tanks that are sort of close, but seem to be off in the dimension between the stock crossmembers that would support the tank. the '71-'72 nova tanks seem to be a lot closer dimensionally to the stock tank, and either way, would require making new mounting straps, cutting out the filler neck, welding it up and repositioning, to the back right corner since the filler neck snakes out to the gas cap on the rear passenger side fender, and the nova tank is at least $100 cheaper, both being from Tanks inc.
https://www.tanksinc.com/index.cfm/...t_id=316/category_id=131/mode=prod/prd316.htm

2020-04-16_06-58-24 by Dan Haas, on Flickr
 
Last edited:
OP
S

Stooge

Well-known member
Joined
Mar 24, 2013
Messages
3,533
Location
South Shore, MA
For cleaning up, electrolysis?

Just wire wheels, grinders, etc. I was planning on having it sandblasted, but after I pulled the front sheet metal off, I was curious and hit part of the frame with a wire wheel and it cleaned up really fast, and is actually in really good shape, so I figure to save myself some money, i'll sacrifice a weekend and just do it this way.

the firewall forward section of the frame is about 6ft, and getting it to look like this only took about an hr, though I didn't do the suspension, since all of that will be coming off anyways to get rebuilt

20200223_151603 by Dan Haas, on Flickr
 

xtremek

Well-known member
Joined
Apr 13, 2012
Messages
11,603
Location
St. Johns, Mi
The frame does look good. Should I continue to harass you about air ride so you get the truck going good? or ask about sheetmetal work so you get the Buick done. Let me know which hill you want me to push you down. Just trying to help.
 
OP
S

Stooge

Well-known member
Joined
Mar 24, 2013
Messages
3,533
Location
South Shore, MA
Looking good:beer:

Hey thanks! It feels like some good progress has been happening lately!

The frame does look good. Should I continue to harass you about air ride so you get the truck going good? or ask about sheetmetal work so you get the Buick done. Let me know which hill you want me to push you down. Just trying to help.

Im going to say probably buick stuff, since this happened today, and that 15ft frame sitting infront of the 11ft body is taking up alot of space :lol_hitti
 

Attachments

  • 20200417_160444.jpg
    20200417_160444.jpg
    148.2 KB · Views: 59
  • 20200417_160539.jpg
    20200417_160539.jpg
    126.5 KB · Views: 53
  • 20200417_160613.jpg
    20200417_160613.jpg
    140.9 KB · Views: 52

xtremek

Well-known member
Joined
Apr 13, 2012
Messages
11,603
Location
St. Johns, Mi
Boy do I know that feeling of having no space. I can't believe how much room a project vehicle takes. What are you going to paint the chassis with?
 

Kev442

Well-known member
Joined
Jan 15, 2009
Messages
5,386
Location
Wi
Weird. The post I made yesterday is gone today.:headscrat

To repeat: I can't believe that frame is so clean, my project needed less floorboard work than yours but my frame was swiss cheese.

It looks like the Plymouth got disassembled? Did they advance you some money on it to start work?
 

Kev442

Well-known member
Joined
Jan 15, 2009
Messages
5,386
Location
Wi
Finally started goofing around with my engine cradle today. Between the welded on motor mount and bent front swaybar bracket, far less was accomplished than I thought would get done. Finding a mouse house inside the frame took a while too.

Some crappy pics taken in the dark of the floorboard work last week.
Note: Never assume bolts are going to be good even with a pretty clean frame, learned that on the power steering.
 

Attachments

  • IMG_20200419_160322.jpg
    IMG_20200419_160322.jpg
    58.4 KB · Views: 38
  • IMG_20200419_160348.jpg
    IMG_20200419_160348.jpg
    98.5 KB · Views: 38
  • IMG_20200419_160425.jpg
    IMG_20200419_160425.jpg
    140.7 KB · Views: 41
  • IMG_20200419_160433.jpg
    IMG_20200419_160433.jpg
    120.4 KB · Views: 44

xtremek

Well-known member
Joined
Apr 13, 2012
Messages
11,603
Location
St. Johns, Mi
The difference between the bolts is pretty wild. Kev inching forward is still progress, keep up the good work.
 
To avoid these ads, REGISTER NOW!
OP
S

Stooge

Well-known member
Joined
Mar 24, 2013
Messages
3,533
Location
South Shore, MA
Finally started goofing around with my engine cradle today. Between the welded on motor mount and bent front swaybar bracket, far less was accomplished than I thought would get done. Finding a mouse house inside the frame took a while too.

Some crappy pics taken in the dark of the floorboard work last week.
Note: Never assume bolts are going to be good even with a pretty clean frame, learned that on the power steering.

Looking good! which car is this again, assuming the new project you mentioned a few posts back, maybe it was in the message that didn't save?

Boy do I know that feeling of having no space. I can't believe how much room a project vehicle takes. What are you going to paint the chassis with?

I actually did myself a little favor, and shoved the giant fenders and the front nose/ radiator support under the body and now I have a ton of room! and I left the frame on wheel dollies so I can move it around where I need it or out of the way a little bit.

20200417_164459 by Dan Haas, on Flickr

I've been chipping away at the several gallons of Valspar Tractor paint that amazon sent me a few yrs ago, when i bought one gallon for the truck frame and they sent me 3 and just told me to keep them, so i was going to use that. Nice and durable and fits the budget, but im not seeing that specific line for sale, but im sure most any decent brand tractor & implement paint would be the same

20200418_160210 by Dan Haas, on Flickr

Weird. The post I made yesterday is gone today.:headscrat

To repeat: I can't believe that frame is so clean, my project needed less floorboard work than yours but my frame was swiss cheese.

It looks like the Plymouth got disassembled? Did they advance you some money on it to start work?

Weird, the font of the Plymouth has been off for yrs, and hasn't really been touched until Saturday when the owner said he ordered new leaf springs and wanted coil overs for the front, so the the old Shockwave air bags were so pulled out so we could take some measurements. The owner is real gung ho about getting it going after a lung cancer scare a few months back, that turned out to be a lung infection

20200418_160751 by Dan Haas, on Flickr

20200418_160249 by Dan Haas, on Flickr

I don't want to suggest that this was a good idea, a safe idea, or a good use of time, but i spent about 10hrs this weekend cleaning up the frame with an assortment of wire wheels, (Milwaukee) on a little Makita grinder. No blood/ incidents, a few near misses when the wheel would grab something and bounce off suddenly, especially with all of the X frame structure and crevices. I am pretty happy with the results though, it came out a lot better than i was expecting and really was a lot easier and went quicker than i was expecting. It looked pretty crusty before, but it was super solid underneath

20200418_123032 by Dan Haas, on Flickr

20200418_143856 by Dan Haas, on Flickr

20200419_135728 by Dan Haas, on Flickr

20200419_135739 by Dan Haas, on Flickr

Also, came across an ebay ad for a new old stock door panel for a 1937 Buick coupe a week or 2 ago for $100, so Wednesday or Thursday, i threw out a best offer of $50 and they accepted and was delivered sunday from fedex, which i didn't know they did deliveries on sundays.


Looks stained in the picture, and im sure its a little faded, but really good condition. Not sure the history on this type of thing, if they were remanufactured for awhile afterwards, or if this has just been sitting in a box for 80+ yrs. non- seamed edge tucks under the window garnishing

2020-04-20_07-50-06 by Dan Haas, on Flickr

2020-04-20_07-48-37 by Dan Haas, on Flickr

Luxor Motor Sales ?
Grand Rapids, MI

20200419_170813 by Dan Haas, on Flickr

20200419_170817 by Dan Haas, on Flickr
 
Last edited:

Kev442

Well-known member
Joined
Jan 15, 2009
Messages
5,386
Location
Wi
The floorboard patches are on my '73 Cutlass. A car that was just supposed to be freshened up with new interior pieces. Then I pulled the carpet up for stereo wiring and discovered the floorboards were a lot weaker on the drivers side than I remembered. Thus a running, driving car has been idle for almost a year over what was supposed to be minor things. Sound like a certain white truck?

The frame cleaning is on a 69 cutlass that was never supposed to be worked on in the garage, but I got so bored during the winters that I started in on it and made a huge mess of my garage. Oh, well. It is the project with the huge amount of pitting in the sheet metal due to sitting outside for decades. Here is a picture of one of the rear quarters where I was trying to buy the section I need for repair from a guy. You can see some of the rust streaks on it yet even after some grinding. The cloudy stuff is the phosphate I brush on to prevent flash rusting.

That frame turned out great! I blasted mine using black beauty. I blasted the one that replaced ol swiss cheese. That only took a couple of hours, but I have another 5+ in using an airgun to get all the dirt out of the boxed frame. Never, ever buy a frame from a car that was used on dirt roads. Lesson learned, it was packed full of hard dirt clumps.
 

Attachments

  • IMG_20190120_130608.jpg
    IMG_20190120_130608.jpg
    137.6 KB · Views: 40
OP
S

Stooge

Well-known member
Joined
Mar 24, 2013
Messages
3,533
Location
South Shore, MA
Ordered the new gas tank last night, ended up going with a '69 Camaro tank, $126 on Summit, along with some new fuel lines and a shock to test fit for the Edsel, KYB Gas-a-just. I've never used KYB so we'll see, I wanted to go with Bilsteins, but especially these days, I don't want to be an *** and try and dictate someone else's budget for a toy car.

Thus a running, driving car has been idle for almost a year over what was supposed to be minor things. Sound like a certain white truck?....

:bigun2: Feeling a little attacked here! And i'll have you know, that along with the new starter I bought that's been sitting next to the truck for a few months, I also bought a new tailshaft seal in the fuel tank order! Maybe having to just get under it once will make it a little more enticing :beer:

Since I have a new gas tank on the way, got to spraying some paint on the frame so it had ample time to dry before I started playing with trying to mount a tank and stuff this weekend or whenever it arrives

20200420_202109 by Dan Haas, on Flickr

20200420_200747 by Dan Haas, on Flickr

And someone on the HAMB steered me in the right direction last night concerning the new transmission support shaft that seemed like it was missing a sleeve or bushing. Rather it uses needle bearings on either side and flat washers to retain them, and looking through my boxes of transmission stuff, looks like Im all set

20200420_214534 by Dan Haas, on Flickr
 

nsula_country

Well-known member
Joined
May 23, 2013
Messages
1,534
Location
Northwestern Louisiana
Amazing what a little chassis paint will do. Frame is banging!

Interesting design with xmission shaft bearing. But we have to rewind to 1930's technology and assembly methods. Looking at the parts, make perfect sense. Hope all goes together well.

CT
 

xtremek

Well-known member
Joined
Apr 13, 2012
Messages
11,603
Location
St. Johns, Mi
DANG!!!!!! You're really getting on this thing. At this rate, you'll have the Buick, the truck, and the Edsel running, with a big dent in the Plymouth, all before the end of the summer. The frame looks really good. Kind of wondering if I should wire brush the the '82 c30 frame, rust convert and then spray a quart of tractor paint on it. Normally I flap disc, rust convert, and brush rustoleum on it, because it's hidden.
 
OP
S

Stooge

Well-known member
Joined
Mar 24, 2013
Messages
3,533
Location
South Shore, MA

Thanks guys! when the body was still on it, I was nervous that I was going to have to do some major repairs or modifications, never imagined that it would clean up this well. And really amazing what something shiny will do for the motivation to go work on something.

Amazing what a little chassis paint will do. Frame is banging!

Interesting design with xmission shaft bearing. But we have to rewind to 1930's technology and assembly methods. Looking at the parts, make perfect sense. Hope all goes together well.

CT

I still don't pretend to understand it, in my mind, with no step or something to seat the needles, they'll just go everywhere, but HAMB'er VTWhead sent this picture of a counter cluster with the needles freely seating without an inner shaft, and said to do this when I asked how, "You will need an arbor of sorts the same length as the cluster. I have used a chunk of conduit, heard that some use a broom handle. Grease up the needles and insert them then add the small washer at each end. Drop it in the case, wrestle the thrust washers in ( clearance end to end on the cluster is around 18 thousands if I recall) insert the shaft from the rear thru the thrust washers (can be a challenge at times) then drive it thru carefully. "

it all sounds pretty frustrating to me! the transmission case it not a big thing with plenty of room to wiggle around. End to end, the new support shaft that I found is only 9" and that runs the entire length of the case

norway1 (2) by Dan Haas, on Flickr

[/I]

Thanks guys! when the body was still on it, I was nervous that I was going to have to do some major repairs or modifications, never imagined that it would clean up this well. And really amazing what something shiny will do for the motivation to go work on something.

DANG!!!!!! You're really getting on this thing. At this rate, you'll have the Buick, the truck, and the Edsel running, with a big dent in the Plymouth, all before the end of the summer. The frame looks really good. Kind of wondering if I should wire brush the the '82 c30 frame, rust convert and then spray a quart of tractor paint on it. Normally I flap disc, rust convert, and brush rustoleum on it, because it's hidden.

It really came out better than i was anticipating, and better than i thought i would care to bring it to since its all hidden, but it is a lot nicer to work on something nice and clean and shiny, and figured i might as well spend the extra day or 2 and do it right.
I would say atleast 95% of the frame was cleaned up with these knotted wire wheels, i also used a knotted cup wheel on a grinder and a crimped wheel on a die grinder for some of the harder to get to places. the regular knotted one really made quick work of it, most of it cleared in one pass or so, BUT, I can also see how it could go wrong quickly if you have a frame with a lot of stuff and places for it to catch and bounce off of it real fast. before i started, i was anticipating having to go back over it with a crimped wheel, or a flap disc or a sander, but it left a really nice surface so i didn't bother. I would probably do it this way again, saved myself a decent amount of money having to bring the chassis somewhere or having someone come out here to blast it, or buying my own capable sandblaster. i think i have $45 into it with the cost of a couple of new wire wheels.

2020-04-21_12-47-06 by Dan Haas, on Flickr
 
Last edited:

Kev442

Well-known member
Joined
Jan 15, 2009
Messages
5,386
Location
Wi
Future, er, Frame so bright ya gotta wear shades!

I need to correct myself: I used those very same knotted wheels on the long open parts of my frame (and floorboards), then black beauty on the coil springs and intricate stuff. The bang for the buck on a knotted wire wheel is amazing.
 

nsula_country

Well-known member
Joined
May 23, 2013
Messages
1,534
Location
Northwestern Louisiana
I believe those wheels are called "stringer bead" wire wheels. Mainly used to clean slag out of welds. Hence, stringer. They work very well, but are unwieldy at times!

Back to the transmission bearing. Use A LOT of grease. Grease will hold the needles in place. Essentially the I.D of the counter cluster is the outer "race" for the needle bearing.

Have worked on industrial equipment that was assembled similarly. I'd assemble it loose 1st, make sure you have ALL the needles. Then count them. Then count them when you assemble. Key is making an "arbor" that is close enough in diameter that the needles cannot fall out, nor push out. Bevel a little lead in on the end of arbor. Then just use the inner shaft to push arbor out. Done!

Must include pics when you assembel the xmission.

CT
 

Bob Heine

ALLIANCE MEMBER
Joined
Oct 24, 2009
Messages
10,706
Location
Boca Raton, Florida
Dan, those needle bearings were still used through the '50s at least. I remember putting a transmission for our '56 Chevy back together on the kitchen table. Disk brakes were the new thing in 1963 and the bearing grease for the rotors was a lot thicker and stickier than regular wheel bearing grease. It worked great to hold needles in place. I may have over-estimated my need for wheel bearing grease because the Quaker State can is still half full. The Pennzoil can of regular wheel bearing grease is also about half full.
attachment.php
 

Attachments

  • Disk Brake Grease.jpg
    Disk Brake Grease.jpg
    109.6 KB · Views: 443
OP
S

Stooge

Well-known member
Joined
Mar 24, 2013
Messages
3,533
Location
South Shore, MA
I think this weekend, im finally going to try and set the engine onto the frame with the transmission, though I think it will just be the trans case for now. I've been looking for a 1937 front engine mount plate that sits behind the timing chain on the front of the straight 8 since I bought the engine a couple yrs ago, and with the body off, it will be the easiest way to test fit everything. Since I cant find a mount, im going with modifying the existing 1947 mount that's on the engine now, and I might be seeing it through rose colored glasees, but it really doesn't look too bad. The '47 uses an engine cradle so the mounts and slanted, where as the '37 has horizontal mounts that sit on top of the frame, so the idea is to cut the bottom edge of the "ears" and pull them down to a horizontal plane that matches up to my quick and dirty frame template then fill the new gap with 3/16, fish plate, etc.

Ordered some 3/4" 70A durometer, high strength neoprene to cut out for the mounts, as well as a strip of 60a rubber to make some body mounts out of, though they are more like shims as they are just sandwiched between the body and the frame. Not sure how im going to cut the 3/4" rubber, but I have a few ideas to try, but it could be hard enough that I might be able to get away sawing it, but drilling may be an issue.

20200422_202032 by Dan Haas, on Flickr

20200422_211741 by Dan Haas, on Flickr

how a stock one sits

2020-04-24_11-35-46 by Dan Haas, on Flickr

20200424_113124 by Dan Haas, on Flickr

20200424_113216 by Dan Haas, on Flickr
 

Kev442

Well-known member
Joined
Jan 15, 2009
Messages
5,386
Location
Wi
Exactly where my frame/engine is stuck at. I'm going from the single mount behind the crank to standard V8 mounts.
Making sure I have exhaust manifolds that would clear was the first hurdle, then giving up on a turbo 400 and switching to a longtail TH350 was the second decision. Avoiding tilting the engine excessiviely may require I use some 3/4" neoprene between the body and frame for some extra wiggle room. The factory "cheated" by angling the engine and casting an intake manifold to sit the carb level.
Was not aware of that when I started this "restomod".:)
 
OP
S

Stooge

Well-known member
Joined
Mar 24, 2013
Messages
3,533
Location
South Shore, MA
The new gas tank was delivered Friday afternoon, for a '69 Camaro/ Firebird from Tanks inc, and an hour or 2 later, it was being cut up to make sure it fit, and I couldn't ask for a better fit. Still need to make some straps for it, and order some hardware and T bolts for it, and when the body is back on, I can make the filler neck that routes through the rear passenger side fender.

20200424_175819 by Dan Haas, on Flickr

20200424_181557 by Dan Haas, on Flickr

The tank metal was thin, it welded in nice, but i got a little oil canning on the flat between the new patch and the sending unit hole, cant really get under there to planish it out, so im trying not to worry about it too much since its a gas tank that will never be seen, but it still bothered me that I did that :lol_hitti

20200424_202814 by Dan Haas, on Flickr

20200424_203915 by Dan Haas, on Flickr

Saturday, I finally started on the engine mount plate. I couldn't decide how I wanted to do it, if I wanted to make the cuts first, get them to where I wanted, and take the plate out to bench weld it, or do it on the engine since it would be probably a little clumsier to weld, but easier to double check the measurements to make sure it was right. The decision was made when I couldn't find a gear puller to fit the timing gear and couldn't take it out. I still will need to pull it to weld the backside, and fish plate it for a little extra security and strength.

20200422_202032 by Dan Haas, on Flickr

some cuts and brought the "ears" down to a horizontal plane

20200425_144715 by Dan Haas, on Flickr

20200425_152338 by Dan Haas, on Flickr

not shown is a little filler piece for that new opening from separating the edges. 3/16 plate

20200425_152438 by Dan Haas, on Flickr

Aesthetically, I should have made 2 separate pieces for the larger filler piece and made the side piece rounded instead of one piece that I scored and bent, but having it squared off a bit will give more clearance to getting long enough bolts in and out

2020-04-27_10-13-28 by Dan Haas, on Flickr

20200426_123750 by Dan Haas, on Flickr

20200426_133605 by Dan Haas, on Flickr

20200426_132944 by Dan Haas, on Flickr

Still need to order the rear engine mounts that mount off of the sides of the bellhousing. A little spendy at $350, with $100 core that I think I have the parts for, but I saved a few hundred doing the front mount so its a little easier to swallow
 
OP
S

Stooge

Well-known member
Joined
Mar 24, 2013
Messages
3,533
Location
South Shore, MA
Nice work. The rubber should cut Ok with a hacksaw. If not - throw it in the freezer and then cut it :thumbup:

yeah, I think the harder 3/4 stuff will cut ok and probably drill ok, but im expecting the softer 3/8 stuff to be a pain to put holes in, so the day I got it, I cut a few 2x2 pieces with a razor blade and threw them in the freezer, I just haven't gotten around to trying to drill a hole in them yet. if that doesn't work, I think I might have some 1/2" steel tubing somewhere, so I was thinking of maybe hitting one end with a roloc or something to sharpen it a bit, and try pressing it through on a small arbor press, or hammer it.

Only plans this weekend, are making tank straps, and I might bolt up the bellhousing and trans case to the engine, so when I get the new mounts, I can set it in and start planning brake master cylinder, and the new header and exhaust. I also lucked upon someone selling a 11inch '36/'37 buick pressure plate on ebay last week $75 so I jumped on it. I can buy a new throwout bearing, but I still need to find a clutch fork to finish off the clutch stuff and have a full drivetrain. Almost there!

(AND cleaned one of my benches that was way overdue!)
20200427_204222 by Dan Haas, on Flickr

between the flywheel and the pressure plate, I bet its pushing 80+lbs

20200427_204241 by Dan Haas, on Flickr

Bought some more old Hop Up magazines from the early '50s to go with my other ones, and one of them had a nice GMC straight 6 being built, and a little motivation for my 8, and some possible air cleaners that fit the budget

20200429_055837 by Dan Haas, on Flickr

20200428_174448 by Dan Haas, on Flickr

20200428_175454 by Dan Haas, on Flickr

------------------------
Unrelated, I "sold" a few paintings in exchange for the buyers making donations to animal charities that a friend of mine was organizing, so that gave me an excuse to add more trash to my living room walls and did this the other night :lol_hitti

2020-04-30_08-03-41 by Dan Haas, on Flickr
 
To avoid these ads, REGISTER NOW!
Top Bottom