Having last week off trying to eat up some vacation time before the end of the year, and managed to get some stuff done, not as much as i was planning but it was nice to have some time off.
The one im pretty excited about, and whats going to save me alot of time and money, getting a seat for the Buick upholstered. i had bought a seat frame, springs, etc. a year or so ago, then Lebaron Bonney, who i was going to get the seat coverings and some interior stuff, went bankrupt, and i've been hemming and hawing about getting it covered, the cost, etc. Then, someone in a 37, 38 Buick group, posted an ad they found for some seats way up in Maine, so i called him, took a vacation day and headed up to Maine a day later. Older guy, drag raced for decades, was a founding member of the Orientals car club, had some cool cars in a nice barn, (also a beautiful house overlooking the mountains) and most importantly, a really nicely upholstered split bench seat, with the decorative chrome pieces, side skirts, etc, from a 1938 Buick for $100
a '26 T that he made into an extended cab truck and stretched it 17", it has an SBC, but he said he's put 65k miles on it driving it around the country,
 20201014_122051
 by
Dan Haas, on Flickr
'39, also an SBC
 20201014_122038
 by
Dan Haas, on Flickr
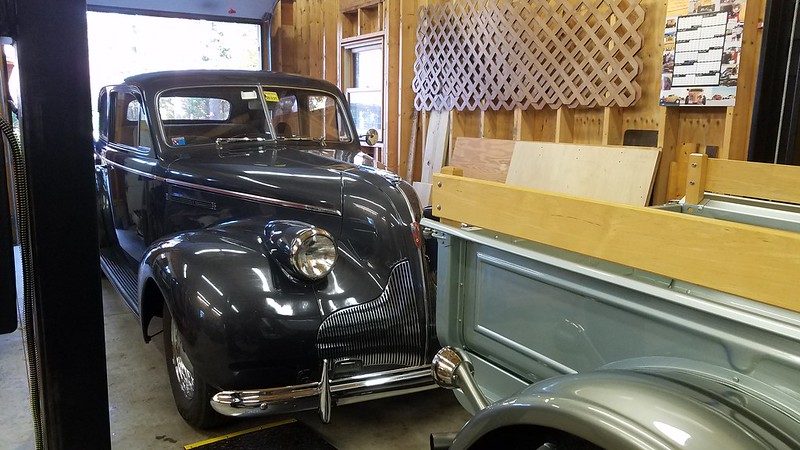
and a '39 Pontiac that he was taking apart, and i believe putting an SBC in it since he asked me if i wanted a flat straight 8 from it
 20201014_122018
 by
Dan Haas, on Flickr
The Equinox earning it's keep, the new seat fit perfectly in the back. i hadnt really taken the equinox on any long drives after buying it last yr, but 3.5hrs up, was at his house for probably 30minutes, then a 4hr drive home, and it was really comfortable cruising the whole time around 75 since i wasnt in a rush and had a nice leisurely drive.
[/url]
20201014_174248 by
Dan Haas, on Flickr
 20201024_193424
 by
Dan Haas, on Flickr
its in great shape, but could use a cleaning. looks like it was just in a car that was brought to shows or something without any hard wear on it. i dont know why the seat bottom looks discolored in the pictures, other than maybe that its corduroy/ broadcord and needs to be brushed in the same direction

 20201025_123900
 by
Dan Haas, on Flickr
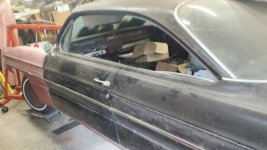
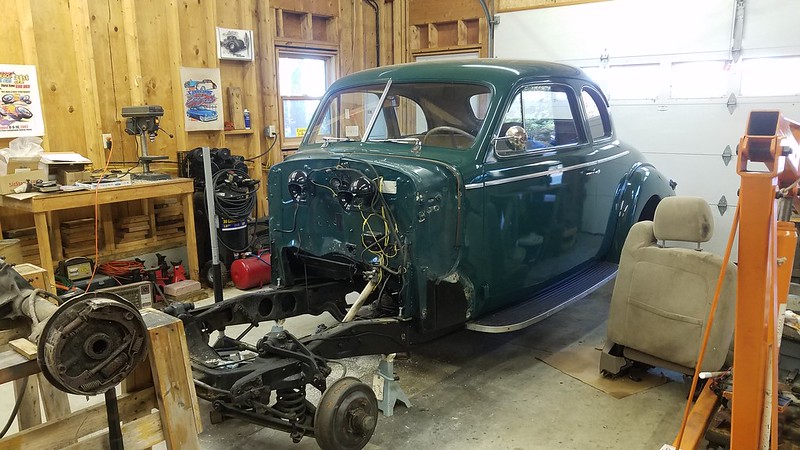
And i finally got to actually sit in my car for the first time after owning it for 3'ish yrs! Just a test fit and to mark out on the floor where the seat will be moved to, since alot of the floor has been replaced and i want the seat to be where im comfortable sitting, rather than the remaining stock floor holes, since they sit you pretty close to the wheel and dahs and im a big guy. (The steering wheel isnt bolted up to the dash yet and is sitting lower than it will)
 20201024_191046
 by
Dan Haas, on Flickr
and the old seat for comparison
 20201012_192539
 by
Dan Haas, on Flickr
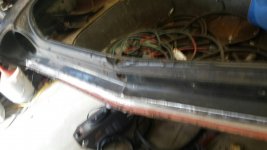
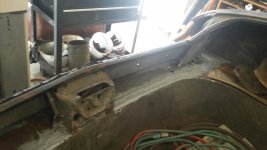
Got the rest of the trunk weather stripping channel cut out, the supports cleaned up, and the new pieces i made fitted. I decided to just drill holes into the new channel to coincide with the supports, and then i'll plug weld them to the stock support pieces. it ends up being around 16ft of new channel, so i've just been picking away at it running a bunch of tacks in between doing other things. Cleaning up the welds and dressing them isnt something im looking forward to, but it shouldnt be TOO bad if i just take my time. the trunk lid will go back on to fit the lower piece of channel, then im going to cut out the rest of the trunk floor and remake it. i was trying to get away with using it as is, but it needs to be done and i'll regret not doing down the line.
 20201025_123349
 by
Dan Haas, on Flickr
 20201025_123341
 by
Dan Haas, on Flickr
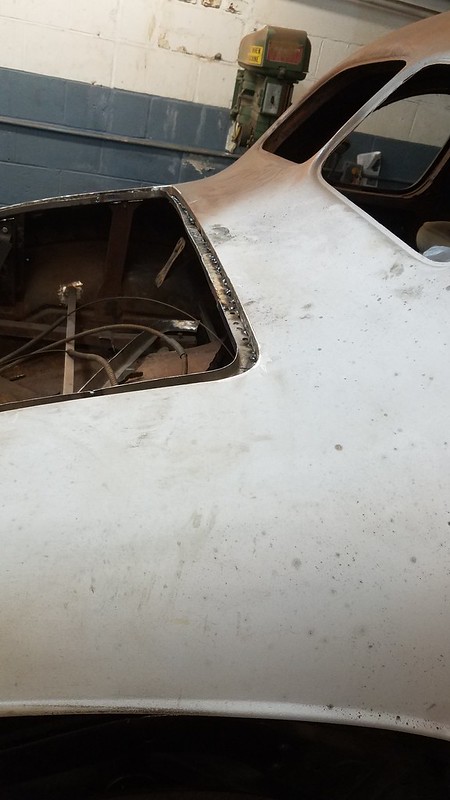 20201025_123353
 by
Dan Haas, on Flickr
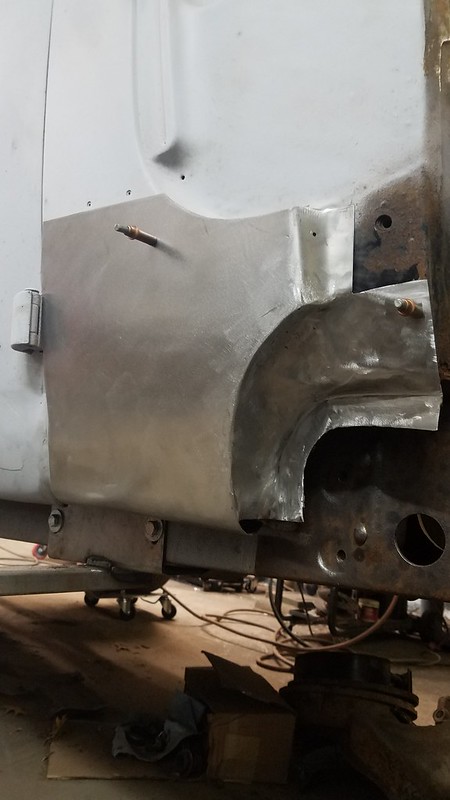
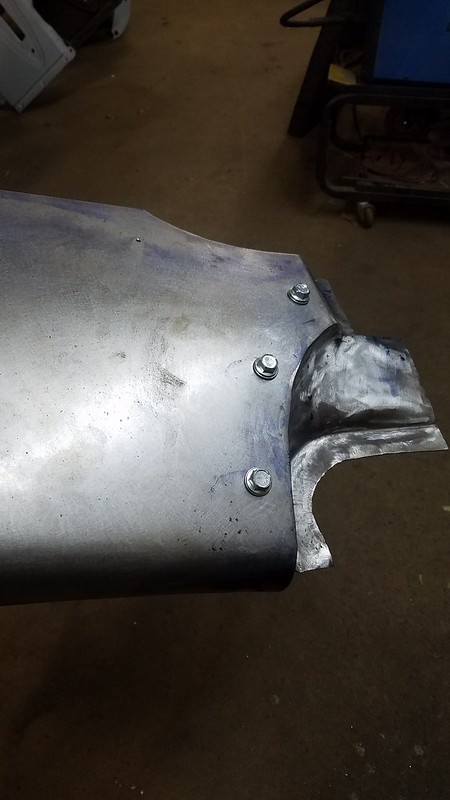
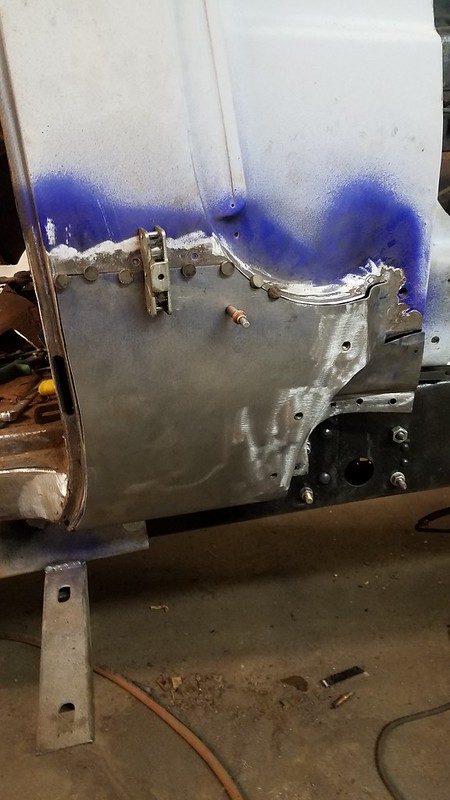
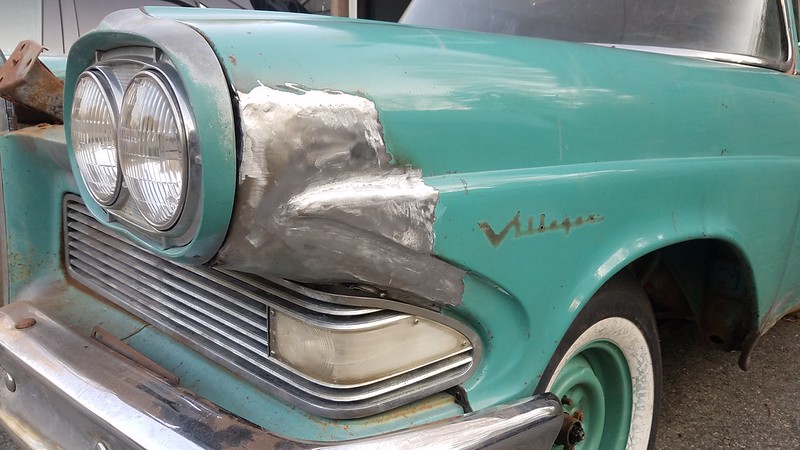
I also thought it was time to finish the Edsel fender that i had started awhile back, since it was getting the in the way and collecting dust. i had been avoiding it because the peak/ end of the body line was giving me trouble trying to get it right, so i started there. The bottom side of the body line, is an indented/ concave shape and slightly sharp, where the top, is a rounded outward shape. i had the new piece made with the rounded up, and got stuck. Then i thought instead of making it all one piece, i ran a strip thought the bead roller and started trimming the edges to fit the opening. Still needs work, but not a million miles away. i'll make a profile shape with the corking tool i got from Cornfield Customs to really fine tune the edges, and sharpen them up a bit.
 20181209_113143
 by
Dan Haas, on Flickr
 20181209_121508
 by
Dan Haas, on Flickr
 20201010_125746
 by
Dan Haas, on Flickr
its just loosely in place and theres no inner fender to help align it, but its looking better
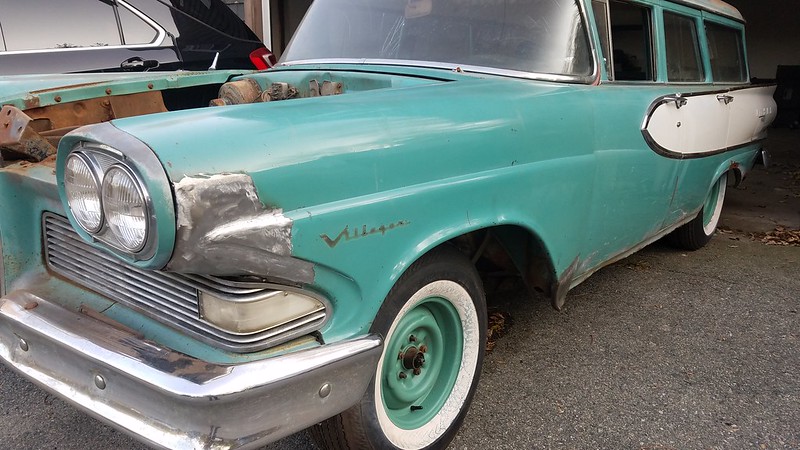 20201010_170820
 by
Dan Haas, on Flickr
 20201010_170823
 by
Dan Haas, on Flickr
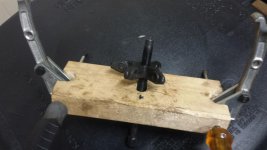
And the corking tool, i'll shape one of the blocks to what i want, and its used with a hammer to fine tune edges. i bought it specifically for this, but i think it will be useful for other projects
 20201010_102530
 by
Dan Haas, on Flickr
Then since the driver side suspension had been stripped, painted, rebuilt and installed, i should start on the passenger side since i didnt need to reference it anymore for the driver side. went easier and came apart without too much trouble, but it was noticeably more rusty than the driver side, but its been off the road since 1968, so i guess im not that surprised. Maybe one side was sitting facing a wall or something away from the weather slightly more than the other side?
Genuine Iowa farm dirt and grass

 20201020_163426
 by
Dan Haas, on Flickr
 20201020_163801
 by
Dan Haas, on Flickr
 2020-10-26_06-36-06
 by
Dan Haas, on Flickr
I'll start getting that stuff all stripped down and cleaned up to paint soon. i still need to order a few control arm bushings, sway bar bushings and the inner tie rods, idler arm, so im not in a rush to clean it up.
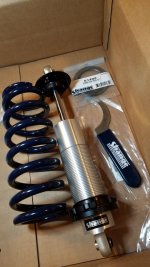
Then since i already had alot of the tools i was going to need, i did a bunch of measuring, found a ride height i liked and did some more measuring, and started taking some things off the white truck that i will no longer be needing
 20201025_132604
 by
Dan Haas, on Flickr
bed is misaligned, but a jack fits under the frame without having to do anything stupid, so im happy with it. Keeping all of the hard suspension parts, the tubular front crossmember and control arms, the rack and pinion, sway bar and the rear 4 link, but taking the air ride out and going with coilovers. i can still keep it real low because it was designed with a low ride height and still drive and handle nice without worrying about anything hanging down and getting caught up. hard to get a good idea with these pictures, but i think i'll be happy with the height/ stance.
 20201025_132624
 by
Dan Haas, on Flickr
 20201025_153145
 by
Dan Haas, on Flickr
less on topic, i also did some goofy paintings this week since i didnt want to just spend all the time working on old cars , so heres one of those
 20201023_211747
 by
Dan Haas, on Flickr


")


 Harry
Harry