To avoid these ads, REGISTER NOW!

Support for making concrete countertops

Kaizen

Well-known member
Joined
Jan 9, 2015
Messages
6,948
Location
New England
Hey guys I'm making concrete countertops. Going to pour in a mold outside on 3/4 white melamine. each pour will be about 320 pounds of concrete and roughly 30 inches by 8feet. I think I'm all set on the making and equipment except for what to support them with. I'm trying concrete as this is a budget aka cheap build plus I want to try it. So I don't want to just go get 2 sets of 1000 pound sawhorses that fold up nice nor do I want wooden ones that will take up shop space after. Thinking of laying 2x4s on edge over whatever it is to spread the load.....maybe 4 across the 30inches. should I spend the time and make some sawhorses out of plywood and scraps? or is there something else I'm not thinking of. last detail its going to be on uneven land and the pour has to be pretty close to perfect. also concerned of a leg sinking after I start the pour. any ideas?
 
To avoid these ads, REGISTER NOW!

ford33

Well-known member
Joined
Feb 26, 2011
Messages
2,118
Location
Chicago, IL. USA
You need to support the mold when it is filled and not have it shift or twist on you. If it does your counter top may come out twisted and not flat. I suggest strong wooden saw horses placed on a firm foundation. You are not going to do this on the grass. Sight down the saw horses to make sure they are flat and level with with each other and shim as necessary. Check again when mold is filled and adjust.

This old house had an episode of a company making concrete tops. They used a specific concrete mix and used a mold that allowed them to put in a sink and faucet holes. It was very interesting.

Also agitate the mix so no voids develop on the working surface of top.

Have you considered coloring the concrete?

Good luck and send pictures when done.
 

SteveeP

Well-known member
Joined
Apr 26, 2013
Messages
74
Location
Pepperell, MA
I would try to stay closer to the ground, for many reasons. I made a small outdoor bar top out of concrete earlier this year. It came out fine for what it is, but I would not have been happy with it for my kitchen countertop. It has a lot of air bubbles and some waviness, due to what I cast the concrete against. Vibrate as much as possible to get rid of all the air and let it fully cure before you try to move it, the corners and edges are very easily damaged. Good luck and post some pics when you do it.
 
OP
K

Kaizen

Well-known member
Joined
Jan 9, 2015
Messages
6,948
Location
New England
You need to support the mold when it is filled and not have it shift or twist on you. If it does your counter top may come out twisted and not flat. I suggest strong wooden saw horses placed on a firm foundation. You are not going to do this on the grass. Sight down the saw horses to make sure they are flat and level with with each other and shim as necessary. Check again when mold is filled and adjust.

This old house had an episode of a company making concrete tops. They used a specific concrete mix and used a mold that allowed them to put in a sink and faucet holes. It was very interesting.

Also agitate the mix so no voids develop on the working surface of top.
Have you considered coloring the concrete?.

I will have the sawhorses on the grass. but raised so I can vibrate under it easy and use the same table to sand them on. guess i'll level some plywood under them. yes I bought powder dye. I tried the liquid at hd before and it sucked. This is the real deal. will have sink cut out, with faucets, soap dish that drains to the sink, a few impressions for square vases for flowers or whatever as its a big island. trying to cast my own mold for a dish rack now. they sell them for 120 bucks so I'm seeing if I can do it on the cheap for 35. I've spent a long time researching these. if it fails miserably I will only be about 400 in the hole. i'll be using quickcrete counter top mix 17 bucks a bag special order at lowe's. all told ten bags for a big area. already have the cement mixer.

I would try to stay closer to the ground, for many reasons. I made a small outdoor bar top out of concrete earlier this year. It came out fine for what it is, but I would not have been happy with it for my kitchen countertop. It has a lot of air bubbles and some waviness, due to what I cast the concrete against. Vibrate as much as possible to get rid of all the air and let it fully cure before you try to move it, the corners and edges are very easily damaged. Good luck and post some pics when you do it.

yea I think as I'm in the northeast i'll be tenting these for a few weeks before I start handling it. after 28 days this mix should be 6000 psi which is really tough. course should be tough to sand it as well though. yes have random orbit sander and an old jitterbug sander to use. also saw people using a sawzall with no blade. i'll have them all on hand to shake the **** out of it.
 

rlitman

Well-known member
Joined
Oct 18, 2010
Messages
24,665
Location
Long Island
Do you have the Cheng book on councrete countertops?
http://www.amazon.com/dp/1561584843/?tag=atomicindus08-20

It's well worth taking the time to read it before your ideas are sent in stone.

Quickrete 5000PSI mix is also commonly used for countertops. Countertop mixes have defoamers that make agitation less necessary (air-entrained concrete is good for outdoor use to protect it from freezing, but is really bad for countertops).

I was all set to do this myself, when I happened on a granite slab on the cheap. The polishing and finishing is the same, so the diamond tools I had set aside for the job came in real handy.

Do you have the tools to do the sanding wet? I can offer a lot of pointers on that part (I've got more than quite a few hours of polishing into my kitchen).

edit: As mentioned above, corners of concrete are more easily damaged than stone, but even in stone, the corners are easily damaged (this is the Achilles heel of stone). For this reason, I ground a 3/4" radius demi-bullnose into my countertops. The radius makes it much more difficult to do permanent damage, though it does add a bunch of polishing work. The router wheel alone ran me $150, plus you need to use it in a machine that shoots water out through the bit. DO NOT try to use it in a regular grinder with only water supplied externally. It will be a disaster.
 
Last edited:
OP
K

Kaizen

Well-known member
Joined
Jan 9, 2015
Messages
6,948
Location
New England
Do you have the Cheng book on councrete countertops?
http://www.amazon.com/dp/1561584843/?tag=atomicindus08-20

It's well worth taking the time to read it before your ideas are sent in stone.

Quickrete 5000PSI mix is also commonly used for countertops. Countertop mixes have defoamers that make agitation less necessary (air-entrained concrete is good for outdoor use to protect it from freezing, but is really bad for countertops).

I was all set to do this myself, when I happened on a granite slab on the cheap. The polishing and finishing is the same, so the diamond tools I had set aside for the job came in real handy.

Do you have the tools to do the sanding wet? I can offer a lot of pointers on that part (I've got more than quite a few hours of polishing into my kitchen).

edit: As mentioned above, corners of concrete are more easily damaged than stone, but even in stone, the corners are easily damaged (this is the Achilles heel of stone). For this reason, I ground a 3/4" radius demi-bullnose into my countertops. The radius makes it much more difficult to do permanent damage, though it does add a bunch of polishing work. The router wheel alone ran me $150, plus you need to use it in a machine that shoots water out through the bit. DO NOT try to use it in a regular grinder with only water supplied externally. It will be a disaster.

I think I have seen enough from him to accomplish this. I have not gotten to the polish part yet in planning. I would love to get a variable speed grinder with water but haven't seen any on the south side of ridiculous. I will have a third piece 2 foot square that I was going to keep inside and play with. Thinking I want up to 2k so really smooth and using epoxy to seal. Any good places for a reasonable grinder and cups? I've done bodywork and see a lot of similarities. Might just get some hf grinders and add a dimmer switch on. You think a running hose and this would be a disaster? If so why? It will be outdoors
 

404

Well-known member
Joined
Aug 23, 2014
Messages
3,463
Location
Mass
Here is another method. The spray gun is available at HF.

GFRC (Glass Fiber Reinforced Concrete


benefit is less material and less weight.
 

iron block

Well-known member
Joined
Jun 22, 2015
Messages
264
Location
Bay Area, CA
Five years here with commercial concrete countertops in our kitchen. Mixed review at this point.

The good -
  • Stunningly beautiful (we chose a lightly tinted mix with colored glass fragments embedded.)
  • Pretty immune to heat damage.

Less good -
  • Concrete soaks up small spills and discolors easily (coffee, for example), even when coated with sealant and wax. Your epoxy coating should do better than this, though.
  • Absolutely no give -- if you tip over a glass it **will** shatter. Not like our old butcher block countertop which was like rubber in comparison.
  • The countertop edge abrades over time as it is knocked with broom handles, etc., and the resulting sharp little points will chew up your wife's blouses if she leans on the countertop. Been there, seen that. Maybe radiusing will help.

Bottom line for us is that we would probably do natural stone next time around. But your DIY approach sounds like you can experiment without breaking the bank, which is nice. Good luck.
 

rlitman

Well-known member
Joined
Oct 18, 2010
Messages
24,665
Location
Long Island
I'm not comfortable mixing water and electricity, so I went with a pneumatic grinder.
If you've got a 60 gallon or bigger compressor, that's the cheapest way to go.

I got a pneumatic wet grinder with a 5/8-11 hub. For that, I picked up a cheap 5" hook&loop foam grinder pad at HF, and cut a hole in the middle for the water to come out to use with the 6" hook and loop diamond pads I already had. I've also got the demi-bullnose cutter, and a "zero tolerance" wheel that's basically a diamond coated cylinder for surfacing straight cuts (for sink cutouts, but also good when working against a straightedge).

Check out these (kind of like what I have):
http://www.ebay.com/itm/4-Inch-Wet-...olishing-9-Pad-Granite-Concrete-/301730810173

edit: forgot to mention why a running hose and a grinder/sander won't work

The water needs to come out of the middle of the tool.
Water's secondary role is to cool the cutting surface. This takes more water than you'd expect.
But water's primary role is to clean the cutting surface, to keep the diamonds in constant contact to maintain the cutting action. A dribble from a hose will almost instantly clog your cutting head with a slippery mud from the material you remove. At this point, the cutting action slows to a crawl. My first attempt playing around with this was to use a hose and my Dynabrade. It was a disaster, as the spinning disc sprays all the water out, and it is impossible to get enough water in there from the outside unless perhaps if the slab were submerged. This might work at the finer grits (800 and up), but is a total fail with the coarser grits (I started my polishing at 50, and finished at 3000).

A good polishing job WITH the right tools takes many hours. Trying to water your discs from the outside multiples the time involved several times. This is one place where the right tool majorly pays for itself in the time saved.

edit2: Pneumatic tools are by their very nature variable speed.
For the most part, I ran my grinder at full speed. So long as I had sufficient water flow, and full contact from the pad to the surface, that worked fine. But I would slow it down when polishing the radius where only a line of the pad made contact.
 
Last edited:

rlitman

Well-known member
Joined
Oct 18, 2010
Messages
24,665
Location
Long Island
Less good -
  • Concrete soaks up small spills and discolors easily (coffee, for example), even when coated with sealant and wax. Your epoxy coating should do better than this, though.
  • Absolutely no give -- if you tip over a glass it **will** shatter. Not like our old butcher block countertop which was like rubber in comparison.
  • The countertop edge abrades over time as it is knocked with broom handles, etc., and the resulting sharp little points will chew up your wife's blouses if she leans on the countertop. Been there, seen that. Maybe radiusing will help.

I've got a commercial concrete counter in my office's pantry. It's been in use for 6 years now, and while I've expected to see it stain from day one, I've not seen any staining of any kind around the coffee machine (which for a long time had a problem with overflowing the pot while brewing too).

I'm not sure what they used, but it's amazing. Probably some sort of densifier applied before polishing, but it is holding up at least as well as I'd expect from granite. Of course with DIY concrete, results will vary a lot.

Yes, these countertop materials are not so glass friendly. Granite has even less give than concrete though.

As I said, radiusing the edge is important. A soft rounded over square edge will chip and wear. It's just a problem of geometry.
 
OP
K

Kaizen

Well-known member
Joined
Jan 9, 2015
Messages
6,948
Location
New England
Here is another method. The spray gun is available at HF.

GFRC (Glass Fiber Reinforced Concrete


benefit is less material and less weight.

Thanks. when I have seen this done they have to heavily sparge it again and I'd rather try to not do that or at least have only minimal air bubbles.

iron and rlitman thanks for your experience. its very valuable. I do have a compressor running at 11 cfm so maybe i'll be able to use it. any issue with intermittent use letting the 60 gallons get back up to speed? so stopping for a beer every 15 min or so for ten minutes.
 

rlitman

Well-known member
Joined
Oct 18, 2010
Messages
24,665
Location
Long Island
11CFM is borderline. You wouldn't be stopping for 10 minutes every 15.
You'd probably be stopping for 1 minute every 2. Not very productive.

Lots of people use the electric version... With the inline GFCI on the cord, and plugged into a gfi outlet, it should be safe enough. Especially since the electric version includes a spray skirt (you'll still want to wear a trash bag to stay dry, and don't do polishing in the cold weather).
 
OP
K

Kaizen

Well-known member
Joined
Jan 9, 2015
Messages
6,948
Location
New England
11CFM is borderline. You wouldn't be stopping for 10 minutes every 15.
You'd probably be stopping for 1 minute every 2. Not very productive.

Lots of people use the electric version... With the inline GFCI on the cord, and plugged into a gfi outlet, it should be safe enough. Especially since the electric version includes a spray skirt (you'll still want to wear a trash bag to stay dry, and don't do polishing in the cold weather).

Yea...god I wish I had spent another 200 bucks when I got my compressor! i'll be going electric. I live in NH......what do you call cold? and why not. figured a cold slab would not heat up much with water on it.


Thanks big thread. I'll read through it today.
 

rlitman

Well-known member
Joined
Oct 18, 2010
Messages
24,665
Location
Long Island
It's just that with water spraying everywhere, you'll get soaked. If you can manage the spray, then you can do the work in any weather.
 

Hawk

Well-known member
Joined
Oct 21, 2009
Messages
1,019
Location
Kannapolis, NC
If you have an old (quarter sheet or so) vibrating sander after you pour the top, use it without paper on the outside frame. This will help bring air bubbles to the top. Or you could use one of Tampa's toys. :lol:
 
OP
K

Kaizen

Well-known member
Joined
Jan 9, 2015
Messages
6,948
Location
New England
It's just that with water spraying everywhere, you'll get soaked. If you can manage the spray, then you can do the work in any weather.

got it. I'll take off the skirt and pull up my big boy pants and get it done. unfortunately I think it will be cold by the time this is poured and cured so going to have to put on some gear.

If you have an old (quarter sheet or so) vibrating sander after you pour the top, use it without paper on the outside frame. This will help bring air bubbles to the top. Or you could use one of Tampa's toys. :lol:

yes thanks mentioned above I will have a jitterbug and a sawzall. with some air impacts at the ready if I run into any issues
 

rayra

Well-known member
Joined
Dec 1, 2014
Messages
4,724
Location
Escaped from Los Angeles
kaizen, put your mold on the ground. Use some sand to level it, or dig the ground if tearing it up isn't a concern.
But I would suggest you just pour the counter top in place. Lots of info out there about the growing fad of concrete counter tops. It's easy to do.

I poured a pair of curved concrete bench tops, turning a an old stone chimney into an outdoor firepit. I also used melamine-coated board on the bottom of the mold, but regular plywood will release just as easily.

Just on the patio table while I was fitting the benderboard and trimming the wire

firepit%20benches%20071110_zpshs3vajic.jpg


Set the mold on teh ground, filled, edged finished it, dried a couple days then I flipped it over and out.

firepit%20concrete%20bench%20080206_zpsgk7nodui.jpg


The chimney was on the corner of a small 'unibomber' shack that stood in the middle of the backyard of a residential property we owned in the Sierras. We tore that rotten shack down but kept the chimney. I had the idea to use it as a firepit area and used a bunch of fieldstone laying around to build flanking benches, which I capped with the concrete slabs.

firepit%20concrete%20benches%20090525_zpsxvplrqle.jpg


Then I built some curved benches to extend the circle. Had big plans for a mulit-section deck adjacent to the whole thing, but that got cut short and we sold the property not long after I finished this. Never really got to use it more than a couple times.

firepit%20benches%2012%20090528_zpsmxo1g34o.jpg
firepit%20screens%20fire%20lit%20090702_zpslawgck07.jpg
 
OP
K

Kaizen

Well-known member
Joined
Jan 9, 2015
Messages
6,948
Location
New England
Thanks rayra. The problem with poured in place is I want a polished granite feel for the surface. Upside down pouring for amateurs from what I have seen has the less surface imperfections. Besides this is a currently in use kitchen and can't see grinding these inside. Too bad about your fireplace those throw perfect heat to people sitting around them
 

andersen24

Well-known member
Joined
Jan 7, 2009
Messages
385
Location
Central Coast, CA
Kaizen - I'll upload a couple photos of poured concrete countertops I did at my old house. I lived there for about 5 years after I finished them and they never chipped, stained, etc. Granted I took extra care to make sure they didn't but they turned out great! I used actual rebar in mine instead of mesh. Main thing is to make sure you hammer the heack out of the sides to make sure there are no gaps. I made a wood channel on the bottom to get the lip that I desired. Once I pulled everything off, I used a palm sander to fine tune the beveled edges that I wanted and sanded the tops to get it as smooth as possible. After that, it was seal, seal and seal......and seal some more. I had maybe $200.00 into my project. When I get home tonight I'll upload the photos........
 
To avoid these ads, REGISTER NOW!
OP
K

Kaizen

Well-known member
Joined
Jan 9, 2015
Messages
6,948
Location
New England
Kaizen - I'll upload a couple photos of poured concrete countertops I did at my old house. I lived there for about 5 years after I finished them and they never chipped, stained, etc. Granted I took extra care to make sure they didn't but they turned out great! I used actual rebar in mine instead of mesh. Main thing is to make sure you hammer the heack out of the sides to make sure there are no gaps. I made a wood channel on the bottom to get the lip that I desired. Once I pulled everything off, I used a palm sander to fine tune the beveled edges that I wanted and sanded the tops to get it as smooth as possible. After that, it was seal, seal and seal......and seal some more. I had maybe $200.00 into my project. When I get home tonight I'll upload the photos........

Those are exactly what I'm hoping to accomplish. did you use any color? looks like 3 pieces.....what did you do at the seam between all of them?
 

rlitman

Well-known member
Joined
Oct 18, 2010
Messages
24,665
Location
Long Island
I see a lot more than 3 pieces.

Beautiful work BTW.
What did you do around the sink (I'd like to see more of that)? That looks like a piece of angle aluminum behind the slide-in range?
 

andersen24

Well-known member
Joined
Jan 7, 2009
Messages
385
Location
Central Coast, CA
Actually it is one pour - I poured them in place and I did a slight expansion joint in-between all of them and then filled the expansion joint. I can't remember the product I used but it was pliable and sealable. The lines where I put in the expansion joints is what gives the illusion of the separate pours. The total thickness including the lip is 4", but the actual pour was 3". The scariest part was the portion behind the slide-in range as it was only 3" wide. But all of it came out without a issue.

I did add color so I could get the shade of grey that I wanted. My biggest concern was the strength of the concrete where I made the lip to hide to base unit. I let it set for two days prior to pulling the forms and it was not a problem. Main thing I did was tap all around the front of the form so there wouldn't be any air gaps in the mud. Fortunately there were none.

For the sink I took the dimensions, cutout the size on the base and put bender board on the inside for the form.
 

moparfreak

Well-known member
Joined
Jan 24, 2005
Messages
853
Location
Milwaukee, WI
Kaizen,

Keep us updated on how this goes. I did a big remodel on the house last year, and did all the research and even started making samples with the plan of making concrete countertops. Ultimately the scale of the project (plus me doing everything else in the remodel) forced us to take the countertops out of the project, we just got granite instead, it was over 80 sqft of counter.

That being said, I am going to be building a new dinette table that will have a 1" concrete cover to get the look and beauty from the concrete. Kinda like this:
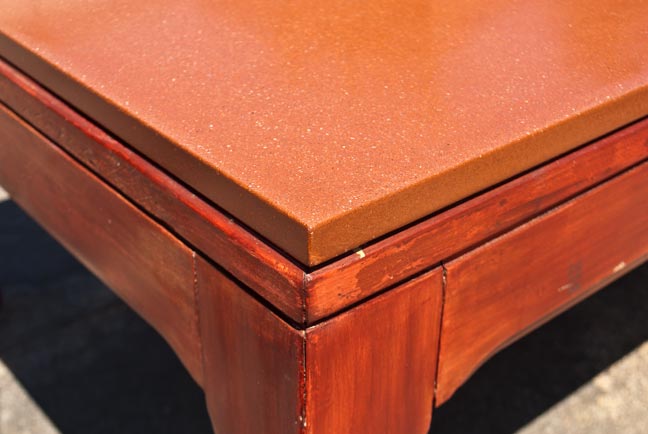
red_tabletop_15.jpg

Also doing a small desk nearby in the kitchen.

I played around with single packs and sample quantities of a bunch of the countertop products out there. A few experiences I can add that might prove useful:

1) Cheng book is a very good starter point for getting educated on the scale of the project

2) Cheng has a wide array of products. Most of them seem to be very good, but I wouldn't take for granted without sampling it.

3) Cheng seems to have the nicest array of color dye powders

4) Mixing Cheng's dyes with the regular quickcrete bag mixes (countertop or not) seem to yield a mix that has too much aggregate (regular rocks / pebbles and stuff) and is too gray for my liking. My current strategy will actually be to use Buddy Rhodes Bone White mix. It's a much more expensive bag but also is truly white so it will allow your color to come through better, and it doesn't have all that gravel and stone in it. When you start grinding, you'll find that stone gets uncovered and affects the final look. It really detracts when you add the glass, but what you see is a mixture of the really good looking glass shards, but then also pea gravel (reds / grays / tans).

5) I bought this Seeco wet grinder. It's is awesome and does the job really nicely, addressing the issues brought up above. My samples came out with a really nice finish and sheen when using this. It puts out a lot of water!

http://www.amazon.com/dp/B001KAM3K4/?tag=atomicindus08-20

6) As crazy as it seems, they even have pre-mixed ready to press / dump into a mold, if your scale is small and you aren't doing that much. Shapecrete is the product (http://www.shapecrete.com/)

7) My samples came out with more bubbles than i would have liked to see, despite a lot of effort put into hammering and vibrating them. I don't think you can really do enough to try and get that air out. I have seen designs for strapping the rod type vibrators to a table, and also HF used to have one of the plate-type vibrators that would have worked well. Unfortunately they don't sell those anymore, but the main idea is you can't do enough here to get the air out. In my opinion, the slurry is pretty easy to pick out and can look bad if you have a lot of holes to fill.

8) HUGE resource for concrete countertops is here: http://www.concretecountertopinstitute.com/, also has a lot of good products that give you another option other than Cheng and Buddy Rhodes.
 
OP
K

Kaizen

Well-known member
Joined
Jan 9, 2015
Messages
6,948
Location
New England
Wow Adam I really appreciate your contributions in that post. I agree anyone going for light colors.. Recent trend seems to be bone white..should count on using the mix sold from Cheng or Rhodes because it is perfect. Quickcrete has two mixes. The white for 23 a bag or the one I'm using in grey for 17. I also think the gravel coming through has a direct correlation to the vibrating. And this is something that would only come from experience or trial and error. I am going for a stone like grey using Cheng's powder dye called stone. I ordered that the other day. One bag per 120 pounds of cement according to them. Guess I'll post adding to this which already has gotten great info and experience from ya'll.
 
OP
K

Kaizen

Well-known member
Joined
Jan 9, 2015
Messages
6,948
Location
New England
First fail. I wanted to make a drain board mold like this one 747aeb425645996be23f86e974970de9.jpg
It's 125 bucks so figured I would take a shot at it. Plastic bin, wood trim, and some of these kits from hobby lobby total with two kits 40 bucks. 957f9c547640b17ced19c0e0b8047bc4.jpg
Guessing this is the wrong product and I should have used a silicone to make a mold. This stuff is what you then make a product from using the rubber mold. Hard as a rock. And sharp. It's a real project now that blood has been spilt.
76aaeac5c5d61a95fe78f185e8a7e51d.jpg
c74d3f881d9a5b99163f466c35df5c86.jpg
35e79c2193c442e7599f5ccbc13672fd.jpg


Sent from my iPhone using Tapatalk
 

moparfreak

Well-known member
Joined
Jan 24, 2005
Messages
853
Location
Milwaukee, WI
Kaizen,

A couple thoughts on the drain board:

1) Cheng's book does have a section addressing incorporating a drain board into the design of the mold. The book was written about a decade ago, before a lot of these various silicone mold shapes have come available onto the market. Back then, if you wanted a fancy shape, you had to build it into your Melamine mold, and that's exactly what he shows in the book. He incorporates brass bar stock into it as well, it's interesting, and more of a woodworking exercise than anything, being able to use your tablesaw & router properly to get the detail and sloping that you are looking for. I will see if I can find that section in the book tonight for more detail.

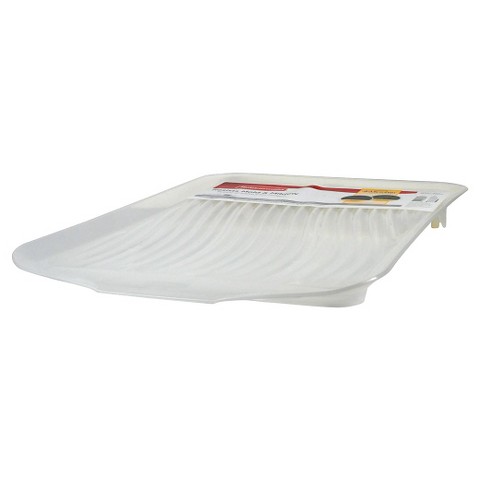
2) Another thought that came to mind, would be maybe to use some of the commonly found retail solutions (i.e. at target / walmart / etc.) and invert it, and position it into your mold? Might need some fussing around to get it supported and installed properly but maybe??? Something like these:

14770416


I think one of the biggest issues w/ this might be getting the concrete to release from the mold, having it be hard plastic and whatnot. You'd want to find one where the drain channels are as wide and rounded as possible, so that the little concrete "fins" have as much strength as possible over time. Maybe even adapting something like this one would be better for that very reason:

14899746


FYI both of these were found on target website searching (dish drain board).
 

pmiranda

Well-known member
Joined
Jul 15, 2008
Messages
1,504
Location
Austin, TX
After a year with concrete counters in our kitchen I wouldn't do it again for a kitchen. Even sealed, hard water deposits from wet glasses happen way too fast and don't come out. Chips easily but if the color is mixed throughout that's not a big deal.
The guy that did ours uses dedicated steel tables and adds foam (styrofoam?) into the last pour to reduce weight... important in unsupported areas like above the dishwasher and on the big island piece which was about 5x12 feet!
 
OP
K

Kaizen

Well-known member
Joined
Jan 9, 2015
Messages
6,948
Location
New England
After a year with concrete counters in our kitchen I wouldn't do it again for a kitchen. Even sealed, hard water deposits from wet glasses happen way too fast and don't come out. Chips easily but if the color is mixed throughout that's not a big deal.
The guy that did ours uses dedicated steel tables and adds foam (styrofoam?) into the last pour to reduce weight... important in unsupported areas like above the dishwasher and on the big island piece which was about 5x12 feet!

do you know what it was sealed with?
 

pmiranda

Well-known member
Joined
Jul 15, 2008
Messages
1,504
Location
Austin, TX
Ours have a "reactive sealant", so I'm guessing not epoxy. It's supposed to be maintenance free, but in theory so is manual transmission fluid according to most carmakers these days:rolleyes:
 

cbracer

Well-known member
Joined
Feb 27, 2012
Messages
643
Location
Costa Mesa, CA
I did one for my bathroom. Never again :( I love the idea, but I won't do it myself. Sounds like you are trying to incorporate a lot of features on your first one, and the first one likely won't come out all that well. The amount of work in prep and finish just doesn't make it worth the effort.
 
OP
K

Kaizen

Well-known member
Joined
Jan 9, 2015
Messages
6,948
Location
New England
I did one for my bathroom. Never again :( I love the idea, but I won't do it myself. Sounds like you are trying to incorporate a lot of features on your first one, and the first one likely won't come out all that well. The amount of work in prep and finish just doesn't make it worth the effort.


Thanks for your experience. Go big or go home right? We will see. I'm tracking my money, materials, and time. It very well could be a broken dream like Laurie mcadams in eighth grade.....oh Laurie...


Sent from my iPhone using Tapatalk
 

xyster101

Well-known member
Joined
Jul 3, 2013
Messages
640
Location
Upstate NY
I did one and here are some tips I learned:

-Bottom of my mold was the top of the counter. I put a thick layer "filiet" of silicone on all the corners so they came out rounded.

-I used a nice angle grinder with polishing discs bought off Amazon Discs($50) and a garden hose. I went with a 4" because I had it, but bigger leaves a flatter finish.

-Worried about an electric grinder and water? Use a GFCI and wear gloves. You don't really get water inside the unit, but you will get it all over you.

-Saw horses can work, get good ones. On grass, put plywood under it. If it moves after you pour, it will be very hard to fix. IT MUST BE LEVEL!! Awesome Saw horses that hole 500lbs each

-Lots of vibrating or hitting it with hammers to get the bubbles out

-Remove from the mold within 7 days and start polishing. The longer you wait the harder it becomes. Concrete reaches like 70% strength in 7 days.

Put reinforcement wire in it, but keep it away from edges and the counter surface.

-Tape the edges of the melomine to keep water out or it could swell

-The money you save doing this is spent in time. Lots of time.
Costs: Concrete $50, Polish Pads: $50, Mold Material: $40, Expoxy Sealer: $50, Total: $190

I have probably 40 hours in this tiny top that I made. I would not do it again.
_______________________________________________

Test piece with polish discs


Mold ready to go. Wire reinforcement in there, foam bits for plumbing. Tape on edges of form.


Done

 
Last edited:
OP
K

Kaizen

Well-known member
Joined
Jan 9, 2015
Messages
6,948
Location
New England
Here are some updates on the project. Concrete is on order from Lowes and probably two weeks till delivery. In the meantime I am gathering supplies and materials. Ordered Cheng concrete powdered pigment called stone which is a dark charcoal color. Also ordered some black granite chips to have in the surface. I want to have things in the counters to make them more interesting. On the wish list is a fruit bowl, square recesses for vases or some decorations, a recessed cutting board , undermount sink, and drain board
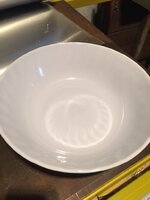
First up is the fruit bowl. Basically had to find a smooth bottom bowl. A bamboo salad bowl would have been great but couldn't find one. Local craft store got me one that I could use. c804808eea878f5aa5e856eaf2d99f3e.jpg
0083eec1eb1dfb2d4aa98959ad80182e.jpg
Had this rim and was too high so to the bandsaw to get it to two inches
da1a698239c65bb7f0039674295d6f2a.jpg
Then some body work to get rid of the lip
95c59fd59717b8f1565d2ae08a965553.jpg
Lastly i needed to support it from collapsing from the hundreds of pounds of concrete so I made some simple wood supports
07143947fc6269dd0066e1579099f141.jpg

Next up I'mm going to tackle the form to make this drainboard
1be12120e216e21fcdb25d49655822f1.jpg


Sent from my iPhone using Tapatalk
 
Last edited:

YeahPete

Active member
Joined
Sep 10, 2013
Messages
41
Location
Indiana
Your largest aggregrate should be no more than 1/3 the thickness of the countertop. The drier your pour the stronger it will be.
 
Joined
Jun 30, 2011
Messages
1,080
Location
AZ
1_zps4khw2pqd.jpg


2_zpsycwxnzsb.jpg


2a_zps95udzftt.jpg


3_zpsjktcvkcu.jpg


Once the concrete cured, I just cut the angle form off from underneath with an angle grinder with a cutting blade.

4_zpsvndokz3b.jpg


5_zpstdlgilsw.jpg
 
Last edited:
OP
K

Kaizen

Well-known member
Joined
Jan 9, 2015
Messages
6,948
Location
New England
Your largest aggregrate should be no more than 1/3 the thickness of the countertop. The drier your pour the stronger it will be.

i'll be using countertop mix so it will be small. interested to see what flows with a drier mix.

ah garage that is some serious weight being held up by that steel. definitely would do a cast in place outside.
 
OP
K

Kaizen

Well-known member
Joined
Jan 9, 2015
Messages
6,948
Location
New England
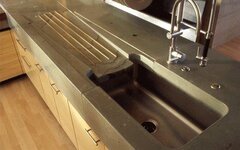
I really wanted to make these countertops custom to make the effort worth it. Earlier I posted a fail of my drain board and finally ponyied up the twelve bucks to get the plans from Cheng. The plans have a slot for a cutting board as well as a drain board. They called for 3/8 mdf but I could only get 1/2 mdf .
d58d71926e66bcb00efa4c7fee0173ca.jpg
0a84b435cbe8870b778268df93510393.jpg
The bottom board is the cutting board and the same width the whole length bit is wider then the sink and I used my sink template to make the cutout
43ea98c6903590b90bce24d3642a6db5.jpg
1d446b54316bf9e669319aa8a6795d16.jpg
This is the drain board. It narrows as it gets closer to the sink. It is supported on one end a half inch high and on the sides. This is all glued and nailed together and painted with spar varnish. I used about four coats everywhere the concrete touches it.
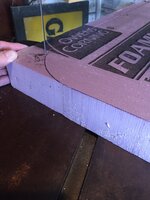
While I was at it I cut out the sink form from two inch insulation. I used my bandsaw and spent a lot of time making it perfect
2a05763d12665b1173ac53f0a0e08693.jpg
After I mocked it up I realized my original thickness of two inches would only leave a half inch thickness so a went up to 2.5 inches. I had to then make my perfect sink cutout thicker so I made it close a wrapped it with packing tape.
I got these foam squares from the hobby shop and cut them to make square holes for jars or something. Also made a soap dish that will drain right to the sink.
84dbdff1e6865e53fc5a0dfce0010be0.jpg
3ed67caa74c87c5f506bad13070dd26b.jpg
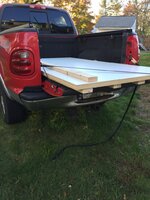
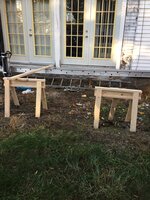
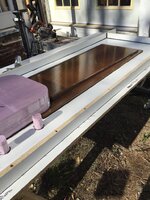
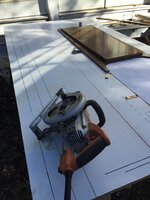
Wrapped up making two sawhorses out of 2x4 and got the melamine. Damn this stuff is heavy and an inch bigger in both directions. Barely fit in the super crew
9e7173599a3568aa449fbacea96f2efe.jpg
I decided to use staging I had setup for one side and the sawhorses on the other
d744e7d2fd8ff032752594a7c92d0849.jpg
 
Last edited:
OP
K

Kaizen

Well-known member
Joined
Jan 9, 2015
Messages
6,948
Location
New England
First mock ups
7fd1c23e2099090d72e7393d56f9d851.jpg
1dc29b9a41f7db85305215df221107d6.jpg
24d2a47c284db339af7057bd637b67d9.jpg
b5b45cff72d36efcf86e6debef125ff1.jpg
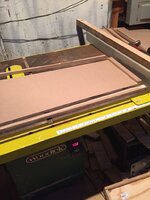
I cut the strips for the rails from each of the two sheets and had plenty of meat left so I can vibrate against it. I don't want to mess with vibrating on the actual rails too much. At this point I realized after drawing it out that I had to flip the drain board to the other side a change the other pieces. Believe it or not after I siliconed the sink piece I realized it was backwards! I still was able to correct my error. I added black granite in each for some added affect. I have three pieces laid out and went as far as laying out the sink mount hardware to make sure I had enough room. All of this is going on an island that I built so I made it extra deep
 
Last edited:
To avoid these ads, REGISTER NOW!
Top Bottom