OP
OccupantRJ
Well-known member
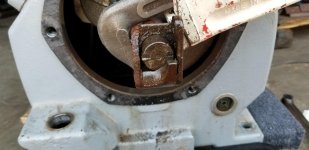
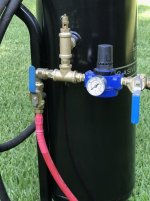
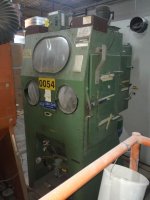
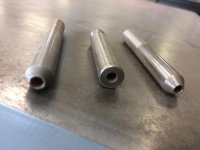
A picture of my shop made media regulator. Due to the 90 degree, the media tends to pile at the intersection to be drawn by the air flow coming into the vent hole on top. The smaller tapped hole on the left is for a thumb style set screw if needed. The suction hose is moved in or out to allow or disallow room air to enter the hole as mix air. The fitting on right was an experiment I may pursue at a later date. This is made of 3/4" nominal threaded pipe and a 5/8" automotive heater hose works nicely for an abrasive feed hose.
Attachments

Last edited:


")