To avoid these ads, REGISTER NOW!

The Everything 3D Printer Thread

brawls43

Well-known member
Joined
Aug 29, 2012
Messages
133
Location
Minneapolis
Penright started a thread about buying 3D printers over here:
https://www.garagejournal.com/forum/showthread.php?t=413125

Lots of good info in the thread. The 200mmx200mm (7.8") table size is the most common but I believe its hard to get prints that use the full table size. The thread above has some sizes laid out, I'd think something in the 250-300mm table size would work well for you.

Fusion 360 is one of the common ones, anything works CAD-wise. The options grow as you look into the slicing program.

Side question, what kind of mill did you CNC convert? I'm researching converting a Tree Journeyman to CNC.
 
To avoid these ads, REGISTER NOW!

GCncsuHD

Well-known member
Joined
Aug 19, 2013
Messages
968
Location
Salisbury, NC
Just now joining the thread, I can't post most of what I build, but here is one I made recently for our launch/trade show handouts. Yes it rolls.
20190121_125431[1].jpg
20190121_125325[1].jpg
Size reference, same width/wheelbase as a standard Hotwheels I stole from my kid.
20190102_173602[1].jpg
 
Last edited:

penright

ALLIANCE MEMBER
Joined
Dec 27, 2016
Messages
618
Location
SW of Mustang, OK
I received and assembled the 3 Pro. I will include pictures of the box and pre-assembled parts. Also, I started the test dog sample that came on the SD card until I found it it was going to take 5.5 hours. I assembled the printer at work (after hours) with a friend, it was past 8 pm so I stopped it and will start it or something else Monday morning.

Most videos on assembling pretty much cover the bolting it together. When we had issues with manually leveling the bed, I found one that showed how to use parts that came with the box how to square up the frame. One idea was to use the top crossbar hold flat against the side rails to make sure the faces are parallel. then the carton that holds the cutters is width to hold the z-motor gap when bolting it on. Then get the side of the side rails parallel without the top rail bolted on. This took some fiddling since losing the side rail could change the face side square up also, but it can be done. Then using the filament holder as a feeler gauge to level the x-axis bar. This is done with only the bar bolted to the z-axis threaded rod side. The other end is free hanging. This is where I think our bed leveling issue was. Again, takes time to tweak and test, but it can be done. Bolted it all back together and was able to manually level the bed without issues.

There are a couple of notes I would add to the video I watched. First, leave off bolting the control panel till after the x-axis bar is leveled. This makes using the filament holder feeler gauge hack easier to use. Second, the video on loading the filament said to start the nozzle and bed heaters getting ready to insert the filament and test. Two things, first the test was from his library and the 3 Pro SD card did not have it. Then I had to figure out the SD card. Get the filament loaded. Got ready to print and I notice that the last step in bed leveling left the hot end a paper width from the bed. By now some of you are doing your Carnac and know where this is going. Ok, if you got that you may be at least in your 50's, that is why I include the link for the millennials. For those of us in our 50's, I also included a link explaining millennials. :)To finish the thought, yes I did burn a small hole where the hot end was. Lesson raise the hot end when fiddling with the nozzle heat on.


Here are the pictures. I did stop the print because I did not want to leave the printer unattended, but any thoughts on the start?


20190201_200026_zpsknqde0fp.jpg

20190130_105625_zpstpwrsvqd.jpg

20190130_105754_zpsl0ljkm1c.jpg
 
Last edited:

danscobra6

Well-known member
Joined
Apr 22, 2015
Messages
200
Location
Glendale, Arizona
I have my ender 3 pro assembled but can't use it yet. It seems to be very well made except the sd card would not go in the slot. The card reader board is not aligned with the slot in the case. It went in sideways and broke trying to get it out. I took the case apart and realigned the board to the slot but now I have no card to test print. I did order an extension cable and the standard size sd card. Cura is downloaded and ready to go and hopefully it will be easy to load the card and it will read in the printer. Fingers crossed.
 

penright

ALLIANCE MEMBER
Joined
Dec 27, 2016
Messages
618
Location
SW of Mustang, OK
It went in sideways and broke trying to get it out.

If you can't find it online PM me and I can post the contents to google drive. You don't need the instructions anymore, there is the slicer file/directory haven't look at it yet and the test dog. I think there are better test items then that one.

I know this is not your issue, I was trying to put it in right side up and realized that is upside down.
 

stu999

Well-known member
Joined
Apr 13, 2014
Messages
92
Location
Scotland
Guys I'm looking for some help. I'm trying to source replica fire helmets to mount on plaques for retiral gifts. I'm really struggling to find a supplier and now wondering if 3D printing may be a way to get some made.

The pictures below have the kind of thing I'm looking for. I would paint to the colour required.

Can you school me on if this is possible?

Thanks

IMG_3800.jpg

IMG_3801.jpg
 
OP
B

BoilermakerFan

Well-known member
Joined
Apr 17, 2006
Messages
2,188
Location
Indianapolis, Indiana
Penright, the bed and nozzle do need to be hot at normal printing temps for final bed tramming to seek out the best consistency. You're supposed to do the tramming cold, then hot. Then when you upgrade to the Auto tramming with a BL Touch or similar, the firmware basically dials in that last little bit of correction.

You also want to have the screws tightened up to at least half way before you start so the spring tension helps minimize the wobble in the bed. The stiffer upgrade springs help too, but it's better to be tighter than looser on those nuts & springs to minimize ghosting or ringing caused by a loose, wobbly bed.

stu999, those helmets will be tougher for us in the States since they're different than ours. There are apps for your phone that can take pictures and turn them into a 3D model so you can use real helmets to make your models.
 

Geteos

Well-known member
Joined
Jun 10, 2018
Messages
55
Location
Toronto
I just set up octoprint on my Ender 3 with a raspberry pi, it is really really cool being able to remote control the printer and monitor it via webcam. My goal is to put the printer in the detached garage so this will be invaluable. Just need to get a wifi plug to be able to remotely turn off the setup and finally build an enclosure.

Next up is installing the bltouch I ordered. I read that it involves losing the sd card so I wanted to make sure that I had another way to control the printer.

If anyone is on the fence about octopi, you should definitely do it.
 

Retrosmith

Well-known member
Joined
Mar 31, 2011
Messages
139
Location
Texas
The pictures below have the kind of thing I'm looking for. I would paint to the colour required.

Can you school me on if this is possible?

Thanks

Yes very possible, you'd need the 3D model, called an STL, first and then you could use a print service like Shapeways.com.

I found this model for $12 on CGtrader.
 

Attachments

  • firefighter-helmet-3d-model-3ds.jpg
    firefighter-helmet-3d-model-3ds.jpg
    13.8 KB · Views: 45
OP
B

BoilermakerFan

Well-known member
Joined
Apr 17, 2006
Messages
2,188
Location
Indianapolis, Indiana
I just set up octoprint on my Ender 3 with a raspberry pi, it is really really cool being able to remote control the printer and monitor it via webcam. My goal is to put the printer in the detached garage so this will be invaluable. Just need to get a wifi plug to be able to remotely turn off the setup and finally build an enclosure.

Next up is installing the bltouch I ordered. I read that it involves losing the sd card so I wanted to make sure that I had another way to control the printer.

If anyone is on the fence about octopi, you should definitely do it.


:confused: I don't think you lose the SD card reader to incorporate the BL Touch. There is a little breakout board that adds the I/O points you need under the ribbon cable connector on the board for the display. The chip has the I/O points available, there was just no physical pins so you have to use a breakout board adapter. I'll try to find the board and post a link tomorrow.
 

arnoldcp

Member
Joined
Jan 27, 2015
Messages
17
Check out the Teaching Tech video about adding the BL Touch, he was able to keep the SD card working. I believe the issue is that there is very little memory on the Ender 3 board so dropping the code for SD card support makes enough room to fit the new lines for the BL Touch. TT instead got rid of the boot up pictures which are not necessary.

Sent from my SM-G955U using Tapatalk
 

penright

ALLIANCE MEMBER
Joined
Dec 27, 2016
Messages
618
Location
SW of Mustang, OK
I started the "All in one 3D print" My first one from the slicer. I am using Cura. As you can see, I did not rotate it correctly first. For printing on its side, I don't think it looks too bad. Or is it kinda like the saying "A face only a mother can love" :)
I posted a short video of trying to print in mid-air:lol_hitti.


edited-image_zpsvwtmgthe.png


edited-image_zpsi8saibut.png
 

penright

ALLIANCE MEMBER
Joined
Dec 27, 2016
Messages
618
Location
SW of Mustang, OK
Next time I will try and take better pictures. It seems to work better when the right side is up.
These settings are right out of the box using Cura slicer.

Thoughts?


edited-image_zps9isj1lfi.png


edited-image_zpsbdscrijs.png


20190206_103532_zpsxbwwum29.jpg


20190206_103540_zpsp4tclfhr.jpg
 

danscobra6

Well-known member
Joined
Apr 22, 2015
Messages
200
Location
Glendale, Arizona
I finally have the ender pro up and running. Also had a problem getting anything to stick to the bed with a full range of temps and settings. Well the bed has a nice dip just off of center so that doesn't help. I tried the blue tape methods but using some adhesive I bought for headliners on the tape worked great. A glass bed is on the way so that will also help. This thing will be a lot of fun now that I won't have to babysit it.
 

Attachments

  • bed spray.jpg
    bed spray.jpg
    135.2 KB · Views: 70
  • warped bed.jpg
    warped bed.jpg
    152.2 KB · Views: 79

penright

ALLIANCE MEMBER
Joined
Dec 27, 2016
Messages
618
Location
SW of Mustang, OK
Printed my first useful item. Well, I think it is useful. Also, I went through a few attempts. I did it from scratch in Fusion 360.
I mention in the previous post that I use this c-channel to hang some storage bins. The very bottom piece holds creates a little shelf for the bins to sit on, so the screws in the back do not hold all the weight.
Anyway, the end being opened looked kind of unfinished. I tried to google an end cap but nothing in the right size.
The first picture is a piece of scrap I used to test the prints. The bottom picture is where they are going to go. Few more to print. :)

edited-image_zpsvzhhexqj.png


20180611_195341_zpsmpeovl8m.jpg
 

Chortler

Member
Joined
Apr 14, 2017
Messages
9
Nice Penright! That is actually a useful 3D printed thing. Very rare, in my opinion. I look forward to seeing what else you make.
 
OP
B

BoilermakerFan

Well-known member
Joined
Apr 17, 2006
Messages
2,188
Location
Indianapolis, Indiana
I have printed several useful things. Mostly small figurines that have meaning to those I've given them too.

I use the V29 whistle for practices. My latest prints that I need to share are Aztec/Mayan Death Whistles! They are extremely useful for annoying my wife and son randomly throughout the day or evening.
 

bradpac

Well-known member
Joined
Sep 8, 2013
Messages
721
Location
Central TX
Thinking about getting one of these to make plastic car parts for restorations. How do they do for semi transparent stuff like tail light lenses or even clear stuff for gauges? Can you print a lense, polish it up and have a nice clear light come through or do you see all the layers throughout the part?
 
OP
B

BoilermakerFan

Well-known member
Joined
Apr 17, 2006
Messages
2,188
Location
Indianapolis, Indiana
Personally, I don't think it would work very well, if at all.

There are a few materials available that are translucent and can be acetone fogged to "polish" them and make them more translucent, but they will never be clear. And those materials are expensive and difficult to print. Polycarbonate would be the best choice, but I don't know if it can be acetone fogged to make it more clear. It might go the other way and become less translucent.

The layer height would have to be very small as well so it would take a higher end printer to achieve that resolution and stability to get there.

Where 3D printing would work great is printing ABS parts that could be sanded, primed, and painted. Or covered with other materials like leather, cloth, or even wood grain wraps.

Car environments get hot, so PLA is out unless you just use it as a form to be wrapped in fiberglass, CF, or Kevlar fabric and epoxied so that the final part does not rely on PLA keeping its shape.

Just my $0.02...
 
To avoid these ads, REGISTER NOW!
OP
B

BoilermakerFan

Well-known member
Joined
Apr 17, 2006
Messages
2,188
Location
Indianapolis, Indiana
Guys have also used 3D printers to make molds for forming sheet metal. You could use a 3D printer to develop a mold to form a steel sheet, then support it internally to complete the buck. Then you could try to heat form tinted or clear polycarbonate sheets to your mold.

Professional parts are thermoformed over vacuum molds that **** the sheet down over the mold. It could be replicated by a home enthusiast, but it's expensive.
 

bradpac

Well-known member
Joined
Sep 8, 2013
Messages
721
Location
Central TX
I have done a some pieces using a cracked lense, gluing it back structurally sound, making a mold and casting a new piece out of resin. Not the best results yet, but I have seen where you can use a vacuum to release some of the bubbles in the resin for a better finish. I was just curious if I could skip the casting process and just design and print. Sounds like the answer is no. Kind of what I was thinking, but I had to ask.
 

penright

ALLIANCE MEMBER
Joined
Dec 27, 2016
Messages
618
Location
SW of Mustang, OK
I am pretty sure my problem is supports. My question how do you support such a small overhang?

First, this is what I was trying to print.

Clip%20With%20Plate%20v4_zpsiogioaaw.png


This this result

20190208_155647_zpsrxvrpd1i.jpg


A little context and scale. Take a look at this part ...

20190208_160601_zpske0ru9yo.jpg


I included the Exacto knife for scale. This will actually fit in a 40 x 40 aluminum extrusion. So my next step is to add the base. Once I have that sized right, I will use it to attach the octopi camera.

I wonder if there is enough room for me to add support? Plus I don't know what shape the camera holding part will look like. This is more of a learning experience right now than practical.
 

Chortler

Member
Joined
Apr 14, 2017
Messages
9
Looking at Creality 3D CR-10 S4 or maybe even S5

What do you all think about the Creality 3D CR-10 S4?

I have been getting back into printing (after 4 years off) with my Printrbot Metal Simple. I was having good luck for the past couple of months and getting good prints, but now I am running into problems with z axis calibration and bed leveling. The past few weeks have been one problem after another, with many failed prints. I have been screwing around with an intermittent bed leveling sensor the past few days and now am realizing that the whole moving arm machine design may be limiting in terms of rigidity and thus print quality. Also the Z screw is on this weird screw-type aluminum coupler that has a lot of flex.

Not to mention being limited by the 5"^3 print size. Also, Printrbot just went out of business and so parts and support are dwindling...

So, now I am looking at upgrading. My reading of the various threads here at GJ have me looking at the Creality CR-10 series. If I am spending, I am thinking about going big and getting a S4 (400mm^3) of S5 (500mm^3).

Anybody have thoughts on this? Also, where to buy it, is creality3d.shop legit?

Thanks.
 

Muggzy

Well-known member
Joined
Jun 29, 2013
Messages
583
Location
Orange Co., NY
I am pretty sure my problem is supports. My question how do you support such a small overhang?


First, this is what I was trying to print.


Clip%20With%20Plate%20v4_zpsiogioaaw.png


This this result


20190208_155647_zpsrxvrpd1i.jpg


A little context and scale. Take a look at this part ...


20190208_160601_zpske0ru9yo.jpg


I included the Exacto knife for scale. This will actually fit in a 40 x 40 aluminum extrusion. So my next step is to add the base. Once I have that sized right, I will use it to attach the octopi camera.


I wonder if there is enough room for me to add support? Plus I don't know what shape the camera holding part will look like. This is more of a learning experience right now than practical.
You could always print it in three parts. The two ends laying on their sides an the flat slab connecting them and use model glue to assemble the parts.

Sent from my Pixel XL using Tapatalk
 

Bad Mojo

Well-known member
Joined
Sep 2, 2012
Messages
113
I just wrapped up getting my Ender 3 setup and running parts. The bed leveling took a couple tries. Once I used an actual business card for the shim and went diagonal instead of in a circle for the leveling knobs it worked perfectly.

The first things I printed were a couple of knobs to help make using the machine a little nice. One is for the Z-axis and the other for the extruder feed knob.

Since then I have been printing drop in boxes for the Milwaukee PackOut boxes. The boxes help subdivide the box so you can hold several types of small fasteners without wasting all of the extra space of the box. The design and more information on the person who designed the file is in the link.


https://www.thingiverse.com/thing:2996724
 
Last edited:

Geteos

Well-known member
Joined
Jun 10, 2018
Messages
55
Location
Toronto
Modelled up these slat wall screw in thingies that I saw online. They're split so you can put them in anywhere and take an 8-32 screw. I've used a couple of them to hang some 3D printed Ryobi tool and battery holders I found on thingiverse. They work really well!

f62086df83fbd733629aade6f9eb2537.jpg

e10dc76e751192382ee3757542741f43.jpg
 

Attachments

  • f62086df83fbd733629aade6f9eb2537.jpg
    f62086df83fbd733629aade6f9eb2537.jpg
    119.1 KB · Views: 3
  • e10dc76e751192382ee3757542741f43.jpg
    e10dc76e751192382ee3757542741f43.jpg
    94.2 KB · Views: 14

AndeiH

Well-known member
Joined
Jun 7, 2014
Messages
284
Location
texas
i picked up an ender 3 during their anniversary sale and its up and running. this is my first 3d printer and i'm loving it so far.

its pretty loud though so i will probably setup a webcam with a wifi receptacle so i can check in on it from work when no one is home. if something goes wrong i'll turn off the receptacle remotely.
 

bdbecker

ALLIANCE MEMBER
Joined
Nov 18, 2015
Messages
5,542
Location
Iowa
What a great thread! I feel like I just took a crash course in all things 3D printing! I'm starting to get my ducks in a row on a 3D printer purchase, the goal being later this summer or early fall after I finish insulating my garage. I'm leaning towards a CR-10 (or 10S) right now, but that might change depending on what innovations hit the market between now and my purchase date.

Anyway, one thing I haven't seen mentioned (or may have forgotten about) is some sort of real world feedback on what sort of PC hardware you guys are running. I've been digging into this and am having a tough time believing what I'm reading on posts/articles related to this subject. If you believe what you read on the internet, I'd need to spend at least $500, probably closer to $1000, to build/buy a "budget" PC capable of running CAD software at a tolerable level (most of my research has been on running Fusion 360). However, I run Inventor Pro 2019 on my work laptop on a daily basis and have very little issue with the (as near as I can tell) bog standard Intel i5-5200U running at 2.2GHz with an integrated GPU. I actually get more fits running big 2D AutoCAD files of building layouts than I do running decently complex 3D Inventor assemblies.

My plan right now is to setup a dedicated PC for running CAD and the slicer programs. I'm planning on loading up Mint on a "used but not ancient" PC from my Mom. I'm picking it up this weekend so I don't have the exact specs on hand, but if I remember correctly it's got a fairly decent processor in it. My plan is to play around with FreeCAD for modeling, and if I don't like it, I'll switch back to Microsoft and run Fusion 360 (not excited about having to buy software for a hobby activity once the free license runs out after a year). It looks like Slic3er and Cura will run on Mint, so I should be covered there.

I am by no means a computer expert, but I do understand there is a difference between minimum software requirements and what is ideal. I keep getting the feeling that a lot of the articles/posts I read on this subject are telling me to buy a Snap-on tool set when all I really want is Craftsman. Most of the ideas I have and a lot of what I see people printing are pretty basic shapes that shouldn't be too difficult for any modeling software to manage. I guess I'm wondering if I'm missing something here.
 

gte718p

Well-known member
Joined
Mar 12, 2009
Messages
3,950
My plan right now is to setup a dedicated PC for running CAD and the slicer programs. I'm planning on loading up Mint on a "used but not ancient" PC from my Mom. I'm picking it up this weekend so I don't have the exact specs on hand, but if I remember correctly it's got a fairly decent processor in it. My plan is to play around with FreeCAD for modeling, and if I don't like it, I'll switch back to Microsoft and run Fusion 360 (not excited about having to buy software for a hobby activity once the free license runs out after a year). It looks like Slic3er and Cura will run on Mint, so I should be covered there.

.

I like FreeCad and used it for years. I haven't used R18 but R17 was not nearly the product F360 is. Fusion has really grown in the last couple of years. It is well worth using. You can renew the license every year as long as you still meet the hobbyist criteria.
 
OP
B

BoilermakerFan

Well-known member
Joined
Apr 17, 2006
Messages
2,188
Location
Indianapolis, Indiana
My experience with my laptops that use on board GPUs are fine for a couple years, then the CAD tech moves beyond the capabilities of the on board graphics. This happened to me with my 2011 MacBook Pro running Win7. Fusion360 ran on it fine for 3 years or so. Then the next upgrade wouldn't even install. Win10 also would not install because of the outdated on board graphics.

I don't think the slicers are nearly as hardware intensive. Prusa Slic3r still runs on my MBP.

Last year I bought a Lenovo P51 mobile workstation for my new laptop. It has a dedicated CAD graphics card that does fine. I'm really only limited by the smaller screen size. Eventually I'll get a bigger, curved monitor for it, but for now it does the job.
 
Last edited:

bdbecker

ALLIANCE MEMBER
Joined
Nov 18, 2015
Messages
5,542
Location
Iowa
Thanks guys...

I swear I've read through the terms of F360 a half dozen times and missed the part about being able to renew for free until you pointed that out GTE. For some reason, I thought you could only get a year for free on the hobby license, but would have to pay for it after that. I'm already very familiar with the Autodesk platform, so I will definitely put that back into consideration.

After thinking about more last night, I'm pretty sure the freebie PC is running an AMD Phenom II x4 CPU, which may or may not be a good thing depending on how old it is. Interestingly enough, my near retirement age Mom knows way more about computers than I do. This was probably her work PC at one point (she works for a fairly large software company) and would have been a higher end machine when new, it just comes down to when "new" was. At the very least, I should be able to get started using FreeCAD, but I won't be surprised if I need to upgrade if I want to run F360. I guess there's only one way to find out!
 

Grumblebum

Well-known member
Joined
Aug 10, 2015
Messages
1,940
Location
Wollongong Australia
Well BMF, finally read through here the last couple of nights, you may remember (probably in your other thread) I’d bookmarked when you created it to read later not wanting to go down the rabbit hole yet :)

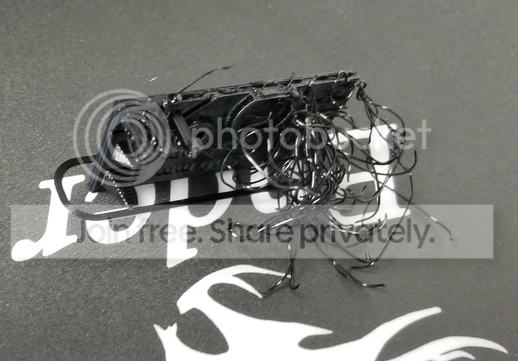
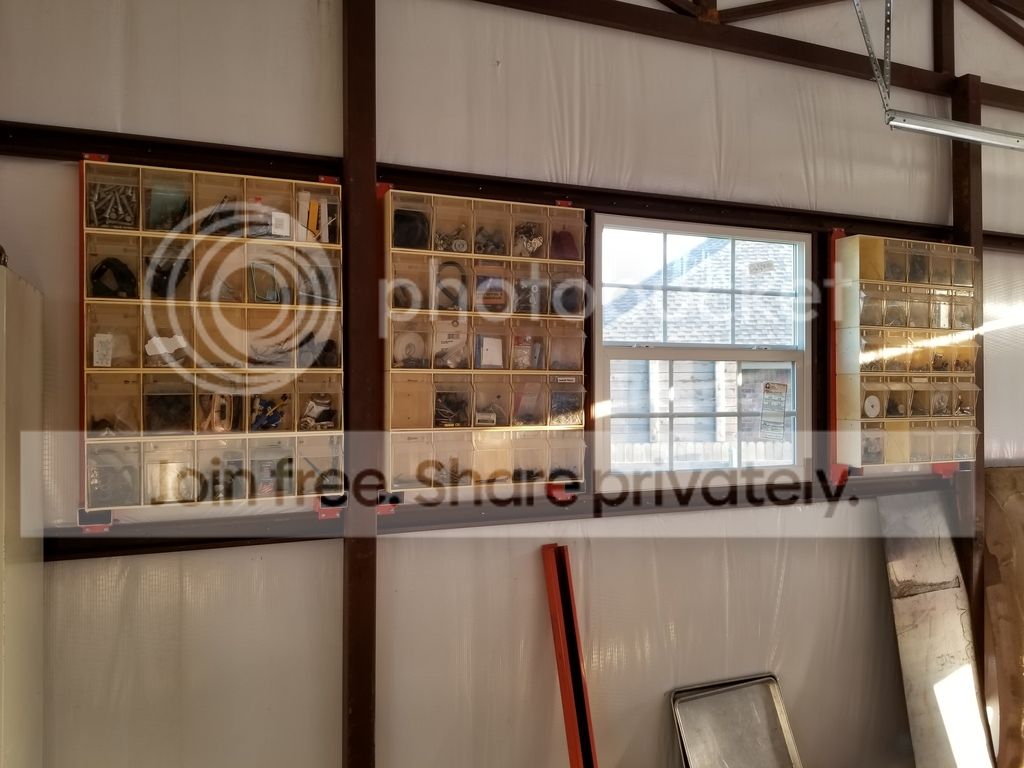
So about 2 weeks ago the boss ordered a knock-off Prusa i3 MK3 kit for sub $200 AU on eBay and I ended up doing most of the assembly. We haven’t tided up the cables yet as we figured we’d get it working first, but that’s a catch 22 because once it’s working you want to print stuff. A good chuck of a day getting it assembled and working out the software etc. Initial prints were just via the onboard memory card reader, but over the next couple of days I got the software loaded on an old Lenovo intel i5 laptop and just connect to the printer via USB. It shipped with an earlier version of Repetier, but the newer update seems much better.

Just the host version of Repetier Is needed. I followed loosely the pdf instructions for the Repetier settings for the printer and saved the profiles/infill patterns etc and started to get some good results.

We are using slic3r and the honeycomb fill. Bed temp is 55 C and 200 C on the extruder. We’ve only been using PLA but do have some nylon and ABS I think to play with once we are more comfortable with it.

A lot of time spent leaning about bed adjustments and we are now getting good adhesion. The printer ships with a sandpaper style full sheet stick on thing which we tore pretty quick while we worked out the bed heights etc. The blue one in the below pics is pretty good but is now updated to a magnetic one today that is better again (I’ll get an updated pic of the unit as it sits now next week).

View media item 94678
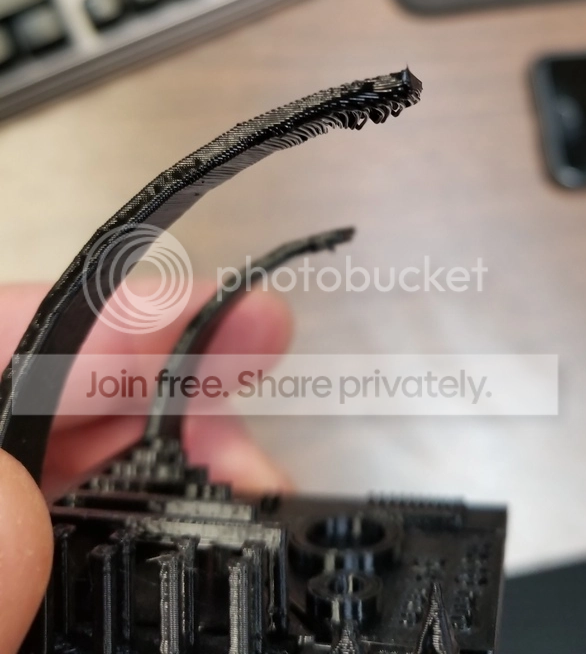
Since I like things of practical use, I found a needle file handle on thingiverse to start printing.

View media item 94679
View media item 94680
View media item 94681
The first 6 I printed individually, but the next 6 we printed as 1 job after modifying the file in tinkercad to do so.

View media item 94808
They finished yesterday evening and I finished assembling the files tonight when I got home. Pretty happy with them.

View media item 94809
Still lots of learning to do but we are getting some good results (although I’ve got nothing to compare it to :headscrat). Repetier seems to be pretty stable and tinkercad looks to be pretty good too. We setup the laptop with resiliosync so we can just dump our print files to it from anywhere now as needed.

Have you seen the Prusa factory tour video on youtube ? Pretty cool.

Will probably go back and do some calibration prints soon so we can play with the software settings some more and see what can be dialled in.

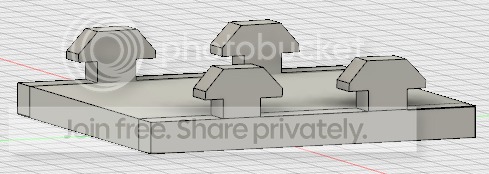
I'm going to print some wrench organisers next and start looking at printing an overhead console for the truck instead of trying to model one from plywood.

Printed the kids some creeper Minecraft rings today as well.

Thanks for moderating the thread, it's a lot of work and I can see you have spent more than a bit of time on your research - appreciated.

Cheers GB :beer:
 

brawls43

Well-known member
Joined
Aug 29, 2012
Messages
133
Location
Minneapolis
I still haven't gotten my Reach3D printer built that I bought on kickstarter forever ago. But seeing deals on prime day for printers, I ended up getting an Ender 3 and a glass bed. It should arrive tonight, I can't wait to get it assembled and printing!
 

vette-kid

Well-known member
Joined
Jul 21, 2008
Messages
3,636
Location
Navarre, FL
Ok, been reading for several hours now and I really want to get into 3D printing. Counter intuitive to some, but I'd like to start on the cheap end. I've read some good things about the Anet A8, anyone have experience with this model? It can be had pretty cheaply. If it's worth it and it works out, I can see upgrading to more expensive setup later. I'm looking at ~$200 initial buy in.

Sent from my Moto Z (2) using Tapatalk
 

bdbecker

ALLIANCE MEMBER
Joined
Nov 18, 2015
Messages
5,542
Location
Iowa
...I've read some good things about the Anet A8, anyone have experience with this model?...

From what I've read/seen in my research, I think the A8 is one of those "I want to tinker with it" type machines meaning that some guys are getting good results out of them, but only after a fair bit of modification. If that's what you want to do, that's totally cool, but something to be aware of if you weren't already. There are also a few accounts of DOA units and fires, but that could just be the internet echo where people repeat the same story over and over again, making the situation seem worse than it is.

If you would rather spend more time printing than modding, the consensus seems to be that the Ender 3 is the better option as a budget/first printer. Again, I do not have any first hand experience with the A8, just going off of what I've seen from researching printers over the last several months.
 

Janv

Active member
Joined
Jan 21, 2016
Messages
30
Ok, been reading for several hours now and I really want to get into 3D printing. Counter intuitive to some, but I'd like to start on the cheap end. I've read some good things about the Anet A8, anyone have experience with this model? It can be had pretty cheaply. If it's worth it and it works out, I can see upgrading to more expensive setup later. I'm looking at ~$200 initial buy in.

Sent from my Moto Z (2) using Tapatalk
I got in recently with the Ender 3 last time I saw a sale. It's been great fun so far and I've been able to repair several items with 3d printed parts instead of tossing them out.

Sent from my SM-G973U using Tapatalk
 

vette-kid

Well-known member
Joined
Jul 21, 2008
Messages
3,636
Location
Navarre, FL
Thanks for the input, I definitely do not want to have to do a lot of tinkering for my first one.

Sent from my Moto Z (2) using Tapatalk
 
To avoid these ads, REGISTER NOW!
Top Bottom