...I used some anesthesia tubing I had laying around.
Lol... that's not a line you read every day.
Thanks for sharing that!

...I used some anesthesia tubing I had laying around.
From what I'm reading about printing PETG is that its all about finding the sweet spot between speed and flow. If the flow seems good, you may need to slow down the travel speed a little.

I have started printing almost exclusively in PETG for some projects for my car. I will say it gets a tad blobby when extruding on a Bowden tube setup but other than that it has been nearly as forgiving as PLA.
I had a lot of problems with PETG on glass same issue you describe. I struggled for awhile and then Overture filament included a "build surface" with a spool of filament I bought. It was essentially buildtak, worked great. I took the glass bed off and haven't gone back.
Sent from my Pixel 3a XL using Tapatalk
I have lifting issues on some projects with the PETG. I was using a raft on every print and throwing away a lot of material so I started trying the brim. I did try painters tape but the hot bed caused the tape to just peel off.
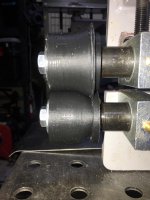
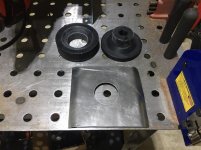
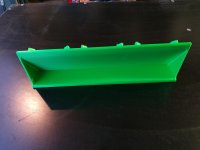
What filament are you using for the bead roller and dimple dies?
Been tempted to print some dimple dies but didn't know if they would be strong enough.
What filament are you using for the bead roller and dimple dies?
Been tempted to print some dimple dies but didn't know if they would be strong enough.
The number of perimeters or walls has a huge influence on strength, maybe even more so than infill %. My son's science fair experiments showed us that...
And PLA does an amazing job under compression loads so PLA should be plenty for dimple dies. Kick your perimeters up to 5 or 7 and run 40% 3D honeycomb. Also, run the extruder a little hotter to get better layer adhesion.
For the guys fighting with PETG, I had the same issues for almost a year. I ended up running on the high side for temps and using a LOT of Aqua Net hairspray. I sprayed a base coating on my bed, then heated the bed to 80degC. And sprayed again. Then heated the bed up to 90degC for the first 3 layers with a small brim. I drop the bed temp down to 85 degC for layers 3 to 30 or so. Then I drop it down to 80degC for the remaining layers. I forget my exact extruder temp, but was the max recommended for my PETG for the first 5 layers, then i dropped it 5degC for the remaining layers.
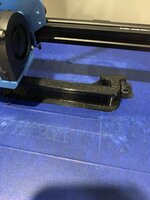
I haven't finished reassembling my printer yet. I did get the bracket drilled and it's ready to install along with all of the old electronics.
My Biqu order is still stuck in China... a full month from when it "shipped."
Short answer is yes, you could do this pretty easily. Millimetre precision is for sure doable but trial and error is sometimes needed to get an absolute dimension. I'm usually aiming for tenths of mm's It varies by printer and material used.
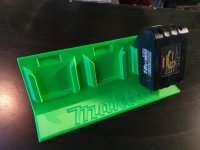
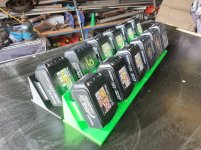
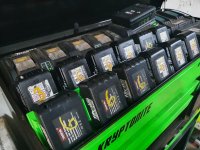
Simple geometries and known dimensions should be short work for anyone to draft as well. Lots of options for you. It's perfect for car parts. Hard to believe you'd need something that precise for a battery mount but hole locations etc sure. Let's see it?[/URL]
Unfortunately, that is kind of the norm for PETG. You can try adjustment of combing and you said you have direct drive coming which will help.
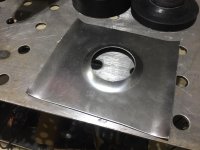
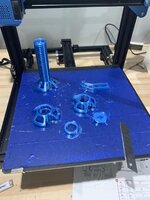
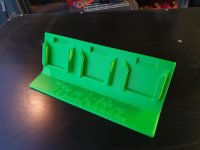
Petg stuck real good. Still getting some fine hairs and lumps where it moves to another piece


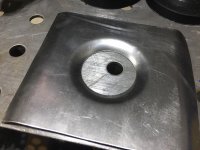
Thank you for the response. My worry about precision is whether it can reproduce the texture on the battery. Here's a close up of the texture and detail I'd like to capture.
You could get texture like that if you wanted to sure. Getting the look exactly the same may be a challenge but the printer would do the job for sure.
Maybe try and find a makerspace group. There are lots of online print places, not sure how it would work if you didnt supply them an stl file to work with. Fusion360 isn't all that tough to learn though if you have a little time, basic shapes arent too challenging to create.Thank you, that is encouraging. I need to find a person/place/outfit that can do this work. Any recommendations? Internet based would be fine, although I'd probably prefer local (San Diego0 as I imagine it would cut down time going back and forth.
My son just got a any cubic mega s from school. Was supposed to have a metals class but got switched to cad after the virus. We are both going to learn together. I’m worried,not that Computer minded. I have big dreams of garage things to make. Lol
I think you should be fine, PETG has some pretty decent flex to it.Nice job on the battery holders.
Quick question. I'm going to be printing some speaker mounts for 4" speakers to be surface mounted to a kick panel in a Toyota pickup. The "tube" will be about 1.5" tall and the bottom will be screwed to the kick panel using nutserts. The speaker end needs to accommodate an attachment method. Ideally I would just run some heavy threaded screws into some pre-printed holes. I'm afraid the plastic will simply crack if I put too much pressure on the screw. I'm planning to use PETG. Any suggestions?