To avoid these ads, REGISTER NOW!

The Everything 3D Printer Thread

OP
B

BoilermakerFan

Well-known member
Joined
Apr 17, 2006
Messages
2,188
Location
Indianapolis, Indiana
Are you prepping the bed at all? I had a hell of a time getting anything to stick to my tevo tornado. Its a ***** to level, so I would have to really fight with it to get it level, but still had issues with things popping loose, or the first layer not sticking enough to get started. I had to make sure I got it as level as humanly possible, and also found that using megahold hair spray is a game changer. I went from basically nothing sticking and being frustrated to it, to everything sticks and I gotta fight to get it off the glass now. I basically gotta smack it with a delrin hammer to break things loose most times. Also found that my esteps on the extruder were under extruding by like 11%. I fixed that, and also changed slicers, and found that slic3r worked better out of the box than cura. I think it defaults to like 150 or 200% extrusion for the first layer.. so basically I've got a lot more material coming out, and with the hairspray it's got something to grab onto


Oh yeah... I use Aqua Net. The Aqua Net is an absolute must for PETG, but I use it for PLA too. The textured sheet is unique. At 60degC it holds great until it cools, then the parts pop off. I thought I would be fine at 50degC since it was just eSun PLA. Nope. The smooth PEI sheet adheres better. I don't need Aqua Net for it with PLA, but it helps and doesn't hurt, so I lightly spray the smooth sheet too.

The calibration prints I do dialed in the first layer height to 0.20mm. A 3 layer print measures 0.60mm (+/- 0.01mm). My bed is really level. The full bed calibration print measured 0.20mm +/- 0.01mm.

Once I split all of the parts out into individual files to print I didn't have any issues. I'm 99% sure my issue was the large area and the steppers moving all over the bed combined with the load of the bed and hotend was just too much power draw for it to keep the hotend temp constant. I'll know for sure once I get the new PSU, but my research on the Prusa forum all points to the PSU being the problem.
 
To avoid these ads, REGISTER NOW!

WoodsTruck

Well-known member
Joined
Jan 12, 2013
Messages
1,019
My Ender 5 seems to have issues with the magnetic print bed in certain areas. I'm going to clean it good and try again. I just recently bought a heat gun to monitor bed temp as I didn't know if part of the bed was having consistent heat issues. I have a 24 hour print job scheduled and don't need any errors.
 

gte718p

Well-known member
Joined
Mar 12, 2009
Messages
3,950
Just a reminder on why to buy from a reputable seller. I initially loved my TMC upgrade. Ever print for the last week has been failing. I upgraded to Marlin 2.0 at around the same time. I though I had a configuration issue, but it turns out one of the drivers had gone bad. I printed something with a round hole and it came out as an oval. Turns out the Z axis driver was jacked up. IT is moving twice as far per step as it should. Thankfully I had a spare because having a TMC in the extruder causes issues. Of course no support from the company I bought them from.
 

67CarGuy

Well-known member
Joined
Feb 6, 2008
Messages
763
Location
Outside Boston, MA
In 2017 I got a Prusa I3 Mk3 and I love it. So, I am sure that all the CR printers have a lot of these features now but for me Moving from the extremely basic PS to the Prusa was like going from a Big Wheel to a Tesla.
I have a good amount of experience printing in ABS, PLA, and PETG. I have a basic knowledge on modeling and use a variety of programs such as Fusion 360. Anyway, just wanted to chime in and if I can be of any help to anyone, fell free to reach out.

I'm now seriously considering grabbing the Mk3 24V control board for the Bear frame to make it a full Mk3 upgrade instead of a Mk2.5S. Then I'll use the Meanwell 12V 350W supply with my original Mk2 board or the Biqu BTT002 board.

I'll have almost all the parts I need to build a second Prusa printer after I upgrade the hotend. I just need an extruder and a couple rods. That said, I might just buy an Ender 3 v2 or Ender 3 Pro. It would only be a little more money. I'll have to mull it over. The Prusa Mini is also on the list, but it's a fair bit more money and needs a few mods out of the box.


11b and Boilermaker (and anyone else, for that matter), I'd love to get your input on the Prusa vs the Ender 3 Pro. I realize there's a price difference, but more curious about build quality and print quality. This will be my first 3d printer, and I've been leaning towards the Ender 3 Pro for a few months while I do my research, but haven't pulled the trigger yet. :dunno:
 

Firebrick43

Well-known member
Joined
May 12, 2015
Messages
13,971
Location
West central Indiana
I have a standard ender 3. As far as build quality the prusa is better,and probably easier to use out of the box. The ender is ok but need frequent bed leveling and is limited by it controller for things link bed mesh leveling with a bltouch and higher temps(hot end is limited). As far as print quality, the ender can probably match nearly anything on the market with careful tuning, it just cant do it fast. I can beat a Taz 6 lutzbot at work but again its because of tuning and methods, and has taken a while to get here. Also I will say that an ender 3 is pretty much limited in stock form to PLA. I have printed in PETG but I will plug the hot end and you absolutely need to upgrade the teflon tubing to a higher temp tubing.

If starting over again I would start with a prusa. A ender with upgraded controller, upgraded hotend(ed3 v6), and bltouch would be very close to a prusa in capabilities but also cost.

I really want to print abs/asa, nylon, and polycarbonate so I am in the process(almost finished) of building a railcore II but its an expensive machine.

THe prussa can print abs/asa but really needs an enclosure. Cartesian printers need quite a large enclosure to print area ratio compared to Core XY printers. If I was printing large quanities of smaller items I would purchase 2 or 3 prusa minis and start a farm.
 
OP
B

BoilermakerFan

Well-known member
Joined
Apr 17, 2006
Messages
2,188
Location
Indianapolis, Indiana
11b and Boilermaker (and anyone else, for that matter), I'd love to get your input on the Prusa vs the Ender 3 Pro. I realize there's a price difference, but more curious about build quality and print quality. This will be my first 3d printer, and I've been leaning towards the Ender 3 Pro for a few months while I do my research, but haven't pulled the trigger yet. :dunno:

If the cost of a Prusa Mk3S is within your budget, then I would say definitely go for it for a first printer...

Even a month ago or so I may not have said that. But here's why I really changed my mind: Their support is INCREDIBLE! Šimon for Prusa helped me all the way through my upgrade of my printer from the original Mk2 to the Mk2.5S. I'm a pretty good problem solver and troubleshooter, yet I could not get my printer to complete the initial calibration. Šimon guided me through several checks and was confident my PINDA 2 probe wasn't fully functioning. I received a new probe in about 4 days, but it took me many weeks before I had a chance to test it. I didn't even remove the old one from the cable bundle because I wasn't sure it would resolve the issue. It did of course. So last week I emailed Šimon to tell him it worked.

After the horrible support from Biqu/BTT just to get parts I ordered in March, I have to say, I'm fully sold on Prusa and their support.

I think the Ender 3 Pro / Ender 3 V2 / Ender 5 Pro are amazing machines for the money, but as Firebrick said, they need a little tweaking and upgrading to reach their top performance capability.

I'll be adding one of those Enders to my fleet at some point in the future. And I will mod the heck out of it. Before that however, I'm biting the bullet and buying the Prusa Einsy control board and a Meanwell 350W 24V PSU to take my Mk2.5S up to a full Mk3S. Then I'll rebuild the original frame I have sitting off to the side as a Mk2.5S again.
 

Attachments

  • 20200726_234529.jpg
    20200726_234529.jpg
    72.8 KB · Views: 99
  • 20200726_234545.jpg
    20200726_234545.jpg
    97 KB · Views: 99
Last edited:
OP
B

BoilermakerFan

Well-known member
Joined
Apr 17, 2006
Messages
2,188
Location
Indianapolis, Indiana
And here is my printer as it sits now.

I have all the replacement parts reprinted in the Devil Design Galaxy Violet PETG, but I haven't installed all of them yet. I have a couple more accessories and upgrades to print before I tear apart the extruder bundle to remove the original probe and swap the controller enclosure.

I want to make sure everything is printed before I tear it down again, just in case...

That said, I have been SUPER impressed with the Devil Design PETG filament. I've had much better prints with it than the eSun PETG and it's been less stringy than the Prusament PETG. I wish it was available here in the U.S. :sad: However, I am planning to order more hardware from RatRig, so I'll be adding several spools of DD filament to that order.

I have a few mods planned for my little cart the printer is on. I'm going to build an insulated enclosure for the top and mount my power strip to the cart. I'm planning to integrate a vent with 4" fan into the enclosure so I can vent the fumes from ABS out of the house through a foundation vent I have under my kitchen crawlspace. When I want to print ABS, I'll have to wheel the cart into my hobby work area and hook up to the vent, but that will keep the awful fumes out of the house.

I'm also going to add a large dry box on the middle shelf to store my open filaments. The lowest shelf will store unopened boxes.
 

Attachments

  • 20200725_154919.jpg
    20200725_154919.jpg
    85.1 KB · Views: 111
  • 20200727_000434.jpg
    20200727_000434.jpg
    60.9 KB · Views: 93
Last edited:

WoodsTruck

Well-known member
Joined
Jan 12, 2013
Messages
1,019
How are you printing with the DD filament if you can't get it in the states?

My eSun seems to work but would be interested in something better.
 
OP
B

BoilermakerFan

Well-known member
Joined
Apr 17, 2006
Messages
2,188
Location
Indianapolis, Indiana
How are you printing with the DD filament if you can't get it in the states?

My eSun seems to work but would be interested in something better.

:bounce: 
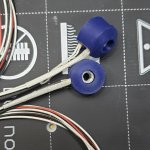
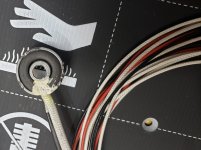
I ordered the Mk3 Full Bear kit from RatRig with custom printed parts. At the time RatRig was the only source that had the genuine Full Kit in stock. When I ordered I selected the Galaxy Violet PETG. RatRig emailed me to tell me they that there would be a 4-6 week delay if I wanted the parts in my filament because of COVID, but they had the parts in stock printed in the GV color in PLA and would include the full spool of PETG if that worked for me. Heck yeah! Normally they print your parts in your filament and send you the balance of the material.

I ordered the extended Z extrusion from Bear along with the hardware for the Bear extruder.

I didn't realize it at the time, but the Y axis motor on the Mk3 is flipped 180deg and doesn't have a limit switch mount because the Mk3 uses sensorless homing. I just fabbed the little bracket to hold my limit switch and swapped two pins on the motor connector. I've since printed the correct Mk2/Mk2.5 motor bracket that mounts the motor on the other side and includes the switch mount, but I haven't installed it yet. I also discovered the Mk3 style setup required a longer belt than the Mk2.5, so I ordered genuine high temp Gates GT2 belt from Filistruder.
 
Last edited:
OP
B

BoilermakerFan

Well-known member
Joined
Apr 17, 2006
Messages
2,188
Location
Indianapolis, Indiana
One of the other upgrades I have planned for my Prusa is a new hotend.

The Slice Copperhead is now released for sale and it is purchased ala cart. I was watching a video from Teaching Tech on an extruder setup from DropEffect out of Germany and it had a really cool ring heater. I reached out to DropEffect with some questions about the specs. They include a 100K thermistor, the silicone boot, and are 35W capable of heating to 285degC. That's perfect for my needs. I ordered two, one in 12V and one in 24V.

DropEffect Ring Heater

I have an E3D X nozzle so I'm going to use the X nozzle on the Ring with the Copperhead E3D style heatsink.
 

67CarGuy

Well-known member
Joined
Feb 6, 2008
Messages
763
Location
Outside Boston, MA
Thanks for the replies, all. Looks like I need to convince my Director of Finance on the increased upfront cost, but I think she'll see reason. :)
 

Firebrick43

Well-known member
Joined
May 12, 2015
Messages
13,971
Location
West central Indiana
Got some parts churned out for the railcore this weekend

View media item 105691
Bltouch mount and y axis limit switch mount in aluminum. Only printed part left on the printer is the part cooling fan mount. Once I get the water cooled hotbed finished the fans will go.

View media item 105690
Tensioning belts.

Finished wiring and fired it up. Every thing homes, and the belt has true self leveling which is awesome. Also the bed is physically so flat the mesh level graph is awesome.

No just have to get the pei print surface on and I can start printing. Infornately not tomorrow though. I am going to have to get a router for the basement to connect to the duet control board. I thought one could have a direct connection to a laptop but no dice. Using a cell phone as a hotspot for now.

Spent last hour or so looking up mesh routers, my head hurts, and am going to hit the hay
 
OP
B

BoilermakerFan

Well-known member
Joined
Apr 17, 2006
Messages
2,188
Location
Indianapolis, Indiana
Got some parts churned out for the railcore this weekend


Bltouch mount and y axis limit switch mount in aluminum. Only printed part left on the printer is the part cooling fan mount. Once I get the water cooled hotbed finished the fans will go.


Spent last hour or so looking up mesh routers, my head hurts, and am going to hit the hay

Wow! That's sweet. Which Z axis height did you build?

My printer has been printing well. I'm still printing upgrade parts for mine. I'm about to begin the dial in of the extruder for each filament to prepare for printing the Bear Extruder/X axis upgrade.

I'm still undecided on what my next printer will be. I'm leaning towards a RatRig kit or building a GRIZZLY bear. I'm waiting for my Ananas Steppers to hopefully ship in August and I plan to use those for the build for a true, closed loop printer.


I've been looking into mesh WiFi too. I was hoping to find a way to setup a Raspberry Pi to to do mesh WiFi, but I haven't really found an easy way to do it. My house isn't large, but it's old so the thick plaster walls and a lot of metal in the walls kills my signals.
 
Last edited:

Firebrick43

Well-known member
Joined
May 12, 2015
Messages
13,971
Location
West central Indiana
Wow! That's sweet. Which Z axis height did you build?

My printer has been printing well. I'm still printing upgrade parts for mine. I'm about to begin the dial in of the extruder for each filament to prepare for printing the Bear Extruder/X axis upgrade.

I'm still undecided on what my next printer will be. I'm leaning towards a RatRig kit or building a GRIZZLY bear. I'm waiting for my Ananas Steppers to hopefully ship in August and I plan to use those for the build for a true, closed loop printer.


I've been looking into mesh WiFi too. I was hoping to find a way to setup a Raspberry Pi to to do mesh WiFi, but I haven't really found an easy way to do it. My house isn't large, but it's old so the thick plaster walls and a lot of metal in the walls kills my signals.
I am building the 300zl which is 300mmx300mmx300mm

I don't print tall things.

I however want to print long objects. I have been thinking of building another railcore if things go well with this one. It will be 300mm in y and z but 600mm in X. Since the railcore uses a thick bed with 3 screws it can take the extra weight. Since the bed is not moving while printing a layer like cartesian printers there is no issues with ringing due to mass/momentum. Trying to increase y over 300 mm is a real issue as you have to increase rail size which increases mass which increases momentum and on and on.
 
OP
B

BoilermakerFan

Well-known member
Joined
Apr 17, 2006
Messages
2,188
Location
Indianapolis, Indiana
So why not just flip the long object vertical? Then the Z just slowly lowers... that's the big advantage of the CoreXY, and especially the RailCore.

My ring heaters arrived today. I'll post a pic later, but I'm really impressed with it based on initial inspection. Now I need to get the Copperhead heatsink ordered. And a few more spools of PETG filament... And a metric micrometer...
 

Firebrick43

Well-known member
Joined
May 12, 2015
Messages
13,971
Location
West central Indiana
Tall skinny objects are hard to keep attached to the bed. Say I want to do a cast aluminum manifold and print the core mold and pattern. The ends of the manifold without tons of supports would be hard to adhere. On the other hand easy to print on the manifold face laying down.

Also strength of parts. Printed parts can be really strong if the stress is in X or Y if designed correctly. There is not as much one can do about Z as the layer bonds is the weakest link.


Ring heaters?? Please explain
 

mkehler

Member
Joined
Jul 15, 2007
Messages
6
I recently got into sheet metal work and tried my hand at designing a radius bead roll die set and dimple die flare for my pipe sized hydraulic knockouts. Designed myself in Fusion360 then printed with 6 walls and 40%
Wow that’s fantastic, didn’t even occur to me that PLA would hold up! May have to try this
 
OP
B

BoilermakerFan

Well-known member
Joined
Apr 17, 2006
Messages
2,188
Location
Indianapolis, Indiana
Tall skinny objects are hard to keep attached to the bed. Say I want to do a cast aluminum manifold and print the core mold and pattern. The ends of the manifold without tons of supports would be hard to adhere. On the other hand easy to print on the manifold face laying down.

Also strength of parts. Printed parts can be really strong if the stress is in X or Y if designed correctly. There is not as much one can do about Z as the layer bonds is the weakest link.


Ring heaters?? Please explain

Ah, yeah, parts under high tension would benefit. But why not just 'glass them over for really strong parts? Personally, if a 3D part's strength is that critical, I'm going to reinforce the whole part with 'glass, CF, or Kevlar & West Systems epoxy.

That said, I have tried to break parts along the layers and didn't get a failure when the extrusion temp is high enough. They can bond really, really well. Easy layer separation is a sign the printer isn't dialed in.

I shared a link to the ring heater a few posts ago. I'll get a pic uploaded soon.
 

Firebrick43

Well-known member
Joined
May 12, 2015
Messages
13,971
Location
West central Indiana
Ah, yeah, parts under high tension would benefit. But why not just 'glass them over for really strong parts? Personally, if a 3D part's strength is that critical, I'm going to reinforce the whole part with 'glass, CF, or Kevlar & West Systems epoxy.

That said, I have tried to break parts along the layers and didn't get a failure when the extrusion temp is high enough. They can bond really, really well. Easy layer separation is a sign the printer isn't dialed in.

I shared a link to the ring heater a few posts ago. I'll get a pic uploaded soon.

My parts don’t break easy along layer lines, just in destructive testing of parts (early prototypes) that is where they do fail. YouTube has some good testing videos as well with some impressive test rigs and result in layer adhesion are always half to a 1/3rd of the other axis. I have designed in long holes in a part and inserted some high strength rig rod cut to length with epoxy.

As for reinforcing, I do some times. But that adds another layer of cost and time

And actually I desire more to make molds and such to make composite and cast metal parts.
 
Last edited:
OP
B

BoilermakerFan

Well-known member
Joined
Apr 17, 2006
Messages
2,188
Location
Indianapolis, Indiana
I like the 3D printed molds to form aluminum sheet for RC scale accessories... And making molds is a cool use that I don't really have a need for right now.

Here are pics of the ring heaters. You can see that the heating element completely surrounds the heat block and nozzle.
 

Attachments

  • 20200803_225822.jpg
    20200803_225822.jpg
    111.6 KB · Views: 63
  • 20200803_225759.jpg
    20200803_225759.jpg
    145.7 KB · Views: 65
  • 20200803_225735.jpg
    20200803_225735.jpg
    136.4 KB · Views: 64
  • 20200803_225715.jpg
    20200803_225715.jpg
    135.9 KB · Views: 62
  • 20200803_225655.jpg
    20200803_225655.jpg
    112 KB · Views: 70
To avoid these ads, REGISTER NOW!
OP
B

BoilermakerFan

Well-known member
Joined
Apr 17, 2006
Messages
2,188
Location
Indianapolis, Indiana
I ordered a couple spools of Atomic Filament PETG today. Metallic Silver v2 PETG PRO and Starry Night Translucent v3 PETG PRO. Atomic gets great reviews so I'm glad both were back in stock. They have a few other colors I'd like that are out of stock.
 

penright

ALLIANCE MEMBER
Joined
Dec 27, 2016
Messages
618
Location
SW of Mustang, OK
Anyone upgraded to Marlin 2.0.6 yet?
I am having an issue with Automatic Bed Leveling (ABL). When I execute the G29, it runs but does not return the mesh. If I use 2.0.5 BF (Bug Fix), it works so I don't think I have a hardware issue. I did a file compare between the two configurations.h to see if I miss anything, did not see any.
 

slim01

Member
Joined
Feb 6, 2010
Messages
23
Made these grinding wheel storage trays recently.

The first one was a bit of a test and could only fit 4 stacks. I did include cut-outs for a thumb or finger to be able the grip the disc from the OD as well as from the ID.
20200807_145728.jpg 20200807_145734.jpg

The second version is full sized and then split into 4 to fit the printer bed. The bottom RHS is a tiny bit off as I did not allow for enough space to get the discs in and out as easy as I would have liked.
20200807_145556.jpg 20200807_145535.jpg
 
Last edited:

slowtwitch73

Well-known member
Joined
Apr 18, 2019
Messages
5,876
Location
Hellgate
Glad to see one of the main uses for a printer is making parts for the printer just like lathes, mills, etc lol.
 

plc268

Well-known member
Joined
Jul 10, 2016
Messages
87
I like the 3D printed molds to form aluminum sheet for RC scale accessories... And making molds is a cool use that I don't really have a need for right now.

Here are pics of the ring heaters. You can see that the heating element completely surrounds the heat block and nozzle.

Here's another similar idea for a hotend heater from Maxiwatt

https://www.amazon.com/dp/B07RXW1Q2Q/?tag=atomicindus08-20

I bought one a while ago and still haven't tried it yet. Mostly because I don't have a silicone sock for it. I did attempt to make a RTV red mold of one, but I wasn't very successful at it.
 

Cryptic1911

Well-known member
Joined
May 24, 2008
Messages
2,884
Location
Willimantic, CT
Made these grinding wheel storage trays recently.

The first one was a bit of a test and could only fit 4 stacks. I did include cut-outs for a thumb or finger to be able the grip the disc from the OD as well as from the ID.
20200807_145728.jpg 20200807_145734.jpg

The second version is full sized and then split into 4 to fit the printer bed. The bottom RHS is a tiny bit off as I did not allow for enough space to get the discs in and out as easy as I would have liked.
20200807_145556.jpg 20200807_145535.jpg

Oh that's awesome. Are you gonna post the stl file anywhere? :rocker:
 

slim01

Member
Joined
Feb 6, 2010
Messages
23
I can send you an stl for the first one , the bottom one might not be of much use depending on the size of your draw though.
 

slim01

Member
Joined
Feb 6, 2010
Messages
23
Finished a 'quick' project this morning. I find when working in the yard or when out in the bush I've always got 3 or 4 batteries laying around loose so I thought I'd make a suitcase style holder for them so they don't get knocked around too much.

My PETG slicer settings need some work since I changed from Cura to Slic3r and this was my first print on the Wham Bam flexi textured bed. Ive been using their smooth finish flexi bed and i didnt adjust the Z offset to suit and the cooling fan kept coming on for some reason which the PETG didn't like at all. The batteries still fit well and once my settings are better I'll try a reprint.

a9b6a67f482223c1e9dd96042b95c34d.jpg 658614b09e45ceb0e6116827a337df53.jpg c26ae60cad47b6aa77a13abd464f3234.jpg 51c3ebbdb9afe4d7a68a25e37a997f96.jpg

Sent from my SM-G973F using Tapatalk
 

Attachments

  • a9b6a67f482223c1e9dd96042b95c34d.jpg
    a9b6a67f482223c1e9dd96042b95c34d.jpg
    101.8 KB · Views: 5
  • 658614b09e45ceb0e6116827a337df53.jpg
    658614b09e45ceb0e6116827a337df53.jpg
    100.6 KB · Views: 4
  • c26ae60cad47b6aa77a13abd464f3234.jpg
    c26ae60cad47b6aa77a13abd464f3234.jpg
    103.6 KB · Views: 4
  • 51c3ebbdb9afe4d7a68a25e37a997f96.jpg
    51c3ebbdb9afe4d7a68a25e37a997f96.jpg
    104.5 KB · Views: 9

penright

ALLIANCE MEMBER
Joined
Dec 27, 2016
Messages
618
Location
SW of Mustang, OK
Created something new, well for me it was new.
I based the idea from

It is a print that will hold a Planters Peanut clear plastic container. What makes this desirable is clear plastic. It will not shatter like glass, but you can see what is in it. If it is a little loose I have included the Fusion 360 file and STL on Thingiverse, you can bump the pegs sizes up. "Make Anything" has another peg that is supposed to fit tighter. I may redo this with them.

The jar can be snapped out of the holder easily, but not so easy to fall out.

https://www.thingiverse.com/thing:4572472

ACtC-3dt5LJoS2acGDoGl6eP-IYnlNE1A3fBZIfIYKcWR29OhRjXBkvEEdAVmtlsujV4T1EDf5vX6g0mFya3PJj8_zoWdZVrL5ZB2GGzASMFQ69NjsQeSNuj2MogmK---e81G39t-7ZZIfmTdH7civDwtd0D=w854-h888-no


ACtC-3fgkWv3ZYxHc46Js9DR_6dx7FYZYzStMy5dAG-qPb5riflG-EswoxpEMTWwqMsFfp_YnVcA1fh4NoWgBVgeh8uhwiHkFO9Bs2TaqMG-VG2STeiGhl8yLXoefwAIqcUDab9H3djoVyfMe3GEZJ7HjB-V=w666-h888-no


ACtC-3fG-wjTfDMBaWKFfF3Iqx6fK44oxwFRohEaeik9fU1canBeT44VHChC14i6EpsVMfAKwGnxgM8ETZpUcXpKg8lzoQllQBqZMl1ZW9WWvcm371LtOt7fsBuGVchlGaFbW4IXNLviR46GqiBf23AVm1lc=w434-h888-no


ACtC-3dRnbqPHMeRGD-tXmuAzlbXfZsO4B34Zy6bKY4cA32RCAf8GaB9yblSCVCvgG9A_oFfwdlqB5fbTb-EgHR7sL_l2FNyYGKsVIjkDyzXzIQeShiY4hQVDZD2_nvnuW3m8w5Et3cWsguLGfB-8Prh3WUl=w573-h888-no
 

slim01

Member
Joined
Feb 6, 2010
Messages
23
Looks good. Out of curiosity, it looks like it was printed flat like the first picture, did you use supports for the top pegs? If so, did you use tree supports or just 'normal' which look to be printed on top of the lower pegs.

I only use supports when I cannot change my design or print orientation to eliminate them so Im always looking at other peoples designs to see if they are doing something I haven't thought of.
 

BB Sig

Well-known member
Joined
May 16, 2018
Messages
139
Location
Florida
Anyone upgraded to Marlin 2.0.6 yet?
I am having an issue with Automatic Bed Leveling (ABL). When I execute the G29, it runs but does not return the mesh. If I use 2.0.5 BF (Bug Fix), it works so I don't think I have a hardware issue. I did a file compare between the two configurations.h to see if I miss anything, did not see any.

I am upgrading my A8 Plus to an SKR 1.4 Turbo and I should be able to test it tonight. I downloaded 2.0.6 last night and only got half way through setup. It will be another week or two before I can get back to adding my BLTouch.
 

penright

ALLIANCE MEMBER
Joined
Dec 27, 2016
Messages
618
Location
SW of Mustang, OK
Looks good. Out of curiosity, it looks like it was printed flat like the first picture, did you use supports for the top pegs?

Sorry it took so long to get back. I did put add supports in Cura, but as it was printing, they were knocked over. So, you might try without supports. The top pegs was not perfectly formed, but it was enough to grab.
 

gte718p

Well-known member
Joined
Mar 12, 2009
Messages
3,950
I ordered a couple spools of Atomic Filament PETG today. Metallic Silver v2 PETG PRO and Starry Night Translucent v3 PETG PRO. Atomic gets great reviews so I'm glad both were back in stock. They have a few other colors I'd like that are out of stock.

Atomic had good reviews, but the roll of crystal clear PETG I just received is ****. It is super brittle. The filament broke 8 times in a 3 hour print. Never happened to me before. I just finished a 36 hour PETG print with no issues so I doubt it is my setup.

Guess I will find out if they have good customer service.

Like Prusa, they send gummy bears, so they have that going for them.
 

californiamilleghia

Well-known member
Joined
Apr 11, 2020
Messages
537
Location
SoCal
I have an extra spool of PLA if anyone is local ( LAX airport) and wants to make some stuff , its free

I would rather try and get my Desktop CNC working ......and the 40Watt Laser I got last week.... last is the 3D printer.......

Let me know.....
 

Gerald O

Well-known member
Joined
Mar 5, 2013
Messages
1,884
Location
NC
This was a approximately 1/2 scale test print of an MGB cylinder head that I've been designing. It's actually done in white PLA and then painted. Didn't spend any time optimizing settings, and had the speeds turned up. Just wanted a physical object to get a different perspective on it from the CAD views.

49750317162_30609179e4_b.jpg

49749989276_a4fab01cb2_b.jpg
 

arnoldcp

Member
Joined
Jan 27, 2015
Messages
17
That cylinder head looks excellent! I may have missed it but what machine did you print that on? It looks like a CR-10 in the background. I am thinking about buying the "Ender Extender for one of my printers to get a 400x400 build area.

Also, I assume the end goal is to have it actually made into a real part. Do you have access to a 5 axis CNC mill that will handle the machining for you?

I actually work for a company that does Laser Powder Bed Fusion and we have printed some automotive cylinder heads and your paint job actually fooled me for a minute.

Neat stuff!

Sent from my Pixel 3a XL using Tapatalk
 

WoodsTruck

Well-known member
Joined
Jan 12, 2013
Messages
1,019
Are you using a mirror as a print bed?

Curious how big the head is that you printed.

I printed a switch box and it maxed out my print bed.
 

Attachments

  • IMG_6566.jpg
    IMG_6566.jpg
    71.3 KB · Views: 100

Gerald O

Well-known member
Joined
Mar 5, 2013
Messages
1,884
Location
NC
Yeah, it's a CR-10 with dual z-axis motors mod. I'm using a 12"x12" glass mirror for printing bed surface. I got a pack of 6 mirrors from the Home Depot for about $10. It gets clipped to the bed with paper clamps. Using hair spray for adhesion.

The actual cylinder head design is for an 1800cc MGB 4 cyl. engine. I just scaled the print to fit on the bed, so it's a little over 11" long.

The eventual plan is to have the heads cast in aluminum since there are liquid cooling cavities inside that could not be created by CNC. External finishing would be CNC however.

I thought I might be able to 3D print full size core molds though, or even investment casting patterns for casting prototypes.

Modeling was done with Fusion 360. Slicing done with Cura.
attachment.php

attachment.php

attachment.php

attachment.php
 

Attachments

  • spark plug denso IK20TT v16.jpg
    spark plug denso IK20TT v16.jpg
    17.1 KB · Views: 544
  • MGB_high_port_head_v1_2020-Apr-09_10-41-30PM-000_CustomizedView23425843665_jpg.jpg
    MGB_high_port_head_v1_2020-Apr-09_10-41-30PM-000_CustomizedView23425843665_jpg.jpg
    146.2 KB · Views: 544
  • MGB head v5 v83.jpg
    MGB head v5 v83.jpg
    58.3 KB · Views: 543
  • f34d9699-a7ff-49c9-9ff9-2b4aedff01a3.jpg
    f34d9699-a7ff-49c9-9ff9-2b4aedff01a3.jpg
    19 KB · Views: 574

arnoldcp

Member
Joined
Jan 27, 2015
Messages
17
Do you have a thread just for this head? I would really like to subscribe to that to follow your progress.

Sent from my Pixel 3a XL using Tapatalk
 
To avoid these ads, REGISTER NOW!
Top Bottom