
You are using an out of date browser. It may not display this or other websites correctly.
You should upgrade or use an alternative browser.
You should upgrade or use an alternative browser.
The Everything 3D Printer Thread
- Thread starter BoilermakerFan
- Start date

rlitman
Well-known member
I have a similar set, though I chose to get the 4-die bootlace crimper, rather than the 6-die. It seemed to me that a square profile under a screw would be better than a hex, but I doubt there's all that much difference.
vavet
Well-known member
happy To share, I’ll put it on thingiverse when I get to work and post a link.Interested in the STL if you have it handy and are willing to share!
PelicanPines
ALLIANCE MEMBER
I like to be different... it's why I went 6 sided. I considered your hypothesis but read somewhere it wouldn't matter. Not sure if was the 6 sided peoples propaganda or not but ... it works well.I have a similar set, though I chose to get the 4-die bootlace crimper, rather than the 6-die. It seemed to me that a square profile under a screw would be better than a hex, but I doubt there's all that much difference.
vpd66
Well-known member
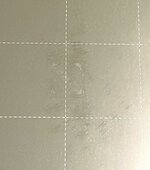
Anyone have any quick ideas on what could be causing this?
On the last 4-5 prints I've done, what should be straight verticals are all over the place.
I had the bright idea to tighten the belts a little this morning. Haven't tested yet, but they didn't seem overly loose.
Weird thing is I had one successful print in between a number of bad ones with the same settings. And, sometimes they start out ok and then get wonky (like below image). Seems like the longer the print the more likely it goes off course.
Nothing unusual in the slicing, or at least it's settings I've used for successful prints, too.
Ender 3 V2, printing PLA
Layer Height - 0.2mm
# of Walls / Perimeters - 3
# of Top / Bottom Layers - 5
10% Infill - Gyroid Pattern
200° C Print Temp
60° C Build Plate Temp
Print Speed 65 mm/s
Wall Speed 32.5 mm/s
Initial Layer Speed 20 mm/s
Retraction Enabled
Print Cooling Enabled (Fan Speed 100%)
Thanks!


Check your stepper belt tension. I've seen this with belts the were loose.
vavet
Well-known member
Thingiverse link:happy To share, I’ll put it on thingiverse when I get to work and post a link.


nicholam77
Well-known member
That does make a lot of sense. Mine has the silent drivers with heat sinks, but I don't have a 3.
While you're in there, check out the connections. The green screw terminals often have issues with stranded wires.
I had the "stranded wire" issue upon my initial inspection when originally installing everything. I noticed it and "put a feral" on those wires.
Could you guys expand on this? What issue does stranded wires cause?
Check your stepper belt tension. I've seen this with belts the were loose.
Thanks, I did check and they definitely aren't too loose. I don't think they ever were, but I did tighten even further and re-ran the same print that failed horribly, with the same result.
Other things I've read that could cause it with the Ender 3 V2
— 4.2.2 main board (susceptible to overheating? inadequate cooling?)
— incorrect vref voltage on stepper motor drivers (overheating)
— static electricity jumping from plastic belts to motor wires
ArcReactorKC
Well-known member
On some of my UL listed equipment the crimps must be made with a 4 sided die and not a 6. Although I bet that's just because that was what I had used when we were getting the listing.I have a similar set, though I chose to get the 4-die bootlace crimper, rather than the 6-die. It seemed to me that a square profile under a screw would be better than a hex, but I doubt there's all that much difference.
PelicanPines
ALLIANCE MEMBER
-- Missing teeth on the beltCould you guys expand on this? What issue does stranded wires cause?
Thanks, I did check and they definitely aren't too loose. I don't think they ever were, but I did tighten even further and re-ran the same print that failed horribly, with the same result.
Other things I've read that could cause it with the Ender 3 V2
— 4.2.2 main board (susceptible to overheating? inadequate cooling?)
— incorrect vref voltage on stepper motor drivers (overheating)
— static electricity jumping from plastic belts to motor wires
-- Belt slipping (if it's too loose OR snagging in some way)
-- ^^-- Loose Gear on stepper motor
-- Loose contact at stepper motor wiring OR at the momma board
-- Improperly set print surface, can it move or slide during printing.
harley jim
Well-known member
Pines, would soldering/tinning the wire ends work as well or should they be crimped?
Bodj Built
Well-known member
Been finding some ways to get more use out of my printer. My fiancee and I decided that since we're moving her out here ($), getting married ($$), building our house ($$$), that we're going to keep Christmas low budget this year and do homemade gifts. She's a book worm, so I'm making her a stamp so she can stamp all of her books.
This has been quite a learning experience. I'm 3D printing a mold, and casting with a mix of silicone and corn starch. It works surprisingly well, but still not good enough. It is a little too flimsy in the lettering and pieces rip off or it doesn't completely fill the mold. I just printed my fourth iteration last night, each time making adjustments to letter depth, thickness, etc. I'm getting tired of the silicone not working well, so I'm waiting on epoxy and releasing agent to come in tonight to try and make a solid stamp. Who knows if it's going to work hah.
First was ABS since it was all I had


Second was PLA. Printed MUCH nicer, and I made the letters wider. SW kept crashing when I was making the flower lines thicker, so I couldn't fix that.

I tried the silicone 3 times with this one, all with varying degrees of success.

The third iteration I fixed the flower, but screwed up the depth. Made it .01" instead of .10". Whoops. Didn't even bother trying to cast this one.

Here is the latest version. Instead of filleted inside corners, I used chamfers to help with the draft angles for removing the epoxy casting. I'm sure it's going to be a pain to remove, so I ordered releasing agent. Fingers crossed. I placed a bent piece of silicon bronze brazing wire to give me something to grab on to when removing it.


Going to let it cure a couple of days before trying to remove it
This has been quite a learning experience. I'm 3D printing a mold, and casting with a mix of silicone and corn starch. It works surprisingly well, but still not good enough. It is a little too flimsy in the lettering and pieces rip off or it doesn't completely fill the mold. I just printed my fourth iteration last night, each time making adjustments to letter depth, thickness, etc. I'm getting tired of the silicone not working well, so I'm waiting on epoxy and releasing agent to come in tonight to try and make a solid stamp. Who knows if it's going to work hah.
First was ABS since it was all I had
Second was PLA. Printed MUCH nicer, and I made the letters wider. SW kept crashing when I was making the flower lines thicker, so I couldn't fix that.
I tried the silicone 3 times with this one, all with varying degrees of success.
The third iteration I fixed the flower, but screwed up the depth. Made it .01" instead of .10". Whoops. Didn't even bother trying to cast this one.
Here is the latest version. Instead of filleted inside corners, I used chamfers to help with the draft angles for removing the epoxy casting. I'm sure it's going to be a pain to remove, so I ordered releasing agent. Fingers crossed. I placed a bent piece of silicon bronze brazing wire to give me something to grab on to when removing it.
Going to let it cure a couple of days before trying to remove it
HPRifleman
Member Emeritus
I had dry erase markers that were shoved in a drawer because I didn't have a handy place to put them near the board. So I modeled and printed this thing.

There are four square sockets accessible from the front that each hold a NdFeB magnet. Each socket has crush ribs to hold the magnet in place. I also think the clear material gives it a unique look.
There are four square sockets accessible from the front that each hold a NdFeB magnet. Each socket has crush ribs to hold the magnet in place. I also think the clear material gives it a unique look.
draco_1967
Well-known member
Have you considered printing the stamp in TPU or other flexible filament? I have no idea if it would work well, or not, just throwing a thought out there.Been finding some ways to get more use out of my printer. My fiancee and I decided that since we're moving her out here ($), getting married ($$), building our house ($$$), that we're going to keep Christmas low budget this year and do homemade gifts. She's a book worm, so I'm making her a stamp so she can stamp all of her books.
This has been quite a learning experience. I'm 3D printing a mold, and casting with a mix of silicone and corn starch. It works surprisingly well, but still not good enough. It is a little too flimsy in the lettering and pieces rip off or it doesn't completely fill the mold. I just printed my fourth iteration last night, each time making adjustments to letter depth, thickness, etc. I'm getting tired of the silicone not working well, so I'm waiting on epoxy and releasing agent to come in tonight to try and make a solid stamp. Who knows if it's going to work hah.
First was ABS since it was all I had
Second was PLA. Printed MUCH nicer, and I made the letters wider. SW kept crashing when I was making the flower lines thicker, so I couldn't fix that.
I tried the silicone 3 times with this one, all with varying degrees of success.
The third iteration I fixed the flower, but screwed up the depth. Made it .01" instead of .10". Whoops. Didn't even bother trying to cast this one.
Here is the latest version. Instead of filleted inside corners, I used chamfers to help with the draft angles for removing the epoxy casting. I'm sure it's going to be a pain to remove, so I ordered releasing agent. Fingers crossed. I placed a bent piece of silicon bronze brazing wire to give me something to grab on to when removing it.
Going to let it cure a couple of days before trying to remove it
Bodj Built
Well-known member
It just occurred to me last night hah. I actually just printed it in PLA last night and it works fairly well. It just doesn't hold ink for more than one stamp. I'll get pictures up later.Have you considered printing the stamp in TPU or other flexible filament? I have no idea if it would work well, or not, just throwing a thought out there.
slodat
ALLIANCE MEMBER
The HF Icon tool chest has very shallow drawers I dare say it’s a huge oversight on their part to make them <2” deep. This means the 2” Schaller bins are too tall. I use these bins all over the shop. So.. 1.5” bins and some PETG it is!

Checked status when I woke up this morning via the OctoPi. Looking good!

Fresh off the printer. I am getting some stringyness. Not enough to bother me for this application. Not sure what the deal is. I don't really want to fiddle with it either.

In their new home, clearing just fine.

Checked status when I woke up this morning via the OctoPi. Looking good!
Fresh off the printer. I am getting some stringyness. Not enough to bother me for this application. Not sure what the deal is. I don't really want to fiddle with it either.
In their new home, clearing just fine.
Bessy
Well-known member
Just out of curiousity, has anyone come across a good STL for socket rails? I've got some loose sockets that don't fit my Hansen style organizers that have found their way onto the silly sheet metal rails. I'm still short two clips to hold everything on a rail. So I am wondering if anyone has printed a clip that would fit a 3/8 socket by chance?
Attachments

Bad Habit
Well-known member
Won't have my printer (Prusa) for a couple of months, then assemble, then melt a bunch of PLA learning how to use it. But no reason not to scour the interwebs finding things to print, maybe even some useful stuff. Came across this vice (physical kind, I already have plenty of the other kind), I'm thinking something like this could come in real handy, and would make a fun project in and of itself.
I was 5 hours into a 6.5 hour PLA print yesterday when the print head started clicking. None of the trouble shooting fixed it so I ended up replace the pfte tube and decided to switch from PLA to Prusament PETG on my Mk3s+.
I used the prusament petg setting in slicer and just printed a tiny box as a test. I have done a few dozens prints with PLA and the textured print surface always looked brand new after removing the piece and using 99% IPA. I printed this box with PETG, let the bed cool and when I popped the box off, a tiny amount of the first layer stuck. I used the scraper for a second and IPA and print bed was left with these smears which IPA do nothing to remove.
Being brand new and PETG and 3D printing for that matter, was curious best way to clean this stuff off the print bed so I can do next print.
Attachments
PelicanPines
ALLIANCE MEMBER
Sorry Jim, missed this comment till now. There are videos saying crimping is the way to go.Pines, would soldering/tinning the wire ends work as well or should they be crimped?
It's like the thing where there are TWO CAMPS ... solder your crimp ends AFTER you crimp. I'm in the Just positively CRIMP and send it to the moon as done.
PelicanPines
ALLIANCE MEMBER
I have looked but only found trays... no rails. Google is your friend.Just out of curiousity, has anyone come across a good STL for socket rails? I've got some loose sockets that don't fit my Hansen style organizers that have found their way onto the silly sheet metal rails. I'm still short two clips to hold everything on a rail. So I am wondering if anyone has printed a clip that would fit a 3/8 socket by chance?
Can't tell...are you using the smooth sheet? PETG works best on the textured sheet
Well shoot, indeed that is the smooth sheet I was using. I have a new textured sheet that came with it when I ordered, and which sheet to use escaped my mind before I went to print. I have done a little more researching and Prusa help pages talks about using kitchen scrub pad or 400-600 grit sandpaper in circular motion to clean up these smooth sheets if they get a lot of wear. Hopefully I can get the residue off without those aggressive methods.
vpd66
Well-known member
I have a PEI smooth spring steel sheet on my Ender 3 and every 10 prints or so I clean it with a green Scotch brite pad, dish washing soap and warm water then with 91% IPA. I get some filament build up every once in a while but not too much. The worst time I had that happen is when the nozzle was too close to the bed. The first layer was actually so thin it was transparent and I was printing green PETG. The purge line and skirt were so stuck I had to scrub for quite a while to get it all off. Raise your nozzle a touch and I'm sure it will go away.Well shoot, indeed that is the smooth sheet I was using. I have a new textured sheet that came with it when I ordered, and which sheet to use escaped my mind before I went to print. I have done a little more researching and Prusa help pages talks about using kitchen scrub pad or 400-600 grit sandpaper in circular motion to clean up these smooth sheets if they get a lot of wear. Hopefully I can get the residue off without those aggressive methods.
I printed one of those in the early part of the year. Was a fun print but before starting make sure your printer tolerances are tight and repeatable. There are a lot of interlocking dovetails and the smallest over extrusion or surface bump means they don't slide together well or at all. All in all it does what it is suppose to, it's a conversation piece on my office desk at this point though.Won't have my printer (Prusa) for a couple of months, then assemble, then melt a bunch of PLA learning how to use it. But no reason not to scour the interwebs finding things to print, maybe even some useful stuff. Came across this vice (physical kind, I already have plenty of the other kind), I'm thinking something like this could come in real handy, and would make a fun project in and of itself.
Bought my ender 3 pro a couple months ago and its been running around the clock, very addicting hobby
Attachments
-
 1A3E47CD-B0FE-45EE-A537-B18D266C6797.jpeg295.4 KB · Views: 69
 -
 6C4A7108-AEF1-4AE8-A875-FE1D43D28806.jpeg366.2 KB · Views: 70
 -
 281523F7-07D8-4540-A7F5-B4F653642315.jpeg252.5 KB · Views: 67
 -
 FE0DE46B-A2D0-4506-B3B3-BA2AD8A94B71.jpeg408.9 KB · Views: 85
 -
 F1E71B77-EBC0-4BB0-84C9-8DB7B9A46755.jpeg316.6 KB · Views: 92
 -
 E2B90E48-FBB8-4BCB-ACD7-6D0F47971982.jpeg288.5 KB · Views: 92
 -
 B245C440-A4D7-4DA6-9715-E811255801D6.jpeg306.4 KB · Views: 83
 -
 68194786-D888-429A-B455-8DA5D2E29839.jpeg467.5 KB · Views: 71
harley jim
Well-known member
Thanks, Pines
Yippee as just received the shipping notice for my Prusa i3 MK3S!!!
I was hoping it would ship quicker than the original early Jan. estimate as I am light duty for a month (no real garage work) and this new toy will help keep me occupied.
I was hoping it would ship quicker than the original early Jan. estimate as I am light duty for a month (no real garage work) and this new toy will help keep me occupied.
Bad Habit
Well-known member
Yeah, got my notice yesterday. We'll see how long it takes to travel half way across the world during the holidaysYippee as just received the shipping notice for my Prusa i3 MK3S!!!
I was hoping it would ship quicker than the original early Jan. estimate as I am light duty for a month (no real garage work) and this new toy will help keep me occupied.
AffableCurmudgeon
Well-known member
While you wait for the printers, if you haven’t played with Fusion 360 already, start playing with it. Makes the printer way more fun!
Yippee as just received the shipping notice for my Prusa i3 MK3S!!!
I was hoping it would ship quicker than the original early Jan. estimate as I am light duty for a month (no real garage work) and this new toy will help keep me occupied.
Yeah, got my notice yesterday. We'll see how long it takes to travel half way across the world during the holidays
Firebrick43
Well-known member
It makes a difference in bigger wires, nothing more agravating that not being able to put it into a terminal to screw it down because its to wide. Even the 4 jaw of that style is not correct. it needs to be more of a u shape from crimpers like the first one. The third one works ok to.I have a similar set, though I chose to get the 4-die bootlace crimper, rather than the 6-die. It seemed to me that a square profile under a screw would be better than a hex, but I doubt there's all that much difference.

Yep as I downloaded it right after making the purchase and have a growing list of items to print. Slowly figuring it out and was able to design a couple tool holders along with several things from Thingiverse.While you wait for the printers, if you haven’t played with Fusion 360 already, start playing with it. Makes the printer way more fun!
Firebrick43
Well-known member
Do you have the stl or a link to it?I had dry erase markers that were shoved in a drawer because I didn't have a handy place to put them near the board. So I modeled and printed this thing.
There are four square sockets accessible from the front that each hold a NdFeB magnet. Each socket has crush ribs to hold the magnet in place. I also think the clear material gives it a unique look.
Bad Habit
Well-known member
Actually, started trying to learn it before I ordered. Got myself up to the point of being piss poor with it so farWhile you wait for the printers, if you haven’t played with Fusion 360 already, start playing with it. Makes the printer way more fun!
")
rlitman
Well-known member
Except that a bootlace terminal is not a freestanding crimp. I use indent and hex crimps extensively at work, and have sectioned several to verify under magnification that they're properly calibrated, so I have some crimp experience.It makes a difference in bigger wires, nothing more agravating that not being able to put it into a terminal to screw it down because its to wide. Even the 4 jaw of that style is not correct. it needs to be more of a u shape from crimpers like the first one. The third one works ok to.
Crimps need to compress the individual round drawn copper strands into sufficiently tight fitting hexagons so that the interstitial spaces are be too small to admit oxygen, and ALSO maintain permanent positive pressure packing the copper together for the rest of its service lifetime. A bootlace terminal has the screw pressure to keep it together when in service, so it is a lot more forgiving. The bootlace serves the purpose of preventing strands from escaping the pressure of the screw clamp, as well as providing an oxygen barrier, but the strand compression can be finished at installation.
HPRifleman
Member Emeritus
I will look for the file when I go back to work in January.Do you have the stl or a link to it?
MadeByMiller
Well-known member
I recently printed my friend @davemoneysign's desk clock design. It was truly a joy to print and I love looking at it on the corner of my desk. I printed it on my Prusa i3 mk3s+ using 3D Fuel filament. Prior to printing, I uploaded Dave's .stl files to Fusion 360 to mock up filament colors. I used Prusa's Gcode viewer software to export the trim plate's gcode as an .obj so I could visualize which exposed infill pattern I wanted. Check it out on his Prusa Printersprofile, you won't be disappointed!


Bad Habit
Well-known member
Well, with Fedex, the last mile is the usually toughest. Shipment made it to the US, got a notice it was being held up in customs, then that it was released. They're saying it'll be here tomorrow...(a little scared to think what the customs folks did to it though...)Yeah, got my notice yesterday. We'll see how long it takes to travel half way across the world during the holidays
txvwnut
Well-known member
MBM that clock is awesome.
MadeByMiller
Well-known member
Dave did an awesome job on the design, it was really too easy to just print and assemble it!MBM that clock is awesome.