rixtrix1
Well-known member
Doesn't that height get you in trouble with the FAA? Otherwise, cool!


 Having the work bench on the side wall came with all kinds of problems. The fuse panel was in the way and the bench would have extended 7 inches into the doorway.
 Lots of work, but everything is coming down and moving to the back wall. My garage is only 19 1/1 feet deep, so losing 2 feet is going to make it hard to park a full size car in it. My future Lotus will fit just fine.


 After breakfast we loaded up the boys and headed out to the park for some RC plane action. The P51 fly's amazing even when the wind kicked up a bit. I'm still nervous that I'm going to lawn dart it, but its so much fun.


 I think I got a system down that will work without messing anything up. For right now I'm only putting 2 screws per panel until they are all up.


 I'll find another one some day.
 The Snap on went pretty easy. Only took 3 hours to get mounted, perfectly level and placed right.


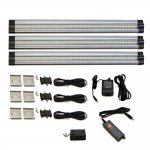
I picked up the Lightkiwi T1228 Under Cabinet Lighting 42 LED 24V Warm White 3 Panel Premium Kit a couple of years ago. It is kind expensive, but its output is really good. I looked at the string led lights, but they would not have worked with my setup. Those lista/vidmar cabinets are awesome with the built in dividers. I got the drop in holders and they are nice too.
My cousin came over yesterday to help me out. I picked up the Butter block in the morning and looked at new cabinets for the kitchen. Gotta keep the wife happy. We set it up outside and I sealed the bottom,back and sides. Layed it on thick and a goppy. After it had dried we routed all the exposed edges top and bottom with the smallest bit we could find. With two of us it wasn't that bad to tilt it up on an edge.