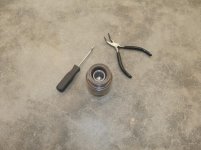
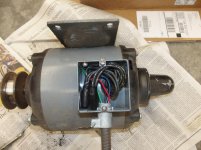
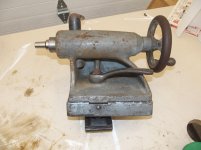
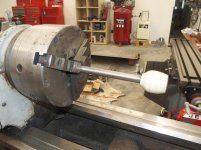
To avoid these ads, REGISTER NOW!

Above 1200 Sq/FT The Lone Beech Garage (60x46x16)

Wokspaces above 1200 squarefeet.
OP
S

sbosecker

Well-known member
Joined
Sep 25, 2012
Messages
3,539
Location
Peachtree City, GA
Re: The Lone Beech Garage Build Thread (60x46)

Saturday - December 23, 2017


Well... last night I came into the house from the shop to research how to reattach the collar of the Jacobs 633C to the chuck itself.

I am pretty sure I went all the way to the end of the internet and I didn't find any help. I can't believe I'm the only person that has tried to do this but Googling a plethora of search terms was to no avail.


20171223-01.jpg

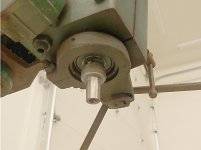
The issue is this trapped retaining ring inside the collar. This side of the collar faces the chuck.


20171223-02.jpg

That has to snap into the groove - black arrow - milled into the shaft of the chuck. The shaft has an internal 33 Jacobs Taper (JT33). The red arrow points to a chamfer that may be useful when attempting to get the clip onto this shaft.


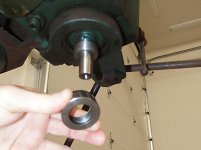
20171223-03.jpg

This is what it looks like from the top of the chuck with the collar sitting on the shaft. I've got to get that retaining ring down the shaft to that groove (black arrow above).

I goofed around with the snap ring pliers and some picks this morning and really didn't get far. I don't know if another set of hands would help - it's pretty crowded with just two.

Do I need to fabricate a tool? Something like a tube, the outer diameter of which would just clear the inner diameter of the collar and has just enough thickness to clear the outer diameter of the shaft. Using a tube like that could I press down and force the snap ring over the shaft's taper and down to the groove which it would then snap into?

I mean, they had to do this somehow in the factory... how else would they do it?


Scott
 
Last edited:
To avoid these ads, REGISTER NOW!

EdT

Well-known member
Joined
Sep 21, 2010
Messages
1,104
Location
North Georgia
Re: The Lone Beech Garage Build Thread (60x46)

I have the same drill press. I had it apart, but either I didn't separate the chuck from the collar or putting together was not a problem. Can't remember which. I would think, as you suggested, that a tubular tool whose OD is smaller than the ID of the threads and whose ID is bigger than the boss on the top of the chuck would get you there. Place chuck in vise (or something). Place collar with square retaining ring in position on the chuck. Slide the tube down 'til it contacts the ring and then tap on or press on the end of the tube to expand the ring over the rounded shoulder on the chuck. Bit of oil on the parts couldn't hurt. Of course, that won't work if the diameters are not as I would guess they are. I'm sure you'll figure it out or some one will chime in with a more definitive answer.
I hope the VS drive on yours in quieter than the drive on mine which sounds "unhappy" especially at the low end of the speed range. Guess I'll have to put it on my list of things to work on someday.
 

larry_g

Well-known member
Joined
Apr 28, 2007
Messages
16,893
Location
oregon
Re: The Lone Beech Garage Build Thread (60x46)

I would think that you could put a spacer between the ends of the retaining ring to hold it open while you slipping it on. Once on remove the spacer. The spacer could be a flat blade screwdriver maybe or a Popsicle stick? What did you use to open the ring to remove the collar?

lg
no neat sig line
 

matt_i

Well-known member
Joined
Mar 14, 2008
Messages
10,744
Location
SE Michigan
Re: The Lone Beech Garage Build Thread (60x46)

It seems like only one solution is possible...with chuck held vertical, install the threaded collar first. Then compress the snap-ring and place into bore. Then allow the snap ring to expand and hold the grooves in alignment.

Some measurement is in order but I bet a thin tube section that could hold the snap-ring fully compressed on its ID would then have enough clearance on its OD to be inserted and then the snap ring allowed to be pushed out the free end of the tube and fully expand.

Consider that a tube made of steel banding (probably .020-.030" thick) has enough strength to hold the snap ring in compression.

One could turn that part carefully from a tube or even a solid with extremely light cuts at the end. Fabricating it from sheet stock is more challenging...I've used a similar technique to pre-compress U-cups used in hydraulic cylinders, to get them past the threads and into their seal glands. The coarse threads would slice the cups if they were simply pushed thru.
 
Last edited:

drivesitfar

Well-known member
Joined
Oct 23, 2013
Messages
36,060
Location
Pacific Northwest
Re: The Lone Beech Garage Build Thread (60x46)

SB: it's been a fun year following along with you with all that's going on in the LONE BEECH GARAGE. i'm learning a lot more than helping, but we both seem to be alive and kicking after another year which is a good thing as we get older so keep up the good work.

take care and have a very MERRY CHRISTMAS!!

also good luck with the fix on your drill chuck or maybe finding a replacement that will be easier to change and use might be a better option.

cheers
 
OP
S

sbosecker

Well-known member
Joined
Sep 25, 2012
Messages
3,539
Location
Peachtree City, GA
Re: The Lone Beech Garage Build Thread (60x46)

I have the same drill press. I had it apart, but either I didn't separate the chuck from the collar or putting together was not a problem. Can't remember which. I would think, as you suggested, that a tubular tool whose OD is smaller than the ID of the threads and whose ID is bigger than the boss on the top of the chuck would get you there. Place chuck in vise (or something). Place collar with square retaining ring in position on the chuck. Slide the tube down 'til it contacts the ring and then tap on or press on the end of the tube to expand the ring over the rounded shoulder on the chuck. Bit of oil on the parts couldn't hurt. Of course, that won't work if the diameters are not as I would guess they are. I'm sure you'll figure it out or some one will chime in with a more definitive answer.
I hope the VS drive on yours in quieter than the drive on mine which sounds "unhappy" especially at the low end of the speed range. Guess I'll have to put it on my list of things to work on someday.


EdT,

Thanks - I may have thought of another approach that would require less machining.

I can't speak to the noise of the Reeves Drive quite yet. My machine will run but the speed cannot be changed due to a broken casting. I have an eBay replacement casting but I haven't gotten it installed yet,


Best regards,

Scott
 
OP
S

sbosecker

Well-known member
Joined
Sep 25, 2012
Messages
3,539
Location
Peachtree City, GA
Re: The Lone Beech Garage Build Thread (60x46)

I would think that you could put a spacer between the ends of the retaining ring to hold it open while you slipping it on. Once on remove the spacer. The spacer could be a flat blade screwdriver maybe or a Popsicle stick? What did you use to open the ring to remove the collar?

lg
no neat sig line

lg,

I'll look into this approach but I don't think I have enough room inside the collar to do what your suggesting.

I got the ring out with a snap ring pliers. I think the only reason I was able to do that was because the retaining ring was in the groove at the time. It may have helped keep the retaining ring under control while it was being force open. (i.e. the retaining ring could only move horizontally as it was spreading open)

Best regards,

Scott
 
OP
S

sbosecker

Well-known member
Joined
Sep 25, 2012
Messages
3,539
Location
Peachtree City, GA
Re: The Lone Beech Garage Build Thread (60x46)

It seems like only one solution is possible...with chuck held vertical, install the threaded collar first. Then compress the snap-ring and place into bore. Then allow the snap ring to expand and hold the grooves in alignment.

Some measurement is in order but I bet a thin tube section that could hold the snap-ring fully compressed on its ID would then have enough clearance on its OD to be inserted and then the snap ring allowed to be pushed out the free end of the tube and fully expand.

Consider that a tube made of steel banding (probably .020-.030" thick) has enough strength to hold the snap ring in compression.

One could turn that part carefully from a tube or even a solid with extremely light cuts at the end. Fabricating it from sheet stock is more challenging...I've used a similar technique to pre-compress U-cups used in hydraulic cylinders, to get them past the threads and into their seal glands. The coarse threads would slice the cups if they were simply pushed thru.

matt_i,

I think - if I'm correctly understanding your suggestion - that you may have misinterpreted the problem.

The retaining ring doesn't need to be compressed to fit inside a tube's internal groove, at the moment it is captured inside the collar and it needs to be expanded to slide over a shaft with an external groove.

Once the retaining ring is in place, it keeps the collar and the chuck together with a loose, rattling fit. Its purpose seems to be to keep the chuck from flying off the Drill Press's spindle should the JT33 Taper lose its grip.

Forgive me if I'm not understanding your solution properly.

Best regards,

Scott
 
Last edited:
OP
S

sbosecker

Well-known member
Joined
Sep 25, 2012
Messages
3,539
Location
Peachtree City, GA
Re: The Lone Beech Garage Build Thread (60x46)

SB: it's been a fun year following along with you with all that's going on in the LONE BEECH GARAGE. i'm learning a lot more than helping, but we both seem to be alive and kicking after another year which is a good thing as we get older so keep up the good work.

take care and have a very MERRY CHRISTMAS!!

also good luck with the fix on your drill chuck or maybe finding a replacement that will be easier to change and use might be a better option.

cheers

DrivesItFar,

Thanks for the kind words and a very Merry Christmas to you!

Best regards,

Scott
 
OP
S

sbosecker

Well-known member
Joined
Sep 25, 2012
Messages
3,539
Location
Peachtree City, GA
Re: The Lone Beech Garage Build Thread (60x46)

Sunday - December 24, 2017

I'm going to post a few more pictures to help (hopefully) describe more completely the rather odd Spindle/Chuck arrangement on the Powermatic 1150 Drill Press.


20171221-02.jpg

The Powermatic 1150 with the Jacobs 633C Drill Chuck installed.


20171224-01.jpg

The Powermatic 1150 with the Jacobs 633C Drill Chuck removed. This shows the JT33 Taper with the threads above that the collar screws onto.


20171224-02.jpg 20171224-03.jpg

The collar separated from the chuck itself - not the normal situation due to the retaining ring inside the collar.


20171223-02.jpg

The Black Arrow points to the groove the retaining ring needs to be installed in.


20171223-01.jpg

A picture showing the retaining ring "captured" inside the collar.


20171223-03.jpg

The collar sitting on top of the chuck. The roughly concentric Retaining Ring sitting on top of the Chuck's shaft.


I may have had an epiphany as I was answering these suggestions this evening. The realization that the problem I'm having is that as I attempt to expand the retaining ring the ring had a tendency to rotate upwards on the opposite side. If I took a 1-inch OD flat washer and ground off a bit less than half of its diameter I might have a tool that I could use to keep the retaining ring from rotating up while still being able to access the split part of the ring with my snap ring pliers. Expanding the retaining ring with the washer blocking the ring's upward movement might allow the ring to be expanded enough to slide down to the groove in the shaft.

I'll have to see if I have a washer in my hardware cabinet that's the right size to try this approach.


Scott
 
Last edited:

drivesitfar

Well-known member
Joined
Oct 23, 2013
Messages
36,060
Location
Pacific Northwest
Re: The Lone Beech Garage Build Thread (60x46)

SB: would maybe a entirely new CHUCK be a better solution? sounds like you might be figuring it out and hopefully if you get it back together you won't have to take if off for a long while.

in case you forgot what SNOW looks like we had about 3 or 4 inches of the stuff dropped on us last night so we will be having a WHITE CHRISTMAS this year.

our 3 small grandkids (2, 4, & 6) played out in our front yard for a couple hours from about 8pm to 10pm and had a great time. we rarely have snow so it was sure cute when the 4 & 6 year old were using a spoon to put some snow in a plastic cup so they could save it in our freezer until later.

cheers
 

Attachments

  • snow day 2 (2).jpg
    snow day 2 (2).jpg
    153.5 KB · Views: 60
  • snow day 3 (2).jpg
    snow day 3 (2).jpg
    152.3 KB · Views: 55
OP
S

sbosecker

Well-known member
Joined
Sep 25, 2012
Messages
3,539
Location
Peachtree City, GA
Re: The Lone Beech Garage Build Thread (60x46)

SB: would maybe a entirely new CHUCK be a better solution? sounds like you might be figuring it out and hopefully if you get it back together you won't have to take if off for a long while.

in case you forgot what SNOW looks like we had about 3 or 4 inches of the stuff dropped on us last night so we will be having a WHITE CHRISTMAS this year.

our 3 small grandkids (2, 4, & 6) played out in our front yard for a couple hours from about 8pm to 10pm and had a great time. we rarely have snow so it was sure cute when the 4 & 6 year old were using a spoon to put some snow in a plastic cup so they could save it in our freezer until later.


DrivesItFar,

Buy a new Chuck?!?

Egad man!!! Death before dishonor!

Ha!

I think a NEW chuck may be out of the question as the Jacobs 633C appears to be an abandoned design. Several used examples on eBay... don't ask me how I know this as it will pretty much shoot down my imperative "Death before dishonor" statement.

Regarding snow...

This year I am very familiar with snow as we had a dose in Georgia on December 9th.


2017 12 09 - Snow On Truck in Delta Parking Lot.jpg

Here's how I found my truck in the Delta parking lot when I got back from Rome, Italy late in the afternoon of the 9th. This slowed my departure from work.

Glad to hear the grandkids got to play in the snow: Special stuff!


Best regards,

Scott
 
Last edited:
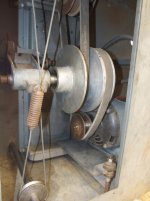
OP
S

sbosecker

Well-known member
Joined
Sep 25, 2012
Messages
3,539
Location
Peachtree City, GA
Re: The Lone Beech Garage Build Thread (60x46)

Monday - December 25, 2017 - Morning

20171225-01.jpg 20171225-02.jpg

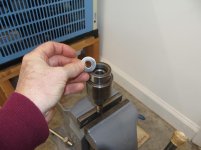
This morning I went down to the basement where the Equipto cabinet that I store hardware in lives. I selected a promising flat washer and walked out to the LBG to see if the washer would fit into the Jacobs 633C Drill Chuck's collar. It fit very nicely.


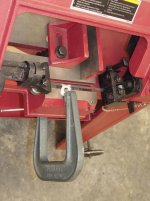
20171225-03.jpg 20171225-04.jpg

I used a deep C-Clamp to secure the washer in a position to be cut.


20171225-05.jpg

With a segment of the washer cut away, I dropped it into the collar which was resting on the chuck itself.


20171225-06.jpg

Ahhhh, victory!

It didn't give in without a bit of a struggle but, by using the washer to keep the retaining ring from rotating up, I was able to use the angled nose pliers to force the ends of the retaining ring down into the shaft's groove. Then, while continuing to apply downward pressure on the washer, I rotated the washer and used the pick to push the retaining ring down until it snapped into position.

I think when I was fighting with it yesterday I may have stretched the retaining ring a bit but it is still functional for this application.


20171225-07.jpg

I threaded the chuck - loosely - back on to the Powermatic 1150 Drill Press.


Scott


Key Words: Jacobs 633C Drill Chuck Collar Retaining Ring Snap Ring Installation
 
Last edited:
OP
S

sbosecker

Well-known member
Joined
Sep 25, 2012
Messages
3,539
Location
Peachtree City, GA
Re: The Lone Beech Garage Build Thread (60x46)

Monday - December 25, 2017 - Afternoon

After being momentarily distracted this morning by the Jacobs 633C Drill Chuck, I was able to turn my full attention to the Rockwell Metal Lathe this afternoon.


20171225-11.jpg 20171225-12.jpg 20171225-13.jpg

I threaded the 3 power wires & ground through the original flexible conduit to the motor. The motor did not have a grounding wire when I opened it up but I thought it best to run one into the box and attach it to the obvious grounding screw. I attached the power wires to their appropriate motor connections and buttoned up the motor's electrical box.


20171225-14.jpg

I did a little house cleaning inside the cabinet.


20171225-15.jpg 20171225-16.jpg

Then I mounted the motor to its mounting plate and hooked up the drive belt. I think one can see that it would be virtually impossible to work on the motor's wiring when it is in its working position in the cabinet.


Continued in next post...
 
OP
S

sbosecker

Well-known member
Joined
Sep 25, 2012
Messages
3,539
Location
Peachtree City, GA
Re: The Lone Beech Garage Build Thread (60x46)

Continued...


20171225-21.jpg

I had run the motor's power wires through the hole in the rear of the cabinet and secured the flexible conduit to the cabinet.


20171225-22.jpg 20171225-23.jpg

I hooked up the power wires to the TECO FM50 Variable Frequency Drive (VFD). I made sure the Lathe's spindle was disengaged via the Drive Selector & the Lathe's Speed Selector was at the lowest speed, then I plugged in the VFD via some temporary wiring.

I returned to the Lathe's drum switch - took a deep breath - and turned the switch on. The motor spun up and the Lathe's Reeves Drive started spinning. I rotated the Speed Selector and the Reeves Drive responded correctly. No disturbing noises or mechanical violence ensued as the speed was varied.

Cool.

I went to the Drum Switch and turned off the motor. I went back to the lathe and selected Direct on the Lathe's Drive Selector. I returned to the Drum Switch and turned it on.

I made a video of the results. Click HERE for the video.

REALLY cool!

I was pleased that the Lathe seemed to be working fine.

I turned off the Drum Switch again, selected the back gears via the Lathe's Drive Selector, then turned the Drum Switch back on.

The Lathe worked as it should but there was a intermittent rattle as I increased the speed via the Reeves Drive. I intend to get a light and peer into the headstock to see what's making that noise ...but that's for another day.

A truly enjoyable day in the Lone Beech Garage!

Merry Christmas!


Scott
 
Last edited:

drivesitfar

Well-known member
Joined
Oct 23, 2013
Messages
36,060
Location
Pacific Northwest
Re: The Lone Beech Garage Build Thread (60x46)

SB: WELL DONE!! your little investment is turning out to be a nice machine and looking forward to seeing how it works once you have a project to make with it. is maybe the little off sound from a loose belt on the motor or is that normal or ?? definitely not a terrible noise and BIG CONGRATS that it's running.

hope your Christmas was enjoyable and looking forward to 2018 as you get more of the Lone Beech garage machines located and working after you spent a lot of quality time setting them up.

cheers
 
OP
S

sbosecker

Well-known member
Joined
Sep 25, 2012
Messages
3,539
Location
Peachtree City, GA
Re: The Lone Beech Garage Build Thread (60x46)

It’s so cool bringing an old inop machine back from the dead!

SB: WELL DONE!! your little investment is turning out to be a nice machine and looking forward to seeing how it works once you have a project to make with it. is maybe the little off sound from a loose belt on the motor or is that normal or ?? definitely not a terrible noise and BIG CONGRATS that it's running.

hope your Christmas was enjoyable and looking forward to 2018 as you get more of the Lone Beech garage machines located and working after you spent a lot of quality time setting them up.

cheers


1949caddyman & DrivesItFar,

Thanks guys!

Still lots to do but it was very satisfying to get the old girl spinning again.

Noises certainly need to be investigated. When I put the motor back in the cabinet, I adjusted its location from where it had been when it came out. I didn't feel that the pulleys were parallel in the old position. The belt to the motor seemed looser than it should be but I will adjust that as well. Some of the noise may be attributed to belts that were moving after having been in the same position for God only knows how many years. There may have been a little "belt position memory" at first. I haven't noticed the "thumping" noise the past couple of times I have run the machine.

Happy New Year guys!

Scott
 
To avoid these ads, REGISTER NOW!
OP
S

sbosecker

Well-known member
Joined
Sep 25, 2012
Messages
3,539
Location
Peachtree City, GA
Re: The Lone Beech Garage Build Thread (60x46)

Thursday - December 28, 2017


20171226-01.jpg 20171226-02.jpg

On Tuesday a confirmation arrived in the mail of my growing confidence in the Metal Lathe being a keeper rather than a donor of parts. An eBay acquired wrench that locks the tailstock to the lathe's bed. I figure once I start spending money on the lathe, the odds of it becoming a parts donor diminish rapidly.


20171226-03.jpg 20171226-04.jpg 20171226-05.jpg

With the Lathe now under power, I really need to get the proper greases and oils to service it before using it to any degree. I am working on that. Yet, I couldn't resist using the lathe for just a bit to clean up the rusty down-feed handles on the Powermatic 1150 Drill Press. A little emery cloth and some rotational energy did wonders.


20171226-06.jpg 20171226-07.jpg

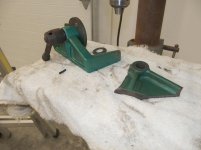
Since the drill press was getting some love, I decided to continue that by finally cleaning up the eBay acquired variable speed control bracket. The drill press's bracket was broken when I got it back in May of '16. I used the wire wheel on a stationary grinder and the angle grinder to remove as much of the old paint as I could. A hand held wire brush was used in the corners.

This thing will be under a cover so it really didn't need any paint as no one will see it. Still, the thought of that gold thing under the green cover would have bothered me a bit. Hence, the cleanup (such as it is) and priming for some new paint.


Continued in next post...
 
Last edited:
OP
S

sbosecker

Well-known member
Joined
Sep 25, 2012
Messages
3,539
Location
Peachtree City, GA
Re: The Lone Beech Garage Build Thread (60x46)

Continued...

While the primer was drying for 48 hours (per the instructions) I researched substitute greases and oils for the lubricants called for in the 1968 owners manual. These items haven't been in production for a long time.

Oil: Texaco Regal BR&O

Grease: Texaco Regal Starfak #2 & Texaco Marfak #0

The Marfak #0 is going to be particularly challenging as it is a NLGI Grade 0 grease. It looks like an equivalent would be Mobilgrease XHP 220 but I haven't been able to find that in anything smaller than a 5 gallon pail.


Another item I researched today was...

What the heck became of my JET X-Axis Powerfeed warranty replacement. The request was made December 11th.
A few days ago I had sent a follow-up email to check on the status. No response.
Today I made a phone call and spoke directly to the gentleman who had assisted me almost 3 weeks ago.
The short version... my email with the requested information needed to process the warranty replacement was in his SPAM folder.

Sigh... JET is processing the replacement now.


20171227-01.jpg

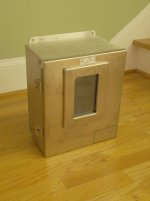
Yesterday I received an eBay purchase via FedEx Ground. A Hoffman A12106NFSS6 NEMA 4X Stainless Steel Box with a window. Purchased at retail, a ridiculously expensive box. At $28 on eBay plus shipping, something I could swallow to house my TECO FM50 Variable Speed Drive (VFD).

Was a window necessary?

No, but I thought it would be nice to be able to see the display of the VFD should I want to.


20171228-02.jpg

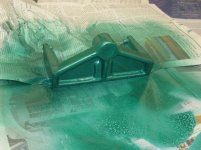
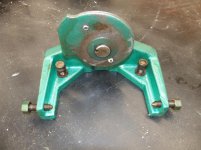
Today I returned to the shop and gave the Drill Press Bracket a dose of green paint. The Hammered Green Rustoleum comes pretty close to matching the Powermatic color.


20171228-03.jpg

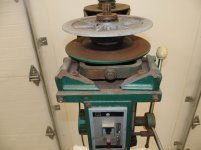
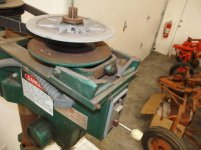
Here's a picture of the Drill Press's broken bracket. While the Drill Press will run, I cannot change speeds in its current state.


20171228-04.jpg

After I painted the bracket, I wanted to work on the Metal Lathe's Apron. Yesterday I had started to examine it closely to see if there were any obvious issues with the gears and such. I tried to exercise the levers on the Apron and found that the Eccentric Handle (arrow) would not move from the center detent. (This picture was taken after I dealt with this problem)

I looked at pictures taken of the lathe taken during its acquisition and the handle is in a different location so I knew it could be moved at one point after I received the lathe.


20171228-05.jpg

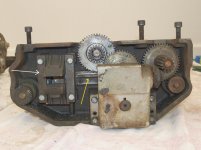
I had done some work on the half-nut mechanism (white arrow) shortly after getting the lathe. I had taken it off the apron and got it working properly. An examination of the gears and such caused me to concentrate on the rod (yellow arrow) as it looked like it should move back and forth - and it wouldn't move.


20171228-06.jpg

I removed some of the half-nut assembly.

The white arrow points to a notch ...which is on the wrong side of the cam mechanism if the rod is going to engage that notch.

Note to retired Rockwell engineers. You didn't make the half-nut cam mechanism Scott-Proof. I had a 50/50 chance to get it right and you know how that went.


20171228-07.jpg

I rotated the cam assembly about 180 degrees and reassembled the half-nut assembly. Now, when the half-nut is fully open, the Eccentric Handle could be moved throughout its 3-position range.


So that's fixed. Now I'm trying to figure out if the clutch lever is working properly... I don't think that it is.


Scott
 
Last edited:
OP
S

sbosecker

Well-known member
Joined
Sep 25, 2012
Messages
3,539
Location
Peachtree City, GA
Re: The Lone Beech Garage Build Thread (60x46)

Friday - December 29, 2017


20171229-01.jpg

The paint on the Powermatic Drill Press Variable Speed Selector Bracket was dry enough this evening to try to install it on the machine.


20171229-02.jpg

Getting the broken bracket & speed selector off the machine was a little more of a fight than I had expected but eventually it was freed.


20171229-03.jpg 20171229-04.jpg

I was hoping to get the new bracket and speed selector installed but the snap ring next to the selector cam was bent and needs to be replaced. I'll see if the local hardware store has one of these tomorrow.


20171229-05.jpg

Once a new snap ring is installed I will try to replace these broken parts with the new parts


Scott.
 
OP
S

sbosecker

Well-known member
Joined
Sep 25, 2012
Messages
3,539
Location
Peachtree City, GA
Re: The Lone Beech Garage Build Thread (60x46)

Saturday - December 30, 2017


20171230-01.jpg

Got an early start this morning and hit a local hardware store. I was pleased that they had a Retaining Ring for a 3/4" shaft as well as a 5/32" x 3/4" Spring Pin. The Spring Pin is for the Speed Selector Handle.


20171230-02.jpg 20171230-03.jpg

So I tried to assemble the Variable Speed Cam Bracket Assembly and ran into an issue. The second picture has an arrow that points to a groove in the shaft. The shaft's groove isn't exposed enough to allow the Retaining Ring to seat in the groove.

The Belleville Spring (conical washer) on the opposite side of the bracket needs to be compressed a bit to allow the groove to be exposed enough for the Retaining Ring to fit.

Sounds simple enough but... I fought it for a while and then took everything apart.


20171230-04.jpg 20171230-05.jpg

I thought maybe the Belleville Spring needed a smoother surface on the cam to allow it to compress. I also noticed that a damaged rivet (arrow) might be interfering with the spring as it tried to flatten out. I cleaned the corrosion off the cam and filed the damaged part of rivet flat with the cam.


20171230-06.jpg

Finally, with the help of my son, the Retaining Ring found its way into the groove. I had my son to apply pressure to the shaft while I persuaded the Retaining Ring to find the groove. It was still a fight but eventually we succeeded.


20171230-07.jpg

So now it was time to remove the old, broken bracket.


Continued in next post...
 
OP
S

sbosecker

Well-known member
Joined
Sep 25, 2012
Messages
3,539
Location
Peachtree City, GA
Re: The Lone Beech Garage Build Thread (60x46)

Continued...


20171230-11.jpg

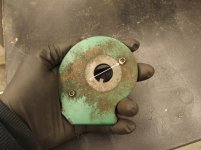
I reconstructed what was left of the shattered Cam Bracket. This damage occurred prior to my purchase and, although the sheet metal was damaged, I was unaware of this situation. Fortunately when I discovered the damage there was a replacement available on eBay for a very reasonable price.


20171230-12.jpg 20171230-13.jpg 20171230-14.jpg

I cleaned a little rust off the surface, got the fasteners situated, and got the repaired assembly into position.


20171230-15.jpg

Time to see if this thing works... I put on a full face visor for protection.

To watch a video of this howling thing, click HERE.

Might need some oil or grease somewhere. Ha!

...but it does work.


20171230-16.jpg

Now to try to repair - to some extent - the sheet metal.
I ain't never done any hammer & dolly work...
it's noisy!


Scott
 
Last edited:
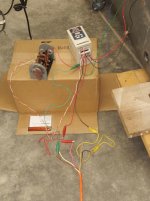
shortykorte

Well-known member
Joined
Sep 1, 2014
Messages
8,039
Location
Tallahassee, Fl
Re: The Lone Beech Garage Build Thread (60x46)

Happy New Years. Wow you’ve been busy. Good to see things moving forwards.


Sent from my iPhone using Tapatalk
 

gte718p

Well-known member
Joined
Mar 12, 2009
Messages
3,977
Re: The Lone Beech Garage Build Thread (60x46)

Merry New Years,

Somehow I have missed this build thread. I've spent the last two days catching up. Your build is truly impressive.

I will say I am a little suspicious of your claimed location. 120 pages and not a single picture of a golf cart and only one mention of golf carts. Seams unnatural for PTC. Just kidding. I went to school in Atlanta and had lots of friends whose parents were Delta pilots. I spent many vacations in the PTC. It truly is a nice area of the world.

If you haven't found him yet Keith Rucker has a You Tube the channel Vintage Machinery. He does a lot of work restoring machine tools of the same generation as your lathe. He is also only a couple three hours down the road in Tifton. He should be a good resource if you run into something you can't solve. Haven't met the man personally, but have learned a lot from his Youtube channel and traded emails with him about a part he was selling for my lathe and he seemed like a truly nice individual.
 

shortykorte

Well-known member
Joined
Sep 1, 2014
Messages
8,039
Location
Tallahassee, Fl
Re: The Lone Beech Garage Build Thread (60x46)

Gte718p thanks for the tip on Keith. He’s right up the road so I could stop in.


Sent from my iPhone using Tapatalk
 
OP
S

sbosecker

Well-known member
Joined
Sep 25, 2012
Messages
3,539
Location
Peachtree City, GA
Re: The Lone Beech Garage Build Thread (60x46)

Happy New Years. Wow you’ve been busy. Good to see things moving forwards.

shortykorte,

It was a good time in the shop there for a while! I do have a few personal & work obligations staring me in the face here in January so my progress will probably slow.

I am going to take a road trip tomorrow for another potential Craigslist treasure. We'll see how that turns out,

OWWM Rule #1 may come into play - which can be good or bad. That rule follows:

A seller standing beside a machine in broad daylight with access to all sides, cannot/will not describe the machine correctly.

Best regards,

Scott
 
OP
S

sbosecker

Well-known member
Joined
Sep 25, 2012
Messages
3,539
Location
Peachtree City, GA
Re: The Lone Beech Garage Build Thread (60x46)

Merry New Years,

Somehow I have missed this build thread. I've spent the last two days catching up. Your build is truly impressive.

I will say I am a little suspicious of your claimed location. 120 pages and not a single picture of a golf cart and only one mention of golf carts. Seams unnatural for PTC. Just kidding. I went to school in Atlanta and had lots of friends whose parents were Delta pilots. I spent many vacations in the PTC. It truly is a nice area of the world.

If you haven't found him yet Keith Rucker has a You Tube the channel Vintage Machinery. He does a lot of work restoring machine tools of the same generation as your lathe. He is also only a couple three hours down the road in Tifton. He should be a good resource if you run into something you can't solve. Haven't met the man personally, but have learned a lot from his Youtube channel and traded emails with him about a part he was selling for my lathe and he seemed like a truly nice individual.


gte718p,

I admire your stamina in doing the binge thing on this thread. Thank you very much for the kind words.

I can explain the lack of a golf cart...

I drive an older F150 pickup. That allows me to enter Fayette County, GA without question. My home is just barely inside the city limits of Peachtree City so I can sneak into my fair city and be inside my garage before anyone knows I'm there. No golf cart needed. Ha!

I may be the only person here without one.

I have seen Keith Rucker's videos. Good stuff and I have thought about a road trip to Tifton but haven't done that so far.

Thanks for stopping by!

Best regards,

Scott
 

matt_i

Well-known member
Joined
Mar 14, 2008
Messages
10,744
Location
SE Michigan
Re: The Lone Beech Garage Build Thread (60x46)

Scott,

Great find on the Powermatic drill press. I think their entire line of tools which were made in McMinnville, TN are high quality stuff!

One caution though, on using abrasives on the lathe....avoid this at all costs unless you can protect the ways with something like a large sheet of newsprint or plastic to catch the grit.

The reason is that the superfine grit is immediately attracted to way oil and becomes a lapping compound that wears both the bedway and the underside of the saddle at the same time. In essence, wearing out your precision machine prematurely.

A possible alternative in the future would be to use a drill press and polish in the chuck, the grit falls to a much more benign location which is also "dry" and not lubricated.

Further aside but related, always use caution when polishing, don't get "greedy" and try to wrap long lengths of abrasive in a greater "circumferential wrap" around the part nor wear gloves to counteract the heat. It is very easy to get pulled into the rotating part and this never ends well. Aside from simple rust removal and brightening, its also sometimes necessary to polish/sand when trying to remove a very small amount of stock controllably and arrive at a nice finish at the same time.
 
OP
S

sbosecker

Well-known member
Joined
Sep 25, 2012
Messages
3,539
Location
Peachtree City, GA
Re: The Lone Beech Garage Build Thread (60x46)

Scott,

Great find on the Powermatic drill press. I think their entire line of tools which were made in McMinnville, TN are high quality stuff!

One caution though, on using abrasives on the lathe....avoid this at all costs unless you can protect the ways with something like a large sheet of newsprint or plastic to catch the grit.

The reason is that the superfine grit is immediately attracted to way oil and becomes a lapping compound that wears both the bedway and the underside of the saddle at the same time. In essence, wearing out your precision machine prematurely.

A possible alternative in the future would be to use a drill press and polish in the chuck, the grit falls to a much more benign location which is also "dry" and not lubricated.

Further aside but related, always use caution when polishing, don't get "greedy" and try to wrap long lengths of abrasive in a greater "circumferential wrap" around the part nor wear gloves to counteract the heat. It is very easy to get pulled into the rotating part and this never ends well. Aside from simple rust removal and brightening, its also sometimes necessary to polish/sand when trying to remove a very small amount of stock controllably and arrive at a nice finish at the same time.

matt_i,

Good thoughtful advice on many fronts - thank you.

Best regards,

Scott
 
OP
S

sbosecker

Well-known member
Joined
Sep 25, 2012
Messages
3,539
Location
Peachtree City, GA
Re: The Lone Beech Garage Build Thread (60x46)

Monday - January 8, 2018


Two days ago (Saturday) my son and I took a road trip to Maryville, TN to look at another Craigslist Delta Rockwell 11-Inch Metal Lathe. This was about a 4 hour drive from my house. The price wasn't that attractive on the face of it but I had noticed an attachment that is very difficult to obtain - somewhat hidden - in one of the 3 pictures of the ad.

The phone conversation with the seller seemed to indicate that he was unfamiliar with the details of the lathe. The story was that it had belonged to his grandfather who had been either a serious amateur machinist or a one-man machine shop pro. With that in mind, in addition to the attachment I coveted, I hoped there would be some additional goodies in the cabinet.

So the point of this quest was to obtain the attachment and a couple of other parts to fill in some gaps on my first lathe. The rest of the lathe might be parted out to offset the costs involved with this purchase.

We arrived and examined the machine - it was not in as good of shape as I had hoped so I discussed the possibility of just buying the attachment. The seller really didn't want to do that but he did come down some on the price.

The deal was struck; the lathe was loaded onto my trailer and we came back to Peachtree City. A pretty long day.


20180106-01.jpg 20180106-02.jpg

"Don't hate me because I'm beautiful" she says. Ha! The serial number seems to date her as having been built in 1956.


20180106-03.jpg

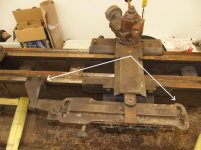
This Taper Attachment (white arrows) was the object of my desire. Almost complete, the only piece that is missing (that I am aware of) I already had. It was a part of the shattered Taper Attachment that came with the lathe I obtained at the end of October.


20180106-04.jpg 20180106-05.jpg 20180106-06.jpg

As I expected, the cabinet contained a few items that sweetened the deal. A 6-inch 4-Jaw Chuck and some tooling for the lathe as well as quite a few things that had nothing to do with the lathe. The item pictured above is an example of the latter.

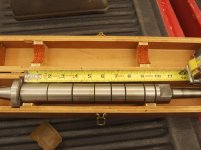
This appears to be an arbor for a horizontal mill. I will be trying to figure out what machine(s) it would fit in the coming days.


Continued in next post...
 
OP
S

sbosecker

Well-known member
Joined
Sep 25, 2012
Messages
3,539
Location
Peachtree City, GA
Re: The Lone Beech Garage Build Thread (60x46)

Continued...


On Saturday we had returned from Tennessee and pulled the truck & trailer into the LBG and called it a day.

This morning my son and I had some time to unload the lathe.


20180106-11.jpg 20180106-12.jpg 20180106-13.jpg

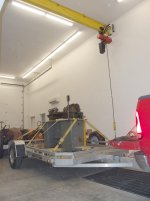
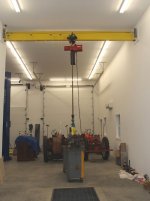
We positioned the lathe under the Electric Chain Hoist and positioned straps in appropriate places.

With preparations complete, we lifted her off the trailer.

A YouTube Video of the lift may by watched by clicking HERE.

The Truck & Trailer were driven out of the building...

...and lowering of the lathe onto dollies viewed by clicking HERE.


20180106-14.jpg 20180106-15.jpg 20180106-16.jpg

The unloading went smoothly and now the lathe is on the dollies. This will make moving this almost 900 pound machine around feasible while the evaluation of its merits takes place over the next few weeks.


Scott
 
Last edited:

drivesitfar

Well-known member
Joined
Oct 23, 2013
Messages
36,060
Location
Pacific Northwest
Re: The Lone Beech Garage Build Thread (60x46)
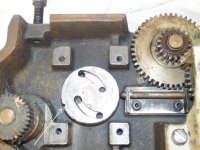
SB: looks like your originally small investment is turning into a little larger one and now you've started a collection of LATHES maybe sort of like your TRACTOR COLLECTION.

seriously even if that is only a PARTS LATHE that new bench/cabinet has some serious COOL POINTS.

nice to see you are now moving around 1000 pound items with ease and I remember the first 500 pound cabinet i moved (that I need to move locations again soon) was an SOB and now it takes something in the ton (2,000 pound) category to get me shaking my head even though anything over 300 pounds usually does need some good safety checks.

I hope the parts are worth the trip!!

good luck
 

shortykorte

Well-known member
Joined
Sep 1, 2014
Messages
8,039
Location
Tallahassee, Fl
Re: The Lone Beech Garage Build Thread (60x46)

There you go. Nothing wrong with spares. Will this allow you to have a functional lathe?


Sent from my iPhone using Tapatalk
 
OP
S

sbosecker

Well-known member
Joined
Sep 25, 2012
Messages
3,539
Location
Peachtree City, GA
Re: The Lone Beech Garage Build Thread (60x46)

SB: looks like your originally small investment is turning into a little larger one and now you've started a collection of LATHES maybe sort of like your TRACTOR COLLECTION.

seriously even if that is only a PARTS LATHE that new bench/cabinet has some serious COOL POINTS.

nice to see you are now moving around 1000 pound items with ease and I remember the first 500 pound cabinet i moved (that I need to move locations again soon) was an SOB and now it takes something in the ton (2,000 pound) category to get me shaking my head even though anything over 300 pounds usually does need some good safety checks.

I hope the parts are worth the trip!!

good luck


DrivesItFar,

Well the resemblance to the tractors is interesting. When you are dealing with old machines - tractors or lathes - one often has to buy a complete machine and its "stuff" rather than just the single item you really want.

That's what happened here.

I'll probably wind up with a FrankenLathe when it's all said & done. Ha!

Best regards,

Scott
 
OP
S

sbosecker

Well-known member
Joined
Sep 25, 2012
Messages
3,539
Location
Peachtree City, GA
Re: The Lone Beech Garage Build Thread (60x46)

There you go. Nothing wrong with spares. Will this allow you to have a functional lathe?

shortykorte,

Well the original lathe is barely functional... it's just not as functional as it could be.

The new acquisition may donate more than just the Taper Jig but it isn't clear yet how I will proceed from here. I will need to evaluate the new one quite a bit more before I will know.

The biggest reason for this is these two lathes each use a different mounting system on the Headstock Spindle.

The 2017 lathe uses a 2-1/4"-8 thread to mount the various chucks and such. The 2018 lathe uses a L00 Taper system. As a result none of the chucks or face plate that came with the 2018 lathe will work on the 2017 lathe and vice versa.

I think the L00 system is probably superior to the 2-1/4"-8 system.

More work to be done before I know which way I'll be going.


Best regards,

Scott
 
OP
S

sbosecker

Well-known member
Joined
Sep 25, 2012
Messages
3,539
Location
Peachtree City, GA
Re: The Lone Beech Garage Build Thread (60x46)

Tuesday - January 9, 2018


I got a little time in the shop today with the recent Delta Rockwell Metal Lathe acquisition. I really wanted to get the 6-Jaw Chuck off the lathe and see what its condition was so that's what I started with.


20180109-01.jpg 20180109-02.jpg

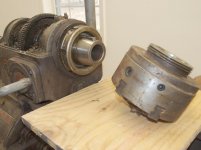
The Lathe's "SPINDLE LOCK" isn't working properly so I used a small piece of 1x1 pine to block the chuck's movement as I tapped on the retaining ring with another shorter piece of 1x1. This worked well.

With the chuck off, I was pleased with the appearance of this Lathe's spindle.


20180109-03.jpg

I have to say this arrangement to (apparently) turn wood instead of metal is interesting. The chuck is covered with saw dust and the jaws absolutely refused to move to release the Headstock Spur. I cleaned off as much of the sawdust as I could and applied PB Blaster liberally.


20180109-04.jpg

I let the chuck stew in the penetrating oil for quite a while. When I came back and tried to get the jaws to move I wasn't having any luck initially but, all at once, they broke free.


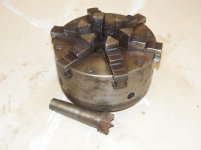
20180109-05.jpg

It looks like I have a Model 3662 6-Jaw Adjust-Tru Buck Chuck mounted on a Buck Chuck L00 Backplate. This is a nice piece of hardware.


20180109-06.jpg 20180109-07.jpg

The Tool Post looked rough but yielded quickly to the penetrating oil. I could find no manufacturing information anywhere on this item.

That was it for today.


Scott
 

drivesitfar

Well-known member
Joined
Oct 23, 2013
Messages
36,060
Location
Pacific Northwest
Re: The Lone Beech Garage Build Thread (60x46)

SB: watching and learning how one goes from buying an old lathe to buying others for parts to make one vintage old one work better than new.

good luck
 
To avoid these ads, REGISTER NOW!
Top Bottom