To avoid these ads, REGISTER NOW!

Above 1200 Sq/FT The Lone Beech Garage (60x46x16)

Wokspaces above 1200 squarefeet.

drivesitfar

Well-known member
Joined
Oct 23, 2013
Messages
36,075
Location
Pacific Northwest
SB: sorry to HIJACK your thread a bit, but Mr. Black just showed us something TOO COOL.

Black: do you fabricate all the parts or do you have a thread that shows how you make such a cool thing for kids? I bet a bonus might be when you deliver it and see the new owner's smile especially the new young driver's?

SB: any Master's tickets on your horizon to give me a good excuse to fly to Georgia to visit you and maybe see August's golf course in person?

I hear they are getting a bit easier to get, but maybe not this year since Tiger has a chance to win again?

keep up the great work in your cool garage and no matter what "If the women don't find you handsome, they should at least find you handy."


and don't forget to buy more DUCT TAPE just in case.

cheers!!
 
To avoid these ads, REGISTER NOW!
OP
S

sbosecker

Well-known member
Joined
Sep 25, 2012
Messages
3,539
Location
Peachtree City, GA
SB: sorry to HIJACK your thread a bit, but Mr. Black just showed us something TOO COOL.

SB: any Master's tickets on your horizon to give me a good excuse to fly to Georgia to visit you and maybe see August's golf course in person?

I hear they are getting a bit easier to get, but maybe not this year since Tiger has a chance to win again?

keep up the great work in your cool garage and no matter what "If the women don't find you handsome, they should at least find you handy."


and don't forget to buy more DUCT TAPE just in case.

cheers!!

DrivesItFar,

No problem... those are some very cool pictures!

I just arrived in Lima, Peru. I shall inquire about Masters tickets when I get back to Georgia on Saturday. I would not get my hopes up as I have no idea what it takes to procure tickets. I have no known sources or contacts.

Best regards,

Scott
 

drivesitfar

Well-known member
Joined
Oct 23, 2013
Messages
36,075
Location
Pacific Northwest
SB: so without Googling is it summer weather in Peru? no worries about the Master's tickets and if you find somebody that is tired of going maybe they'll part with there tickets for less than a scalper would charge. I bet you actually know people that go to the Masters and just never paid attention so i'm putting the bug in your ear.

since you might not live too far if you might happen to get an invite to go to lunch there it might be a fun way to spend a few hours.

cheers and best of luck on your flight back home!!
 
OP
S

sbosecker

Well-known member
Joined
Sep 25, 2012
Messages
3,539
Location
Peachtree City, GA
SB: so without Googling is it summer weather in Peru? no worries about the Master's tickets and if you find somebody that is tired of going maybe they'll part with there tickets for less than a scalper would charge. I bet you actually know people that go to the Masters and just never paid attention so i'm putting the bug in your ear.

since you might not live too far if you might happen to get an invite to go to lunch there it might be a fun way to spend a few hours.

cheers and best of luck on your flight back home!!

DrivesItFar,

Yes - it is summer time in Peru. It was quite pleasant there with high temperatures around 80.

I've been asking around about Master's Tickets. No joy so far.


Best regards,

Scott
 
OP
S

sbosecker

Well-known member
Joined
Sep 25, 2012
Messages
3,539
Location
Peachtree City, GA
Sunday - January 6, 2019


I've decided to spend the next few days working on cleaning up my two Rockwell Metal Lathes. For the sake of story-telling clarity, I'll call the 1956 Lathe "Rockwell Sr." & the 1966 lathe "Rockwell Jr.".


20190106-01.jpg 20190106-02.jpg
20190106-03.jpg

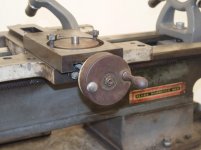
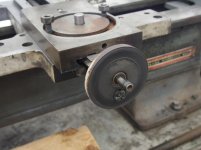
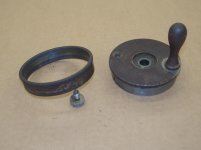
Rockwell Sr.'s Apron Handwheel needs some Evaporust love so I removed it.


20190106-04.jpg 20190106-05.jpg

Into the Evaporust bucket she goes.


20190106-06.jpg

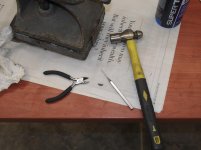
The Apron Handwheel shaft had the obligatory chewed up woodruff key. I used a small pair of diagonal cutting pliers to get a grip on the key and work it free from the shaft. I will buy a replacement key from a local hardware store tomorrow.


Continued in next post...
 
Last edited:
OP
S

sbosecker

Well-known member
Joined
Sep 25, 2012
Messages
3,539
Location
Peachtree City, GA
Continued...


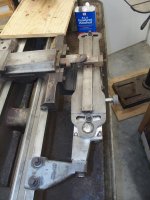
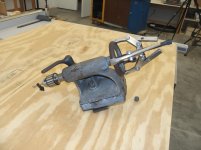
The rest of my time in the shop today was spent on Rockwell Sr.'s Taper Jig. This Taper Jig is the reason I have two Rockwell lathes as the previous owner would not sell the Taper Jig separate from Rockwell Sr.


20190106-11.jpg 20190106-12.jpg

It looks like rust but - for whatever reason - Rockwell Sr. appears to have been used as wood lathe and there is a lot of wood dust on everything. There's still plenty of work to be done on cleaning up the Taper Jig but it does move now.


Scott
 
Last edited:
OP
S

sbosecker

Well-known member
Joined
Sep 25, 2012
Messages
3,539
Location
Peachtree City, GA
Monday - January 7, 2019


20190107-01.jpg 20190107-02.jpg

Rockwell Sr.'s Apron Handwheel came out of the Evaporust and was reinstalled on the lathe.


20190107-03.jpg 20190107-04.jpg

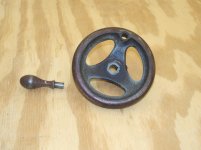
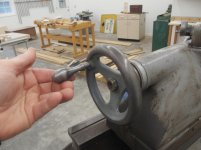
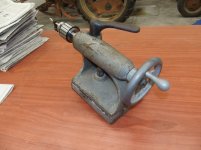
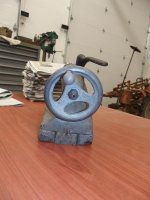
Rockwell Sr.'s Tailstock Handle is identical to the Apron Handwheel and it needed an Evaporust bath too.


20190107-05.jpg 20190107-06.jpg

Different day; different handle. In she goes!


Scott
 
Last edited:
OP
S

sbosecker

Well-known member
Joined
Sep 25, 2012
Messages
3,539
Location
Peachtree City, GA
Tuesday - January 8, 2019


20190108-01.jpg 20190108-02.jpg

Rockwell Sr.'s Tailstock Handle was removed from the Evaporust bucket and reinstalled.


20190108-03.jpg

When I purchased Rockwell Sr. the Tailstock Wheel Handle's Handle was not installed on the Wheel. I can see now why ...the Handle's shaft is too small for the wheel and it easily falls out. I'm wondering what would be the best way to repair this situation... something wrapped around the Handle's shaft?


20190108-04.jpg 20190108-05.jpg 20190108-06.jpg

Rockwell Jr.'s Tailstock was in worse shape than Rockwell Sr. It's time for it to get an Evaporust bath.


Continued in next post...
 
Last edited:
OP
S

sbosecker

Well-known member
Joined
Sep 25, 2012
Messages
3,539
Location
Peachtree City, GA
Continued...


20190108-11.jpg

Rockwell Jr.'s Tailstock Woodruff Key wins the prize for the most mangled key so far. What a mess! There's no key present above the shaft.


20190108-12.jpg 20190108-13.jpg

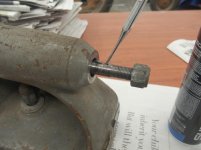
The only way I could get that rascal out was by tapping one end with a 3/16" punch and then using a small diagonal pliers to grab it.


20190108-14.jpg

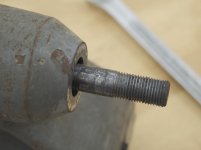
The shaft was pretty scarred as well. I used some fine sandpaper wrapped around the shaft to remove the high spots and then a new key was installed.


20190108-15.jpg 20190108-16.jpg

I had gotten the Handwheel into the Evaporust pretty early today. By evening Rockwell Jr.'s Tailstock Handwheel looked much better and was reinstalled.


Scott
 
Last edited:
OP
S

sbosecker

Well-known member
Joined
Sep 25, 2012
Messages
3,539
Location
Peachtree City, GA
Wednesday - January 9, 2019


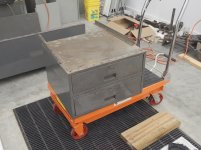
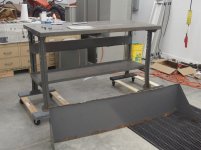
I had seen a LYON Table near by on Craigslist for the past few days. The seller - based on the wording of the ad - did seem to be motivated to sell but I didn't think I really needed this table.

Today I did think of a use for the table and I decided to go have a look. Although it had been disassembled for storage it appeared to be in pretty good shape. The seller and I came to an agreement and he helped me load the table into my pickup.

As we worked he mentioned that he was going to buy some property soon and build a "nice shop building". I mentioned I had just done that myself.

He asked how large mine was and I told him... he then said that his was going to be 75' x 100'.

I need to get this guy over to visit and make sure my wife's around when he's there! Maybe she won't think I'm such an oddball. Ha!


20190109-01.jpg 20190109-02.jpg

I got the new (to me) Lyon Table home just as the sun was setting. I'll work on assembling it tomorrow.


Scott
 
OP
S

sbosecker

Well-known member
Joined
Sep 25, 2012
Messages
3,539
Location
Peachtree City, GA
Thursday - January 10, 2019


20190110-01.jpg 20190110-02.jpg 20190110-03.jpg

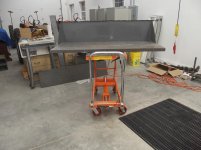
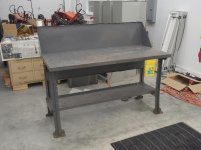
I used a hydraulic lift table to get the table top up to where I could place the legs beneath it. It was pretty straight forward to get the table assembled from that point.

While this didn't take that long I had a few obligations to tend to today so this was all I was able to do in the LBG.


Scott
 
OP
S

sbosecker

Well-known member
Joined
Sep 25, 2012
Messages
3,539
Location
Peachtree City, GA
Friday - January 11, 2019


20190111-01.jpg

This morning I removed the "backsplash" from the LYON Table and got it on some dollies to move it.


20190111-02.jpg 20190111-03.jpg 20190111-04.jpg

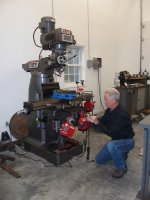
I had a "temporary workbench" set up near the JET Mill. The newly acquired LYON Table was a perfect replacement for that situation. While the new LYON Table could use some cleaning, I decided to put it to work immediately. It is a much more efficient use of the space near the JET Mill.


20190111-05.jpg 20190111-06.jpg 20190111-07.jpg

Rockwell Jr.'s Crossfeed Handle looks like the dickens! Time to remove it and get it cleaned up.


Continued in next post...
 
OP
S

sbosecker

Well-known member
Joined
Sep 25, 2012
Messages
3,539
Location
Peachtree City, GA
Continued...


20190111-11.jpg

Rockwell Jr.'s Crossfeed Handle was placed into the Evaporust bucket.


20190111-12.jpg 20190111-13.jpg 20190111-14.jpg

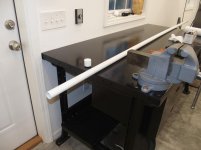
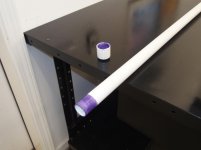
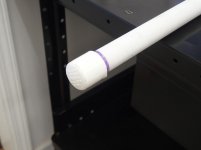
Rockwell Jr.'s Lead Screw has some rust on it. I purchased 10 feet of thin wall 1-inch PVC pipe and a couple of caps. Today I glued one of the caps on the end of the PVC. Tomorrow this PVC pipe will become an Evaporust container for the Lead Screw.


Scott
 
Last edited:
OP
S

sbosecker

Well-known member
Joined
Sep 25, 2012
Messages
3,539
Location
Peachtree City, GA
Saturday - January 12, 2019


20190112-01.jpg 20190112-02.jpg

This morning Rockwell Jr.'s Crossfeed Handle came out of the Evaporust. After getting rinsed off and dried, it was reinstalled.


20190112-03.jpg

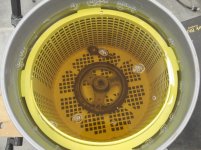
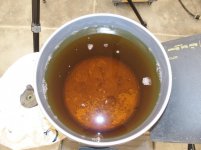
I decided to check out how the Evaporust liquid was doing. I removed the strainer bucket and took a peek. Hmmm... probably wouldn't hurt to filter the Evaporust fluid in the near future.


20190112-04.jpg 20190112-05.jpg

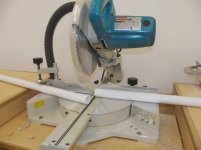
I took the length of PVC pipe and, using my miter saw, trimmed it to the length needed to hold Rockwell Jr.'s Lead Screw.


20190112-06.jpg

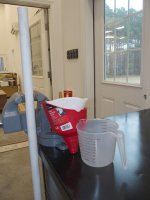
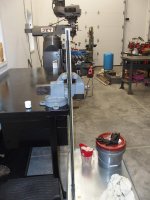
I had purchased a funnel and plastic quart measuring cup. I placed a catch pan on the floor and slid the Lead Screw into the PVC pipe, I now set the PVC pipe vertical in a vise and tightened the jaws a bit.


20190112-07.jpg

I poured about a quart of Evaporust into the top of the pipe. The funnel was a perfect fit in the pipe's opening so I started to add another pint or so without checking the progress of the fill.

I hadn't poured much of the pint into the PVC when the Evaporust started overflowing. I was annoyed at myself for not doing a calculation so as to have a rough idea of the volume of Evaporust that would fill the pipe while the lead screw was inside. Thanks to the catch pan, the mess was contained without issue but... *****!

Anyway... I capped the top of the PVC. The Lead Screw will stew in the Evaporust until tomorrow morning.


Scott
 
Last edited:

drivesitfar

Well-known member
Joined
Oct 23, 2013
Messages
36,075
Location
Pacific Northwest
SB: Sorry I haven't made time to make a post so you'll know at least a few viewers are helping or questioning you. your thread is pretty popular for the lookers and i'm sure some of the members really are gaining a lot of information with your great posts so keep up the great work.

some of the guys have a tank (solvent tank for one style) full of evaporust that they filter out with old coffee filters as it gets dirty and if the solution becomes a bit less effective they either replace it all or most just add a new 1/4 or 1/2 gallon to the old stuff.

thanks for checking on MASTER'S tickets and I won't hold my breath that you will find any, but it's also the same week as my bride's birthday and she's always said she would go with me if I qualified to play there or found tickets. if you might find 4 tickets maybe you and your bride could join us cause along with the amazing golf course i hear the food and drinks are even better and priced like SENIOR DISCOUNT CHEAP.

I'm still watching and learning.!!
 
OP
S

sbosecker

Well-known member
Joined
Sep 25, 2012
Messages
3,539
Location
Peachtree City, GA
SB: Sorry I haven't made time to make a post so you'll know at least a few viewers are helping or questioning you. your thread is pretty popular for the lookers and i'm sure some of the members really are gaining a lot of information with your great posts so keep up the great work.

some of the guys have a tank (solvent tank for one style) full of evaporust that they filter out with old coffee filters as it gets dirty and if the solution becomes a bit less effective they either replace it all or most just add a new 1/4 or 1/2 gallon to the old stuff.

thanks for checking on MASTER'S tickets and I won't hold my breath that you will find any, but it's also the same week as my bride's birthday and she's always said she would go with me if I qualified to play there or found tickets. if you might find 4 tickets maybe you and your bride could join us cause along with the amazing golf course i hear the food and drinks are even better and priced like SENIOR DISCOUNT CHEAP.

I'm still watching and learning.!!

DrivesItFar,

Thanks for stopping by and for the kind words.

I too am learning and, since my senile brain needs help remembering things, I try to take a lot of pictures. Since I have taken the pictures, I try to share a few things that may or may not be of interest to others.

I'm still asking around for ticket possibilities... still no joy.

Best regards,

Scott
 
Last edited:
OP
S

sbosecker

Well-known member
Joined
Sep 25, 2012
Messages
3,539
Location
Peachtree City, GA
Tuesday - January 15, 2019

Today I retrieved Rockwell Jr.'s Lead Screw from the Evaporust tube.


20190115-01.jpg

It was a close enough fit that I had to use needle nose plyers to grab it.


20190115-02.jpg 20190115-03.jpg

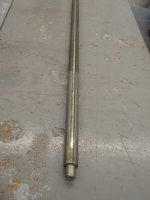
I got it out of the tube and rinsed it off outside under a hydrant. I'm pretty pleased with the results. There is a bit of greenish film in the threads. I think this is where some grease or other lubricant that was on the Lead Screw interacted with the Evaporust. I don't think that should be an issue.

With the Lead Screw out of it's bath I turned to a project that had been set aside quite a while ago and needed to be completed.


20190115-04.jpg

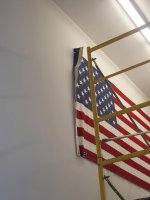
The Flag hanging project had been sidelined when it turned out it was a different size than "advertised". Part of the issue was the magnets I had used to "attach" the Flag to the wall weren't strong enough to deal with the heavier part of the Flag that has the grommets in it.

I had thought I'd come up with some sort of a mechanical device that could be adjusted to support the Flag using its grommets. After allowing my subconscious to work on this for quite a while, no mechanical solution had emerged.

I think I've come up with a simpler solution using magnets so I started down that path today.


20190115-05.jpg

I cut a pieces of 1/8" x 1" piece of steel to the length that matched the height of the Flag.


20190115-06.jpg 20190115-07.jpg

Three holes were drilled into the steel to accommodate Hollow Wall Anchors.


Continued in next post...
 
To avoid these ads, REGISTER NOW!
OP
S

sbosecker

Well-known member
Joined
Sep 25, 2012
Messages
3,539
Location
Peachtree City, GA
Continued...


20190115-11.jpg 20190115-12.jpg 20190115-13.jpg

Nothing will induce a breeze on what had been a dead calm day faster than trying to paint outside with a rattle can. However the area to be painted was small and the task was accomplished in short order despite some air moving.

The steel is drying in the LBG tonight and I hope to get it fastened to the wall tomorrow afternoon.


Scott
 
Last edited:

drivesitfar

Well-known member
Joined
Oct 23, 2013
Messages
36,075
Location
Pacific Northwest
SB: great projects as per usual. next time you are near an appliance store see if you can grab a few big refrigerator boxes. they work great as a mini paint booth cause you are right it doesn't seem windy at all unless you bring out a can of spray paint.

or make some 2x2 frames with plastic over them that you can bolt together. with that size wood even an 8x8 foot frame wouldn't be that heavy and unbolted they would store up against a wall nicely waiting their turn for the next outdoor painting session.

no worries on the Masters cause we did get a new TV, but one of these days you might find some tickets for me or yourself cause i hear it's an amazing place in person.

keep up the great work!!
 

Xporter

Well-known member
Joined
Aug 22, 2013
Messages
267
Location
Apopka, FL
SB: great projects as per usual. next time you are near an appliance store see if you can grab a few big refrigerator boxes. they work great as a mini paint booth cause you are right it doesn't seem windy at all unless you bring out a can of spray paint.

or make some 2x2 frames with plastic over them that you can bolt together. with that size wood even an 8x8 foot frame wouldn't be that heavy and unbolted they would store up against a wall nicely waiting their turn for the next outdoor painting session.

no worries on the Masters cause we did get a new TV, but one of these days you might find some tickets for me or yourself cause i hear it's an amazing place in person.

keep up the great work!!
I made a similar mini booth with PVC and plastic drop cloth, when I'm done I can disassemble it and put the pieces up in the attic until the next use.
 

drivesitfar

Well-known member
Joined
Oct 23, 2013
Messages
36,075
Location
Pacific Northwest
XP: sounds even better. next time you use it would you car to post a picture of it here or on my ORGANIZING THREAD?

SB: some of the members really do have some great ideas and i got the appliance box and plastic over 2x2's from a few of them cause my spray painting wasn't pretty when the wind blew even at 5mph.
 
OP
S

sbosecker

Well-known member
Joined
Sep 25, 2012
Messages
3,539
Location
Peachtree City, GA
SB: great projects as per usual. next time you are near an appliance store see if you can grab a few big refrigerator boxes. they work great as a mini paint booth cause you are right it doesn't seem windy at all unless you bring out a can of spray paint.

or make some 2x2 frames with plastic over them that you can bolt together. with that size wood even an 8x8 foot frame wouldn't be that heavy and unbolted they would store up against a wall nicely waiting their turn for the next outdoor painting session.

I made a similar mini booth with PVC and plastic drop cloth, when I'm done I can disassemble it and put the pieces up in the attic until the next use.


DrivesItFar & Xporter,

Thanks for the ideas! I'll probably build something like Xporter describes at some point. While a fridge box would work great, I think I'd prefer something that can be broken down and stored compactly.

Best regards,

Scott
 
OP
S

sbosecker

Well-known member
Joined
Sep 25, 2012
Messages
3,539
Location
Peachtree City, GA
Wednesday - January 16, 2019

By afternoon today the white paint on my strip of steel had dried.


20190116-01.jpg

I installed 3 Molly Bolts on a vertical line behind the hoist of the flag. These Molly Bolts fastened the steel to the wall.

I still had quite a few of the ceramic magnets left over and attempted using them to secure the left side of the flag to the wall. This worked better than I expected as I didn't think the strength of the ceramic magnets would be sufficient. I plan to get some stronger neodymium magnets to replace the ceramic ones.

Once the stronger magnets arrive I should be able to take down the scaffolding.


20190116-02.jpg

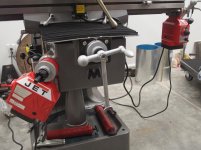
Now to address another long delayed project... installing the Y-Axis Powerfeed on the JET Mill.


20190116-03.jpg 20190116-04.jpg

I removed the Y-Axis Handle.


20190116-05.jpg 20190116-06.jpg 20190116-07.jpg

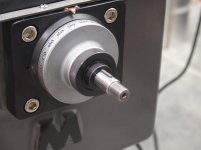
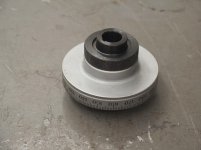
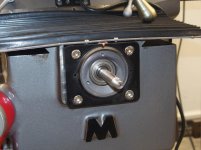
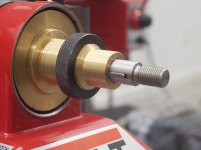
Then I slid off the Y-Axis Dial & Dial Nut. This allows access to the JET Mill's bearing retainer.


Continued in next post...

KEYWORDS: Y-Axis Powerfeed Power Feed Installation
 
Last edited:
OP
S

sbosecker

Well-known member
Joined
Sep 25, 2012
Messages
3,539
Location
Peachtree City, GA
Continued...

20190116-11.jpg 20190116-12.jpg

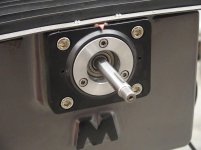
The Bearing Retainer was removed.


20190116-13.jpg

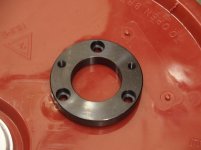
The box containing the Y-Axis Powerfeed has several parts ...including this replacement Bearing Retainer (called a Connector Base in the installation manual).


20190116-14.jpg

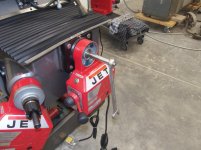
The Connector Base was installed in place of the Bearing Retainer. This replacement part has two threaded holes that will allow the Y-Axis Powerfeed to be mounted securely.


20190116-15.jpg 20190116-16.jpg 20190116-17.jpg

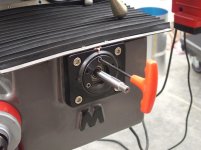
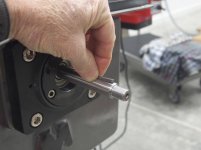
The Key on the Y-Axis Drive Shaft was removed to allow a Bushing to be installed.


Continued in next post...
 
Last edited:
OP
S

sbosecker

Well-known member
Joined
Sep 25, 2012
Messages
3,539
Location
Peachtree City, GA
Continued...

20190116-21.jpg 20190116-22.jpg 20190116-23.jpg

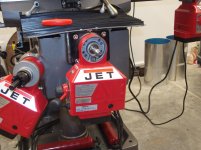
I slid the Y-Axis Powerfeed onto the Bushing. Two cap screws were included in the parts bag and I used them to mount the Powerfeed to the Mill.

This is where I rediscovered a previously encountered installation snag. The included cap screws are too long. The end of the screws bottom out before the Powerfeed is secured to the Mill.

This happened back in May during the installation of the Z-Axis Powerfeed (POST 2517).

Tomorrow I will go to a hardware store and get a couple of shorter cap screws. Until I get those screws I can't proceed further.


Scott
 
Last edited:
OP
S

sbosecker

Well-known member
Joined
Sep 25, 2012
Messages
3,539
Location
Peachtree City, GA
Thursday - January 17, 2019


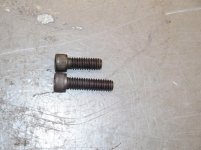
This morning I made a trip to the hardware store to get a couple of 3/4" long 1/4"-20 hex socket head cap screws. These would replace the two that came with the Y-Axis Powerfeed as they were too long.


20190117-01.jpg 20190117-02.jpg

Old & new; oddly... the supplied (too long) screws required a metric hex wrench - of course my replacements were driven by an imperial hex wrench.


20190117-03.jpg

The Powerfeed body was mounted securely to the JET Mill with the two new screws. I slid the Bevel Gear onto the shaft to check the backlash of the gears and it seemed OK without adding any shims.


20190117-04.jpg 20190117-05.jpg 20190117-06.jpg

I greased the gears, reinstalled the original feather key onto the shaft and then slide the Bevel Gear onto the shaft.


20190117-07.jpg

Well that ain't right.


Continued in next post...
 
Last edited:
OP
S

sbosecker

Well-known member
Joined
Sep 25, 2012
Messages
3,539
Location
Peachtree City, GA
Continued...


It should be noted at this point that the installation manual is particularly vague regarding the installation of the Y-Axis Powerfeed. Essentially the instructions consist of a miniaturized vertical cross-section drawing of the installed Powerfeed and directions to - in so many words - "follow the instructions for the X-Axis Powerfeed; except where it's different."

This looks like one of the different places.


20190117-11.jpg

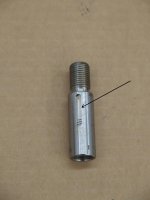
Sure enough, in one of the parts bags was this Extension.
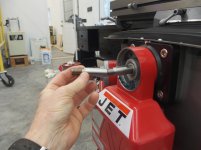


20190117-12.jpg 20190117-13.jpg

I threaded the Extension onto the existing shaft.

A black arrow in the first picture of the Extension (above) points to a keyway that led me on a wild goose chase for most of the day.
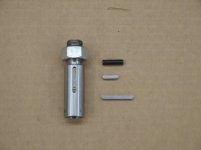


20190117-14.jpg

Obviously the keyway in the original shaft and the keyway in the Extension didn't line up. Since I assumed "There can be only one!", I proceeded to try to figure out how that would work for quite a while.

Reference the above picture to see all the players in this adventure.

The Extension is on the left. The parts from top to bottom on the right are:

1. A Roll Pin.
2. A short (12mm) 3mm x 3mm Feather Key that was in the parts bag.
3. A long (25mm) 3mm x 3mm Feather Key that was original to the Mill.

Let's start with the Roll Pin...

The instructions effectively just say to "drill and fit roll pin". No indication as to what the size of the hole should be. The X-Axis installation did not have a roll pin (I'm supposed to refer to the X-Axis instructions for the Y-Axis installation). The Z-Axis installation DID have a roll pin installed in a drilled 5mm hole.

I assumed that is what I needed to do here... drill a 5mm hole. Fortunately I decided to check the diameter of the provided roll pin with my calipers. The calipers indicated the roll pin was .169" or 4.29mm in diameter.

Hmmm... a 5mm hole seems excessive for a 4.29mm roll pin. Time spent on the internet didn't really seem to provide a suitable hole size for this roll pin. The closest I came across was 5/32" hole size and this pin was a little above max size for that.

Plus I measured this Roll Pin at .694" and the shaft it is supposed to be in is 5/8" (.625"). So I've been struggling to figure out what I'm doing wrong with determining the right hole size for this Roll Pin. I may check out the hardware store for a 5/8" long pin of an appropriate diameter and use that.

Now we move on to the two Feather Keys. As I mentioned I assumed the original long key would not be used and only the shorter key would be used. Both the Bevel Gear and the Handle are broached for a key so I assumed the short key needed to engage both of them.

The length of the keyway in the Extension is bit over 20mm and the short key was only 12mm. While the short key COULD be positioned in the middle of this keyway to catch both the Bevel Gear and the Handle, it didn't seem right.

My assumption was I needed a 20mm long 3mm x 3mm Feather Key to fit into the Extension's keyway.

My local Hardware Store didn't have any Feather Keys let alone metric ones.

I spent quite a bit of Google time trying to find a 3mm x 3mm x 20mm Feather Key. From the time I spent on the computer, it seems my best bet for this item would be to drop by a hardware store next time I had a London layover.


Giving up on finding a longer Feather Key, I decided to check JET Machines web site to see if they had updated the installation manual for the Powerfeed. I went to the manuals section of their site and located an Acrobat file of the manual. I was hoping the manual might have been updated to include a hole size for the Roll Pin.

Hey! This is cool! The manual is a high enough resolution that I can actually enlarge and properly see the cutaway drawing of the Y-Axis Powerfeed...

...and the cutaway is showing BOTH Feather Keys on the shaft.

As Homer Simpson would say, "Doahh!!"


20190117-15.jpg

I placed the long key in the keyway of the original shaft and slide the Bevel Gear on. Then I could see how keyway in the Extension could receive the short key and, despite the "too long" keyway, be trapped in place and engage the Handle.

So a lot of wasted mental energy today but I think I can move forward on the installation now.


Scott
 
Last edited:

drivesitfar

Well-known member
Joined
Oct 23, 2013
Messages
36,075
Location
Pacific Northwest
SB: sounds like you figured it out. you deserve a cold one and some quiet time for figuring out that puzzle. too many guys writing our manuals ASSUME too much and adding a few good detailed pictures with parts would be great wouldn't it?

it's looking great inside LONE BEECH.

just curious other than the small leak in your grease pit that i'm sure you'll figure out how to stop when you have time to are there any other modifications you'd have done different in your build. or any potential problems on the horizon? is it big enough or too big or not big enough? how do you like the ceiling height and have you thought of a loft or maybe you built one i forgot about?
 
OP
S

sbosecker

Well-known member
Joined
Sep 25, 2012
Messages
3,539
Location
Peachtree City, GA
SB: sounds like you figured it out. you deserve a cold one and some quiet time for figuring out that puzzle. too many guys writing our manuals ASSUME too much and adding a few good detailed pictures with parts would be great wouldn't it?

it's looking great inside LONE BEECH.

just curious other than the small leak in your grease pit that i'm sure you'll figure out how to stop when you have time to are there any other modifications you'd have done different in your build. or any potential problems on the horizon? is it big enough or too big or not big enough? how do you like the ceiling height and have you thought of a loft or maybe you built one i forgot about?


DrivesItFar,

Problems with instruction manuals? The reasons for this situation are many and varied but in this case they are probably all of those PLUS a lazy translation from Chinese to English. Ha!

Lone Beech Garage modifications or things I'd do different...

Well...They're NEVER big enough ...However I shall endeavor to persevere.

The ceiling height was the result of wanting to have the option of being able to work on or store a Class A RV in the building. That required a 14 foot tall garage door and that required a 16 foot ceiling. I'm happy with it.


I do have an upper room but it hasn't been used that much so far. Still working on it.

Things I would definitely change?

The roof overhang on the sides of the building is only 2 feet. I added a sidewalk that runs the length of the south side of the building. The sidewalk is 4 feet wide. The roof overhang needs to be 4 feet on that side of the building and it probably wouldn't hurt anything to have more overhang on the north side too.

A water bib on the outside of east side of the building would be useful.

Generally speaking, there isn't too much I'd change.

Best regards,

Scott
 
OP
S

sbosecker

Well-known member
Joined
Sep 25, 2012
Messages
3,539
Location
Peachtree City, GA
Friday - January 18, 2019

Went to the local Hardware Store to try to find a 5/8" long Roll Pin for the Y-Axis Powerfeed installation project. The Hardware Store had either 1/2" or 3/4" long pins.

I came home and sent an email to JET Technical Support regarding the installation manual being silent on the size of the Roll Pin hole. This was sent about noon.

I did not hear back by close of business today. It's probably a waste of time to send an email to a business on a Friday afternoon. Particularly before a 3-day weekend.

We'll see if I get a response next week. I suspect they'll tell me to drill a 5/32" hole but we'll see.

A lot of the day was spent preparing for special guests that should arrive at the LBG on Sunday. My dad and one of my brothers are going to drive from Indiana on Sunday. I'm looking forward to seeing them.


Scott
 
Last edited:
OP
S

sbosecker

Well-known member
Joined
Sep 25, 2012
Messages
3,539
Location
Peachtree City, GA
Sounds like fitting Jet parts on a Jet mill is smooth sailing.
Hope your dad and brother have a great visit.


shortykorte,

Regarding my visitors...

Dad called earlier this morning and let me know he was snowed it due to Winter Storm Harper. There hadn't been a lot of snow but the wind had made it drift across the road to the Lone Beech Melon Farm.

My brother was out on a tractor with a blade making a path to a road that was relatively clear. That road went north not south but - after about 5 miles - they would hit the town of Vincennes, Indiana and Highway 41. From there they would point their noses south and try to escape on 41.

I was skeptical that this was going to work but I got a text about 30 minutes ago that they had just crossed the Ohio river and made it to Kentucky.

It should get better the further south they go but they are behind schedule by about 3 hours.

Hopefully they'll be here around 6 or 7:00 pm.


Best regards,

Scott
 
OP
S

sbosecker

Well-known member
Joined
Sep 25, 2012
Messages
3,539
Location
Peachtree City, GA
Monday - January 21, 2019


My brother & dad arrived at my home at about 6:00 pm. They said the road was pretty heavy with ice until the middle of Kentucky and was gone completely until just about the time they hit I-24 and started east. The up side was they were Kings of the Road most of the trip. Not much traffic from southwestern Indiana to my place in Peachtree City, GA.

My brother and dad got settled into their guest rooms and then we had supper. I was grateful they had arrived safely. Dad was pretty tired - I think as much from the uncertain beginning as the trip itself. He excused himself not too long after supper.

My brother and I grabbed a beer from the fridge and we headed towards the Lone Beech Garage for a tour. My brother had last been here for my daughter's marriage (October 2015) and the LBG was just the Lone Beech Mud Hole. The first footers had been poured but there was a long way to go at that point.

As we were wrapping up the walk through I could see my brother was starting to fade. He had had a long day and he was going to have another one today as the journey to Florida continued. He complemented me on my building and we finished our beers and headed back to the house.

This morning they were up at 5:30 and were on the road for Florida by 6:45. They arrived safely at their destination around 3:30 pm.


20190121-01.jpg

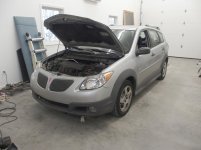
Last night, just before I gave my brother his tour, my son arrived with his car. It was overdue for an oil change. We got his Vibe into the LBG and removed the oil drain plug.


20190121-02.jpg 20190121-03.jpg

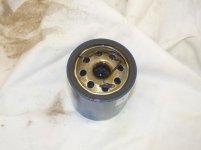
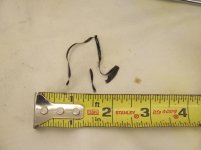
Today I returned to his car and removed the oil filter. When I was getting ready to throw away the filter I noticed what looked like markings on the inside base of the filter. When I picked at the markings they turned out to be a thin strip of black plastic stuck to the filter base. In the first picture I've sat the plastic back onto the filter in a location similar to where I found it.


20190121-04.jpg

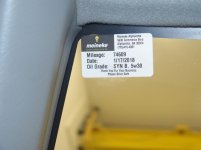
My son purchased this car sometime around May 2018. I gave it its first oil change under our care in October and this is the second.

I'm wondering if the previous owner's oil filter left this strip of plastic behind and I didn't notice it at the last filter change or... I have no idea.

I'd be interested in any GJer's comments if they have seen something similar to this situation.

Another oddity was the oil itself. It had a yellow cast to it when I drained it this time. I'm trying to remember if the previous oil drained during the last change was yellow but I don't recall. According to the reminder sticker it was a synthetic oil so maybe it was a yellowish oil and there was enough still in the engine after the last change in October to influence the color of the oil I removed ...but I do let the oil drain for a long time - it is usually not dripping at all from the drain when I return the drain plug to the oil pan.

Again, anyone who has had a similar experience... please leave a comment.

I don't think there's anything wrong here. All the other fluids seemed to be at their normal levels but this was a different oil change than I'm used to seeing.

Scott
 
Last edited:
To avoid these ads, REGISTER NOW!
Top Bottom