To avoid these ads, REGISTER NOW!

Above 1200 Sq/FT The Lone Beech Garage (60x46x16)

Wokspaces above 1200 squarefeet.
OP
S

sbosecker

Well-known member
Joined
Sep 25, 2012
Messages
3,539
Location
Peachtree City, GA
Wednesday - January 23, 2019


As mentioned a few posts ago, I'm trying to (finally) wrap up the flag magnetic mount.


20190122-01.jpg 20190122-02.jpg

Yesterday the Neodymium Disc Magnets I ordered arrived. These things have quite a magnetic force! They have to be separated form the stack with some thought or they will snap back together with enough force to shatter themselves.




20190123-03.jpg 20190123-04.jpg

Today I used these magnets on the hoist of the flag. Technically I think this project is complete but I may try to do something to help the magnets blend in better.


Last Friday I mentioned that I had sent an email to JET Machinery requesting information on the size of the hole required for the pinning of the Y-Axis Powerfeed Shaft. Yesterday afternoon, not having gotten a response to my email, I called JET Technical Support.

Matt took my call and he looked at the same manual I've been using as he tried to find the answer to my question. He was expressing puzzlement on the lack of information when I reminded him that JET installs these Powerfeeds on their Milling Machines.

As I mentioned this fact, I heard Matt call to someone. It turned out the Shop Manager was walking through the Tech Support area and Matt had hailed him as he did so. The manager then departed to ask his people the size of the hole. Matt said he would call me back when the Shop Manager returned with the hole size information.

About 10 minutes later Matt called. "You're gonna love this", he said. "They don't use the pin so they don't even drill a hole in the shaft."

I think I responded with something profound like, "Hmmm... but..."

Matt was just the messenger so he couldn't really enlighten me further. I told Matt I would need to go out to my shop and see if I could figure out the ramifications of NOT using a pin to lock the Extension to the Y-Axis Shaft. It was pretty much quitting time so Matt said to call back today if I needed more information and he would help me.


20190123-05.jpg

Today I tried to sort out how NO PIN might work. I threaded the Extension onto the Y-Axis Shaft till it bottomed out. The picture shows that the keyways don't line up.



20190123-06.jpg

I then used some rubber webbing to protect the shafts from my Vise-Grips as I rotated the Extension out of the Y-Axis Shaft until the keyways lined up.



20190123-07.jpg

With the keyways lined up, I placed the original Feather Key into its keyway and slid the Bevel Gear onto the shaft. Now I would be able to place the small Feather Key into the Extension's keyway. When I slide the Handle onto the Extension the Feather Key will lock this assembly together.

I am assuming this is what the JET folks are doing but I will call tomorrow and see if this correct.

Scott
 
Last edited:
To avoid these ads, REGISTER NOW!
OP
S

sbosecker

Well-known member
Joined
Sep 25, 2012
Messages
3,539
Location
Peachtree City, GA
Saturday - February 9, 2019


When I last posted at the end of January I was trying to verify the details of installing the Y-Axis Powerfeed onto my JET Milling Machine. I did indeed make a phone call the following day to the gentleman Matt at JET Technical Support had labeled to be the Go-To guy for JET's Milling Machines but he was out sick. I left a voice mail.

As it turned out, Steve - the Milling Machine Guru - was out sick for several days.


20190204-01.jpg 20190204-02.jpg 20190204-03.jpg

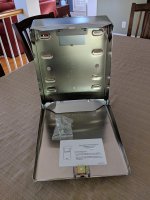
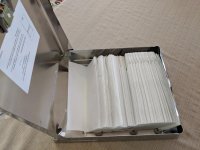
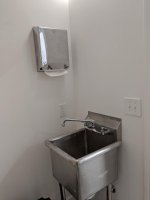
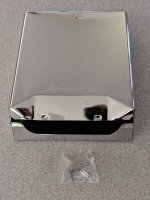
During this time Zoro.com had sent me a 20% off coupon and I used it for, among other things, a Paper Towel Dispenser (Georgia Pacific 56620) for the LBG's bathroom.


20190204-04.jpg 20190204-05.jpg

20190204-06.jpg 20190204-07.jpg

The Paper Towel Dispenser was mounted in the bathroom and certainly makes the bathroom more functional.


Continued in next post...
 
Last edited:
OP
S

sbosecker

Well-known member
Joined
Sep 25, 2012
Messages
3,539
Location
Peachtree City, GA
Continued...

I finally connected with the JET Tech Support fellow I needed to talk to. He verified that my assumption regarding the methodology for installing the Y-Axis Powerfeed without a pin was correct.

Before I could get started on the final bits of the installation, I had some unexpected family issues that needed to be taken care of. Several days later, after that was all resolved, I installed the Powerfeed.


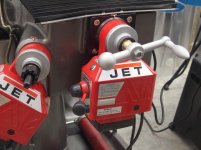
20190209-01.jpg 20190209-02.jpg 20190209-03.jpg

The keyways were lined up; the various components shimmed as needed and slid onto the shaft; the handle mounted.


20190209-04.jpg

My son had recently introduced me to the concept of "Power Squids". I used one to distribute power from the outlet to the Milling Machine's 3 Powerfeeds.

I didn't install the Y-Axis Limit Switch at this time. My next move will be adding a DRO to the JET Mill so I want to wait on the Limit Switch so I can ensure there won't be interference with the Y-Axis DRO Rail.

I made a short video of myself exercising the Y-Axis Powerfeed. That video may be seen by clicking HERE.


20190209-05.jpg 20190209-06.jpg

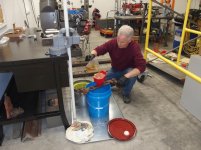
I also finally got around to filtering the Evaporust. There was a reasonable amount of residue left in the #6 coffee filter I used to filter the liquid.


Scott
 
Last edited:
OP
S

sbosecker

Well-known member
Joined
Sep 25, 2012
Messages
3,539
Location
Peachtree City, GA
Great use of the magnets. I just picked some up identical to yours. Even with the plastic between them, they’re a bear to pull apart.
Glad to see you have moved forward on the mill.


shortykorte,

Thanks for the kind words!

I'm moving forward on the JET Mill slower than I'd like ...but I am moving forward. Ha!


Best regards,

Scott
 
OP
S

sbosecker

Well-known member
Joined
Sep 25, 2012
Messages
3,539
Location
Peachtree City, GA
Wednesday - February 13, 2019


20190212-01.jpg

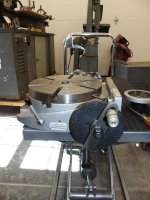
A few years ago I came across an ad on Craigslist for a 10-inch Rotary Table. Although I really didn't have a use for the item at the time, I hoped to one day get a Knee Mill and I rationalized that I could make the Rotary Table useful at some future date.

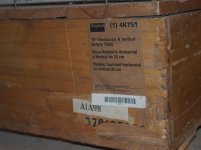
This particular Rotary Table had no manufacturers information on it. The only clue was the label on the shipping box that read "Dayton 4K751". I could find little or no information on the Internet regarding this particular device.

EDIT

I realized that the "Dayton" nameplate was associated with Grainger Supply but, since a Google search seemed to throw craps, I hadn't bothered to go to the Grainger Website and poke around. Today (14 Feb 2019) I did use the Grainger Supply website's search feature and found a page that describes the Rotary Table and notes that it is a discontinued item.

Grainger Supply Dayton 4K751 Link

END EDIT

However I did compare my Dayton Rotary Table to pictures of other Rotary Tables I found on the Internet and I thought the Dayton screamed "Phase II".

Earlier this week I decided to see if I was hearing things... I ordered some HHIP 3900-2401 Dividing Plates "For Phase II Style Rotary Tables" from Amazon.


20190212-02.jpg 20190212-03.jpg

20190212-04.jpg 20190212-05.jpg

The package from Amazon arrived late yesterday. It contained the Dividing Plates & paraphernalia but remarkably sparse directions... half of which were in Chinese.

This morning I went out to the LBG to see if this new purchase would fit on my Rotary Table.


20190212-06.jpg


The handle of the Rotary Table needs to be removed to install a Dividing Plate. With the handle off the worm gear shaft the question was, "Would the 4 holes in the Dividing Plate line up with the Rotary Table's 4 holes.

When I tried to slide the Dividing Plate onto the shaft I got a rude surprise... The hole in the Plate seemed to be too small. The Plate didn't want to go onto the shaft.


20190212-07.jpg

It turned out that the hole in the Dividing Plate was an incredibly close fit. It had to be precisely aligned with the shaft in order for it to slide on.

So after that initial disappointment I was pleased to find that the screw holes lined up properly. I didn't get everything mounted correctly in this picture, I was just trying to see if the Plate would interface with the Rotary Table properly.


Scott
 
Last edited:

matt_i

Well-known member
Joined
Mar 14, 2008
Messages
10,754
Location
SE Michigan
I didn't install the Y-Axis Limit Switch at this time. My next move will be adding a DRO to the JET Mill so I want to wait on the Limit Switch so I can ensure there won't be interference with the Y-Axis DRO Rail.

I think you're really going to like the readout. In my mind its one of the best features to improve ease of operation because of the ability to re-zero and to directly measure the table position without having to worry about counting hashes on the dials. I always have to go back and remind myself that World Wars were won with the dial technology, so its not a bad one :)

The modern technology does make things faster though, when using edge finders, you'll most likely have a bolt circle function which always looks cool, and you can even profile some complex shapes by using something like Excel to calculate an X-Y approximation to the smooth curve (or linear taper) and stepping thru it say .005" at a time. While the sawtooth movements of the table seem ragged at first, made in very small increments it usually turns out worthwhile.
 

drivesitfar

Well-known member
Joined
Oct 23, 2013
Messages
36,077
Location
Pacific Northwest
SB: how do you like using the EVAPORUST? also if you are going to reuse and filter out with the old coffee filters I heard adding a little fresh evaporust helps keep it working great.

nice looking rotary vise too!!
 
OP
S

sbosecker

Well-known member
Joined
Sep 25, 2012
Messages
3,539
Location
Peachtree City, GA
I think you're really going to like the readout. In my mind its one of the best features to improve ease of operation because of the ability to re-zero and to directly measure the table position without having to worry about counting hashes on the dials. I always have to go back and remind myself that World Wars were won with the dial technology, so its not a bad one :)

The modern technology does make things faster though, when using edge finders, you'll most likely have a bolt circle function which always looks cool, and you can even profile some complex shapes by using something like Excel to calculate an X-Y approximation to the smooth curve (or linear taper) and stepping thru it say .005" at a time. While the sawtooth movements of the table seem ragged at first, made in very small increments it usually turns out worthwhile.


matt_i,

Thanks stopping by and for confirming my thinking on a DRO purchase.

Do you (or any other readers of this post) have any thoughts on a Z-Axis DRO configuration?

Knee? Spindle? Both? ...or no Z-Axis DRO at all.


Best regards,

Scott
 
Last edited:
OP
S

sbosecker

Well-known member
Joined
Sep 25, 2012
Messages
3,539
Location
Peachtree City, GA
SB: how do you like using the EVAPORUST? also if you are going to reuse and filter out with the old coffee filters I heard adding a little fresh evaporust helps keep it working great.

nice looking rotary vise too!!

DrivesItFar,

The Evaporust seems particularly useful for items that would be difficult to treat with electrolysis. Several individual small rusty items can be done at the same time; items that have surfaces hidden from the line of sight of the electrolysis anodes, etc.

I'm still playing with it.

Best regards,

Scott
 
OP
S

sbosecker

Well-known member
Joined
Sep 25, 2012
Messages
3,539
Location
Peachtree City, GA
Sunday - February 17, 2019


Last week I decided to give the Evaporust a pretty good test...


20190213-01.jpg

I had procured this item (I have no idea what it is called: load leveler? lifting bar?) for a buck at an estate sale some time ago.


20190213-02.jpg 20190213-03.jpg

I threw it in the bucket of freshly filtered Evaporust… with mixed results.

I think I really needed to soak this rusty item completely submerged but about 1/4 of it stuck up out of the fluid. I soaked it for over 24 hours like that and then turned the item 180 degrees and soaked the opposite end.

I have to say I expected better results. Perhaps this item - whatever it is called - was too rusty. Perhaps the Evaporust is getting tired. Perhaps I need to find a different container and completely submerge my project.

Oh yeah... does anyone know the correct technical term for this rusty item?


A few months ago I acquired some Metric Transposing Gears for my metal lathe via eBay. I need to make container to store them safely.


20190213-04.jpg 20190213-05.jpg 20190213-06.jpg

I'm playing around with how to do this. I decided to turn a short piece of 2x2 scrap into something that the gears could slide onto. Not sure where I'll go with this. I'm still brainstorming.


It won't be long until it's time to start mowing grass again. I brought my lawnmower into the LBG and positioned it over the "Tornado Shelter".

An oil change and a greasing of the various zerks on the machine took place.


20190213-07.jpg

It was also time to install a couple of new blades. Torqueing the bolts that attach the blades to their drive axles has always been "interesting". I've never been happy with the pieces of wood I've used to block the blade from rotating as torque was applied ...it seemed sketchy.

This time around I used a Kant-Twist clamp to block the blade from moving. It worked great! I can't remember if I ever tired using a C-Clamp and maybe that would have worked also.


Continued in next post...
 
OP
S

sbosecker

Well-known member
Joined
Sep 25, 2012
Messages
3,539
Location
Peachtree City, GA
Continued...

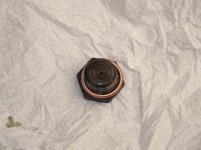
Last September I changed the oil in a couple of my Allis-Chalmers Model G tractors. There is a copper washer between the oil pan and the oil plug and I tried reusing an old washer and then I became aware of aircraft AN900-14 crush washers and used one of them for the second tractor.


20190217-01.jpg 20190217-02.jpg 20190217-03.jpg

The tractor with the recycled copper washer was very slowly weeping oil from its drain plug. I decided to remedy that today by draining its oil and installing an AN900-14 crush washer.

My other tractor has been leak free for the past 5 months so I'm expecting similar results from this installation but we'll see.


Scott
 
Last edited:

AZpilot

Well-known member
Joined
Sep 29, 2012
Messages
413
Location
Mesa, AZ
Yay for aircraft spruce! The only method that I was taught for total rust removal was electrolysis with a sacrificial anode.
 

Motoman1100

Well-known member
Joined
Oct 2, 2014
Messages
443
Location
GA
Scott the shop is really coming together with so many cool tools and tech added since the place went up. Of course with all those tools comes an expectation that great things will be accomplished. Ha!

Thanks for sharing the journey!
 

drivesitfar

Well-known member
Joined
Oct 23, 2013
Messages
36,077
Location
Pacific Northwest
SB: not that you need to keep track, but how much has the $200 lathe cost you so far? and your mill? it doesn't matter and i'm sure both will bring you a ton of pleasure in the years to come especially when you make some of those UNOBTANIUM PARTS for your tractors and other things you need.

hope your work trips are avoiding all this crazy weather we've been having (snowed 2 feet here last week).

take care and thanks again for posting up pics and explanations of your projects.

who would have thought you'd be working on a riding lawnmower from the PIT or maybe that was your plan all along.

cheers
 
OP
S

sbosecker

Well-known member
Joined
Sep 25, 2012
Messages
3,539
Location
Peachtree City, GA
Yay for aircraft spruce! The only method that I was taught for total rust removal was electrolysis with a sacrificial anode.

AZpilot,

I have used electrolysis and it works well. I'm finding the Evaporust is useful for odd-shaped stuff - like the lathe leadscrew. Also, it should be useful to get rust that line-of-sight electrolysis wouldn't be able to deal with.

Example: Inside a vintage steel kitchen cabinet door.

Best regards,

Scott
 
OP
S

sbosecker

Well-known member
Joined
Sep 25, 2012
Messages
3,539
Location
Peachtree City, GA
Scott the shop is really coming together with so many cool tools and tech added since the place went up. Of course with all those tools comes an expectation that great things will be accomplished. Ha!

Thanks for sharing the journey!

Thanks so much for stopping by!

There's still lots to do but I'm slowly chipping away at squaring away the shop space.

Regarding the "Tool Expectations"... I'm thinking about taking some courses at Southern Crescent Technical College in nearby Griffin GA to help with that. I recently learned that Geezers in Georgia (62 years old or older) supposedly get free tuition.


To wit:

Southern Crescent Technical College Handbook

Senior Citizen (Georgia Amendment 23) Admission

Amendment 23 to the Georgia Constitution provides for the enrollment of persons 62 years of age or older in post-secondary education in Georgia. Provisions of the amendment include: 1. The applicant must be 62 years of age or older at the time of registration and must present a birth certificate, state issued identification, or other comparable written documentation of age. 2. Upon admission, the applicant may enroll as a regular or auditing student in courses offered for resident credit on a space- available basis without payment of tuition. 3. However, the applicant will be responsible for payment of other applicable fees. The applicant must meet all admission requirements.


Best regards,

Scott
 
OP
S

sbosecker

Well-known member
Joined
Sep 25, 2012
Messages
3,539
Location
Peachtree City, GA
SB: not that you need to keep track, but how much has the $200 lathe cost you so far? and your mill? it doesn't matter and i'm sure both will bring you a ton of pleasure in the years to come especially when you make some of those UNOBTANIUM PARTS for your tractors and other things you need.

hope your work trips are avoiding all this crazy weather we've been having (snowed 2 feet here last week).

take care and thanks again for posting up pics and explanations of your projects.

who would have thought you'd be working on a riding lawnmower from the PIT or maybe that was your plan all along.

cheers


DrivesItFar,

I've certainly sunk some money into...

WAIT A MINUTE!!!

Are you wearing a wire!!! How much did my bride pay you to do this!

HA!

Trips & weather: At the end of February I flew a Military Charter to Fort Drum, NY. Located just east of Lake Ontario: Three degrees, stiff breeze & snow falling. An unpleasant place to fly out of at that time of the year! The only upside was it was so cold the snow wasn't melting so ice on the taxiways & runways was minimal. There was plenty of dry snow though!

PIT i.e "Tornado Shelter"... let's just say I knew it would be a feature of the Lone Beech Garage that could multi-task.

Best regards,

Scott
 
To avoid these ads, REGISTER NOW!
OP
S

sbosecker

Well-known member
Joined
Sep 25, 2012
Messages
3,539
Location
Peachtree City, GA
Wednesday - March 13, 2019


It has been a while since I've posted... Flying, taxes, computer hard drive failure, family drama... the calendar days add up pretty quick.

Plus there's been quite a bit of non-garage stuff... I'm adding some LED lighting inside my home and there's been quite a bit of yard work & spring cleaning.

However the yard work did result in a small bit of time in the LBG.


20190307-01.jpg

The white arrow points to some brush that has grown up where we cleared the trees a few years ago.

Last week I thought I could use G29253 (the “Alabama G”) that has a Woods 42G Belly Mower to clean this up. I admit I was expecting trouble as I hadn’t actually tried to use this thing to do work before. I do think, when I first got it, that I briefly engaged the PTO (Power Take Off) and everything moved. I quickly shut the PTO off and that was the last time the mower had rotated.

I started the tractor and pulled it out of the shop building. I engaged the PTO and the mower vibrated to life. It seemed OK.

Emboldened, I advanced on the enemy.


20190307-02.jpg

I had been chopping for about 10 minutes and things were going pretty well when the mower started vibrating quite a bit. I thought I’d gotten some chunk of wood under the mower deck but, before I could investigate, the mower stopped. The drive belt had come off so I drove the tractor back to the shop’s concrete pad and shut down the tractor.

I got the belt back on the pulleys and started the tractor again. Before I headed back to the work area, I engaged the PTO.

What a commotion!


20190307-03.jpg

I could now see what was going on. The white arrow points to an Idler pulley that the bearing had failed.

So that was the end of that for the day. I ordered a new idler pulley that was scheduled to arrive within 3 or 4 days. This new pulley probably represents 20% of the value of the mower. Ha!

Here’s a link to a video of the old damaged pulley.


20190307-04.jpg

Here’s a picture of that Idler Pulley. Apparently it is possible to drill out the 18 rivets holding this sheave together and replace just the bearing.

1. That would be quite a bit of work.
2. I’m afraid that the pulley’s “hole” may be egg-shaped as well as the bearing being destroyed.

So I ordered a replacement pulley from the closest Woods Mower Dealer, Wade Tractor & Equipment in Griffin GA.

I think this is what happens when an implement sits outside for years with nothing to protect it. This pulley is pretty much horizontal and the rain would just sit on top of that bearing.


Late yesterday afternoon I received a phone call from Wade Tractor & Equipment. My pulley had come in.


20190313-05.jpg

This morning I made the 30 minute drive to Griffin and picked up the pulley. I have to say I'm disappointed that the folks at Wade Tractor & Equipment didn't bother to mention there would be a shipping charge when they quoted the price of the pulley last week. If I'd known I was going to pay shipping, it would have made more sense to order the part on the internet and have it delivered to my home rather than waste over an hour of my time driving plus about 2-1/2 gallons of gas.

But at least it was the right part!


20190313-06.jpg 20190313-07.jpg

A little quality time in the LBG and then it was back outside mounted on my trusty steed.


Continued in next post...
 
Last edited:
OP
S

sbosecker

Well-known member
Joined
Sep 25, 2012
Messages
3,539
Location
Peachtree City, GA
Continued...

20190313-11.jpg

The mower's repair worked well!


20190313-12.jpg 20190313-13.jpg

20190313-14.jpg 20190313-15.jpg

My wife made a video (her first attempt) of me chopping the brush. She also took all the of the above "action pictures". Here's the link to that video.


20190313-16.jpg

With the help of G29253 the brushy area was cleaned up. It was great to use one of my old tractors to do some useful work.


Scott
 
Last edited:

Motoman1100

Well-known member
Joined
Oct 2, 2014
Messages
443
Location
GA
Thanks so much for stopping by!

There's still lots to do but I'm slowly chipping away at squaring away the shop space.

Regarding the "Tool Expectations"... I'm thinking about taking some courses at Southern Crescent Technical College in nearby Griffin GA to help with that. I recently learned that Geezers in Georgia (62 years old or older) supposedly get free tuition.


To wit:

Southern Crescent Technical College Handbook

Senior Citizen (Georgia Amendment 23) Admission

Amendment 23 to the Georgia Constitution provides for the enrollment of persons 62 years of age or older in post-secondary education in Georgia. Provisions of the amendment include: 1. The applicant must be 62 years of age or older at the time of registration and must present a birth certificate, state issued identification, or other comparable written documentation of age. 2. Upon admission, the applicant may enroll as a regular or auditing student in courses offered for resident credit on a space- available basis without payment of tuition. 3. However, the applicant will be responsible for payment of other applicable fees. The applicant must meet all admission requirements.


Best regards,

Scott


That's very interesting, I'll have to look into it....I do have a good decade to wait before my tuition would be free, but I would like to take some welding classes.

Cheers!
 
OP
S

sbosecker

Well-known member
Joined
Sep 25, 2012
Messages
3,539
Location
Peachtree City, GA
That's very interesting, I'll have to look into it....I do have a good decade to wait before my tuition would be free, but I would like to take some welding classes.

Cheers!

Alan,

They way I stumbled onto the Senior Citizen Tuition Good Deal was via a thread started by bczygan (Learning to Weld) in Fabrication & Techniques.

As I read some of his posts, I picked up on the fact that he was benefitting from some Senior Citizen Tuition assistance in Michigan. More reading seemed to indicate that this sort of Senior Tuition Benefit might be available in many states.

That led me to do a Google Search which turned up:

Senior Citizens Can Go to College for Free or Cheap in All 50 States

There are other similar sites that provide similar and/or additional information.

Best regards,

Scott
 

matt_i

Well-known member
Joined
Mar 14, 2008
Messages
10,754
Location
SE Michigan
matt_i,

Do you (or any other readers of this post) have any thoughts on a Z-Axis DRO configuration?

Knee? Spindle? Both? ...or no Z-Axis DRO at all.

Hi Scott, sorry I missed this some time back! Both of the Z-axes have their use. I have a separate Mitutoyo 6" reader on the quill/spindle and the normal Z scale on the machine's knee. I believe there are knockoffs of the Mitu kit that come with all of the bracketry as a "bridgeport kit" but it might be wise to check about specifics of your machine.

Both DROs have their uses, sometimes you would like to drill a hole to a specific depth and its fast to use the "drill press handle". Other times the quill is locked and you are taking successively lower passes while raising the knee. Its not totally bad to use the graduated dial in those cases but like anything once you get used to looking at the readout, all of the information is contained there.

Great to see the old tractor doing what it was meant to do :D I think I ran a copy of that Woods deck except under a Farmall Cub out on my grandfather's place. He had around 5-6 acres and about 3 trees and so there was a lot of grass to cut. Woods prices aren't necessarily cheap but I've found their engineering to be very solid. I have done the "drive to tractor dealer" trips too but I do always think that my business incrementally helps keep them in business so I have a source of parts later on. I seem to trash the super long V-belt on my mower every 3-4 years and a Case IH dealer in Adrian, Mi still has them in stock.
 
Last edited:
OP
S

sbosecker

Well-known member
Joined
Sep 25, 2012
Messages
3,539
Location
Peachtree City, GA
My son enjoyed your tractor video over his morning banana earlier this week. Thanks for sharing.

250,

Sorry I am slow in replying!

Glad to hear your son found the tractor video interesting. He may be amused to learn that that tractor is about 64 years old.

Best regards,

Scott
 
OP
S

sbosecker

Well-known member
Joined
Sep 25, 2012
Messages
3,539
Location
Peachtree City, GA
Not geezers, wise men. Lol. I’ll have to check that out here in Florida.

shortykorte,

If my link's information was correct, Florida is generous in that it waives tuition & fees if one is above 60. However no credit will be awarded for the class. Not a bad tradeoff if one is just wanting to "learn"!

Best regards,

Scott
 
OP
S

sbosecker

Well-known member
Joined
Sep 25, 2012
Messages
3,539
Location
Peachtree City, GA
OK well I had never seen anything like that mower thing.....

Looks like a very well built little machine. Really like the tight turn capability. Almost as quick as a zero turn, but more stable with the tall rear wheels. Mike

davo727 & 1953mercury,

Thanks for stopping by!

The tight turning is mostly due to the differential braking. All the tractors I have seat time in can pretty much spin right around by stomping on the correct brake and turning the steering wheel to the stop.


Best regards,

Scott
 
OP
S

sbosecker

Well-known member
Joined
Sep 25, 2012
Messages
3,539
Location
Peachtree City, GA
Hi Scott, sorry I missed this some time back! Both of the Z-axes have their use. I have a separate Mitutoyo 6" reader on the quill/spindle and the normal Z scale on the machine's knee. I believe there are knockoffs of the Mitu kit that come with all of the bracketry as a "bridgeport kit" but it might be wise to check about specifics of your machine.

Both DROs have their uses, sometimes you would like to drill a hole to a specific depth and its fast to use the "drill press handle". Other times the quill is locked and you are taking successively lower passes while raising the knee. Its not totally bad to use the graduated dial in those cases but like anything once you get used to looking at the readout, all of the information is contained there.

Great to see the old tractor doing what it was meant to do :D I think I ran a copy of that Woods deck except under a Farmall Cub out on my grandfather's place. He had around 5-6 acres and about 3 trees and so there was a lot of grass to cut. Woods prices aren't necessarily cheap but I've found their engineering to be very solid. I have done the "drive to tractor dealer" trips too but I do always think that my business incrementally helps keep them in business so I have a source of parts later on. I seem to trash the super long V-belt on my mower every 3-4 years and a Case IH dealer in Adrian, Mi still has them in stock.

matt_i,

Thank you very much for your thoughts on Digital Readout for the JET Mill. Your description of a Knee Z-Axis DRO + the additional Quill item makes a lot of sense.

I'm pretty sure you are correct regarding my mower and your Farmall Cub's unit having a lot of overlapping DNA.

I completely agree about trying to use "local" businesses but that relationship needs to work both ways. I wasn't happy about the unmentioned shipping charge.

Best regards,

Scott
 
OP
S

sbosecker

Well-known member
Joined
Sep 25, 2012
Messages
3,539
Location
Peachtree City, GA
Wednesday - April 10, 2019


I haven't been posting as much due to the incremental progress I've been making on stuff in between covering 4-day Trans-Con trips.


But, as usual, when I am home I've been keeping an eye on Craigslist. Ha!


20190401-01.jpg 20190401-02.jpg 20190401-03.jpg

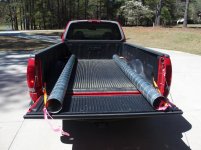
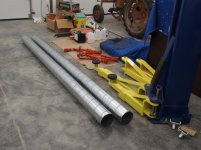
About a week and a half ago I spotted an ad for an accumulation of HVAC "stuff". Included in the accumulation was two 10-foot sections of 24 gauge 6-inch Spiral Duct. The seller and I came to an agreement on price and I brought the material to the LBG. I hope to use this duct as part of a future dust collection system in the Woodshop.


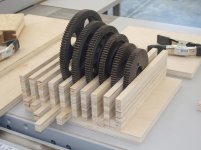
I've also been noodling around with making a box to store and protect the Metric Transposing Gears Accessory for the Rockwell Metal Lathe. (POST 2715 - November 28, 2018)


20190405-04.jpg 20190405-05.jpg 20190405-06.jpg

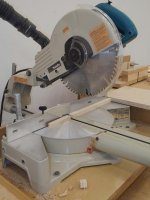
I'm trying to use scraps of the plywood left over from constructing the Miter Saw Station. I ripped 1/2-inch strips and cut them to the desired length with the Miter Saw. I then glued up 4 of the strips.


20190407-07.jpg

The idea was to make "slots" to store the gears. I was hoping to move from concept to finished product this week but...


Continued in next post...
 
Last edited:
OP
S

sbosecker

Well-known member
Joined
Sep 25, 2012
Messages
3,539
Location
Peachtree City, GA
Continued...


On Monday Craigslist intervened again.


20190408-01.jpg

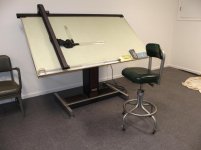
The seller had some old drafting chairs and I acquired one of them for the Mezzanine...


20190408-02.jpg 20190408-03.jpg 20190408-04.jpg

...but the drafting chair was purchased strictly as an afterthought and wasn't the real reason I contacted the seller. What really had gotten my attention was the gentleman had a large collection of Industrial shelving at attractive prices and he was close by.

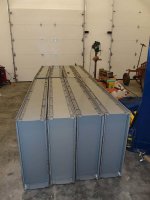
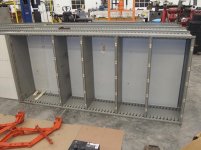
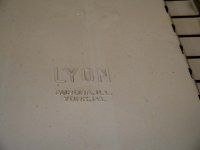
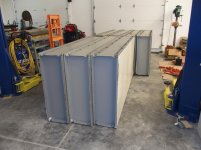
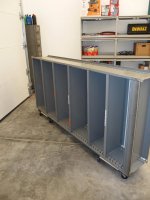
For some time I had been looking for some 12-inch deep shelving and he had quite a few examples. I sorted through his collection and grabbed eight 12"x38"x84" LYON and (apparently) LYON clone shelving units. [Some of the shelves were stamped with a LYON trademark and some - despite being almost exactly the same - were not]

As I mentioned above, the seller was not far from me - about a 15 minute drive - so my wife helped me load/unload the awkward items and we made 3 trips to get the shelves. We sat them in the middle bay of the LBG and called it a night.


Today I started setting up the shelves.


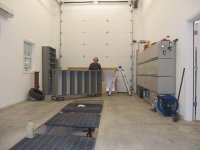
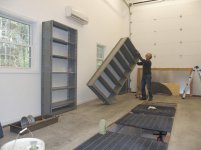
20190410-05.jpg 20190410-06.jpg 20190410-07.jpg

Working by myself, I selected the first set of shelves and sat it on a couple of Harbor Freight Furniture Dollies.

I knew the first location I selected to place a shelf would interfere with the locker near the garage door but I didn't want to empty & move the locker until I knew the shelf would work in this location.


Continued in next post...
 
Last edited:
OP
S

sbosecker

Well-known member
Joined
Sep 25, 2012
Messages
3,539
Location
Peachtree City, GA
Continued...

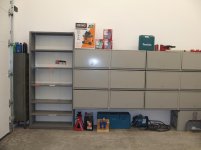
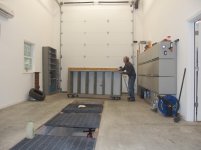
With the first shelving unit's new home established as a practical location, I pulled it out and moved the locker to the north wall of the Long Bay. I reinstalled the first shelving unit on the south wall and started placing shelving units along the north wall.


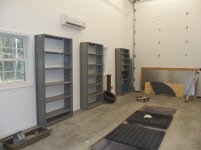
20190410-11.jpg 20190410-12.jpg 20190410-13.jpg

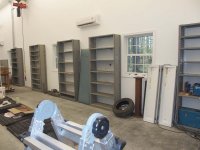
I established a rhythm and over the course of the afternoon & early evening the shelving units were placed on the north wall of the long bay.


20190410-14.jpg 20190410-15.jpg

The last two shelving units aren't quite ready for prime time. I'm going to have to attempt to fabricate a couple of missing brackets that strengthen the shelving units. I hope to do that tomorrow. Once that's done, I'll have to move a couple of tractors to gain adequate access to the north wall before I can place the last two shelving units.

Some modification to the rear sheet metal of some of the shelving units will have to be made to allow access to 2 or 3 electrical outlets. Also, I will probably need to fasten the shelving units to the wall. Plenty of work to be accomplished yet before these items are totally ready for prime time.

So far I'm very pleased that I was able to acquire these shelving units. I think they will be an extremely useful addition to the Lone Beech Garage.


Scott
 
Last edited:
OP
S

sbosecker

Well-known member
Joined
Sep 25, 2012
Messages
3,539
Location
Peachtree City, GA
Fantastic CL buys Scott, the place is really coming together.

That’s a nice score. Are the shelves 84” tall? Going to be a lot of useful vertical storage.

Alan,

I'm very pleased with the Shelving Units. Industrial quality shelving only 12 inches deep hasn't shown up on the local Craigslist very often. So when the stars aligned earlier this week (right item, right price, close by) I moved quickly.


shortykorte,

Yes they are 84" tall. When I first got them unloaded onto the floor of the center bay of the LBG I briefly thought, "What was I thinking?" It seemed like an overwhelming amount of shelving.

However when I started getting them into position, the 60 feet of wall soaked up the shelving units pretty nicely. Ha!


Best regards,

Scott
 
OP
S

sbosecker

Well-known member
Joined
Sep 25, 2012
Messages
3,539
Location
Peachtree City, GA
Thursday - April 11, 2019


20190411-01.jpg

Yesterday I mentioned that I was going to have to fabricate a couple of brackets that were AWOL on one of the Shelving Units. Above is a picture of what I need to make (Black Arrow points to the item).

Nothing all that sophisticated but the original bracket is material that is a hair over a tenth of an inch in thickness (at least that's what I measured) and has a sharp 90 degree bend.

I had some scrap that was almost exactly the same width but was thicker. How was I going to bend that material to get the sharp 90 degree I needed? My metal brake didn't have the horsepower for this thick of steel.

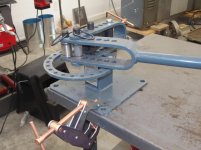
Then I remembered I had purchased a used Northern Equipment Compact Bender on Craigslist years ago. I had used it once to bend some rod and then set it in a corner of the basement.


20190411-02.jpg 20190411-03.jpg 20190411-04.jpg

I brought the tool from the basement to the LBG this afternoon, clamped it to a work table and studied the instructions for a bit. This is not the most intuitive tool ever made. When I got it setup, I put the piece of scrap into the bender and pulled the handle.


20190411-05.jpg 20190411-06.jpg

Cool! That went pretty well!

Now I just need to make another one, trim them to a size that will work and machine a couple of slots in each one.


20190411-07.jpg

Using a Angle Grinder with a wire wheel, I cleaned the rust off the end of the scrap.


Continued in next post...
 
Last edited:
To avoid these ads, REGISTER NOW!
Top Bottom