To avoid these ads, REGISTER NOW!

Above 1200 Sq/FT The Lone Beech Garage (60x46x16)

Wokspaces above 1200 squarefeet.
OP
S

sbosecker

Well-known member
Joined
Sep 25, 2012
Messages
3,539
Location
Peachtree City, GA
Continued...

2019091012-11.jpg 2019091012-12.jpg

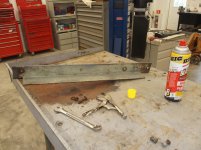
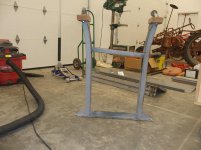
Here was the biggest issue that needed to be addressed. For some reason this leg had been modified by someone. The stringer spanning between the legs had been taken from its normal position parallel to the floor and welded at an angle.

Beats me.


2019091012-13.jpg 2019091012-14.jpg

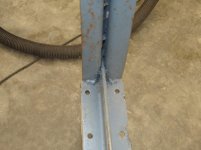
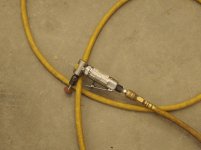
I took a pneumatic die grinder with a stone and ground on the welds.


2019091012-15.jpg

I also used a pneumatic cutoff tool to cut some of the weld.


2019091012-16.jpg 2019091012-17.jpg

Eventually I freed the stringer from the one side and pulled it into position with a pipe clamp. With the stringer back where it should be, I welded it to the leg.


Continued in next post...
 
Last edited:
To avoid these ads, REGISTER NOW!
OP
S

sbosecker

Well-known member
Joined
Sep 25, 2012
Messages
3,539
Location
Peachtree City, GA
Continued...

2019091012-21.jpg

The leg assembly was reattached to the table top and then the new stringer & shelf were added. Most of the holes line up but I'm going to have to add a couple of new holes to the shelf.

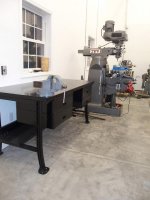
All in all I'm happy with the repairs and how the non-LYON parts worked on the table. At some point in the future, the cosmetic surgery will begin and I'll try to give this LYON Table a paint job.


Scott
 
Last edited:

drivesitfar

Well-known member
Joined
Oct 23, 2013
Messages
36,078
Location
Pacific Northwest
SB: I've heard that Electrolysis can work even without LINE OF SIGHT, but sounds like your Evaporust works great so keep up the great work. i'm sure electrolysis is done a lot to save the cost of Evaporust so if you like the results and can afford a few gallons by all means keep it up.

one thing I heard from some of the members is that they use coffee filters to strain out the junk and put the evaporust back into it's container and use it many many times until results start to be less than desired.

don't you have another LYON bench like that? looks like you are rebuilding this one so i'm sitting back and watching and learning once again as you do all the work.

hope you are enjoying your weekend and I surely am cause I just had a beyond burger (best veggie burger ever made in my book) with a good amount of BBQ sauce on a chibatta bun.

cheers
 

drivesitfar

Well-known member
Joined
Oct 23, 2013
Messages
36,078
Location
Pacific Northwest
SB: Yep that's the LYON bench I recall you showing me (us) how to spiff up and how to put all those drawers on by yourself. nice looking vise on top too!!

looks great alongside that mill too.

do you still have your little Standard vise we talked about a few years ago? another member wanted mine and i'd already gave it to a friend that sadly passed away and I don't want to call his bride about it so I sent him to you. I hope that's ok?

you can email me if you want his information cause I guess he has a Standard stand or something that works for that particular little vise and maybe he's got something better to trade or give you some needed green for your tool funds.

cheers and hope you have a great day in LONE BEECH!!
 

matt_i

Well-known member
Joined
Mar 14, 2008
Messages
10,758
Location
SE Michigan
Just checking in, lots of stuff going on, really great to have a nice versatile workspace that can take on a wide variety of projects! I hadn't seen your drafting table before, but that's usually how I start working, some sketches and then I go to CAD. :) That sounds like its a lot of computer work but usually its running all over with a tape measure and an envelope writing various measurements down so I can put it into the model.

Really like the metal trash can, that's superb!

I have a similar steel workbench that my Dad got from his neighbor. He cleaned and painted it and its definitely a favorite spot to work. While not beautiful I added some 2x4 crossmembers down low and a couple of 2x6s crossing that so I can move it around with the pallet jack, even while loaded with "projects"...

I saw you die grinding on the welds...one tool I didn't know I needed until I saw it work was a Metabo 6" angle grinder, then fitted with the Metabo thin "metal slicer" cutoff wheels....this thing makes fast work of all forms of welds wherever the disk can fit.
 

shortykorte

Well-known member
Joined
Sep 1, 2014
Messages
8,039
Location
Tallahassee, Fl
Nice fix on the table but I don’t remember you enlightening us on those racks. New or used?


Shorty Korte
Always remember quality in QST

Sent from my iPhone using Garage Journal
 
OP
S

sbosecker

Well-known member
Joined
Sep 25, 2012
Messages
3,539
Location
Peachtree City, GA
...do you still have your little Standard vise we talked about a few years ago? another member wanted mine and i'd already gave it to a friend that sadly passed away and I don't want to call his bride about it so I sent him to you. I hope that's ok?

you can email me if you want his information cause I guess he has a Standard stand or something that works for that particular little vise and maybe he's got something better to trade or give you some needed green for your tool funds.


DrivesItFar,


20181228-03.jpg

The Standard Vise is mounted to the black LYON Table but I am intrigued by what a "Standard Stand" might be.

Best regards,

Scott
 
OP
S

sbosecker

Well-known member
Joined
Sep 25, 2012
Messages
3,539
Location
Peachtree City, GA
Just checking in, lots of stuff going on, really great to have a nice versatile workspace that can take on a wide variety of projects! I hadn't seen your drafting table before, but that's usually how I start working, some sketches and then I go to CAD. :) That sounds like its a lot of computer work but usually its running all over with a tape measure and an envelope writing various measurements down so I can put it into the model.

Really like the metal trash can, that's superb!

I have a similar steel workbench that my Dad got from his neighbor. He cleaned and painted it and its definitely a favorite spot to work. While not beautiful I added some 2x4 crossmembers down low and a couple of 2x6s crossing that so I can move it around with the pallet jack, even while loaded with "projects"...

I saw you die grinding on the welds...one tool I didn't know I needed until I saw it work was a Metabo 6" angle grinder, then fitted with the Metabo thin "metal slicer" cutoff wheels....this thing makes fast work of all forms of welds wherever the disk can fit.


matt_i,

Thanks for stopping by and the kind words.

The die grinding was the result of not being able to really get anything else into that space. I did use a cutoff wheel to go as deep as I could between the leg and the stringer. A larger diameter wheel like you describe might have been the way to go and I'll look into the "Metal Slicer" as well.

Best regards,

Scott
 
OP
S

sbosecker

Well-known member
Joined
Sep 25, 2012
Messages
3,539
Location
Peachtree City, GA
Nice fix on the table but I don’t remember you enlightening us on those racks. New or used?


Shorty Korte
Always remember quality in QST


Shorty Korte,

Thanks for stopping by!

I got those racks back in April... see POST 2890.

They had been modified to be "mobile" by adding some stout casters on each corner. When I got them they were in the possession of a Movie Studio's "Warehouse of Stuff". The greater Atlanta metropolitan area has become - as the fellow that sold the racks to me put it - "Hollywood East".

Anyway, I guess the movie folks had been storing stuff on them but had found something else to serve that purpose.

At first I was thinking the casters were a liability but I'm finding them to be VERY useful as I am able to move them around as needed.

I was trying to find something to support the LYON Table as I worked on it and was walking around the shop looking for inspiration. As my gaze fell on the racks (made by LYON by the way) I stopped looking as it appeared that I could mount the "arms" on the back of the rack.

The rest is history and they worked pretty well for this task.

Best regards,

Scott
 
Last edited:
OP
S

sbosecker

Well-known member
Joined
Sep 25, 2012
Messages
3,539
Location
Peachtree City, GA
Monday - October 14, 2019


The de-rusting of the Emmert Pattern Maker's Vise continued...


2019091014-01.jpg

I pulled out some hardware that I had thrown in the EvapoRust Bucket's plastic strainer basket.


2019091014-02.jpg 2019091014-03.jpg

I pulled the Front Jaw out of the plastic tray it had been soaking in. I washed it off and then hit it with a Heat Gun - as I have done with the other parts - to dry it more completely.


2019091014-04.jpg 2019091014-05.jpg

I think I know why the outside of the jaw still has some rust on it. The area of the "ribs" where there is rust were probably bottomed out on the bottom of the plastic tray. The EvapoRust may not have been able to touch these areas of the jaw as they were against the plastic.


2019091014-06.jpg

I'd like to soak the Rear Jaw in the EvapoRust using the plastic tray as I did the Front Jaw but I have a concern. The cylindrical portion of the Rear Jaw will be sticking up out of the EvapoRust if I use the plastic tray again.

Does anyone have experience in treating a part in EvapoRust in two sessions? In other words, treating one side of a part in the EvapoRust with the other side above the surface and then flipping the part to do the other side.

I'm wondering if there would be some undesirable results by doing it in two passes vs. a complete submergence.


Continued in next post...
 
Last edited:
OP
S

sbosecker

Well-known member
Joined
Sep 25, 2012
Messages
3,539
Location
Peachtree City, GA
Continued...


I did just a bit of work on the LYON Table today.


2019091014-11.jpg 2019091014-12.jpg

There was a piece of 2-1/2" x 2-1/2" x 3/16" angle iron fastened underneath the top of the LYON Table at the rear of the tabletop. It looks like this may have been used at one time to provide additional support for something mounted to the table. If rotated towards the front, the holes on the free end of the angle iron match up with holes in the tabletop towards the front of the table.

So why is this angle iron still there? Probably because it would be difficult to remove due to the fastener that was used ...as I was about to find out.


2019091014-13.jpg

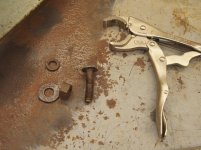
A smooth round topped bolt head was above the tabletop and a rusted nut attached to the bolt under the table. Also, the flange of the table top interfered with getting an impact tool on the nut under the table.

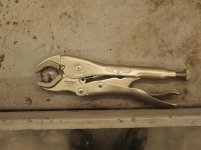
I manage to get a purchase - barely - on the top of the bolt with a Vise Grip Pliers.


2019091014-14.jpg 2019091014-15.jpg

A bit of a fight from that point but eventually got the nut off the bolt and remove the angle iron.


As I came into the house to clean up and meet my wife for supper, I found an email from FedEx. A delivery from Kennedy should arrive on Wednesday. I am hoping these are the rivets I need to finish refurbishing the Kennedy K-20 Toolbox.


Scott
 
Last edited:

drivesitfar

Well-known member
Joined
Oct 23, 2013
Messages
36,078
Location
Pacific Northwest
SB: from what i've read from the tools guys that use Evaporust a lot they say that they don't think you can leave a part in it too long. that said i'm thinking there is a point where evaporust quits working and you need to use a dremel, wire wheel on your bench grinder or old fashioned elbow grease.

next time I'm thinking of cutting off a bolt I'm going to think you and your mastery of sticking with it and getting the damn bolt out that's in the way using the tools, elbow grease and your brain.

nice work!!
 
OP
S

sbosecker

Well-known member
Joined
Sep 25, 2012
Messages
3,539
Location
Peachtree City, GA
SB: from what i've read from the tools guys that use Evaporust a lot they say that they don't think you can leave a part in it too long. that said i'm thinking there is a point where evaporust quits working and you need to use a dremel, wire wheel on your bench grinder or old fashioned elbow grease.

next time I'm thinking of cutting off a bolt I'm going to think you and your mastery of sticking with it and getting the damn bolt out that's in the way using the tools, elbow grease and your brain.

nice work!!


DrivesItFar,

Writing from Los Angeles this evening... I should get back to Georgia tomorrow.

Thanks for the kind words - Had I not been able to get the Vise Grips on the bolt I probably would have welded a nut to the top of it. That would have worked also.

FedEx made a delivery from Kennedy today and my wife has retrieved it from the front porch. I'm looking forward to seeing if it contains the rivets to finish the Kennedy K-20 Toolbox refurbishment.

Best regards,

Scott
 
Last edited:
OP
S

sbosecker

Well-known member
Joined
Sep 25, 2012
Messages
3,539
Location
Peachtree City, GA
Thursday - October 17, 2019


Got back from my trip this evening and opened a couple of packages that had arrived while I was gone.


2019091017-01.jpg

The package from Kennedy did contain a couple of small bags of rivets. I'll check them out tomorrow to see if they look like they'll work on the Kennedy K-20 Toolbox.


2019091017-02.jpg 2019091017-03.jpg

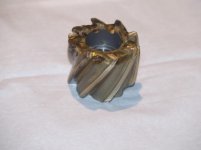
A package from Amazon also arrived while I was gone. A Dormer 40mm Shell Mill. This is a bit of a weird story... I'd be interested in folks comments on this.

I was doing a little internet work looking for a 2-inch or 50mm shell mill for my JET Mill. While on Amazon I came across a 50mm shell mill from Dormer for about $240 and moved on to look at other items. Somehow I stumbled onto a 40mm shell mill from Dormer but the price was $23.78 with only one left in stock.

Good Grief! That was a big difference in price for 10mm smaller. I did a quick internet search for this 40mm cutter to see what the price was at other vendors. I could not find this item priced anywhere else for less than $150.

I figured for less than $25 I could hardly miss so I came back to Amazon and hit the buy button. After I placed the order this 40mm shell mill was now out of stock and the listed price was $172.19!

I seem to recall a discussion, somewhere on this site, regarding Amazon sometimes pricing things at pennies on the dollar when the stock of a item gets very low. I can't remember the details but that seems to be what happened here. I anyone reading this is familiar with happy situations like what happened to me I'd like to hear why Amazon would price something like this.

Now I need to find a R8 Shell Mill Holder with a 16mm bore. I can't seem to find a vendor in the USA that has such a thing. So far just about the only place I've been able to find this item is at Gloster Tooling Supplies Limited, Gloster UK.

They have a presence on eBay.

Does anyone know of other sources for an R8 Shell Mill Holder with a 16mm bore?


Scott
 
Last edited:

drivesitfar

Well-known member
Joined
Oct 23, 2013
Messages
36,078
Location
Pacific Northwest
SB: I hadn't heard that about Amazon's pricing, but I hope they paid the vender his going rate before they sold and priced items like that.

now the big issue will you use it? i've bought many a great deal to have them only sit around which is why i'm on the boarderline of being a hoarder, but i'm working on that and my FSD so stay tuned.

hope those are the right parts to finish your Kennedy.

looks like you made another trip from coast to coast without an issue. i heard it's been getting snow storms last week or so, but maybe you fly high enough that the weather isn't an issue?

cheers and yep still drinking a ton of Moroccan green ice tea
 
OP
S

sbosecker

Well-known member
Joined
Sep 25, 2012
Messages
3,539
Location
Peachtree City, GA
SB: I hadn't heard that about Amazon's pricing, but I hope they paid the vender his going rate before they sold and priced items like that.

now the big issue will you use it? i've bought many a great deal to have them only sit around which is why i'm on the boarderline of being a hoarder, but i'm working on that and my FSD so stay tuned.

hope those are the right parts to finish your Kennedy.

looks like you made another trip from coast to coast without an issue. i heard it's been getting snow storms last week or so, but maybe you fly high enough that the weather isn't an issue?

cheers and yep still drinking a ton of Moroccan green ice tea


DrivesItFar,

Yes, the Amazon pricing was very odd on this.

I think I will use the Shell Mill. I have to find an arbor that will hold it and that's been more challenging than I would have thought.

I believe the rivets and such will do the job. The biggest issue will be coming up with a toolbox "setup" that will allow me to set the rivet and not destroy the toolbox. I'll have to come up with some jigs to make that work.

As it turns out the weather did affect this trip. I was supposed to fly from Los Angeles to New York on Thursday and then catch a ride to Atlanta. At about 5 am Los Angeles time my hotel phone rang. Usually this means that the front desk has gotten someone else's wakeup call mixed up with my room number. However this time it was a call to let me know that my flight to New York had been canceled and I was now going to ride back to Atlanta on a flight leaving Los Angeles in about an hour. There was no way to make that happen so I got that changed to a later flight. I am assuming the windy weather that had hit New York had caused this change in the plan.

Best regards,

Scott
 
OP
S

sbosecker

Well-known member
Joined
Sep 25, 2012
Messages
3,539
Location
Peachtree City, GA
Friday - October 18, 2019


Today, as is often the case when I return from a trip, was filled with non-shop related chores. I did have about a 45 minute window in the early afternoon where I could accomplish something to move the ball forward.


2019091018-01.jpg 2019091018-02.jpg

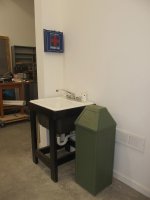
I've needed to put a Paper Towel Dispenser near the shop sink for some time. Today I moved the First Aid Kit down the wall a bit and mounted a newly acquired Paper Towel Dispenser above it.


Scott
 
OP
S

sbosecker

Well-known member
Joined
Sep 25, 2012
Messages
3,539
Location
Peachtree City, GA
Sunday - October 20, 2019


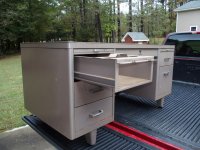
Yesterday I was doing my morning perusal of Craigslist and I came across an ad in the FREE section for a Metal Desk. The picture was of a Tanker Desk that appeared to be missing a drawer. The location of the desk was only about 10 miles away from me. I thought a Tanker Desk would be a good addition to the Upper Room of the Lone Beech Garage but an inspection was needed to see if it was worth the price. Ha!

I texted the seller and a meeting was arranged. I drove over to examine the desk. I didn't expect to pick it up on this visit because I was by myself and I knew the desk would be heavy. If it looked worthy of the effort, I would see if my son could give me a hand when he had some time.

I arrived and the seller was there with her son-in-law. I looked it over and it seemed acceptable... even better, the son-in-law offered to help me load it into my pickup.

But wait; there's more!

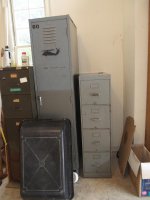
The seller was planning a yard sale and asked if I'd be interested in another free item... an old filing cabinet. Well, why not... especially since I had help to load it.


2019091020-01.jpg 2019091020-02.jpg

It was raining yesterday so I had just pulled my loaded truck into the garage. Today the rain had ended and I needed to unload these beauties... this time by myself.


2019091020-03.jpg

I placed the old filing cabinet in the house garage.


2019091020-04.jpg 2019091020-05.jpg

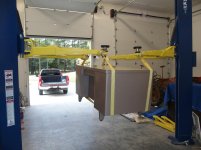
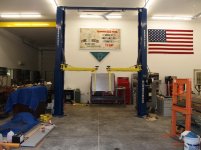
Even though I have a loading dock, it's set up for a normal truck bed's height (about 48"). The electric chain hoist had some stuff that would need to be rolled out of the way to get at it. I elected to use the 2-Post Lift to get the desk on the floor.


2019091020-06.jpg 2019091020-07.jpg

Once on the floor I sat it on some Harbor Freight Dollies so I can move it around easily until it can be taken to the Upper Room.


Continued in next post...


KEYWORDS: Globe-Wernicke Streamliner 3SL-60 FT Desk Tanker
 
Last edited:
OP
S

sbosecker

Well-known member
Joined
Sep 25, 2012
Messages
3,539
Location
Peachtree City, GA
Continued...


2019091020-11.jpg 2019091020-12.jpg

So here's the desk I have.


2019091020-13.jpg 2019091020-14.jpg

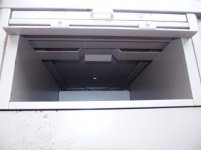
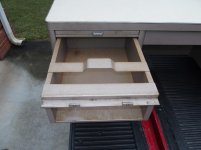
So what is this feature that I thought was a missing drawer in the seller's picture?


2019091020-15.jpg 2019091020-16.jpg 2019091020-17.jpg

It is a module that can be removed and a regular drawer installed in its place. I am guessing this module could support something... maybe a small table?

I've done some searching on the InterWeb but I haven't seen anything like this. If someone reading this knows, please share in a post.


Scott
 
Last edited:
To avoid these ads, REGISTER NOW!

drivesitfar

Well-known member
Joined
Oct 23, 2013
Messages
36,078
Location
Pacific Northwest
SB: i've had a few tanker desks before and scratching my head and there isn't enough hair or brains there to tell me what that hole is there for. some sort of machine?

anyway if you are flying to Seattle anytime soon I have the wood pen & pencil holder that fits nicely in the middle drawer that I'd be happy to give you to slip into your suit case. i'm not sure how i'd ship it to you so it wouldn't get broken even though its a nice wood one.

I was looking at picking up a free 660 pound fireproof cabinet this weekend and the gal said it took 4 professional movers to move it in her office a few years ago so she doubted i'd be able to move it by myself. I almost ran over to take her "dare me" and load in my Honda, but my youngest son flew up this weekend for his 10th HS reunion and UW homecoming too so we were busy being his UBER DRIVER.

hope you figure out what the hole is for or just grab a drawer off another tanker and call it good.

cheers.
 
OP
S

sbosecker

Well-known member
Joined
Sep 25, 2012
Messages
3,539
Location
Peachtree City, GA
Scott,

Though this is not the same desk, I think it might help with your mystery "drawer".
https://www.ebay.com/itm/Vintage-Steel-Tanker-Desk-with-Typing-Return-/273482331527

I'd imagine that the reason yours has the opening in the face is for reams of paper or triplicate forms or the like to be stored & at close hand.

Great Find!

Matt

Matt,

Thank you so much for posting that information!

This is pretty much what I thought that module was for but when I was searching I never considered calling it a "Return". Apparently that is correct office furniture lingo: See this LINK.

Best regards,

Scott
 
OP
S

sbosecker

Well-known member
Joined
Sep 25, 2012
Messages
3,539
Location
Peachtree City, GA
SB: i've had a few tanker desks before and scratching my head and there isn't enough hair or brains there to tell me what that hole is there for. some sort of machine?

anyway if you are flying to Seattle anytime soon I have the wood pen & pencil holder that fits nicely in the middle drawer that I'd be happy to give you to slip into your suit case. i'm not sure how i'd ship it to you so it wouldn't get broken even though its a nice wood one.

I was looking at picking up a free 660 pound fireproof cabinet this weekend and the gal said it took 4 professional movers to move it in her office a few years ago so she doubted i'd be able to move it by myself. I almost ran over to take her "dare me" and load in my Honda, but my youngest son flew up this weekend for his 10th HS reunion and UW homecoming too so we were busy being his UBER DRIVER.

hope you figure out what the hole is for or just grab a drawer off another tanker and call it good.

cheers.

DrivesItFar,

Should I get a Seattle trip I'll be sure to let you know - Thanks so much!

Thank your son when you get a chance for saving you from bodily harm as you wrestled the quarter-ton+ fire safe. Ha!

Looks like the mystery has been solved! (see above - POST 3142)

Every discipline has its own nomenclature... where in the world did "Return" come from?

Best regards,

Scott
 

drivesitfar

Well-known member
Joined
Oct 23, 2013
Messages
36,078
Location
Pacific Northwest
SB: it's a bit too early for me to head out to my garage to get you a picture of the wood tray, but i'll try to put it somewhere that i'll remember i have it so you can have it if you stop here even if it's only a quick plane repair or fill up the tank on one of your long trips.

you know i was thinking typewriter, but had no idea it was the start of another desk (RETURN).

BTW that member that thought he needed a Standard vise for his stand did a bit more research and now he thinks its a NEW BRITIAN vise stand so i'll keep you posted.

enjoy your day out in LONE BEECH!!
 
OP
S

sbosecker

Well-known member
Joined
Sep 25, 2012
Messages
3,539
Location
Peachtree City, GA
Saturday - October 26, 2019

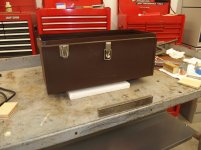
This week I've been able to get a little QST in the shop and I've been trying to figure out how best to set the last rivets in the Kennedy K-20 Toolbox. I was afraid I wouldn't have enough room to properly strike the Rivet Clinching Tool when working inside the toolbox. There was also the problem of getting the toolbox into a location that would allow me to position the head of the rivet onto a flat, hard "anvil" as I struck the rivet's tail.

I began to think that maybe I could use a Kant-Twist Clamp and some jigs to squeeze the rivet and set it. I sat about to do that.


2019091025-01.jpg 2019091025-02.jpg

I cut some MDF into equal size pieces and drilled 1/2-inch holes in some of the MDF to accept the 5/64" Rivet Clincher; a 13/64-inch hole was drilled in other pieces of MDF to accept the 1/8" Rivet Clincher. I used the individual tools to line up the holes and glued the pieces together.


2019091026-03.jpg 2019091026-04.jpg

I drilled a correct size hole in two remaining pieces of MDF. These holes were drilled just deep enough to receive the end of the individual clinchers.

Yesterday and today I attempted to line all of this stuff inside the toolbox and use the clamp to squeeze the rivet ...this did not go well. Since I needed 4 hands and a prehensile tale to accomplish the task I didn't take pictures of the attempt.


2019091026-05.jpg 2019091026-06.jpg

Enough with attempting to finesse the task. I had just enough room to turn a hammer sideways and whack the Rivet Clincher. In a pretty short amount of time I had all four of the 5/64-inch rivets nicely set. The center latch was now secure to the toolbox.


2019091026-07.jpg

These are the tools & stuff I used to accomplish this.


Continued in next post...
 
Last edited:
OP
S

sbosecker

Well-known member
Joined
Sep 25, 2012
Messages
3,539
Location
Peachtree City, GA
Continued...

2019091026-11.jpg 2019091026-12.jpg 2019091026-13.jpg

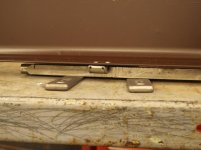
The lower part of the center latch was a real pain as it was necessary to get an "anvil" into position despite the flopping upper part of this latch.

In the first picture I've placed my "anvil" flat on the edge of the table. This allowed the anvil to support the lowest rivet and the "flopping" part of the latch could swing out over the edge of the table.

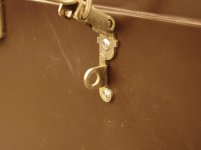
The second picture shows the "anvil" set on its thinnest side. Despite the padlock flange, this allowed the "anvil" to provide solid support for the head of the rivet as the tail was being struck with the clincher.

(The left hand latch hasn't been riveted - I just used a couple of machine screws to position it on the toolbox)

The last picture shows the rivets after they had been set.


2019091026-14.jpg 2019091026-15.jpg 2019091026-16.jpg

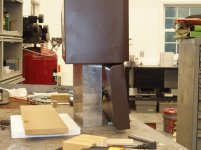
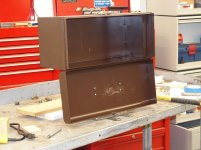
The upper part of the center latch had some challenges. A block of aluminum supported the toolbox's carcass and allowed the lid to swing down towards the table. I used a couple of machinist wedges to place my "anvil" at the proper angle to support the heads of the rivets. This worked great!


2019091026-17.jpg

The center latch of the toolbox successfully riveted in position.

I'll probably work on the outer latches this week. They offer a special challenge as they are thin metal bent so the face of the latch is about 200 thousands above the side of the toolbox. I think I need to support those latches somehow to prevent them from being smashed while their rivets are being set. Either that or it's back to the squeezing jig I gave up on.


Continued in next post...
 
Last edited:
OP
S

sbosecker

Well-known member
Joined
Sep 25, 2012
Messages
3,539
Location
Peachtree City, GA
Continued...


2019091026-21.jpg 2019091026-22.jpg

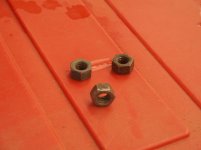
Last night I put the Emmert Vise's Rear Jaw into the EvapoRust tray. I used 3 nuts to keep the flat part of the Jaw from sitting on the bottom of the tray.


2019091026-23.jpg

Today I flipped the Rear Jaw over and let the other side of the Rear Jaw steep in the EvapoRust until this evening.


2019091026-24.jpg 2019091026-25.jpg

I think there may have been some sort of adhesive on the face of the Rear Jaw. You can also see where the 3 nuts were. I think if I hadn't used the nuts to keep the Jaw off the bottom of the tray, the Jaw would not have gotten as clean as it did. On the other side of the Rear Jaw you can see that there wasn't quite enough EvapoRust in the tray. There is a "ring" around the center cylinder where it didn't get treated.


2019091026-26.jpg 2019091026-27.jpg

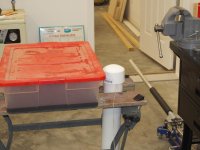
Before I left the shop for the night, I put EvapoRust into some PVC pipe and dropped the Emmert Vise's Leadscrew into it. The Leadscrew Handle acts as a cap on the tube and should help to prevent the EvapoRust from evaporating too much tonight.


Scott
 
Last edited:

GeoRoss

Active member
Joined
Jan 2, 2018
Messages
44
Location
Southern AZ
Continued...


2019091020-11.jpg 2019091020-12.jpg

So here's the desk I have.


2019091020-13.jpg 2019091020-14.jpg

So what is this feature that I thought was a missing drawer in the seller's picture?


2019091020-15.jpg 2019091020-16.jpg 2019091020-17.jpg

It is a module that can be removed and a regular drawer installed in its place. I am guessing this module could support something... maybe a small table?

I've done some searching on the InterWeb but I haven't seen anything like this. If someone reading this knows, please share in a post.


Scott

typewriter?
 
OP
S

sbosecker

Well-known member
Joined
Sep 25, 2012
Messages
3,539
Location
Peachtree City, GA
typewriter?


GeoRoss,

Here's a picture of a similar desk that illustrates how the "module" on my desk probably supported a side table.


2019 10 20 - Tanker Desk Return.jpg

Matt Johnson found the desk on an eBay auction and posted the link (see POST 3142)

I don't know if this arrangement was what you were thinking of when you mentioned typewriter.

Best regards,

Scott
 

Matt Johnson

Well-known member
Joined
May 2, 2014
Messages
59
Location
Washington State
The typewriter "drawer" feature was typically a pull out, then hinged & locked into position (also typically double pivot hinge with some form of spring assist).

Here's a link to an example of a Steelcase brand typewriter shelf "pull up" -
https://marketplace.apartmenttherapy.com/listings/b2f36ae7-a5d2-490d-b5f9-a377b8c5fb4c

I believe that Scott's desk is designed for a Left Return to be bolted into position on the upper ledge of the "drawer" & then the drawer is simply used as an open shelf (vs being pulled in & out).

With that being said, I'm really a decade younger than a person that would have used this generation of office furniture.
However, I do remember them well as a kid & am partial to Mid-Century design. I also inquired with my mother for her experience & she used a Steelcase desk very similar to the link above in the early part of her 30+ year career/pre desktop computer days with GTE.

Matt
 

GeoRoss

Active member
Joined
Jan 2, 2018
Messages
44
Location
Southern AZ
GeoRoss,

Here's a picture of a similar desk that illustrates how the "module" on my desk probably supported a side table.


2019 10 20 - Tanker Desk Return.jpg

Matt Johnson found the desk on an eBay auction and posted the link (see POST 3142)

I don't know if this arrangement was what you were thinking of when you mentioned typewriter.

Best regards,

Scott

My guess was a pull out extension for a typewriter, your picture proves me wrong.

The desk was a great score!
 
OP
S

sbosecker

Well-known member
Joined
Sep 25, 2012
Messages
3,539
Location
Peachtree City, GA
Sunday - October 27, 2019


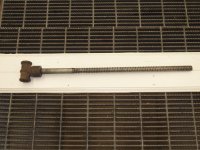
This afternoon I pulled the Emmert Vise's Leadscrew out of the tube filled with EvapoRust.


2019091027-01.jpg

After rinsing off & drying the Leadscrew, the far end still needed some work. I think that end of the Leadscrew was exposed to a lot of wood dust and some was caked onto that end. I used a bench grinder with a wire wheel to finish the clean up of the Leadscrew.


2019091027-02.jpg 2019091027-03.jpg

I then hosed down the Leadscrew with some lithium grease and sat the "handle part" of the Leadscrew into a small plastic tub of EvapoRust.

I hope to get the "handle part" removed from its bath tomorrow afternoon.


Scott
 

drivesitfar

Well-known member
Joined
Oct 23, 2013
Messages
36,078
Location
Pacific Northwest
SB: It sure looks like you've been busy and making a lot of progress on your Emmert and Kennedy.

thanks for all the pictures and stories (or lessons) too.

good luck putting that big Emmert back together and next thing you'll need to do is build a nice big woodworking bench for it. start gathering old lumber or beams to make your bench and do you own a planer yet cause it will become a very handy tool if you get one if you want to do most any types of woodworking.

cheers
 
OP
S

sbosecker

Well-known member
Joined
Sep 25, 2012
Messages
3,539
Location
Peachtree City, GA
SB: It sure looks like you've been busy and making a lot of progress on your Emmert and Kennedy.

thanks for all the pictures and stories (or lessons) too.

good luck putting that big Emmert back together and next thing you'll need to do is build a nice big woodworking bench for it. start gathering old lumber or beams to make your bench and do you own a planer yet cause it will become a very handy tool if you get one if you want to do most any types of woodworking.

cheers


DrivesItFar,

The Emmert Vise cleanup is just about complete. I'll probably paint it black - that appears to be the color it was originally.

I'll be trying to finish up the Kennedy Toolbox this week.

Of course that could all go sideways tomorrow. I'm going to look at a tractor tomorrow. Ha!

Best regards,

Scott
 
OP
S

sbosecker

Well-known member
Joined
Sep 25, 2012
Messages
3,539
Location
Peachtree City, GA
Tuesday - October 29, 2019

Recently I've noticed a smell after I park my 2000 Ford F150 in the house garage. It smells "hot" and maybe electrical. There also is quite a bit of pinging type noise coming from under the truck after shutdown. I would attribute that sort of noise to air conditioning condensate dripping onto a hot exhaust pipe... but I'm not using the air conditioning. I was thinking maybe a piece of plastic on the road had gotten flipped up onto the exhaust pipe but the smell doesn't seem to be going away.
Today I decided to take the truck into the LBG for a look underneath.


2019091029-01.jpg

The quickest way to do this seemed to be positioning the truck over the "Tornado Shelter".


2019091029-02.jpg 2019091029-03.jpg

This black material on the exhaust pipe was the only thing that looked suspicious. I didn't notice it when I was under the truck but, looking at the first picture now, I'm seeing something up high just in front of the clamp. From the picture I can't make out if it's something foreign or it's something that should be there. I'll have to check it out again tomorrow.

One thing for sure, you have to love owning a vehicle in Georgia. In a couple of weeks I will have had this truck for 20 years and the underbelly of this thing is as clean as a whistle. Not much road salt used in this part of the world.


2019091029-04.jpg

I got the Emmert Vise's Handle out of the EvapoRust today. I would have done it yesterday but I had a medical procedure in the morning where I was under anesthesia for about 20 minutes. Before the procedure my wife made me promise that I wouldn't enter the Lone Beech Garage until enough time had passed to overcome any aftereffects. To her -and by extension, me - that meant waiting until today.


2019091029-05.jpg 2019091029-06.jpg 2019091029-07.jpg

So the only remaining component of the Emmert Vise that's still rusty will get an EvapoRust dip. Despite the fact that the EvapoRust has turned the color of an expresso, it still seems to be doing its job.

I got a piece of 3-inch PVC pipe, glued a cap on the bottom and set the open end upright using a Workmate. The Square Beam was lowered into the pipe and EvapoRust was added. I placed a 2nd cap on the top of the pipe to minimize evaporation.

We'll see what it looks like tomorrow!


Scott
 
Last edited:

drivesitfar

Well-known member
Joined
Oct 23, 2013
Messages
36,078
Location
Pacific Northwest
SB: did i mention that some of the guys that use evaporust all the time filter it every so often using the old coffee filters that they pick up at garage sales. not sure if they use one or more at a time, but they say it sure helps to clean up the evaporust and some add new evaporust to old to freshen it up a bit, but not sure how that works or how long this stuff lasts. i've heard for months and some have mentioned a year or so.

if you keep picking up great old rusty finds you might have to set up an electrolysis tank.

have fun looking at (or buying) another tractor!!
 
OP
S

sbosecker

Well-known member
Joined
Sep 25, 2012
Messages
3,539
Location
Peachtree City, GA
SB: did i mention that some of the guys that use evaporust all the time filter it every so often using the old coffee filters that they pick up at garage sales. not sure if they use one or more at a time, but they say it sure helps to clean up the evaporust and some add new evaporust to old to freshen it up a bit, but not sure how that works or how long this stuff lasts. i've heard for months and some have mentioned a year or so.

if you keep picking up great old rusty finds you might have to set up an electrolysis tank.

have fun looking at (or buying) another tractor!!


DrivesItFar,

When I pull the Emmert Vise Square Beam out of the EvapoRust I'll probably filter it as it goes back into the bucket.

I do have a very suitable tank for electrolysis.


2019 10 30 - Tote.jpg

I've have a tank similar to this one.

The tractor visitation was different. It was one of many projects a nearby gentleman had going on and he is suffering from late stage Alzheimer's. For the past few years he was living at his home (alone) and he now has moved to a place that can take care of him. Family members are trying to sort through the projects - a few tractors, a late 60's Camaro, several Hit-Miss Engines, etc. - and find interested buyers.

The tractor I was looking at was completely in pieces and was scattered between 3 buildings. In each building the parts of the tractor were intermixed with parts of other projects. You really had to know what you were looking for to find the correct items. A sad story.

At first I didn't think I wanted to deal with this unorganized mess but, after some thought, I called and made an offer.


Best regards,

Scott
 
Last edited:
OP
S

sbosecker

Well-known member
Joined
Sep 25, 2012
Messages
3,539
Location
Peachtree City, GA
Wednesday - October 30, 2019


Yesterday I mentioned I had examined the belly of my elderly F150 Pickup. After I drove around today I took the truck back to the LBG to see if I could see anything unusual while it was still hot. Really didn't see anything that I didn't see yesterday. I did look at that area by the muffler clamp and it was a small button on the exhaust pipe that helps line up the muffler assembly.

I did pin down where all those pings and pops that I've been hearing were coming from. It seems to be coming mostly from the Catalytic Converters and a bit from the Muffler. I'm not surprised to hear some noises but this seems "recently excessive" for that sort of thing. Maybe it's always been like this and I'm just noticing it since I've noticed the odor.

So I pulled the truck out of the LBG and headed for the grocery store about 3 miles away.


2019091030-01.jpg

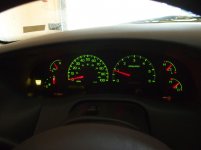
Before I got a mile down the road the Service Engine Soon light came on.


2019091030-02.jpg

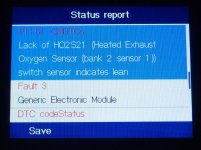
I completed my grocery run and pulled the truck back into the shop. I pulled out my scanner and got a P1151 Code. There appear to be several things that can cause this code. One of these is a bad O2 sensor. Of the possible items listed the O2 sensor would seem to be the only one that might cause an electrical odor.

More work needs to be done to sort this out.

Scott
 
Last edited:
To avoid these ads, REGISTER NOW!
Top Bottom