To avoid these ads, REGISTER NOW!

Above 1200 Sq/FT The Lone Beech Garage (60x46x16)

Wokspaces above 1200 squarefeet.

LutzTD

Well-known member
Joined
Dec 31, 2011
Messages
3,673
Location
Lutz, Florida
AZpilot,

HA!

"Retired Guys" are generally old and slow. I can certainly say this is the case at the LBG.

Then one adds in standing in front of the tool chest trying to remember why you are there and what item you are looking for and the time demand for the project continues to climb.

We need all the spare time we can get just to get safely out to the shop and back without getting lost.

Best regards,

Scott


auto fixes for retired pilots take a lot longer anyway, the repair logs must be kept up to date. :)
 
To avoid these ads, REGISTER NOW!
OP
S

sbosecker

Well-known member
Joined
Sep 25, 2012
Messages
3,539
Location
Peachtree City, GA
Sunday - September 20, 2020


The "test run" of the Woodshop's Dust Collection System by plaining some pine lumber a week ago was rewarding but there is a dark side to having the system functional...

...it removes a major incentive to finish all the ductwork details.


20200917-01.jpg

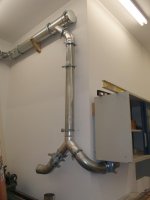
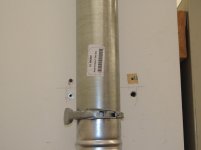
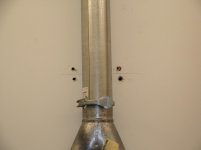
On Thursday, after what was left of Hurricane Sally passed by to the south of us leaving 5-inches of rain in the gauge as a keepsake, I started working on securing the ductwork down leg that will serve the wood lathe & the router table.


20200917-02.jpg

Removed the down leg to give me room to place the Bracket.


20200917-03.jpg

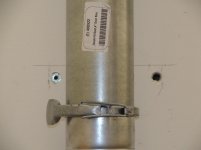
Marked up the Bracket to drill holes for the Moly Bolts.


20200917-04.jpg

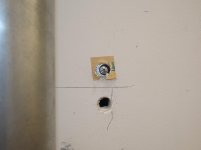
Tried to install the Moly Bolts... this did not go well. My initial concern was that a stud would interfere with the Moly Bolt installation but an entirely different issue presented itself. There was so much drywall compound layered up near the corner of the wall, the Moly Bolt's little teeth couldn't get a purchase and just drilled through the hardened compound. The drywall's paper layer some distance below the surface.

I punched that effort through the wall and tried again.


20200917-05.jpg 20200917-06.jpg 20200917-07.jpg

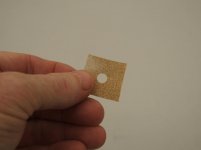
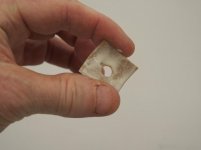
I reasoned if there was some paper glued to the surface of the drywall compound, the Moly Bolt's two teeth could get a purchase and I'd be able to install the fastener.

I cut a square out of some 120 grit sandpaper and made a hole with a hole punch. I glued this item over the hole I hoped to install the Moly Bolt in and walked away for 24 hours.


Continued in next post...
 
OP
S

sbosecker

Well-known member
Joined
Sep 25, 2012
Messages
3,539
Location
Peachtree City, GA
Continued...


20200918-11.jpg 20200918-12.jpg

Friday I attempted to install a Moly Bolt in my reinforced hole. At first it worked and I was pretty jazzed as I assumed if it didn't fail immediately it was going to work.

Then, after about 90 degrees of turning the screw, the sandpaper failed and I started chewing through the drywall compound again.

Time for a different approach.


20200920-13.jpg 20200920-14.jpg

Today I brought the Highlander over the "Tornado Shelter" to change the oil. While that was going on, I started working on a modification to my down leg Bracket.


20200920-15.jpg

I trimmed about 3/8-inch from the bottom of the Bracket.


20200920-16.jpg

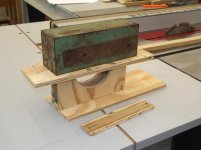
I cut a piece of 3/8" plywood to size.


20200920-17.jpg

Then I glued those two items together using the weight of a piece of steel to "clamp" them together as the glue set.

A small bit of trivia regarding that piece of steel...

I had obtained the steel at an Estate Sale. The fellow that ran the Estate Sale had been a mechanic at Delta Air Lines and took me aside after I paid for my various treasures ...including this piece of scrap steel.

He mentioned that the piece of metal I now was using as a "clamp" in the above picture looked a LOT like an item that was used as a balance weight on a Lockheed L-1011 Horizontal Stabilizer's Elevator control surface. The reason that he wanted to tell me that was, if it really was a balance weight from an L-1011, those were made from depleted uranium and I should probably not machine it.

We both "hand weighed" the metal at the sale and thought it didn't seem heavy enough to be depleted uranium but I appreciated his warning. When I got home I did a little Internet research and found that several airplanes had used depleted uranium for control surface balance weights. I was unaware of this.

Link to some depleted uranium information

Letter describing the issue of depleted uranium in commercial aircraft

I also measured the metal and then did a calculation whose results matched the density of steel.


Continued in next post...
 
Last edited:
OP
S

sbosecker

Well-known member
Joined
Sep 25, 2012
Messages
3,539
Location
Peachtree City, GA
Continued...

20200920-21.jpg

After the glue had set I realized I didn't have a long enough drill bit to drill a hole through the attached plywood.


20200920-22.jpg 20200920-23.jpg

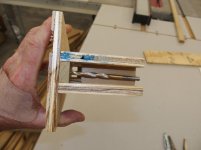
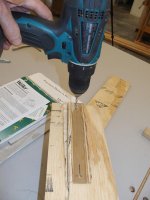
Fortunately I still had the scrap piece that I had trimmed off the Bracket and could use that as a guide to drill a hole in the plywood.


20200920-24.jpg

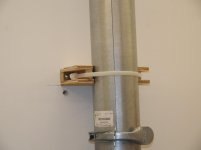
The modified Bracket could now be attached to the wall using deck screws on the problematic corner location and a large Zip Tie secured the down leg to the Bracket.


20200920-25.jpg 20200920-26.jpg

I added the Blastgate and this section was finished.

I should be able to knock out the remaining two down legs in the near future.


Scott
 
Last edited:

shortykorte

Well-known member
Joined
Sep 1, 2014
Messages
8,039
Location
Tallahassee, Fl
Uh, you’re suppose to use the inadequacies of the short bit as a reason to get new 12” long bits. lol.

Looking good.


Sent from my iPhone using Garage Journal
 
OP
S

sbosecker

Well-known member
Joined
Sep 25, 2012
Messages
3,539
Location
Peachtree City, GA
Uh, you’re suppose to use the inadequacies of the short bit as a reason to get new 12” long bits. lol.

Looking good.

Shorty Korte,

I have to say that it did occur to me that this situation was an excuse to purchase a more adequate drill bit...

...but I really wanted to move forward vs. sideways on the project.

...and there's nothing to keep from being proactive and buying an entire set of longer drill bits - for a possible future need.

HA!

Thanks for the kind words and for stopping by.

Best regards.

Scott
 
Last edited:
OP
S

sbosecker

Well-known member
Joined
Sep 25, 2012
Messages
3,539
Location
Peachtree City, GA
Tuesday - September 22, 2020

The weather has been outstanding here yesterday and today. Expecting the same tomorrow and then the chance of rain jumps to around 70%. As a result I've been trying to get some outside tasks done.


20200921-01.jpg 20200921-02.jpg

Late afternoon yesterday I finished the work on the Craftsman Lawn Edger and took it for a test run just before dusk. It seemed to be working well so I'm glad I rehabilitated it.



20200922-03.jpg 20200922-04.jpg

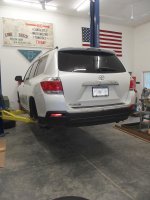
This morning, before I took advantage of the weather and did lawn work, I rotated the tires on our 2013 Highlander.


20200922-05.jpg

While the Highlander was up on the lift, I took this picture of the Splash Guard under the engine compartment. The arrow points to a missing bolt that secures the oil filter cover to the Splash Guard.

I noticed the missing bolt when I was changing the oil on Sunday and later tried to find the missing bolt on Toyota Parts sites on the Internet.

I'm going to go off on a rant here...

A few years ago one could pretty much go to an Internet Parts site and find an Exploded diagram of the Engine Compartment or whatever and drill down to find the item one was looking for ...but not anymore.

Now one chooses a "system" ...be it body, electrical, brakes, emissions, etc. and then an exploded diagram(s) of that "system" is displayed.

Who organizes stuff like that?

Well, OK, my wife does... but I shouldn't have to put up with that sort of "logic" outside of my home, should I?

For the life of me I cannot find a "system" that displays that little oil filter cover. As a result, I cannot find a part number for that bolt.

I MIGHT be able to locate it via a keyword search but none of my guesses as to the correct nomenclature for that little "hatch" has turned up a positive result.

Does anybody know what that little cover is called or, even better, does anyone know the part number for the missing bolt I'm trying to locate?

I'd like to replace that bolt before the second one falls out and the whole "hatch" (or whatever it's called) is lost...

Scott
 
Last edited:

LutzTD

Well-known member
Joined
Dec 31, 2011
Messages
3,673
Location
Lutz, Florida
Tuesday - September 22, 2020

The weather has been outstanding here yesterday and today. Expecting the same tomorrow and then the chance of rain jumps to around 70%. As a result I've been trying to get some outside tasks done.


20200921-01.jpg 20200921-02.jpg

Late afternoon yesterday I finished the work on the Craftsman Lawn Edger and took it for a test run just before dusk. It seemed to be working well so I'm glad I rehabilitated it.


20200922-03.jpg 20200922-04.jpg

This morning, before I took advantage of the weather and did lawn work, I rotated the tires on our 2013 Highlander.


20200922-05.jpg

While the Highlander was up on the lift, I took this picture of the Splash Guard under the engine compartment. The arrow points to a missing bolt that secures the oil filter cover to the Splash Guard.

I noticed the missing bolt when I was changing the oil on Sunday and later tried to find the missing bolt on Toyota Parts sites on the Internet.

I'm going to go off on a rant here...

A few years ago one could pretty much go to an Internet Parts site and find an Exploded diagram of the Engine Compartment or whatever and drill down to find the item one was looking for ...but not anymore.

Now one chooses a "system" ...be it body, electrical, brakes, emissions, etc. and then an exploded diagram(s) of that "system" is displayed.

Who organizes stuff like that?

Well, OK, my wife does... but I shouldn't have to put up with that sort of "logic" outside of my home, should I?

For the life of me I cannot find a "system" that displays that little oil filter cover. As a result, I cannot find a part number for that bolt.

I MIGHT be able to locate it via a keyword search but none of my guesses as to the correct nomenclature for that little "hatch" has turned up a positive result.

Does anybody know what that little cover is called or, even better, does anyone know the part number for the missing bolt I'm trying to locate?

I'd like to replace that bolt before the second one falls out and the whole "hatch" (or whatever it's called) is lost...

Scott

depending on if it has a speed nut or a true machine nut it could be a standard metric thread or a sheetmetal type screw. If its a machine thread it wouldnt be too hard to take out the one that is still there and use the sizer card at HD to find a new one. head type is irrelevant, but likely you will find a hex head screw there or Lowes whichever is closer. If its a speednut, then you should be able to just get a sheetmetal screw of a similar diameter to fit. if you are terribly worried about losing the cover, drill a couple holes and wire it on so if the screws come out it will not be lost, but thats likely a little overkill :)
 
OP
S

sbosecker

Well-known member
Joined
Sep 25, 2012
Messages
3,539
Location
Peachtree City, GA
Scott, you can probably find the right bolt at McMaster-Carr. Granted you might have to buy more than one (100?) but you would be guaranteed of a supply for the future.
https://www.mcmaster.com/fasteners/...tric-class-8-8-steel-flanged-hex-head-screws/

depending on if it has a speed nut or a true machine nut it could be a standard metric thread or a sheetmetal type screw. If its a machine thread it wouldnt be too hard to take out the one that is still there and use the sizer card at HD to find a new one. head type is irrelevant, but likely you will find a hex head screw there or Lowes whichever is closer. If its a speednut, then you should be able to just get a sheetmetal screw of a similar diameter to fit. if you are terribly worried about losing the cover, drill a couple holes and wire it on so if the screws come out it will not be lost, but thats likely a little overkill :)


Bob & LutzTD,

HA!

Sorry about that...


Old Man Yells At Cloud.jpg

...the rant wasn't because I couldn't necessarily identify the specifications of the bolt, it was due to my inability to find the part in the obtuse online Toyota Parts web pages.


20200924-01.jpg

The bolt in question is a M6-1.0 item with a captured washer. I certainly could have ran to the hardware store and found something that would work but I have a personality quirk that induces me to try to keep the Highlander "stock" if possible.

...for a complete list of personality quirks, you may contact my long-suffering bride. She can supply the list in any order you prefer:

Most annoying
Occurs most often
First observed in the wild
etc.

I did a search of the Highlander forum at ToyotaNation.com and found a couple of posts that indicated the individuals in question were having exactly the same problem as I was locating a part number.

These posts resulted in the usual bell-curve of responses but eventually someone posted a part number that "probably" was what I was looking for. The post that had this information was subject to various interpretations as it wasn't clear if the part was exactly what I was looking for or it secured the splash shield and was a good substitute.


20200924-02.jpg 20200924-03.jpg 20200924-04.jpg

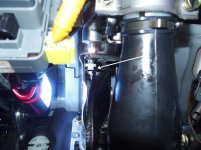
I ran the Highlander up on the 2-Post Lift again and had a look. The white arrows point to the Oil Filter Cover bolt areas and the yellow arrows point to a bolt(s) that secures the Splash Shield to the Highlander.

These items appear to be identical.


20200925-05.jpg

I went to the local Toyota Dealer and gave them the part number [90080-11718]. The parts lady efficiently produced the item and it appeared to be the same as the Oil Filter Cover Bolt.

For $1.84 American, I was allowed to leave with my prize.

Scott
 
Last edited:
OP
S

sbosecker

Well-known member
Joined
Sep 25, 2012
Messages
3,539
Location
Peachtree City, GA
Sunday - September 27, 2020


Almost two weeks ago my wife's 1997 Honda del Sol was found with its brake lights on while sitting in the garage with no one in the car.

POST 3758 described the event.

I ordered a replacement "Pedal Pad" on the 14th...


20200926-01.jpg

Yesterday it finally arrived.

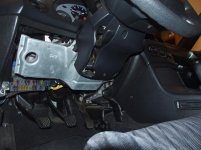
Today I started removing items to allow me to have just a bit more room to work under the dash.


20200926-02.jpg 20200927-03.jpg

20200927-04.jpg 20200927-05.jpg

Removing these items didn't gain a lot of room but it did help.


20200927-06.jpg

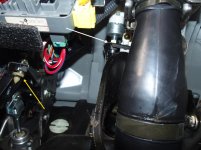
The white arrow points to the area where the new Pedal Pad will be installed. The yellow arrow points to the clutch's Pedal Pad. It is still in operating condition.

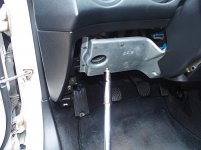
Worked for some time trying to get the new Pedal Pad into position without altering anything else under the dash. Finally I decided I was going to have to make a little more room to get the Pedal Pad into position. The options were unhooking the Brake Light Switch and screwing it out of position or unhooking the Yoke that connects the Brake Pedal to the Master Cylinder.


20200927-07.jpg

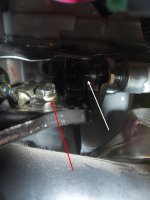
I couldn't see a way to get to the Brake Light Switch's connector to unhook it so I went with the Yoke. The red arrow points to Yoke and the pin that connects it to Brake Pedal. The white arrow points to the Brake Light Switch.

The biggest issue with the Yoke was a cotter pin on the opposite side. It was extremely difficult to get a pick or a pliers into a position that would provide leverage on the eye of the cotter pin. I fought it for quite a while before I finally had success with a small side cut pliers.


Continued in next post...
 
OP
S

sbosecker

Well-known member
Joined
Sep 25, 2012
Messages
3,539
Location
Peachtree City, GA
Continued...

20200927-11.jpg

The Yoke Pin and mangled Cotter Pin


20200927-12.jpg

With the Brake Pedal free from the Yoke I had room to insert the Pedal Pad. Sadly it was too large to fit into the hole.


20200927-13.jpg

I used a file to remove a bit of material around the Pedal Pad's base.


20200927-14.jpg

That did the trick and I was able to seat the Pedal Pad into the hole.


20200927-15.jpg

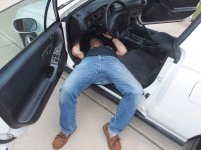
With the Pedal Pad in place, I was able to reattach the Yoke to the Brake Pedal. I had spent over 2 hours in this position. It was unpleasant work.


20200927-16.jpg

All of the trim was reattached to the del Sol's dashboard and the job was finished.

Scott
 
Last edited:

AZpilot

Well-known member
Joined
Sep 29, 2012
Messages
413
Location
Mesa, AZ
Now that you are home more your wife is going to be suffering more. My wife made me write that. As I close in on retirement I have been told to find a hobby that takes me away.
 

squirmdogg

Member
Joined
Jan 14, 2020
Messages
6
Location
Mooresville, NC
Scott,

I have spent the last month reading your journey with the LBG. I too am working on plans for my forever garage and since I am planning such a similar size(50x60x16) with an enclosed woodshop(20x42) your thread intrigued me.

First of all, you have done a remarkable job writing this and one can tell by your personality that you are most likely an excellent pilot. Detail oriented and very methodical with everything you do. I applaud your abilities.

That being said, following this thread is better than watching any reality show, probably because it is actual reality. I have enjoyed every read. My wife thinks I’m crazy for wanting this building, I remind her that I could have much worse hobbies.

I have gained a few ideas from your garage that I hope to incorporate in my own. It’s well thought out.

I too am an antique tractor collector, my Grandfather farmed with Oliver’s and I have several that are in various stages of restoration. My family is originally from NW Iowa and my folks retired back there after a tour of the Midwest raising the family. My wife call Mooresville, NC home. I have fond memories of going to the home farm and spending the day sitting on tractors.

That being said, not sure I will chronicle my build as you have. But will stay on to see what I can learn from the wealth of knowledge here.

I would like to offer my congratulations on your retirement. Sounds like you have had an extraordinary career.

Gary


Sent from my iPad using Tapatalk
 
OP
S

sbosecker

Well-known member
Joined
Sep 25, 2012
Messages
3,539
Location
Peachtree City, GA
Now that you are home more your wife is going to be suffering more. My wife made me write that. As I close in on retirement I have been told to find a hobby that takes me away.


AZpilot,

I think mine's numb. She doesn't seem to mind having me around.

I do hear that a lot of spouses find having their retired husbands around 24/7 is an adjustment. Sometimes a big one. HA!

Best regards,

Scott
 
OP
S

sbosecker

Well-known member
Joined
Sep 25, 2012
Messages
3,539
Location
Peachtree City, GA
Scott,

I have spent the last month reading your journey with the LBG. I too am working on plans for my forever garage and since I am planning such a similar size(50x60x16) with an enclosed woodshop(20x42) your thread intrigued me.

First of all, you have done a remarkable job writing this and one can tell by your personality that you are most likely an excellent pilot. Detail oriented and very methodical with everything you do. I applaud your abilities.

That being said, following this thread is better than watching any reality show, probably because it is actual reality. I have enjoyed every read. My wife thinks I’m crazy for wanting this building, I remind her that I could have much worse hobbies.

I have gained a few ideas from your garage that I hope to incorporate in my own. It’s well thought out.

I too am an antique tractor collector, my Grandfather farmed with Oliver’s and I have several that are in various stages of restoration. My family is originally from NW Iowa and my folks retired back there after a tour of the Midwest raising the family. My wife call Mooresville, NC home. I have fond memories of going to the home farm and spending the day sitting on tractors.

That being said, not sure I will chronicle my build as you have. But will stay on to see what I can learn from the wealth of knowledge here.

I would like to offer my congratulations on your retirement. Sounds like you have had an extraordinary career.

Gary

Gary,

Thanks for coming along for the ride and all the very kind words!

I am particularly honored to be the recipient of your first post.

I have a friend who restored the Minneapolis Moline his father bought new a long time ago. It's a beautiful tractor!

Good luck with your build!

One thing I would do differently- if possible - that I don't think I've mentioned in this thread is the overhang of the roof on the sides of the LBG.

The roof only overhangs the sides by 2 feet. If I could get a do-over I would change that to at least 3 feet and maybe 4 if that could be done.

Two reasons for this.

One - and this wasn't on the original plans - is the sidewalk on the south side of the building is about 4 feet wide, The rain running off the roof hits right in the middle of the sidewalk. Trying not to get wet walking on the sidewalk when it is raining is almost impossible.

Two - on the north side of the building there isn't a sidewalk and the water running off only a couple of feet from the side of the building has cut a small valley in the ground. This catches the water and keeps it close to the side of the building. That, I think, has contributed to some of my issues with water getting into the "Tornado Shelter".

I need to get off my dead hind end and make sure the water drains away better from the north side of the building but I haven't done that yet.

Gutters would probably solve the issue entirely but the thought of trying to keep gutters cleaned out 16 feet off the ground drove the decision not to install them.

Best regards,

Scott
 
Last edited:
OP
S

sbosecker

Well-known member
Joined
Sep 25, 2012
Messages
3,539
Location
Peachtree City, GA
Saturday - October 3, 2020


While I got some things accomplished in the LBG this week, it was hard to get a lot done due to a some unexpected unpleasantness.

First sideshow was pushing the button that installed a Windows 10 Update on my computer. When my computer had digested that update and restarted, my email program (Live Mail 2012) no longer worked.

Since the number of people that use Live Mail these days probably numbers in the 100's, I didn't find much online to help me sort out my issue. The one site I did find that offered a fix was not an "official" web site and it described a fix that required poking around in the registry and making some modifications.

The condensed version is that, after wasting several hours trying to find other solutions, I finally followed the procedure as written and ...it worked!

Second sideshow was a phone call I got from my next door neighbor to the north of me on Thursday evening. He was calling to let me know that he and his wife had contracted COVID-19. This was significant to me as I had spent some time with him on Sunday. My wife and I found an Urgent Care facility that did COVID-19 testing and was open until 8 pm. We had about 45 minutes to run over and get tested before they closed. This we did.

So we're quarantining ourselves until we get the results of the tests. Probably will hear something on Monday or Tuesday of next week.

I had meant to try to finish the Woodshop's ductwork but another, more pleasant side show presented itself.

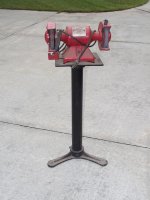
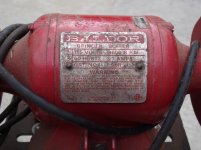
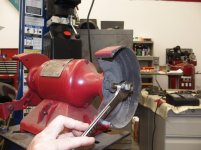
I had gone to an Estate Sale and poked around. There were several outbuildings and one of them was a smaller low ceilinged shed with no lights inside. Towards the back of this shed - in the shadows - was a red bench grinder on a generic pedestal stand. In the darkness it looked like a cheap Chinese grinder and it was priced at $28. I had probably walked past it a couple of times before I finally took out my small flashlight and shined it on the grinder.

It was a Baldor 1/3 HP grinder. I found an extension cord and ran it from an adjacent building to the grinder. Turned the switch on and the grinder vibrated enough as it ran that the pedestal moved a bit on the floor. I turned it off and the wheels took a long time to spin down. I assumed the pedestal was worth $15 and I hoped that the arbor wasn't bent as I handed the cash lady $28.


20200928-01.jpg 20200928-02.jpg

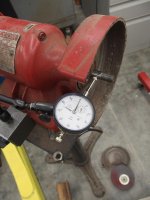
It's a Baldor 662R "Big Red" Bench Grinder.


20200929-03.jpg 20200929-04.jpg

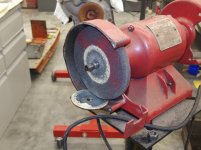
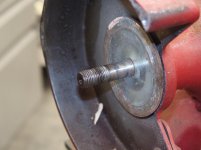
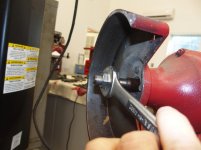
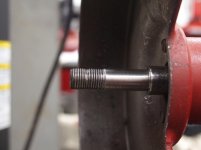
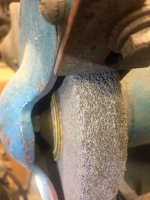
Instead of working on the Woodshop's ductwork, I decided to evaluate the grinder a bit. The stones were in terrible shape and the threads on the left side were in bad condition.


20200929-05.jpg 20200929-06.jpg

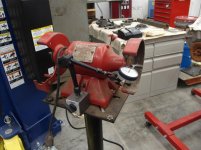
I checked the arbor on both sides and was pleased to find negligible runout.


20200930-07.jpg

The inner Flange on the left side was also difficult to remove from the arbor.

There's a few parts missing and before I spend the money to replace them, I need to see if that left handed thread on the left side of the Grinder can be restored.

I ordered a 1/2-20 LH Thread Restoring Die.


Continued in next post...
 
Last edited:
OP
S

sbosecker

Well-known member
Joined
Sep 25, 2012
Messages
3,539
Location
Peachtree City, GA
Continued...


Now I could turn my attention to the Woodshop again.

There were two remaining downlegs that I wanted to shorten.


20200930-11.jpg

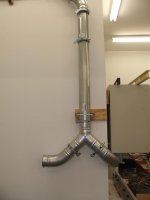
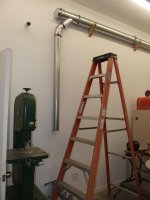
I removed the Wye from the bottom of this downleg and then removed the 5-foot long pipe from the upper elbow. I wanted to shorten this - and the next downleg as well - 2 feet.


20200930-12.jpg 20200930-13.jpg

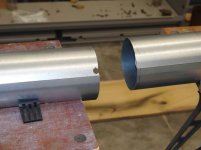
I cut 28 inches off the end of the pipe and added an Adjustment Sleeve which made resulting pipe 2 feet shorter that before.


20200930-14.jpg 20200930-15.jpg

I clamped the now shorter downleg to the upper elbow and attempted to use Moly Bolts to attach my supporting bracket. This did not go well. The Moly Bolts just chewed right through the drywall's paper. I don't know what the problem is but I needed a different approach.

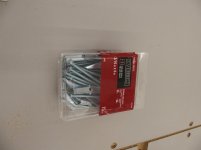
The next morning I went to Home Depot and got...


20201001-16.jpg 20201001-17.jpg

...some Toggle Bolts.


Continued in next post...
 
Last edited:
OP
S

sbosecker

Well-known member
Joined
Sep 25, 2012
Messages
3,539
Location
Peachtree City, GA
Continued...


20201001-21.jpg 20201001-22.jpg

That did the trick.


20201001-23.jpg

I used the same approach as described above to shorten and secure the last downleg.

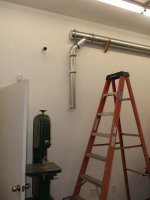
Version 1.0 of the Woodshop's Ductwork is now complete.

Plenty to do still but good to have this part done.


20201003-24.jpg

Today UPS delivered the Left Handed Rethreading Die for the Baldor Grinder's chowdered up threads. They would only sell them two at a time so now I've got an extra one.


20201003-25.jpg 20201003-26.jpg

I had pretty low expectations for the Rethreading Die. Repairing the damage seemed like a lot to ask.

I put a couple of nuts on the right side to lock together and give me something to counteract the torque on the left side as I turned the Rethreading Die. I applied a liberal amount of Tap Magic and started threading the Die onto the Arbor.


20201003-27.jpg

I have to say I was surprised the Die worked as well as it did! I think this may be good enough to allow a new Left Hand 1/2-20 Nut to secure a grinding stone to the Grinder.

I've considered getting a Left Hand 1/2-20 Thread Die to clean up the threads a little more. All the ones I've seen advertised are "adjustable" Dies... What's the point of an Adjustable Die?

I'll try to go to a local Fastenal Store to get that Left Hand Nut as soon as I get an all clear on the COVID test.


Scott
 
Last edited:
To avoid these ads, REGISTER NOW!

shortykorte

Well-known member
Joined
Sep 1, 2014
Messages
8,039
Location
Tallahassee, Fl
Nice score on grinder especially if you get left side operational. Hope your tests return favorably.


Sent from my iPhone using Garage Journal
 
OP
S

sbosecker

Well-known member
Joined
Sep 25, 2012
Messages
3,539
Location
Peachtree City, GA
Nice score on grinder especially if you get left side operational. Hope your tests return favorably.

Shorty Korte,

Thanks - It's been a week since my "exposure" and I feel fine. I'm pretty confident the test will come back negative this week.

I think the left side of the Grinder can be made operational but we'll see once I'm able to get out and about again.

Best regards,

Scott
 

squirmdogg

Member
Joined
Jan 14, 2020
Messages
6
Location
Mooresville, NC
Nice grinder, my father has the very same one. Farm sale purchase.

Good luck on the Covid test. Hopefully that will turn out to be negative. Trying times we live in.
Gary


Sent from my iPad using Tapatalk
 
OP
S

sbosecker

Well-known member
Joined
Sep 25, 2012
Messages
3,539
Location
Peachtree City, GA
Nice grinder, my father has the very same one. Farm sale purchase.

Good luck on the Covid test. Hopefully that will turn out to be negative. Trying times we live in.
Gary


Gary,

COVID test came back negative on Monday - thanks for your concern and positive thoughts.

I don't know if you live close to your father or not but if you do...


20201007-01.jpg 20201007-02.jpg

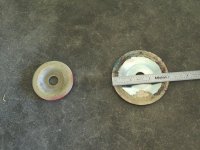
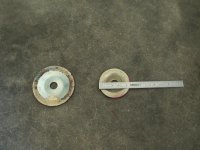
The Baldor Grinder I have had two different size "Wheel Flanges". The diameter of the larger one is about 3 inches; the second one has a diameter of about 2-3/16".

I suppose it's possible that it came with two different sized flanges. If it came with a grinding wheel on the left and a wire wheel on the right it might have had two different wheel flanges.

If you were able, I'd be curious as to what your dad has on his. Certainly understand if this isn't possible.

Best regards,

Scott
 

shortykorte

Well-known member
Joined
Sep 1, 2014
Messages
8,039
Location
Tallahassee, Fl
Scott
All of mine are 3” dia. inside and out. (4 wheels)IMG_1485.jpg
The wire wheel could use a small one probably IMG_1484.jpg


Sent from my iPhone using Garage Journal
 

squirmdogg

Member
Joined
Jan 14, 2020
Messages
6
Location
Mooresville, NC
Scott,
I do not live close. But, when I talk to him next I will ask him. I am sure he changed out the wheels when he got it. Unfortunately, he is recovering from open heart surgery and won't be able to go see and confirm, as the grinder is in a storage building with some tractors. Will let you know
Gary
 
OP
S

sbosecker

Well-known member
Joined
Sep 25, 2012
Messages
3,539
Location
Peachtree City, GA
Scott
All of mine are 3” dia. inside and out. (4 wheels)IMG_1485.jpg
The wire wheel could use a small one probably IMG_1484.jpg


Shorty Korte,

Thanks - That's very useful!

My model # is 662R which I believe was sold with a grinding wheel on the left side and a wire wheel on the right side. I think there is a model 612R that was sold with Grinding Wheels on both sides .

Despite the Estate Sale configuration of a grinding wheel on both sides, the smaller Wheel Flanges on the right side may have been associated with the Wire Wheel it originally came with.

Best regards,

Scott
 
OP
S

sbosecker

Well-known member
Joined
Sep 25, 2012
Messages
3,539
Location
Peachtree City, GA
Scott,
I do not live close. But, when I talk to him next I will ask him. I am sure he changed out the wheels when he got it. Unfortunately, he is recovering from open heart surgery and won't be able to go see and confirm, as the grinder is in a storage building with some tractors. Will let you know
Gary

Gary,

I hope your father's recovery goes well. I suspect the COVID situation would limit visitation even if you were geographically close.

Thanks very much for your offer to try to track this down but please don't go to any trouble.

Best regards,

Scott
 

LutzTD

Well-known member
Joined
Dec 31, 2011
Messages
3,673
Location
Lutz, Florida
Shorty Korte,

Thanks - That's very useful!

My model # is 662R which I believe was sold with a grinding wheel on the left side and a wire wheel on the right side. I think there is a model 612R that was sold with Grinding Wheels on both sides .

Despite the Estate Sale configuration of a grinding wheel on both sides, the smaller Wheel Flanges on the right side may have been associated with the Wire Wheel it originally came with.

Best regards,

Scott

no loss! wire wheels on pedestal grinders always seem to shed wire like little arrows, I used to end up with wires sticking in my leg!. So in the end its better to have grinding wheels anyway. If you need a wire wheel use a small cup and lower RPM to avoid these little projectiles.
 
OP
S

sbosecker

Well-known member
Joined
Sep 25, 2012
Messages
3,539
Location
Peachtree City, GA
no loss! wire wheels on pedestal grinders always seem to shed wire like little arrows, I used to end up with wires sticking in my leg!. So in the end its better to have grinding wheels anyway. If you need a wire wheel use a small cup and lower RPM to avoid these little projectiles.

LutzTD,

Thanks!

I've got wire wheels on a Baldor 8-inch and a Craftsman Block Grinder and find them quite useful - so far I haven't had the shrapnel problem. I've heard others report the same issue so you're not alone by any means.

Best regards,

Scott
 
OP
S

sbosecker

Well-known member
Joined
Sep 25, 2012
Messages
3,539
Location
Peachtree City, GA
Sunday - October 11, 2020


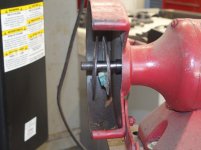
Earlier this past week I was messing around with the 3-inch Wheel Flanges for the Baldor 662R Grinder. They really weren't that happy about coming off the grinder and they had no interest in going back onto the left hand arbor.


20201007-11.jpg

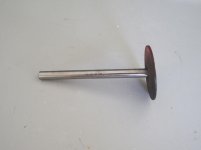
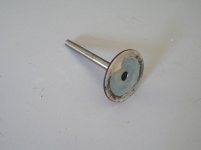
I had bought a couple of indexes of Drill Blanks at an Estate Sale earlier this year. I selected the 1/2-inch item from the index.


20201007-12.jpg 20201007-13.jpg

The Wheel Flanges would not allow the 1/2-inch Drill Blank to pass through. I suspect an over tightening (by mistake during a removal attempt) of the left handed nut on the left arbor had caused the chowdered arbor threads - perhaps this over-torqueing also caused issues with the Wheel Flanges.


20201007-14.jpg 20201007-15.jpg

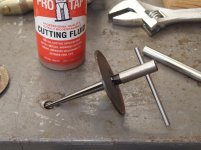
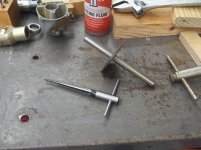
I used a tapered reamer to open up the Wheel Flanges.


20201007-16.jpg

This repair allowed the Wheel Flanges to slide onto the Arbor.


I got my Left Hand 1/2"-20 Nuts from Fastenal this past week. I bought 4 to have a few spares and the one I tried on the Baldor 662R threaded on nicely.


Today I removed a 6-inch grinding wheel from a Craftsman 1/3 HP grinder I have and mounted it onto the left side of the Grinder. There had been some vibration with the old wheels installed, I was hoping the relatively clean Craftsman wheel would run smoother.

I made a video of the test run.

VIDEO

It really starts shaking pretty good just before the 2-minute mark of the video.

I need to put this wheel back on the Craftsman grinder and see how it acts on it. I don't remember it causing any vibration but it had been a while since I had ran it before the wheel was removed. I didn't check it on the Craftsman before I removed it.

EDIT: I just came back from running the Grinder Wheel on the Craftsman.

Before I did that I put the Dial Indicator back on both sides of the Baldor again ...just to be sure. Again, I found little to no runout ...maybe a couple of ten-thousands.

I mounted the Grinding Wheel back on the Craftsman and spun it up. I turned it off and watched it spin down. It didn't take nearly as long to spin down as the Baldor (HA!) but at approximately the same RPM's it vibrated in a similar manner.

I'm starting to think it's the Craftsman Grinding Wheel that's off a bit. I visually examined this wheel's bushing and the arbor hole may be a bit egg shaped.

Scott
 
Last edited:

squirmdogg

Member
Joined
Jan 14, 2020
Messages
6
Location
Mooresville, NC
Gary,

I hope your father's recovery goes well. I suspect the COVID situation would limit visitation even if you were geographically close.

Thanks very much for your offer to try to track this down but please don't go to any trouble.

Best regards,

Scott

Scott,

Talked to my dad this morning and he had the grinder at home in his minishop in his basement. He said all 4 flanges of his are about 3" near as he could measure without taking the wheels off. I think he was happy I gave him something to do, as he has always been very active and this recovery has been hard on him mentally.

Very happy to hear about your neg test results.

Gary
 
OP
S

sbosecker

Well-known member
Joined
Sep 25, 2012
Messages
3,539
Location
Peachtree City, GA
Scott,

Talked to my dad this morning and he had the grinder at home in his minishop in his basement. He said all 4 flanges of his are about 3" near as he could measure without taking the wheels off. I think he was happy I gave him something to do, as he has always been very active and this recovery has been hard on him mentally.

Very happy to hear about your neg test results.

Gary


Gary,

Please thank your father for checking on that for me. I pray that he will be able to be more active as his recovery progresses.

Best regards,

Scott
 
OP
S

sbosecker

Well-known member
Joined
Sep 25, 2012
Messages
3,539
Location
Peachtree City, GA
Tuesday - October 13, 2020

I have a 2000 Ford F150 pickup. After 20 years of providing me with reasonably reliable service, it is starting to show its age a bit.


20201013-01.jpg

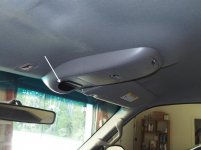
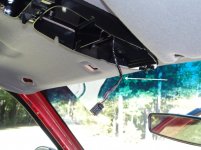
Case in point: The overhead console has a display that indicated temperature and compass direction. The white arrow points to the display. I noticed a couple of days ago that the display was not lighting up.

I did a search of YouTube and discovered several videos describing the issue my truck had.

An example of these videos follows:

VIDEO

Armed with the experiences of others, I moved forward today with a repair attempt.


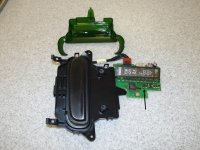
20201013-02.jpg 20201013-03.jpg

I removed the console from the overhead and extracted the display device.


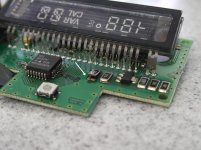
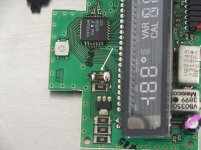
20201013-04.jpg 20201013-05.jpg

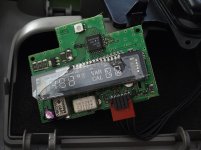
It was almost surreal to get a view of my display and see the exact same issue that was on the YouTube Videos. The arrow points to a resistor that has come loose on one end. When I pushed that resistor down with my finger, the opposite end detached as well.


20201013-06.jpg 20201013-07.jpg

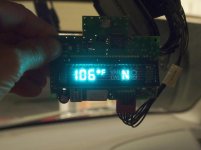
Not proud of the solder job but it did reconnect the resister to the appropriate contacts. With the connection of the resistor re-established, I reconnected the display to the truck's cable and turned the ignition switch to ON. The display illuminated.

I'll reassemble everything tomorrow when I have a little more light to work with.

I'd like to clean up that solder joint tomorrow as well but I probably should leave well enough alone.

Scott

KEYWORDS: 2000 F150 F-150 Temperature Display
 
Last edited:

gilr

Well-known member
Joined
Jul 26, 2008
Messages
300
Location
Richmond, VA
Yeah, if it works, don't mess with it, surface mount components will vaporize if you try too many times ot re-solder them. As you stated- leave well enough alone.....
 
OP
S

sbosecker

Well-known member
Joined
Sep 25, 2012
Messages
3,539
Location
Peachtree City, GA
Yeah, if it works, don't mess with it, surface mount components will vaporize if you try too many times ot re-solder them. As you stated- leave well enough alone.....

gilr,

I had agreed with your wise council this morning when I read it.

However, I apparently require constant, close adult supervision and if you only had been here this morning as I was attempting to finish this project, disaster may have been averted.

HA!

See following report.

Best regards,

Scott
 
OP
S

sbosecker

Well-known member
Joined
Sep 25, 2012
Messages
3,539
Location
Peachtree City, GA
Wednesday - October 14, 2020


Last evening I went to bed and slept the satisfied sleep of a person who knew he had fixed something on his vehicle. Slumber came quickly because a problem had been solved and only a few loose strings needed to be tidied up the next morning.

Had I known that that in just a few hours defeat would be snatched from the jaws of victory... well, I wouldn't have gotten as much rest as I did.


20201014-01.jpg

After I had drank my morning coffee I stepped outside to a glorious fall day! The birds were singing and there wasn't a cloud in the brilliantly blue sky. All was right with the world.

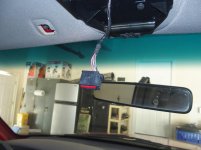
I went to the cab of my pickup and unhooked the repaired display from the cable protruding from the headliner. Note the 20 year old electrical tape wrapped around the cable. It is dissolving a bit and is oozing black, sticky goo.


20201014-02.jpg 20201014-03.jpg

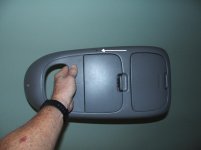
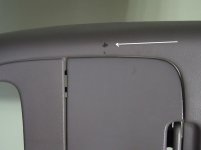
I had stored all of the disassembled components associated with this project in the truck's cab overnight. Using the gray plastic cover as a basket, I stacked the various bits inside the shallow depression and started walking towards a workbench. As I walked across the concrete, I felt something sticky on the cover against my arm. I raised the plastic cover and tilted it about 20 degrees to see what the sticky material was. (See white arrows in above pictures)


20201014-04.jpg

As I tilted the cover, everything inside shifted and the repaired display fell about 5 feet onto the concrete. The display is now ruined.

I'll have to see if I can find another one at a junkyard or on eBay.

On the upside, my solder job seems to have withstood the shock.


Scott
 
Last edited:

LutzTD

Well-known member
Joined
Dec 31, 2011
Messages
3,673
Location
Lutz, Florida
Wednesday - October 14, 2020


Last evening I went to bed and slept the satisfied sleep of a person who knew he had fixed something on his vehicle. Slumber came quickly because a problem had been solved and only a few loose strings needed to be tidied up the next morning.

Had I known that that in just a few hours defeat would be snatched from the jaws of victory... well, I wouldn't have gotten as much rest as I did.


20201014-01.jpg

After I had drank my morning coffee I stepped outside to a glorious fall day! The birds were singing and it there wasn't a cloud in the brilliantly blue sky. All was right with the world.

I went to the cab of my pickup and unhooked the repaired display from the cable protruding from the headliner. Note the 20 year old electrical tape wrapped around the cable. It is dissolving a bit and is oozing black, sticky goo.


20201014-02.jpg 20201014-03.jpg

I had stored all of the disassembled components associated with this project in the truck's cab overnight. Using the gray plastic cover as a basket, I stacked the various bits inside the shallow depression and started walking towards a workbench. As I walked across the concrete, I felt something sticky on the cover against my arm. I raised the plastic cover and tilted it about 20 degrees to see what the sticky material was. (See white arrows in above pictures)


20201014-04.jpg

As I tilted the cover, everything inside shifted and the repaired display fell about 5 feet onto the concrete. The display is now ruined.

I'll have to see if I can find another one at a junkyard or on eBay.

On the upside, my solder job seems to have withstood the shock.


Scott

bummer, job well done either way. should be plenty of those displays at the yard, likely youll even get another chance to fix the resister.
 

Jayman17

Well-known member
Joined
Feb 6, 2017
Messages
3,820
Location
Seattle, Wa
Doh! Scott, sorry to hear your display didn't survive the fall. Hope your search for a replacement display is successful.

Jay
 
OP
S

sbosecker

Well-known member
Joined
Sep 25, 2012
Messages
3,539
Location
Peachtree City, GA
bummer, job well done either way. should be plenty of those displays at the yard, likely youll even get another chance to fix the resister.

Doh! Scott, sorry to hear your display didn't survive the fall. Hope your search for a replacement display is successful.

Jay

LutzTD & Jay,

I was pretty mad at myself for several minutes ...it was just a reflexive lift & tilt to see what was sticking to me. When I was in the Navy we referred this sort of accident as "loss of SA" (Situational Awareness).

It's been a while since I've been to one of the local salvage yards. I did drive by one I liked while running errands a couple of weeks ago and it looked like it was closed.

I'll start this quest soon.

Best regards,

Scott
 
Last edited:
To avoid these ads, REGISTER NOW!
Top Bottom