To avoid these ads, REGISTER NOW!

Above 1200 Sq/FT The Lone Beech Garage (60x46x16)

Wokspaces above 1200 squarefeet.
OP
S

sbosecker

Well-known member
Joined
Sep 25, 2012
Messages
3,539
Location
Peachtree City, GA
Scott, what a coincidence, I am making an exact duplicate of your mobile base right now. I picked up a free metal cabinet and repainted that. I made a butcher block oak top for it and will eventually mount a bench top vintage dp on top.
In the process of making the base, yours looks great.

Jay


Jay,

That's pretty wild that we're making the same type of mobile base! Thanks for the kind words about mine. I'm pleased with how it is turning out.

Your vintage Drill Press cabinet/mobile base sound like a great project - good luck with making those items!

Best regards,

Scott
 
To avoid these ads, REGISTER NOW!
OP
S

sbosecker

Well-known member
Joined
Sep 25, 2012
Messages
3,539
Location
Peachtree City, GA
Thursday - November 19, 2020


So today I would find out if my Jointer would mate up with my fabricated Mobile Base.


20201119-01.jpg 20201119-02.jpg

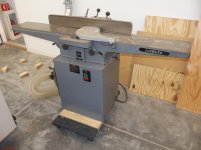
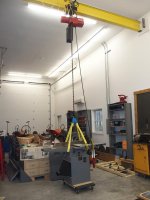
I've had the Jointer on a Harbor Freight furniture dolly while I was finishing the Woodshop's ductwork project. I rolled it out to the Electric Chain Hoist. The Chain Hoist effortlessly lifted the Jointer off the dolly.


20201119-03.jpg 20201119-04.jpg
20201119-05.jpg

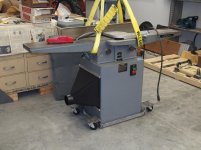
I positioned the Mobile Base under the Jointer and let it down. It fit nicely.

One of my concerns with using angle iron for the Mobile Base's Frame was the fact that angle iron does not have a sharp interior corner. Angle iron's interior corner has a radius which I was concerned would interfere with the Jointer's base if I didn't add a bit of extra space between the edges of the Mobile Base.

I had added that extra space and the Jointer rested firmly on the flat part of the Mobile Base's interior.

Good.

The Chain Hoist lifted the Jointer off the Mobile Base and I lowered the Jointer back onto the dolly. I took the casters off the Mobile Base and cleaned the Base with acetone. I then sat the Base into the Blasting Cabinet and blasted the welds to remove any remaining slag.


20201119-06.jpg 20201119-07.jpg

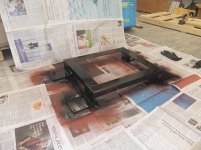
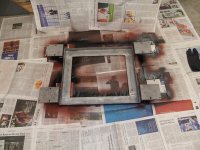
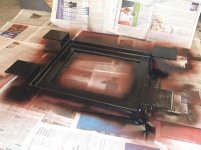
With the Base as clean as it was going to get, it was time for some paint. I sat the Mobile Base on some newspapers and hit it with rattle can Rustoleum primer and black paint. When this side is dry I'll flip it over and paint the other side.

I'm looking forward to putting this Mobile Base to work.

Scott
 
Last edited:
OP
S

sbosecker

Well-known member
Joined
Sep 25, 2012
Messages
3,539
Location
Peachtree City, GA
Thursday - November 26, 2020 - Thanksgiving Day


The past week time in the shop has been hit & run. Little tasks knocked out between "life stuff".

I did get the Jointer Mobile Base completed...


20201121-01.jpg 20201121-02.jpg 20201121-03.jpg

I flipped the Mobile Base over and put spray-can Rustoleum on the unpainted areas. Rustoleum's directions say to either put another coat on with 2 hours or to wait 48 hours. So I hit the primer with the color coat almost immediately and then waited 48 hours before mounting the casters back onto the base.


VIDEO

Once the paint was dry it was time to put it to work. The video (above) shows me using the Electric Chain Hoist to make that happen.


20201124-04.jpg 20201124-05.jpg

After the Jointer was wheeled back into the Woodshop, I got it into position. I still need to trim the flexible duct that attaches the Jointer to the Dust Collection System.


Happy Thanksgiving everyone! This will be the first time in 34 years I haven't been in Indiana celebrating with my family. Hopefully we'll get this COVID thing taken care of in the next few months.


Scott
 
Last edited:
OP
S

sbosecker

Well-known member
Joined
Sep 25, 2012
Messages
3,539
Location
Peachtree City, GA
Friday - November 27, 2020

Once the Mobile Base project was completed on Wednesday, I turned my attention to an old problem.

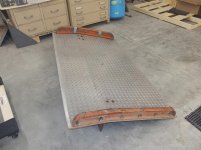
Several years ago I had purchased a used Aluminum Dock Board on Craigslist. The seller was selling it pretty much for the aluminum because one of the structural "bumpers" had a cracked weld.


20201125-01.jpg

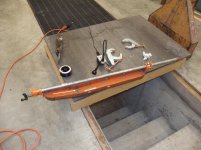
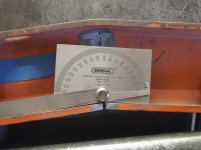
I had used a cutting wheel in a angle grinder to clean out the old weld but, at that time, I didn't see a way to bring the open "crack" back together. On Wednesday I realized maybe a Pipe Clamp would do the trick (white arrow points to the crack).


20201125-02.jpg 20201125-03.jpg

With all the pieces of the puzzle falling into place, I put the bumper into the Blasting Cabinet and cleaned up the area around the crack. I also blasted another area on the bumper to provide a location for a good ground.


20201125-04.jpg

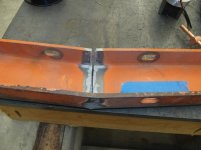
I took an angle measurement from the "good" bumper and used that to determine how much clamping force to crank into the Pipe Clamp.


20201125-05.jpg 20201125-06.jpg

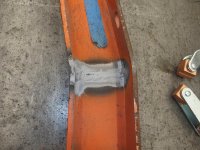
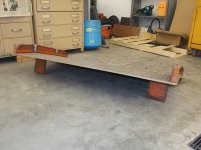
I got the bumper positioned on my makeshift welding table and put a tack weld on the end of the crack in the bumper. Then I repositioned the bumper to put the first weld along the "bottom" of the bumper. I then welded the crack from every side I could get at.


20201125-07.jpg

The bumper was then returned to the Blasting Cabinet and the welds were sandblasted.


Continued in next post...
 
Last edited:
OP
S

sbosecker

Well-known member
Joined
Sep 25, 2012
Messages
3,539
Location
Peachtree City, GA
Continued...


20201125-11.jpg 20201125-12.jpg 20201125-13.jpg

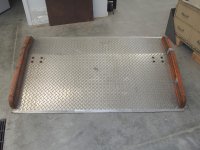
With the welds cleaned up, I fastened the welded bumper back onto the Dock Board. The Dock Board is 3 feet by 5 feet and was rated for 10,000 pounds. I don't have a forklift and even if I did I wouldn't assume that the Dock Board would handle its rated load after what it's been through. Still it should handle a robust load - either on a dolly or via a pallet jack - should I unload something at the LBG's loading dock.

I do intend to take the Dock Board apart, blast the "bumpers" and the "prongs" and give them some new paint. Then I'll put it back together and probably rarely use it.

HA!


Today I made a repair I'm almost embarrassed to document.


20201125-14.jpg

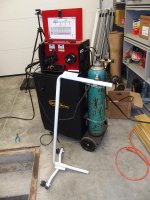
I've got this flimsy clothes rack that my wife gave me to use as a paint rack. Not too long ago some spot welds on one of the legs had failed. I did find the cheap thing handy for painting small items so I repaired it today.


20201127-15.jpg 20201127-16.jpg 20201127-17.jpg

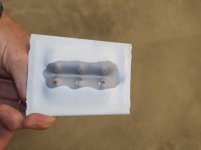
I drilled out the old welds on the bracket and blasted the areas around the holes. The rack got the same treatment around where the bracket had been welded to the rack. I also blasted a place to get to clean metal for a ground. I have to say, despite this rack being cheaply constructed, the paint on this thing was REALLY on there. It showed considerable resistance to the media blasting.


Continued in next post...
 
Last edited:
OP
S

sbosecker

Well-known member
Joined
Sep 25, 2012
Messages
3,539
Location
Peachtree City, GA
Continued...


20201127-21.jpg

With the components cleaned up, I used some .025 wire with shielding gas to attempt to weld this (maybe) 16 gauge metal together.


20201127-22.jpg

Well it worked but it wasn't pretty. HA!
I really couldn't see what I was doing when I was welding. I burned through one of the 6 spots I was welding but it seems to be functional again.


Scott
 
Last edited:

Jayman17

Well-known member
Joined
Feb 6, 2017
Messages
3,820
Location
Seattle, Wa
Scott, I hope you enjoyed the Thanksgiving holiday. That's a pretty slick repair on the loading dock bumper. As far as the drying rack repair goes, even the ugly welds usually hold, don't ask me how I know. :D. I'm still learning how to weld.

Jay
 
OP
S

sbosecker

Well-known member
Joined
Sep 25, 2012
Messages
3,539
Location
Peachtree City, GA
The paint was probably powder coat, yes seeing the weld puddle when mig welding is hard!

1949 caddyman,

Powder coated makes sense... it was tough stuff!

I have trouble seeing the weld puddle period... this was down in a dimple where I don't know how anyone would be able to see what was going on. It was pretty much try to get the wire in the right place and pull the trigger for a second.

I think it worked but it was a mess. HA!

Best regards,

Scott
 
OP
S

sbosecker

Well-known member
Joined
Sep 25, 2012
Messages
3,539
Location
Peachtree City, GA
Scott, I hope you enjoyed the Thanksgiving holiday. That's a pretty slick repair on the loading dock bumper. As far as the drying rack repair goes, even the ugly welds usually hold, don't ask me how I know. :D. I'm still learning how to weld.

Jay


Jay,

I too hope you had a good holiday!

Thanksgiving here has been OK... I am thankful but the interaction with family and friends has been, out of necessity, almost non-existent.

I am very thankful that there appears to be a light at the end of this tunnel.

Thanks for the kind words on the Dock Board.

It's been fun to get in a little work with the welder. I'm hoping when this COVID stuff gets brought to heel that I might be able to take some classes at a Technical College to learn how to do this stuff correctly.

Senior citizens get free tuition (with several strings attached) in Georgia so I plan to take advantage of that.

Best regards,

Scott
 

LutzTD

Well-known member
Joined
Dec 31, 2011
Messages
3,673
Location
Lutz, Florida
1949 caddyman,

Powder coated makes sense... it was tough stuff!

I have trouble seeing the weld puddle period... this was down in a dimple where I don't know how anyone would be able to see what was going on. It was pretty much try to get the wire in the right place and pull the trigger for a second.

I think it worked but it was a mess. HA!

Best regards,

Scott

I had to go all the way to 5X magnifying glasses to see what my weld instructor was describing. now I'm not awful at welding......, but if its blocked I guess this is no help. never saw the puddle **** in until I had magnifiers though (aluminum)
 
OP
S

sbosecker

Well-known member
Joined
Sep 25, 2012
Messages
3,539
Location
Peachtree City, GA
I had to go all the way to 5X magnifying glasses to see what my weld instructor was describing. now I'm not awful at welding......, but if its blocked I guess this is no help. never saw the puddle **** in until I had magnifiers though (aluminum)

LutzTD,

I'm told that practice is essential to learning the art of welding... I need a lot of practice. HA!

I think seeing is essential as well and I just had a thought. I was really having some issues seeing "stuff" on these latest projects. I was getting some light into the helmet from behind but also from under the chin of my helmet. I had noticed the "behind" light when welding before but the under the chin stuff was a new phenomenon.

What was different this time? Well, I was in a different location. The last time I did welding was in the middle bay of the LBG. This time I was in the long bay standing on the steps of the Tornado Shelter. In the middle bay I was some distance from the side walls while in the latest location, the (white) side walls were much closer. Maybe I was getting more reflection from the walls and that was sneaking in under my helmet's chin. The fact I was standing on the steps of the Tornado Shelter when I was welding may have intensified the reflections as well. Light reflecting from the walls & floor of the shelter?

I fashion a "cowl" out of an old dark dish towel and clip that to the back of my welding helmet to block the light coming in from behind. I've asked for a "chin bib" that would clip to my helmet for Christmas.

Speaking of Aluminum.... I'm getting ready to try out the Spool Gun I've had for a while but never tried out. That should be interesting.

HA!

Best regards,

Scott
 
Last edited:
OP
S

sbosecker

Well-known member
Joined
Sep 25, 2012
Messages
3,539
Location
Peachtree City, GA
Sunday - November 29, 2020


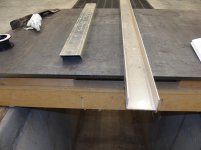
Quite a few years ago I bought some aluminum C-Channel from a Craigslist Ad. I had cut a miter in one of the pieces a few years ago... I'm trying to remember what I had in mind for that but whatever that project was, it didn't go beyond the cut.


20201129-01.jpg

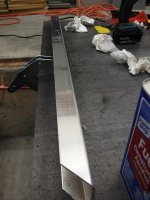
Today I retrieved this cut C-Channel from the basement and brought it out to the shop. I was aware that this aluminum had a plastic film on one side of it and I started picking at it with my fingers and then with a blade trying to get it to peel off.

That didn't go well.

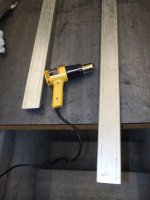
I tried a small amount of heat with a heat gun with the same results.


20201129-02.jpg

Perhaps some solvent would help. I soaked a couple of paper towels with acetone & alcohol respectively and laid them on the aluminum for 10 minutes.

The acetone had a minor effect on the plastic film but I think both of these solvents evaporated quickly and they didn't have enough "wet time" to do much.


20201129-03.jpg

...back to the heat gun. I directed the heat onto a small area of the aluminum for a longer time.


20201129-04.jpg

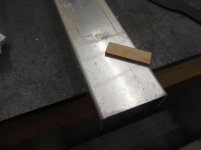
The aluminum was now hot and I used a scrap of hardwood with sharp edges to scrape at the plastic film.


20201129-05.jpg

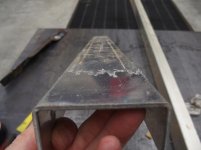
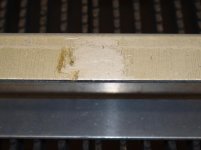
It was tough sledding but at least I was removing the plastic. I needed to follow up with some solvent to remove the residual adhesive.

There must be a better way to get this old film off of this aluminum.


Scott
 

Jayman17

Well-known member
Joined
Feb 6, 2017
Messages
3,820
Location
Seattle, Wa
Now that looks like a good time. I wish I was closer so I could help. Not! :evil:
Scott, good luck with that task.
What's the plan for the Al channel?

Jay
 
OP
S

sbosecker

Well-known member
Joined
Sep 25, 2012
Messages
3,539
Location
Peachtree City, GA
Now that looks like a good time. I wish I was closer so I could help. Not! :evil:
Scott, good luck with that task.
What's the plan for the Al channel?

Jay


Jay,

You're right... it's a pain in the **********.

I was thinking a little cart with some casters for my Stick Welder to sit on would be a good use for that channel.

I did make a little progress today with the plastic film.

Best regards,

Scott
 
OP
S

sbosecker

Well-known member
Joined
Sep 25, 2012
Messages
3,539
Location
Peachtree City, GA
Monday - November 30, 2020

I had a few chores to deal with after the holiday weekend but managed to get some time in the shop this evening to deal with the Aluminum Plastic Film puzzle.

I slapped an Electric Light Orchestra CD into the music box, hit the play button and started setting up my work. I did pause a bit during the song Rockaria as I experienced some frisson and then it was back to trying to get that bleeping plastic off.


20201130-01.jpg 20201130-02.jpg

I had applied the heat gun and was scrapping at the plastic with the piece of wood scrap when I noticed the plastic film seemed to be a bit more pliable. I managed to get a pinch of the plastic and was able to start lifting it off a bit.

In a pretty short amount of time I had removed most of the plastic from between the "seams" on the back of the C-Channel.
While this progress was gratifying, I didn't find another place where I could do something similar.


20201130-03.jpg 20201130-04.jpg

I recalled that I had gotten a few Eraser Pads in a toolbox full of tools I had bought a few years ago. If these things work on pinstripes and stickers maybe they would work on this plastic film.
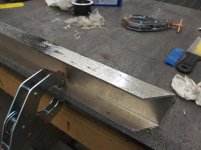


20201130-05.jpg 20201130-06.jpg

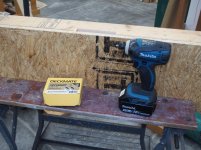
I set to work with my Makita battery powered drill and it did work. The process went though batteries pretty quick and the "plastic swarf" that resulted needed to be cleaned up pretty often to keep it from interfering with the removal of the film. Still, if I leaned on the Eraser Pad pretty hard and kept removing the debris that resulted with a alcohol wipe-down, the plastic got cleaned off the aluminum.

It wasn't fast but it was a lot faster than the heat gun and the wooden scraper.

I'm still looking for a method, probably involving chemicals, where I can apply an elixir to the plastic film and walk away for however long it takes for the magic to occur.

I probably need a magic hat like Mickey Mouse when he was the Sorcerer's Apprentice. That's probably what it will take to find a low energy solution.

Maybe paint stripper? There's got to be something that eats plastic but leaves aluminum untouched.

Scott
 
Last edited:

LutzTD

Well-known member
Joined
Dec 31, 2011
Messages
3,673
Location
Lutz, Florida
Monday - November 30, 2020

I had a few chores to deal with after the holiday weekend but managed to get some time in the shop this evening to deal with the Aluminum Plastic Film puzzle.

I slapped an Electric Light Orchestra CD into the music box, hit the play button and started setting up my work. I did pause a bit during the song Rockaria as I experienced some frisson and then it was back to trying to get that bleeping plastic off.


20201130-01.jpg 20201130-02.jpg

I had applied the heat gun and was scrapping at the plastic with the piece of wood scrap when I noticed the plastic film seemed to be a bit more pliable. I managed to get a pinch of the plastic and was able to start lifting it off a bit.

In a pretty short amount of time I had removed most of the plastic from between the "seams" on the back of the C-Channel.
While this progress was gratifying, I didn't find another place where I could do something similar.


20201130-03.jpg 20201130-04.jpg

I recalled that I had gotten a few Eraser Pads in a toolbox full of tools I had bought a few years ago. If these things work on pinstripes and stickers maybe they would work on this plastic film.


20201130-05.jpg 20201130-06.jpg

I set to work with my Makita battery powered drill and it did work. The process went though batteries pretty quick and the "plastic swarf" that resulted needed to be cleaned up pretty often to keep it from interfering with the removal of the film. Still, if I leaned on the Eraser Pad pretty hard and kept removing the debris that resulted with a alcohol wipe-down, the plastic got cleaned off the aluminum.

It wasn't fast but it was a lot faster than the heat gun and the wooden scraper.

I'm still looking for a method, probably involving chemicals, where I can apply an elixir to the plastic film and walk away for however long it takes for the magic to occur.

I probably need a magic hat like Mickey Mouse when he was the Sorcerer's Apprentice. That's probably what it will take to find a low energy solution.

Maybe paint striper? There's got to be something that eats plastic but leaves aluminum untouched.

Scott

sadly, everything that works is outlawed..... I have had good luck with isopropyl, but it works or it doesn't. It's better at attacking glue than plastic, so if it can't get under, it likely won't work. it all I have found to remove VHB tape.
 

Bob Heine

ALLIANCE MEMBER
Joined
Oct 24, 2009
Messages
10,709
Location
Boca Raton, Florida
Me to. Had to look that one up. Glad to hear I'm not the only one. At least GJ is expanding my vocabulary, and my wife thinks I am wasting time.
Lotusnut, very true but my guess is the number of people who know the meaning of Frisson beyond our sheltered GJ lives is also small. If we use it three times in a sentence I believe it is ours.

"I had a frisson moment when eBay notified me my bid won!"
 
To avoid these ads, REGISTER NOW!
OP
S

sbosecker

Well-known member
Joined
Sep 25, 2012
Messages
3,539
Location
Peachtree City, GA
sadly, everything that works is outlawed..... I have had good luck with isopropyl, but it works or it doesn't. It's better at attacking glue than plastic, so if it can't get under, it likely won't work. it all I have found to remove VHB tape.


LutzTD,

I suspect you are correct regarding "everything that works is outlawed".

Still I came across this...


2020 11 30 - Plastic Sovent Table.jpg

I'm not sure this chart is totally correct but I can cross-check it with other references.

I'm going to try some of the solvents that are available on the pieces of film I pealed off. I should be able to figure out by the process of elimination what might work (or not).

I've put a bit of the film in a glass jar with some acetone. That was almost 6 hours ago and the last time I looked (a couple of hours ago) the film seemed to be unaffected. I'll be going out again here in a few minutes to see if that's changed.

If not, that would seem to eliminate the film from being Acrylonitrile Butadiene Styrene (ABS), Polycarbonate (PC) or Polystyrene (PS).

I'll look over the chart and other sources and see if I can find something readily available that would remove the film but not hurt the aluminum. Once I get the film off, alcohol seems to nicely take care of the adhesive.

Best regards,

Scott
 
OP
S

sbosecker

Well-known member
Joined
Sep 25, 2012
Messages
3,539
Location
Peachtree City, GA
Frisson, new word for me!

Me to. Had to look that one up. Glad to hear I'm not the only one. At least GJ is expanding my vocabulary, and my wife thinks I am wasting time.

Lotusnut, very true but my guess is the number of people who know the meaning of Frisson beyond our sheltered GJ lives is also small. If we use it three times in a sentence I believe it is ours.

"I had a frisson moment when eBay notified me my bid won!"


1949 caddyman, Lotusnut & Bob,

HA!

I hesitated on mentioning the frisson but thought it might be interesting to see if anyone reading this would admit they experience this.

I only recently learned that the tingling on the back of my head and neck I occasionally experience during some musical passages had a name: Frisson.

I get a similar sensation that is associated with some other noises which is apparently something called ASMR.

These things may be related to other phenomenons called Synesthesia which I had not heard of until I was reading Ryan's The Atomic Shop thread in the Garage Gallery and he mentioned back in 2015 that he sees numbers in color which is a type of Synesthesia.

Webpage Post 230.

The mind can be a weird thing... HA!

We now return to the shop.


Best regards,

Scott
 
OP
S

sbosecker

Well-known member
Joined
Sep 25, 2012
Messages
3,539
Location
Peachtree City, GA
Wednesday - December 2, 2020

It being the start of the month, a lot of today's shop time was spent on routine maintenance checks on my vehicles and similar activities with my old tractors.

I took a peek at the plastic film in the jar of acetone and the plastic might as well have been floating in a jar of water. It appeared none the worse despite having been in the solvent for over 12 hours.

However, as I was working, I did realize that LutzTD's remark about "everything that works is outlawed" in regards to my "plastic film on the aluminum problem" had a corollary:

The stuff that works used to be legal.

One of the advantages of being an old guy, and there are darn few of them, is that in my past I had access to "stuff that worked".

I've got some old, dangerous stuff on my shelves in the basement.


20201202-01.jpg 20201202-02.jpg

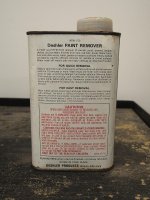
Exhibit A - some ancient paint remover. No bar code, no list of any kind as to what dangerous, cancer causing chemicals are inside - probably from the early to mid 80's.

Perhaps this might work on the plastic film.


20201202-03.jpg 20201202-04.jpg

I put a bit of this liquid on a small area of the aluminum and waited 10 minutes. The film came right off!


20201202-05.jpg

I wiped the paint remover off and washed it with water per the instructions. There was a little adhesive still on the aluminum that I wiped off with some alcohol.

This was very easy and it worked fast! I'll try to cover a large section at one time in the near future and see how that goes.


Scott
 
Last edited:

Jayman17

Well-known member
Joined
Feb 6, 2017
Messages
3,820
Location
Seattle, Wa
Yes! 1980's era cancer causing chemicals for the win! I have felt the burn of that stuff on my skin in the past. :evil:

Jay
 
OP
S

sbosecker

Well-known member
Joined
Sep 25, 2012
Messages
3,539
Location
Peachtree City, GA
Yes! 1980's era cancer causing chemicals for the win! I have felt the burn of that stuff on my skin in the past. :evil:

Jay


Jay,

I'll try to avoid "the burn". HA!

I plan to brush on some of the forbidden liquid tomorrow.

Hopefully I didn't just skim the "cream" (active ingredients) off the top of this ancient fluid when I put that dab that worked on the aluminum.

Best regards,

Scott
 
OP
S

sbosecker

Well-known member
Joined
Sep 25, 2012
Messages
3,539
Location
Peachtree City, GA
Thursday - December 3, 2020


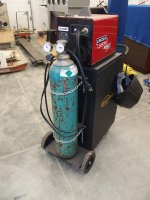
I noticed when I was welding last week that I was just about out of welding gas (75/25 - Argon/CO2).


20201203-01.jpg

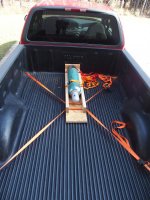
However, before I can swap this 80 cubic foot bottle at the welding supply store in Newnan, GA , I need to make a Cylinder Cradle so that I can transport it safely in the bed of my pickup truck.

...what's that? Ahhh... ...on the advice of council I decline to answer any questions as to how I got this cylinder to the LBG without a Cylinder Cradle.


20201203-02.jpg 20201203-03.jpg

I got a few scrap pieces of material and started cutting things to size.

Bonus Points for anyone that can tell me the original use of the pieces of 2x4! They have appeared in this thread before.

The Answer


20201203-04.jpg 20201203-05.jpg

Fastened the wooden bits together with deck screws.


20201203-06.jpg

The gas bottle seems to fit nicely.


20201203-07.jpg

I used some Pony Strap Clamps to secure the gas bottle to the Cylinder Cradle. The Cylinder Cradle was secured in position with ratchet straps via the truck bed's tiedown cleats.

This all worked great - the fellow who swapped out the bottles at Nexair in Newnan, GA remarked, when he saw the cradle, "...most people just let them roll around in the bed..."

Scott
 
Last edited:

LutzTD

Well-known member
Joined
Dec 31, 2011
Messages
3,673
Location
Lutz, Florida
Thursday - December 3, 2020


I noticed when I was welding last week that I was just about out of welding gas (75/25 - Argon/CO2).


20201203-01.jpg

However, before I can swap this 80 cubic foot bottle at the welding supply store in Newnan, GA , I need to make a Cylinder Cradle so that I can transport it safely in the bed of my pickup truck.

...what's that? Ahhh... ...on the advice of council I decline to answer any questions as to how I got this cylinder to the LBG without a Cylinder Cradle.


20201203-02.jpg 20201203-03.jpg

I got a few scrap pieces of material and started cutting things to size.

Bonus Points for anyone that can tell me the original use of the pieces of 2x4! They have appeared in this thread before.

The Answer


20201203-04.jpg 20201203-05.jpg

Fastened the wooden bits together with deck screws.


20201203-06.jpg

The gas bottle seems to fit nicely.


20201203-07.jpg

I used some Pony Strap Clamps to secure the gas bottle to the Cylinder Cradle. The Cylinder Cradle was secured in position with ratchet straps via the truck bed's tiedown cleats.

This all worked great - the fellow who swapped out the bottles at Nexair in Newnan, GA remarked, when he saw the cradle, "...most people just let them roll around in the bed..."

Scott

wish I had some of the old stuff on the shelf, things were so much easier without big brother......

nice job on the cylinder cradle, Can't count the number of cylinder missiles I have seen awaiting launch, and of course, without that pesky cap you can never find......
 

Bob Heine

ALLIANCE MEMBER
Joined
Oct 24, 2009
Messages
10,709
Location
Boca Raton, Florida
...This all worked great - the fellow who swapped out the bottles at Nexair in Newnan, GA remarked, when he saw the cradle, "...most people just let them roll around in the bed..."

Scott
Scott, I like the cradle. My 40 cubic foot bottle fits nicely on the passenger side floor in the Corvette. The bottle doesn't have a cover so I am careful to drive to the welding store with the top down. Your solution is a lot safer.

My ancient can of nuclear waste paint stripper ate through the can and disposed of itself. Looks like yours is getting close. :shocking:
 
OP
S

sbosecker

Well-known member
Joined
Sep 25, 2012
Messages
3,539
Location
Peachtree City, GA
wish I had some of the old stuff on the shelf, things were so much easier without big brother......

nice job on the cylinder cradle, Can't count the number of cylinder missiles I have seen awaiting launch, and of course, without that pesky cap you can never find......

Scott, I like the cradle. My 40 cubic foot bottle fits nicely on the passenger side floor in the Corvette. The bottle doesn't have a cover so I am careful to drive to the welding store with the top down. Your solution is a lot safer.

My ancient can of nuclear waste paint stripper ate through the can and disposed of itself. Looks like yours is getting close. :shocking:


LutzTD & Bob,

Thanks for the kind words regarding the cradle...

There was some analysis paralysis as I searched the InterWeb for ideas. Most of the published solutions were rather grandiose affairs meant for securing multiple bottles. Thankfully someone had a picture of something similar to what I built and I realized, for me, that was the direction to go.

Mine was a little more refined than the one I used as inspiration but it was the simplicity of the approach while still effectively securing the bottle that I appreciated.

Regarding the ancient paint stripper... I will be using it up pretty soon so, in my case, it looks like the metal container will have survived long enough to do its job.

Best regards,

Scott
 
Last edited:
OP
S

sbosecker

Well-known member
Joined
Sep 25, 2012
Messages
3,539
Location
Peachtree City, GA
Saturday - December 5, 2020


20201205-01.jpg

It turns out the active ingredient in the 35 year old paint stripper IS listed on the can. I had missed it when I glanced at the container earlier.

I suppose since it wasn't inside a box with a list of the other active ingredients - typically how it's displayed these days - it didn't jump out at me.

Tolulene is also known as methylbenzene. California banned its sale a few years ago so it's hard to get it anywhere these days. So much for federalism.

I think it's still available but it isn't sold in any of the big box stores around me here in Georgia. Apparently the fumes of this stuff can be used during recreational pharmacology so maybe that's the motivation. Once again I am paying for the sins of others.

Likewise with methylene chloride (Aircraft Paint Stripper)... It would probably work better than Tolulene but it too has been mugged by the "it's dangerous" hand wringers. I get it... it's good to know that something is hazardous but how about some moderation? Instead of banning something how about just labeling it and moving on?


20201205-02.jpg 20201205-03.jpg

I moved the two pieces of the C-Channel Aluminum outside and went to work with my forbidden chemicals. I dabbed it onto the plastic film and let it sit for about 30 minutes. It was cool today (50's) so I would expect quicker results on a warm day.

Still this worked pretty well. I put the stripper on the middle first and, after giving it time to do its magic, used a piece of wood as a scraper. After cleaning up the middle, I worked on the sides. These two pieces had been experimented on during earlier attempts to find a solution to getting the plastic off but now, thanks to the Tolulene, I had them cleaned up pretty well.


20201205-04.jpg 20201205-05.jpg

Now I brought out an untouched 8-foot section and put the stripper on the middle section. When I started scraping this, it was peeling up to one side as I scraped. I pushed the plastic to that side, turned the aluminum 90 degrees, and then applied the stripper to the side that was now up. When I started scraping this side, the plastic started peeling away. I was able to pretty much peel this plastic off by pulling on it.

I rotated the aluminum 180 degrees and more stripper went on to the remaining plastic.


20201205-06.jpg

The end result was a plastic-free piece of 3" x 1.5" x 1/8" aluminum C-Channel.


Scott
 
Last edited:
OP
S

sbosecker

Well-known member
Joined
Sep 25, 2012
Messages
3,539
Location
Peachtree City, GA
Monday - December 7, 2020

Today was the start of a new adventure with stuff I purchased some time ago but had not closed the loop by actually using.

Yesterday I pulled out a Lincoln Magnum 100SG Spool Gun that had been sitting in its case waiting to be called to "the show" for quite a while.


20201207-01.jpg

I unhooked the MIG torch from welder, changed the shielding gas from 75/25 Argon/CO2 to 100% Argon and attached the Spool Gun.


20201207-02.jpg

I had recently acquired some aluminum mystery metal at an Estate Sale. 3/8-inch thick, it was covered with paint and stains when I got it but it cleaned up nicely in the Blasting Cabinet.

I used a stainless steel wire brush to further clean an area on my test piece, set the recommended settings on the welder and tried putting down a bead.

It worked OK but was sooty and I got quite a bit of splatter. I tried a few different settings and changed the flow of the argon, trying again after each variation. Not a huge difference regardless of what I did. I would clean the soot away with the wire brush after each attempt.


20201207-03.jpg 20201207-04.jpg

I brought out another piece of the mystery metal aluminum and tried to weld a **** joint. You can see my previous beads in the picture on the left.


20201207-05.jpg 20201207-06.jpg

I now welded the two pieces together. That seems to have gone OK but still a lot of soot around the sides of the weld.
There's so many variables with what I'm doing. The spool of 4043 aluminum wire has been out of its package for over 5 years, the aluminum I'm welding is mystery metal, etc.

Still it seems to have worked for the most part. I'll be doing some research on the soot and spatter and see what suggestions there are are on the Internet to improve my work.

It was a fun day! ...but just think how much fun I'd be having if I had a clue as to what I am doing. HA!

Scott
 
Last edited:

LutzTD

Well-known member
Joined
Dec 31, 2011
Messages
3,673
Location
Lutz, Florida
that weld looks pretty darn good! what I have found is when you think it is clean, clean it one more time! I used acetone and the stainless brush needs to be new and then only used for aluminum. acetone it first so the brush doesn't push the dirt in. also try getting the tip closer. also too much shield gas is as bad as not enough. My very limited experience is when I got the black soot was I was either too far away or still too dirty. I still cant get a fully clean weld either but that I think is caused by my inexperienced torch movement. the weld looks great though, maybe weld some scraps and cut it to see how your penetration is going.
 
OP
S

sbosecker

Well-known member
Joined
Sep 25, 2012
Messages
3,539
Location
Peachtree City, GA
that weld looks pretty darn good! what I have found is when you think it is clean, clean it one more time! I used acetone and the stainless brush needs to be new and then only used for aluminum. acetone it first so the brush doesn't push the dirt in. also try getting the tip closer. also too much shield gas is as bad as not enough. My very limited experience is when I got the black soot was I was either too far away or still too dirty. I still cant get a fully clean weld either but that I think is caused by my inexperienced torch movement. the weld looks great though, maybe weld some scraps and cut it to see how your penetration is going.

LutzTD,

Thanks for the kind words. More practice will take place after I deal with my truck's leaking antifreeze issue.

As you point out, I need to see if I can actually make some aluminum stick together with decent penetration. However, since this is mystery metal aluminum, I can always blame the metal and not my own lack of welding skill.

HA!

Best regards,

Scott
 
OP
S

sbosecker

Well-known member
Joined
Sep 25, 2012
Messages
3,539
Location
Peachtree City, GA
Tuesday - December 8, 2020


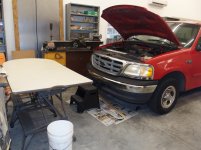
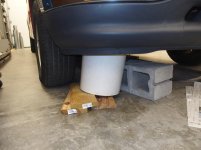
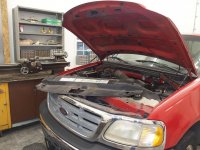
Early yesterday evening I brought my 2000 Ford F150 (4.2L V6) into the LBG and stationed it over the multi-tasking Tornado Shelter.


20201207-11.jpg

I put a couple of scrap pieces of wood across the Tornado Shelter's opening and draped some newspapers over them. I would let this sit overnight and try to pin down where the leak was coming from today

Before I went to bed last night I went out and checked the newspaper. At that time there was nothing on the newspaper.


20201208-02.jpg

This morning not only was there a wet spot on the newspaper but I could see a few drips on the oil pan itself. This made me think I had some sort of leak towards the back of the engine.

I searched for quite a while trying to locate a source of the leak around the rear of the engine but didn't see anything. I decided to let the truck sit longer and look at things again this evening.


20201208-03.jpg 20201208-04.jpg

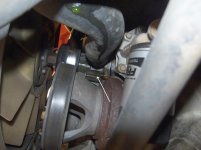
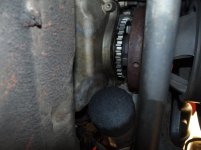
This evening I again looked at the truck from underneath and now I realized that the antifreeze was actually weeping out of the water pump. It was leaking so slowly that, for the most part, the antifreeze was running down the front of the engine and then along the bottom until it hit the low spot all the way back on the oil pan.

White arrow points to a wet water pump. The leaking antifreeze really doesn't show up very well in these pictures.

I think I need to replace the water pump but will do a little more investigating before buying a replacement.


Scott
 
Last edited:
OP
S

sbosecker

Well-known member
Joined
Sep 25, 2012
Messages
3,539
Location
Peachtree City, GA
I made a mistake posting this and I can't seem to delete it. I thought we used to be able to delete a post...

Scott
 
Last edited:

Paul_VR6

Well-known member
Joined
Dec 27, 2012
Messages
301
Location
Oxford, Pa USA
Considering it is mystery metal, the weld looked pretty good. One way I judge is if you have garbage in the weld or outside, and yours looks all outside. I see this even with well cleaned castings, baked in an oven, torched and acetone/brushed to death.
Also, it's always the waterpump, no matter how much I always wish it's something else.
 
OP
S

sbosecker

Well-known member
Joined
Sep 25, 2012
Messages
3,539
Location
Peachtree City, GA
Considering it is mystery metal, the weld looked pretty good. One way I judge is if you have garbage in the weld or outside, and yours looks all outside. I see this even with well cleaned castings, baked in an oven, torched and acetone/brushed to death.

Also, it's always the waterpump, no matter how much I always wish it's something else.

Paul_VR6,

Thanks for the kind words regarding the aluminum welding. Hopefully I'll be able to practice some more soon.

Regarding the water pump... I'm hip deep in extracting it from the F150. As a result I look like I've been in a pretty good fist fight. A lot of today was spent with my abdomen taking all the force of the front of the engine compartment as I wrenched on things way down inside. My belly and chest look like I took a few body blows. HA!

Best regards,

Scott
 
OP
S

sbosecker

Well-known member
Joined
Sep 25, 2012
Messages
3,539
Location
Peachtree City, GA
Saturday - December 12, 2020


It appears that my 2000 F150 needs a new water pump. I've spent the past few days trying to figure out what parts are needed. For reasons I will explain tomorrow, there's a good chance that at least one additional component, besides the water pump, will be required. Also it isn't clear, despite extensive research in manuals and YouTube, what Gaskets and O-Rings are needed.


20201212-01.jpg 20201212-02.jpg

I finally decided that I just needed to get on with it and remove the water pump. After I accomplish that I will have a pretty clear idea what parts I need to obtain to complete the project.

So that's how I spent the day - I've gotten the water pump out but I still need to examine the Heater Water Outlet Tube that is attached to the top of the water pump. I almost had the Outlet Tube out and then discovered there was one more hose attached to it. As it was 12:30 am, I called it a night.


Scott
 
Last edited:
OP
S

sbosecker

Well-known member
Joined
Sep 25, 2012
Messages
3,539
Location
Peachtree City, GA
Sunday - December 13, 2020


One of the issues I had been researching prior to starting the removal of my F150's water pump was what Fan Clutch Tool would work on my truck. I could not find anything that indicated it was the correct tool for my 4.2 liter engine in my 2000 model year pickup.


20201212-11.jpg

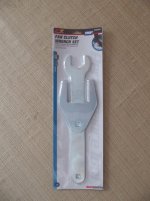
What little information I did have seemed to indicate that the Performance Tool W80585 Ford Fan Clutch Wrench Set might work. When I started trying to purchase this item online, the delivery dates were a week or more away. This is probably due to Christmas overload. However, I have a Summit Racing Equipment big box location (one of 4 in the USA) not too far away from me in McDonough GA. They had this tool in stock so I bought it online and went to the store to pick it up.


20201212-12.jpg

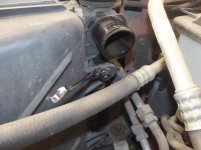
I returned home and got to work on this project. I had already moved the Air Filter Intake Tube out of the way earlier in the week.


20201212-13.jpg 20201212-14.jpg 20201212-15.jpg

The first order of business was to drain the coolant from the truck. There is a petcock at the lower right side of the radiator. I had watched videos of people using this to drain their vehicle's coolant without drama. That was not my experience.

I placed a 5 gallon bucket in the vicinity of the petcock and placed a piece of tubing over the drain ******. I turned the plastic "knob" with a 19mm wrench and coolant started dribbling out the tube into bucket ...as well as from the end of the petcock.

I hadn't counted on that and I was scrambling to somehow place the bucket into a position that would catch both of these fluid sources. Of course the front frame was directly under the leaking petcock and the bucket was too tall to fit underneath flat on the floor.

I cobbled together a solution ...very professional. HA!

One thing I was surprised by - this is the first time I've drained a coolant system - was how slowly the coolant drained from the radiator. I was expecting the draining to be over within a couple of minutes. The coolant drained for quite a while.


20201212-16.jpg 20201212-17.jpg

It was time to see if the Fan Clutch Tool Set would work. The short answer is: Yes but...

The wrench that fit onto the Fan Nut was a good fit. The larger opening wrench that engages the bolt heads on the fan belt "pully", not so much.

The opening on the larger wrench is a bit too big for my application. I got it to work but, due to the loose fit, it was a bit of a fight. Mostly I was concerned I might damage the bolt heads due to the loose fit. I found if I placed the "nut wrench" as close to the "bolt wrench" as I could get it, that would trap the "bolt wrench" and keep it from slipping off.

I found it absolutely essential to use 1/2-inch ratchet wrenches or breaker bars (I had one of each) to break the fan loose. I tried just a breaker bar on the "bolt wrench" and tapping the "nut wrench" handle with a hammer but that didn't work. As soon as I put my ratchet wrench on the "nut wrench" and gave it some torque, the nut broke loose.


Continued in next post...


KEYWORDS: 2000 F150 F-150 4.2 Liter 4.2L Water Pump Heater Water Outlet Tube Replacement
 
Last edited:
OP
S

sbosecker

Well-known member
Joined
Sep 25, 2012
Messages
3,539
Location
Peachtree City, GA
Continued...

The Shop Manual suggests removing the Fan and the Fan Shroud at the same time. I didn't completely remove the Fan and turned my attention to the Shroud.


20201212-21.jpg 20201212-22.jpg 20201212-23.jpg

There are several of these Philips Head Clips that secure the top of the Fan Shroud to the truck. I think only one of them worked properly. The rest I had to use a Trim Tool to pop them out. I will try to find appropriate replacements for the broken ones.


20201212-24.jpg 20201212-25.jpg

There are a pair of bolts holding the vertical part of the Fan Shroud to the truck frame. The one on the left is easy to get to but the one on the right has the Upper Radiator Hose in the way. I'm planning on replacing these hoses so this is as good a time as any to unhook this rascal.


20201212-26.jpg 20201212-27.jpg

Even with the Radiator Hose out of the way, access to this bolt was limited. I used a 10mm swivel head ratchet wrench to remove the bolt.

With both bolts removed, the vertical Fan Shroud is held in place by a couple of slots. Lifting up frees the Fan Shroud.


Continued in next post...


KEYWORDS: 2000 F150 F-150 4.2 Liter 4.2L Water Pump Heater Water Outlet Tube Replacement
 
Last edited:
To avoid these ads, REGISTER NOW!
Top Bottom