To avoid these ads, REGISTER NOW!

The Machine Work Thread

ClappedOutBport

Well-known member
Joined
Mar 30, 2016
Messages
998
On a restoration, I would have used the original threads, too.

Dave


Well, whatever floats your boat. I'm always thinking of the next guy, since I so often happen to be the next guy of others repairs. The next guy might not have a lathe, just a die. You'll notice that often these obsolete threads are updated, as will the male is relatively easy to make, the female is not. So if one of those ancient nuts needs replacing, time for a whole new rod. Or at lease cutting this one down to 1/2" and chasing the threads.
 
To avoid these ads, REGISTER NOW!

whateg01

Well-known member
Joined
Mar 13, 2006
Messages
11,185
Location
doo dah, kansas, usa
Well, whatever floats your boat. I'm always thinking of the next guy, since I so often happen to be the next guy of others repairs. The next guy might not have a lathe, just a die. You'll notice that often these obsolete threads are updated, as will the male is relatively easy to make, the female is not. So if one of those ancient nuts needs replacing, time for a whole new rod. Or at lease cutting this one down to 1/2" and chasing the threads.

That's a difference between restoring something and just fixing it.
 

ClappedOutBport

Well-known member
Joined
Mar 30, 2016
Messages
998
Whatever.

I guess I better retitle my Royersford restoration as I used a few modern fasteners and belts. Can't be a restoration if it's not 100% original, duh.

For that matter I guess MushCreek didn't restore it either as the original rod was probably wrought iron or an obsolete steel alloy. Bummer.

What did they use for paint in 1880?
 

MushCreek

Well-known member
Joined
Jan 14, 2015
Messages
9,737
Location
Upstate South Carolina
Ok, Ok, lets just calm down a bit. I'm not really that much of a restoration freak. For me, it was the path of least resistance. I only had to machine one part, the rod. The nuts are perfectly usable the way they are. You'd have to go to a lot of trouble to strip them or wear them out. It's a bench. You put it together, and that's it, probably for many, many years. Considering it's been around for a long time, and left out in the weather to rot, I'm surprised that the parts aren't in worse shape. I'm going to keep it on a covered porch, not out on a lawn, which is where it was for much of its life. I have no idea what will become of it after I'm dead and gone, but it's an antique now, with some value, so it will likely get better care for the next 150 years. And- I looked yesterday, and I don't have a 9/16" tap, so I would have had to buy one, or go down to 1/2-13, and make new nuts.
 

ClappedOutBport

Well-known member
Joined
Mar 30, 2016
Messages
998
Ok, Ok, lets just calm down a bit. I'm not really that much of a restoration freak. For me, it was the path of least resistance. I only had to machine one part, the rod. The nuts are perfectly usable the way they are. You'd have to go to a lot of trouble to strip them or wear them out. It's a bench. You put it together, and that's it, probably for many, many years. Considering it's been around for a long time, and left out in the weather to rot, I'm surprised that the parts aren't in worse shape. I'm going to keep it on a covered porch, not out on a lawn, which is where it was for much of its life. I have no idea what will become of it after I'm dead and gone, but it's an antique now, with some value, so it will likely get better care for the next 150 years. And- I looked yesterday, and I don't have a 9/16" tap, so I would have had to buy one, or go down to 1/2-13, and make new nuts.


Yeah that makes sense. I was just curious in the first post, but your explanation is logical.


I was just getting pissed at an unrealistic expectation of what a "restoration" is. I only seem to see that on this forum and ones dedicated to old tractors and stuff. People that wish to use old items generally don't care. Like Keith Rucker who is restoring a 130 year old planer and doing an amazing job, is still replacing his 43/64th hardware with something modern.


At any rate, as a show of my apologies, send me your address in PM and I'll send you a sharp 9/16" tap. I've got plenty.
 

Toolmaker51

Well-known member
Joined
Nov 26, 2015
Messages
176
Location
Missouri
Park bench or machine tool, being able to use one might overrule just 'pretty'. There is a crowd bent on ideal period-correct condition, which to me, depends on what it is. There are few things cannot benefit from some updating; others will never equaled.
I have a 1917 [4th of July no less] Pratt & Whitney Jig Bore, needing attention. Originally, just a motor rewind, repair 4-speed and high/ low voltage switches seemed appropriate. Until I removed the Y lead screw extension housing, that is. Out come 4 large slotted screws, did it just fall into my hand as normal these days? No, the housing is taper-pin doweled, and joint faces invisible except the slight mismatch of casting contours. Lightly prying and dead blows, it began to move. It slid over the lead screw fit nicely, and then a gasp. The mating surfaces are hand scraped!
I've broken down a few capital equipment. Tool marks there, always bear large radius of big face mills.
So, repairs now focus on preservation, not restoration or just fixing. There is nothing I can do that will improve 1st class work. Aside from readers, none likely to know or appreciate what I found.
Those who know me, also aware I have a short view of premier machine tool builders. P&W was already on the list.
Of course; I share. Just ask.
 

kazlx

Well-known member
Joined
Oct 30, 2012
Messages
2,851
Location
Tustin, CA
Making more of the adjustable V Blocks for fixture tables. Gage pins are probably one of my favorite measuring tools.
 

Attachments

  • 71273778-E72D-4524-BF36-35EFB56C2C43.jpeg
    71273778-E72D-4524-BF36-35EFB56C2C43.jpeg
    125.5 KB · Views: 144
  • CE13C9ED-2F89-4A62-8E0C-4A5FA9985F84.jpg
    CE13C9ED-2F89-4A62-8E0C-4A5FA9985F84.jpg
    68 KB · Views: 144
  • 64DBA361-800F-442B-B2DA-3888E6B69479.jpeg
    64DBA361-800F-442B-B2DA-3888E6B69479.jpeg
    92.7 KB · Views: 145

Griff93

Well-known member
Joined
Jul 25, 2009
Messages
1,121
Location
Huntsville, AL
I've been using gauge pins more and more myself. I really should buy a full set. I keep getting whatever ones I need for a specific part.
 

zmotorsports

ALLIANCE MEMBER
Joined
Oct 20, 2009
Messages
21,312
Location
Northern Utah
I've been using gauge pins more and more myself. I really should buy a full set. I keep getting whatever ones I need for a specific part.

I was surprised how much I found myself using pin gauges once I bought them. I had found a very slightly used set at a local pawn shop several years ago and bought it. Then I wanted the sets larger and smaller and set out on a mission to have a full set from .062" through 1". I have through .750" now and just need to find that last 1/4" range but I use them a lot now.
 

kazlx

Well-known member
Joined
Oct 30, 2012
Messages
2,851
Location
Tustin, CA
They are super handy. Small holes, slots, anything like that. Can easily stack them on a hole like I did if you don't have a single the correct size. I've been collecting some Meyer off ebay, but there are some inexpensive sets off Amazon that are surprising good and probably more than anything anyone short of a precision shop would need.
 

kazlx

Well-known member
Joined
Oct 30, 2012
Messages
2,851
Location
Tustin, CA
True, but can always coat them with inhibitor or something. There's a reason nice pins are 3x the cost.
 

ez-duzit

Well-known member
Joined
Jun 24, 2013
Messages
5,094
Location
Marina del Rey
True, but can always coat them with inhibitor or something. There's a reason nice pins are 3x the cost.

I don't care for the idea of having to coat them and then the necessity of removing and recoating each time you use one. Some of my sets have the treated paper in the lid. One of my sets is Meyers--forget the other brands; each set was bought separately off eBay.
 

kazlx

Well-known member
Joined
Oct 30, 2012
Messages
2,851
Location
Tustin, CA
I get it. I'm not disagreeing with you. Nice pins are nice. Imports are ok depending on what you get, but they are cheaper for a reason and nice pins are more expensive for a reason. I'm just stating that even the cheaper pins are handy for people on a bit more of a budget if they don't want to scour ebay.
 

C91x

Well-known member
Joined
Aug 26, 2015
Messages
267
Location
Prescott Valley
Anyone know what these two items are?

The one looks like a boring bar but all mine are carbide so I'm not sure. The part numbers don't bring up anything from Armstrong or jh Williams, the other thing I have no idea. Image.jpgImage%20(1).jpeg

Sent from my SM-G960U using The Garage Journal mobile app
 
To avoid these ads, REGISTER NOW!

ClappedOutBport

Well-known member
Joined
Mar 30, 2016
Messages
998
1. Milling machine quick adjust quill handle
2. Armstrong holder and boring bar
3. Homemade bullnose center?
4. Flycutter
 

whateg01

Well-known member
Joined
Mar 13, 2006
Messages
11,185
Location
doo dah, kansas, usa
My son and I decided to tackle a problem that many have complained of lately. This fits between the mask and your chin and gives air a place to go besides up under your glasses, so your glasses don't fog as easily.

This air is, of course, unfiltered, but so is the air that would escape around your nose and fog your glasses. This does, at least, direct the air rearward along your neck, though.

Dave
 

Attachments

  • mask-duct.jpg
    mask-duct.jpg
    72.3 KB · Views: 202

Toolmaker51

Well-known member
Joined
Nov 26, 2015
Messages
176
Location
Missouri
If you mean photos, then I'll ask:

"Toolmaker51, do you have any photos to share with us here?"

In response to Mr. F Marty and other forum readers, which beats National Enquirer or facebook any day, I'll journalize my version of a shop. Been at this, in one form or another 60 years with no retirement interest.

Photos? Well,......no and yes. With that, warning folks, I don't know any short stories. Part of my work is technical writing, it creeps into everything! But those details might help others when they have projects.
So....
We moved from CA, primarily due the Mrs. didn't like Los Angeles. Being foreign born and world traveler, her objections were reasonable, and found the Midwest appealed to her. I already had a few machine tools, scattered where I rented shop space and power.
Initially, we figured farm property and erecting a building. Dropped that later, considering our ages, could make a need to sell one jeopardized the other. We agreed owning a separate building was a better situation; she found a incredible one in same area with a fabulous house nearby. So we sold off CA property and off we went.
Building is rectangular 6500 sq ft, zoned M-1 [manufacturing], brick walls a foot thick, 15' 10" ceiling height, loading dock high, fork lift ramp, 3 load docks [one over concrete pad where three 20' silos once stood], single entry door.
Bought from family, descendants of who built it in late 1890's.
My theories of real estate do not allow placing heavy, millwright rigged equipment with all the wiring etc; in property subject to whims of a landlord. I'd NEVER rent or lease a shop; renting space was bad enough. Sure, it took some cash; but comparing per square foot rates [SoCal] to buying, it paid itself in 18 months. Very easy to justify. After 2 years, had it re-roofed [now interior is free span, no posts!which cost more than the building, equaling 27 months. No vents, skylights or penetrations of any kind, original flat roofed, completely removed, re-done with 65' wood W trusses. I've rejected $400,000 purchase offers, almost 3x what's been spent.
****:sad: Pics aren't linked! No url's, http://! How do I post pics?:dunno:
Aahhhhhaa. Pirating comedic phrase "Found It" Hey Admin, add a PC browse button to the photo upload, please?
I'm 1700 miles from home, so a full-on photo journal ain't gonna happen, but;
Pic 1, views front from street.
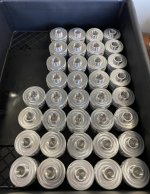
Pic 2, got killer deal on a press line, which was not part of original plan. Here they are onboard before heading out last July. Great driver, he rescued the crank off big boy so it wouldn't get lost. They're angled for stock feeders, big boy aims directly centered on ramp door.
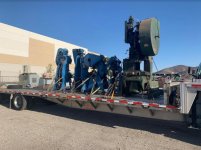
Pic 3, riggers leave, I spend rest of night cleaning up. Here they are at morning muster.....Paaarade Ressst. lol
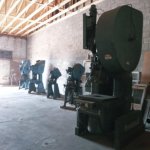
Pic 4, this was tricky. Needed a sheet metal brake, looked for aa-ges. Found this very cool but crazy Form-All near Chicago. Rigged the whole shebang on my own, onto 5x10 tilt trailer. Worked over-night again and locked up for the owners! Cool parts same as crazy parts. It's a 18ga x 48" manual press brake with aprons on both sides. Also, accepts fingers instead of the full length punch. Has patent and serial numbers, but zero search returns for others that exist, just patent owner. I believe it's the R&D or prototype build. Did find giant hydro-mechanicals, under same name that work much the same way.

See, no short stories :rant:! And, I've barely started.
 

Attachments

  • home_away_from.jpg
    home_away_from.jpg
    124 KB · Views: 190
  • LTL_barely JPEG.jpg
    LTL_barely JPEG.jpg
    86.4 KB · Views: 207
  • in_place.jpg
    in_place.jpg
    71 KB · Views: 193
  • FormAll_1 (5).jpg
    FormAll_1 (5).jpg
    148.7 KB · Views: 189

Toolmaker51

Well-known member
Joined
Nov 26, 2015
Messages
176
Location
Missouri
re the eyeglasses vs mask anti-fogging vent.

My son and I decided to tackle a problem that many have complained of lately. This fits between the mask and your chin and gives air a place to go besides up under your glasses, so your glasses don't fog as easily.

This air is, of course, unfiltered, but so is the air that would escape around your nose and fog your glasses. This does, at least, direct the air rearward along your neck, though.

Dave

I compliment aspect of design in providing a bit more comfort. Mine fog continually, but able to function well without glasses unless driving where I will NOT wear a f'n mask.

And each time they do fog, I'm reminded how strenuously perpetrators must be drawn and quartered, the media chastised for sensationalizing "pandemic, lockdown, all in this together, inflating "recommendations" into orders,...." anything besides fact instead of paranoia, and the market capitalizing on making them a fashion statement. That is equally noxious, turning this into a beta-test of acceptance.
One nation is fortunate I'm not president. I'd sue for every penny of unproductive labor [sneeze guards, floor stickers, short retail hours, excess cleaning...], bankrupt businesses, federal subsidies, the works.
Then I'd pray for them to claim sovereignty.
Good. Put that sovereignty in a sandwich.
As of now; your goods being imported is over, goods here embargoed; our exports you require severely taxed. Go fix those 94,000 dams that jeopardize neighboring countries. Don't lay claim on international waters. Disengage border wars. Reinstate proper monetary exchange rate. That is not being 'global'. There is plenty more.
Starting with POTUS Clinton, no one would address them seriously [or cowed to lobbyists] and look what negligence hath wrought.
There'd be a coup, populace needs to eat. They'd recover just like Japan, going from trinkets and poor products to a higher rate manufacturing economy.
And if they don't?
Nothing from there can't be done elsewhere.
 
OP
H

Hephaestus29

Well-known member
Joined
Mar 13, 2011
Messages
2,969
Location
Indianapolis
After rebuilding my Keyless Albrecht
drill chucks I decided to tackle my
Jacobs 1/8-3/4 Super Chuck.

To remove the outside cover or whatever
you call it, it has to be pressed off. I
bored out a piece of steel to 2.600 to
do the job.

This chuck wasn’t as nasty as the
Albrecht chucks. I did do quite a bit of
de-burring to make sure everything
worked smooth though. The jaws had
little buggered up places near the tips
so I took my diamond coated files and
deburred all that stuff.
It’s a pretty easy, straight forward job
really.
 

Attachments

  • A4C4DECA-5144-4A2E-9B75-9713C110BBE1.jpg
    A4C4DECA-5144-4A2E-9B75-9713C110BBE1.jpg
    134.4 KB · Views: 112
  • 42DC72DA-4F39-4FA6-A87B-88871DA98CED.jpg
    42DC72DA-4F39-4FA6-A87B-88871DA98CED.jpg
    144.9 KB · Views: 98

slodat

ALLIANCE MEMBER
Joined
Feb 6, 2010
Messages
3,679
Location
Central-ish, WA
Doing new controls and servos on this Hardinge Accuslide cnc lathe. Need to make a new motor mount. I’m new to machining parts and FAR from a machinist. I do play with tools in the shop though.

Original part. Need to move the two mating faces closer together about 1/2”.

e83d4bbf63cfd9d807caae5f3cb20968.jpg

Model:
751ff1776a18c36332b95114bf76e7dd.jpg

Original was made from round stock. Not needed so I’ll be making from bar. I needed to move the motor mounting holes out. Made each end in 1/2 material to check dimensions. Went well and I caught a few mistake that would have scrapped the bigger material had I not found them.

My humble part:
32b3db5a5144a0a44ba1d08244435c4a.jpg
063578fbb7c2854b79761c422ddfb319.jpg

Material comes tomorrow.
 

Attachments

  • 32b3db5a5144a0a44ba1d08244435c4a.jpg
    32b3db5a5144a0a44ba1d08244435c4a.jpg
    97.6 KB · Views: 3
  • e83d4bbf63cfd9d807caae5f3cb20968.jpg
    e83d4bbf63cfd9d807caae5f3cb20968.jpg
    74.8 KB · Views: 3
  • 751ff1776a18c36332b95114bf76e7dd.jpg
    751ff1776a18c36332b95114bf76e7dd.jpg
    110.6 KB · Views: 3
  • 063578fbb7c2854b79761c422ddfb319.jpg
    063578fbb7c2854b79761c422ddfb319.jpg
    83.5 KB · Views: 4

Mario428

Well-known member
Joined
Dec 4, 2009
Messages
156
Location
PEI, Canada
Doing new controls and servos on this Hardinge Accuslide cnc lathe. Need to make a new motor mount. I’m new to machining parts and FAR from a machinist. I do play with tools in the shop though.

Original part. Need to move the two mating faces closer together about 1/2”.

e83d4bbf63cfd9d807caae5f3cb20968.jpg

Model:
751ff1776a18c36332b95114bf76e7dd.jpg

Original was made from round stock. Not needed so I’ll be making from bar. I needed to move the motor mounting holes out. Made each end in 1/2 material to check dimensions. Went well and I caught a few mistake that would have scrapped the bigger material had I not found them.

My humble part:
32b3db5a5144a0a44ba1d08244435c4a.jpg
063578fbb7c2854b79761c422ddfb319.jpg

Material comes tomorrow.

Lovejoy couplings will not do a good job on a CNC machine. The constant reversals and you get bscklash from the insert conpressing.
A disc ot bellows ttype is required.
IMHO or my 2 cents
 

Attachments

  • 063578fbb7c2854b79761c422ddfb319.jpg
    063578fbb7c2854b79761c422ddfb319.jpg
    78.5 KB · Views: 3
  • 32b3db5a5144a0a44ba1d08244435c4a.jpg
    32b3db5a5144a0a44ba1d08244435c4a.jpg
    91 KB · Views: 3
  • 751ff1776a18c36332b95114bf76e7dd.jpg
    751ff1776a18c36332b95114bf76e7dd.jpg
    105.5 KB · Views: 2
  • e83d4bbf63cfd9d807caae5f3cb20968.jpg
    e83d4bbf63cfd9d807caae5f3cb20968.jpg
    70.9 KB · Views: 2

larry4406

Well-known member
Joined
Jan 27, 2006
Messages
18,948
Location
Northern Virginia
Lovejoy couplings will not do a good job on a CNC machine. The constant reversals and you get bscklash from the insert conpressing.
A disc ot bellows ttype is required.
IMHO or my 2 cents

I know zero about this but watched a This Old Tony video yesterday where he’s doing similar on his machine and said same.
 

slodat

ALLIANCE MEMBER
Joined
Feb 6, 2010
Messages
3,679
Location
Central-ish, WA
It's not a Lovejoy coupling, despite looking like one. It is a KTR Rotex GS 14 coupling. They were what came on the lathe, coupling the servos to the ball screws. I'm just replacing the motors. Lots of these machines out there making tons of parts.
 

Jim Johnstone

Well-known member
Joined
Apr 11, 2011
Messages
1,841
Location
Brantford, Ontario
Nothing too exciting today, had some run time on my CNC mill so I hopped on the lathe at work and whipped up a bearing press tool to help install new bearings in my son's go kart rims. 305515eba315ae6e46770667ad9657c3.jpgeacfd96be0d0e8652009128711719969.jpg

Sent from my SM-G970W using Tapatalk
 

Attachments

  • 305515eba315ae6e46770667ad9657c3.jpg
    305515eba315ae6e46770667ad9657c3.jpg
    447.7 KB · Views: 3
  • eacfd96be0d0e8652009128711719969.jpg
    eacfd96be0d0e8652009128711719969.jpg
    425.9 KB · Views: 5

duc916

Well-known member
Joined
Apr 18, 2013
Messages
284
Jim,
Does that bearing tool have a taper or recess so it only contacts the outer race? Hard to see in the picture.
 

Jim Johnstone

Well-known member
Joined
Apr 11, 2011
Messages
1,841
Location
Brantford, Ontario
Jim,
Does that bearing tool have a taper or recess so it only contacts the outer race? Hard to see in the picture.
Nope, it's flat across, but thats a good idea, I think I'll add a recess.

I'm going to make a few different ones for common size bearings I deal with, and send them out for zinc plate, so they don't rust all to hell.

Sent from my SM-G970W using Tapatalk
 
Last edited:

whateg01

Well-known member
Joined
Mar 13, 2006
Messages
11,185
Location
doo dah, kansas, usa
Nope, it's flat across, but thats a good idea, I think I'll add a recess.

I'm going to make a few different ones for common size bearings I deal with, and send them out for zinc plate, so they don't rust all to hell.

Sent from my SM-G970W using Tapatalk

How much are you allowing for the thickness of the plating?

Dave
 

Jim Johnstone

Well-known member
Joined
Apr 11, 2011
Messages
1,841
Location
Brantford, Ontario
How much are you allowing for the thickness of the plating?


Dave
I'll know after I speak to the plating place. we send trailer pins for plating regularly, but they have a boatload of clearance in them, so it really makes no difference. Quick call should let me know how much to leave.

Sent from my SM-G970W using Tapatalk
 

ClappedOutBport

Well-known member
Joined
Mar 30, 2016
Messages
998
Lol I just made one of those out of 6061. Double sided for 6206 and 6305 and threaded in the middle for a shaft. I did recess mine and made the centering boss shorter than the bearing for blind holes.
 

matt_i

Well-known member
Joined
Mar 14, 2008
Messages
10,717
Location
SE Michigan
Little project I hacked out over a couple of weeks.

Goal is to adapt a new electronic distributor in place of an old breaker point model. After some heat scratching and some CAD sessions I came up with a plan to cut down the main tube. It does take a bit of dialing up the confidence to take a brand new distributor out of the box and go over and slice it on the bandsaw....


Because of the large top end, reluctor, pole, etc, I have no lathe that can swallow that inside the headstock. If I did, it would be a relatively easy job. But I don't so off to create a fixture. Basic thing made of flat bar to clamp in the mill's vise, so I can indicate the OD, bore the ID concentric for a bronze bushing and then set it up in the lathe to machine the pilot dia on the lathe.


Off to the mill to indicate, bore for straightness, ream for size and mill to length.


Couple of precision pilots to hold the distributor body in the lathe between centers.


SAE660 bronze turned for light press, ream for .002" clearance ID with .125" flange.


The fixture was heavy enough to double as a press fixture to keep stress off the top-end.


So its done right??? Yea!!! Not. The shaft has to go under the knife again, its very well case hardened.


This is the detail that the old shaft has at the bottom, in a larger diameter, so I have 2 pieces to make to adapt the shaft diameters.


5/32" slot in W1 drill rod.


Parts made and drilled for roll pins.


My entry chamfer is filed and not machined but I don't think this engine will care.


Using height gage to confirm the assembled height of the unit for drilling the hole accurately along the length. One of the pilots was used as a length offset to "reach" down inside of the magnetic pole.


Carbide drill to get thru the case


Slice off the shaft with Metabo


Cheating (!!!) Belt sand to length to a drill point mark I made when in the mill ;)


Shaft test-fitted to endform.


And WHEW! ITS Done :) Thanks for watching, lots of intermediate steps along the way, the assembly is tight but smooth to rotate, exactly what I was hoping for. Thanks for watching, it took a bit of fiddling around to get there.

 
To avoid these ads, REGISTER NOW!
Top Bottom