zmotorsports
ALLIANCE MEMBER
thanks, i like that directional pattern as well. I dont know how much time and effort hes going to put into tidying up this one, he's got this one plus another old rim he wants cut to put on the inside of the dually, then he's ordering 4 more new Alcoa wheels to cut that will be the visible ones.
Sent from my SM-G970W using Tapatalk
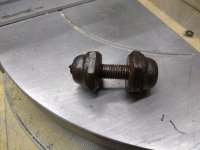
Gotcha, that makes more sense although he may end up having to install longer wheel studs. They usually aren't long enough to accommodate the thickness of two aluminum wheels as the inside dual is generally steel.