To avoid these ads, REGISTER NOW!

Between 705 & 1200 SQ/FT The 'NOT' a garage, CABIN build.

Workspaces between 705 and 1200 squarefeet.
OP
P

PWC Repair

Well-known member
Joined
Dec 27, 2012
Messages
3,188
Location
Arkansas
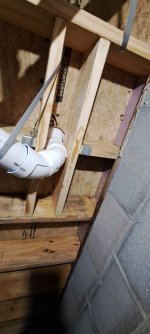
We've been 2 days crawling around and wollering in the crawl space.......FINALLY all the waste drain is DONE!!! Just need to finish up the supply. And where did the downstairs toilet end up...??.....right over a joist OF COURSE :rant:!! Well, it is what it is, cut it out and box it in!
 

Attachments

  • 20260210_175031_073442.jpg
    20260210_175031_073442.jpg
    376.9 KB · Views: 265
  • 20260210_175340_073405.jpg
    20260210_175340_073405.jpg
    507.3 KB · Views: 95
  • 20260210_175825_073233.jpg
    20260210_175825_073233.jpg
    376.4 KB · Views: 60
To avoid these ads, REGISTER NOW!
OP
P

PWC Repair

Well-known member
Joined
Dec 27, 2012
Messages
3,188
Location
Arkansas
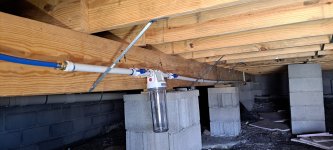
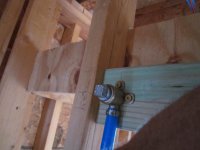
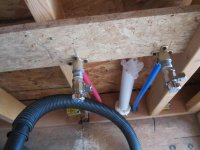
With the exception of the shower and tub valves, the plumbing is DONE!! I installed a filter can with valves too because my son has a water well. After the 'pre-drywall' inspection and pressure test, all the water lines will be insulated
 

Attachments

  • 20260211_143259_053639.jpg
    20260211_143259_053639.jpg
    428.2 KB · Views: 54
  • 20260211_143135_053555.jpg
    20260211_143135_053555.jpg
    508.7 KB · Views: 61
OP
P

PWC Repair

Well-known member
Joined
Dec 27, 2012
Messages
3,188
Location
Arkansas
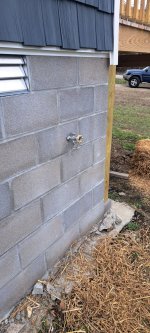
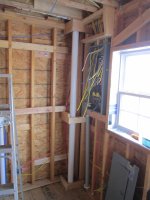
Finished all the plumbing, including the frost proof hose bib, and trying to wrap up odds-n-ends. We have an inspection Friday. I made the connection in the electrical boxes and ran the wires in conduit to the disconnects for the HVAC units.
 

Attachments

  • 20260217_145316_062402.jpg
    20260217_145316_062402.jpg
    598.6 KB · Views: 59
  • 20260217_140821_062545.jpg
    20260217_140821_062545.jpg
    961 KB · Views: 54
OP
P

PWC Repair

Well-known member
Joined
Dec 27, 2012
Messages
3,188
Location
Arkansas
Well, the inspection went well. He stated that my wife and I should become home builders so people could actually get a quality house in our area. He was especially pleased with attention to detail on tight gaps and great nail placement without missing the lumber or splitting/chunking out the boards. If there was anything he could tick off for at all it's that I notched out the top of an I-joist for the tub drain.....BUT I boxed it in and doubled the I'joists in that area so it's really a NON issue anyway. He was also elated to see proper flashing of the front porch deck, a slight pitch away from the house, and proper footings for the posts sitting on bases instead of right IN the concrete. Overall thoughts were that it's better done than almost everything he has inspected in this area!! :beer:

Time to pressure test the plumbing and start insulating!!
 
OP
P

PWC Repair

Well-known member
Joined
Dec 27, 2012
Messages
3,188
Location
Arkansas
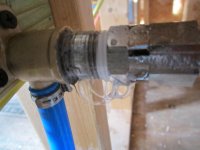
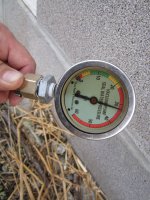
I put some plugs in the shower fittings today and opened those valves up. Then I used teflon tape and temporarily installed all the shutoff valves for the faucets and toilets in the OFF position. I put a pressure gauge in the end of the hot side line cause the water heater is not here yet. Then I got this brilliant idea to drill a hole through a garden hose CAP and install a valve stem. This way I could pressureize the whole thing with air throough the hose bib!!! It worked like a champ, I immediately found a bad crimp.......I actually heard it under the crawl space and saw the deformed clamp. No biggie, cut it off and recrimped. Next up was SEVERAL of the shutoffs leaking at the teflon tape seal......GRRRR!!! Unscrewed 'em all, wrapped up about 6 rounds on the threads, reinstalled.......OK! Everything looks good now and currently pressureized. We'll see where my gauge sits tomorrow afternoon.
 

Attachments

  • IMG_4185.JPG
    IMG_4185.JPG
    542.1 KB · Views: 45
  • IMG_4186.JPG
    IMG_4186.JPG
    617.5 KB · Views: 32
  • IMG_4183.JPG
    IMG_4183.JPG
    1.1 MB · Views: 33
  • IMG_4182.JPG
    IMG_4182.JPG
    827.7 KB · Views: 34
  • IMG_4184.JPG
    IMG_4184.JPG
    528 KB · Views: 35
  • IMG_4189.JPG
    IMG_4189.JPG
    646.5 KB · Views: 36
  • IMG_4188.JPG
    IMG_4188.JPG
    535.3 KB · Views: 36
  • IMG_4187.JPG
    IMG_4187.JPG
    680 KB · Views: 40
OP
P

PWC Repair

Well-known member
Joined
Dec 27, 2012
Messages
3,188
Location
Arkansas
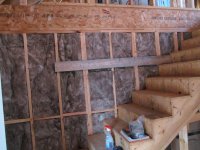
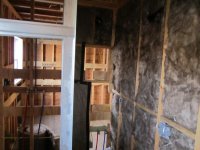
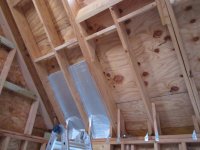
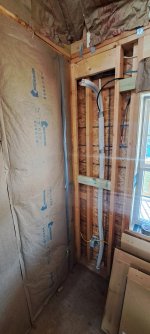
The whole time I was doing the pressure test stuff, my wife was putting up insulation. This is for sound deadening of the bathroom walls and living room/home theater. Then late in the afternoon I got started on the radiant barrier, which is also the insulation baffling for the eaves.
 

Attachments

  • IMG_4190.JPG
    IMG_4190.JPG
    693.2 KB · Views: 38
  • IMG_4191.JPG
    IMG_4191.JPG
    618.9 KB · Views: 37
  • IMG_4192.JPG
    IMG_4192.JPG
    591 KB · Views: 33
  • IMG_4193.JPG
    IMG_4193.JPG
    649.3 KB · Views: 47

thammel

Well-known member
Joined
Oct 3, 2005
Messages
2,245
Location
Maryland
Making good progress!! On the leaks, I have pretty much given up on white teflon tape. I prefer the yellow tape - it's thicker. And I do at least 3 wraps.
 
OP
P

PWC Repair

Well-known member
Joined
Dec 27, 2012
Messages
3,188
Location
Arkansas
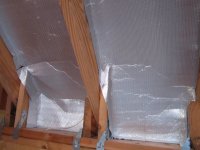
I wet inside all the valves with my soapy water spray and worked the valves a few times.....then I pressure tested again today. Held at 32psi for about 3 hours. I'm sure it's good to go. Then I worked on making more of these insulation baffles. The whole front is done and half the rear. You can see how I left about an inch air gap for the ventilation.
 

Attachments

  • IMG_4199.JPG
    IMG_4199.JPG
    519.1 KB · Views: 37
  • IMG_4200.JPG
    IMG_4200.JPG
    550.5 KB · Views: 38
  • IMG_4198.JPG
    IMG_4198.JPG
    601.2 KB · Views: 50
OP
P

PWC Repair

Well-known member
Joined
Dec 27, 2012
Messages
3,188
Location
Arkansas
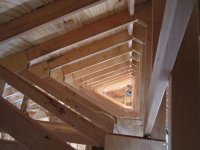
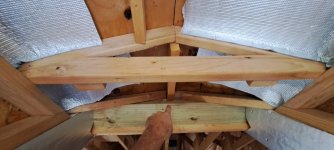
I've completed the first row on the front and started on a second. I also bent up some hurricane ties in my bench vise. I just thought I might like some extra holding on these I-joists. They now have a nice lip that "grabs" the joists! And just BECAUSE.......I thought looking down through all the trusses made a neat pic!
 

Attachments

  • IMG_4210.JPG
    IMG_4210.JPG
    561.3 KB · Views: 41
  • IMG_4209.JPG
    IMG_4209.JPG
    516.9 KB · Views: 41
  • IMG_4207.JPG
    IMG_4207.JPG
    529.4 KB · Views: 39
  • IMG_4205.JPG
    IMG_4205.JPG
    581.5 KB · Views: 52
OP
P

PWC Repair

Well-known member
Joined
Dec 27, 2012
Messages
3,188
Location
Arkansas
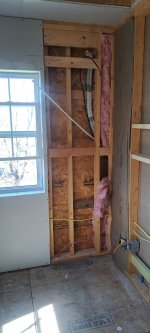
Today I turned the water on and bled all the valves into a bucket. Left it on all day while we were working......seems good to go. I also framed out the plumbing and electrical 'chase' or 'bulkhead'.......whatever, now it's ready for sheet goods.
 

Attachments

  • IMG_4213.JPG
    IMG_4213.JPG
    514 KB · Views: 44
OP
P

PWC Repair

Well-known member
Joined
Dec 27, 2012
Messages
3,188
Location
Arkansas
Good luck.

I’m sure you are hanging and taping the drywall along with your wife?
You bet we are...........but we're pretty good at drywall, we've had a lot of practice on our crooked, unlevel, rough cut, 1958 model house LOL!!! She can hang, tape, and perform first and second mud coats all on her own. She just can't get the hang of smoothing the joints or corners real well.
 
OP
P

PWC Repair

Well-known member
Joined
Dec 27, 2012
Messages
3,188
Location
Arkansas
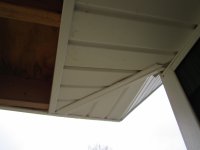
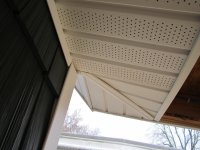
I worked on closing off the soffit in the porch corners today........much more involved than I anticipated LOL!! The eave angles IN from the house to the porch front. THIS ALONE caused me some grief! The diagonals I needed here to mount J channel to were 45* cut on one side but only a 30* cut on the other.......AND......that side was also needed angled vertically by about 15* for it to fit nice. Then of course trying to actually install those pieces AARgh. Finally figured it out and it's closed up to keep birds out but I'll go back and re-cut some J channel to fit a lot nicer.
 

Attachments

  • IMG_4224.JPG
    IMG_4224.JPG
    325.9 KB · Views: 30
  • IMG_4223.JPG
    IMG_4223.JPG
    496.9 KB · Views: 39

68400BIRD

Well-known member
Joined
Nov 14, 2017
Messages
333
Location
Shorewood, MN
Not starting anything here. But, is your son helping with the house projects?? It would be a great feeling knowing that you helped build the house you are living in.
 
OP
P

PWC Repair

Well-known member
Joined
Dec 27, 2012
Messages
3,188
Location
Arkansas
Not starting anything here. But, is your son helping with the house projects?? It would be a great feeling knowing that you helped build the house you are living in.
Not so much.........he works fulltime.....BUT, he will be paying us, my labor is NOT free. He will be doing ALL the painting, flooring, window trimout, etc.......with a little of my supervision/guidance. The plan is to help these young'uns get into the house with the cash in their pockets. Then he will move in with instant equity. At that time we will come up with an amount based upon total hours worked (which we are keeping track of) and we will set up an escrow and he can start making us monthly payments. The payments will be cheaper than any rent or mortgage AND will give us some extra income for a while. I really just don't see how any young person can get ahead these days, at least not in my 'poverty paychecks' area
 
OP
P

PWC Repair

Well-known member
Joined
Dec 27, 2012
Messages
3,188
Location
Arkansas
This morning I finished up crimping shielded connectors onto the cat6a cables and testing them. I had to re-do one but all check out now. Then we did a bit of insulating and started hanging drywall in one room. I've never used a drywall router (rotozip) before and there is a little learning curve. I've included a couple pics where it got away from me LOL!! Good thing drywall is super easy to patch!! Also insulated the water supply lines for the second floor before we bury them.
 

Attachments

  • IMG_4232.JPG
    IMG_4232.JPG
    492.4 KB · Views: 31
  • IMG_4233.JPG
    IMG_4233.JPG
    442.7 KB · Views: 31
  • IMG_4229.JPG
    IMG_4229.JPG
    490 KB · Views: 32
  • IMG_4231.JPG
    IMG_4231.JPG
    480 KB · Views: 29
  • IMG_4227.JPG
    IMG_4227.JPG
    519 KB · Views: 31
  • IMG_4228.JPG
    IMG_4228.JPG
    604.1 KB · Views: 60
OP
P

PWC Repair

Well-known member
Joined
Dec 27, 2012
Messages
3,188
Location
Arkansas
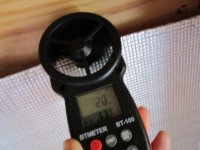
Today we finished drywall in the living room. I snuck a picture of my wife using the drywall router to cut in the window openings. I also got up on the ladder......ON the scaffolding, to hang more of the radiant barrier. Hopefully finish that up tomorrow. Also I noticed a pretty good breeze coming up between the roof sheathing and the radiant barrier. Good, that's exactly what I want it to do. So I grabbed some fancy test equipment and measured air flow on 3 different bays. That breeze was 2-2.2mph ( about 180cfm)!!! That oughta keep the attic exhausted efficiently!
 

Attachments

  • IMG_4234.JPG
    IMG_4234.JPG
    397.8 KB · Views: 45
  • IMG_4236.JPG
    IMG_4236.JPG
    596.4 KB · Views: 45
  • IMG_4239.JPG
    IMG_4239.JPG
    576.3 KB · Views: 39
  • IMG_4240.JPG
    IMG_4240.JPG
    610.8 KB · Views: 45
To avoid these ads, REGISTER NOW!
OP
P

PWC Repair

Well-known member
Joined
Dec 27, 2012
Messages
3,188
Location
Arkansas
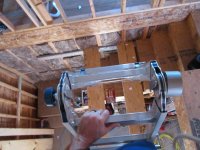
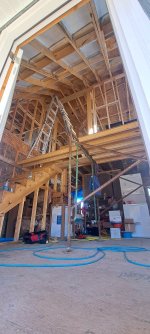
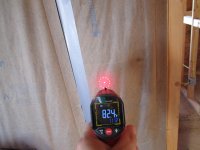
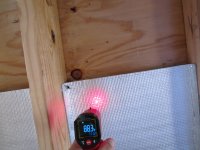
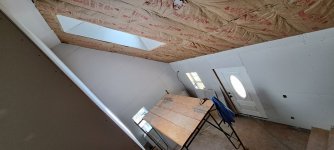
More ladder on scaffolding work today, here was my view. I spent MOST of today UP and DOWN and moving and UP and DOWN again and again..........whew. The radiant barrier is done, I can finally insulate this vaulted ceiling. It also got warm today so I grabbed the laser thermometer.........ambient temps upstairs in the lower 80's. Windows were closed and it was around 70 and sunny out today. Roof decking just about 110* and just under it on the radiant barrier........only a few degrees warmer than abient room temps!! It's doing it's job.
 

Attachments

  • IMG_4245.JPG
    IMG_4245.JPG
    660.7 KB · Views: 36
  • 20260308_160927_053442.jpg
    20260308_160927_053442.jpg
    576.4 KB · Views: 34
  • IMG_4251.JPG
    IMG_4251.JPG
    499.7 KB · Views: 31
  • IMG_4254.JPG
    IMG_4254.JPG
    607.8 KB · Views: 28
  • IMG_4253.JPG
    IMG_4253.JPG
    613.3 KB · Views: 41
OP
P

PWC Repair

Well-known member
Joined
Dec 27, 2012
Messages
3,188
Location
Arkansas
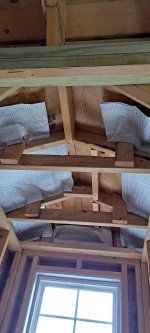
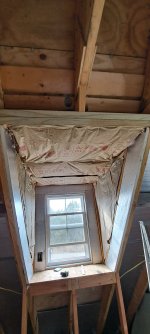
Today I got the Radiant barrier in the dormers. I've left just the peaks open and drilled holes (that I'm pointing to) for the draft to pass through. Then it can carry on into the attic and out. Then my wife insulated the one in the bedroom. As soon as she buttoned that up there was already a nice little wind blowing through those 2 holes! And IF there's enough radiant barrier left we will put it on the INSIDE of these dormers before drywall. She went ahead and put some around the window already.
 

Attachments

  • 20260310_141453_063044.jpg
    20260310_141453_063044.jpg
    527.6 KB · Views: 36
  • 20260310_141518_063137.jpg
    20260310_141518_063137.jpg
    383.1 KB · Views: 26
  • 20260310_141528_063213.jpg
    20260310_141528_063213.jpg
    290.5 KB · Views: 25
  • 20260310_170013_063245.jpg
    20260310_170013_063245.jpg
    478.4 KB · Views: 31
OP
P

PWC Repair

Well-known member
Joined
Dec 27, 2012
Messages
3,188
Location
Arkansas
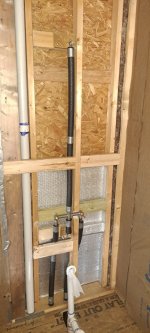
....more.........and MORE......INSULATING!!!! That slanted wall in the small bedroom is done, YAY! Most of the master bedroom is also done. I also sleeved all the pex inside and had some radiant barrier leftover so it went in behind the upstairs tub plumbing. I don't foresee any issues but that IS an exterior wall.
 

Attachments

  • 20260313_140156_100150.jpg
    20260313_140156_100150.jpg
    499.7 KB · Views: 25
  • 20260313_140126_100221.jpg
    20260313_140126_100221.jpg
    508.8 KB · Views: 22
  • 20260313_140230_100251.jpg
    20260313_140230_100251.jpg
    382.4 KB · Views: 20
  • 20260313_181744_100053.jpg
    20260313_181744_100053.jpg
    523.1 KB · Views: 24
Last edited:
OP
P

PWC Repair

Well-known member
Joined
Dec 27, 2012
Messages
3,188
Location
Arkansas
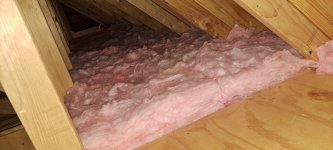
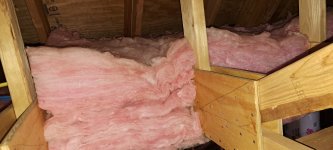
I started insulating the attic today. R19 batts in between trusses, then another layer of R19 laid perpendicular across the top.
 

Attachments

  • 20260315_122416_123413.jpg
    20260315_122416_123413.jpg
    427.5 KB · Views: 13
  • 20260315_122537_123319.jpg
    20260315_122537_123319.jpg
    430.3 KB · Views: 25
OP
P

PWC Repair

Well-known member
Joined
Dec 27, 2012
Messages
3,188
Location
Arkansas
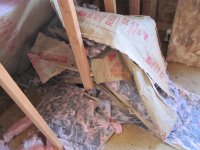
Same old, same old............insulating!! Itchy, ITCHY!!! So, why is this taking so long??? WELL,..I'm glad you asked LOL!! Arkansas is about 20 years behind the times. I went with 19.2" truss and TJI spacing. And since all the "well built" or "custom" homes around here ARE STILL PUTTING STUFF 24" o.c...........I had to special order all my insulation for 19.2" spacing. I did this through my 'Pro' account at HD and either the lady helping me didn't know how to do her job......OR, I actually couldn't break up my insulation order (had to order a pallet) of batts WITH facing and batts WITHOUT. So this means ALL the stacked insulation,...I have to take my little comb tool and scrape insulation off as I remove the paper. Also, I'm VERY picky about the way I do things so it all has to sit nice and tight with no gaps. That means slicing around truss members and wiring, etc. I also cut these nice little wedges to fit up into the baffling I made with the radiant barrier, nice and tight! I hung around 500sq ft today.
 

Attachments

  • IMG_4270.JPG
    IMG_4270.JPG
    553.1 KB · Views: 20
  • IMG_4271.JPG
    IMG_4271.JPG
    536.3 KB · Views: 20
  • IMG_4266.JPG
    IMG_4266.JPG
    472.3 KB · Views: 18
  • IMG_4265.JPG
    IMG_4265.JPG
    533.8 KB · Views: 18
  • IMG_4268.JPG
    IMG_4268.JPG
    642.4 KB · Views: 17
  • IMG_4269.JPG
    IMG_4269.JPG
    623.3 KB · Views: 21
OP
P

PWC Repair

Well-known member
Joined
Dec 27, 2012
Messages
3,188
Location
Arkansas
I forgot to mention, I installed the large bathroom vent fan before that insulation. The vent is semi-rigid and sealed up right out to the soffit vent. And I hung the vent so it sits in between the layers of insulation. That should minimize any sweating.
 

Attachments

  • 20260318_115034_064129.jpg
    20260318_115034_064129.jpg
    399.4 KB · Views: 21
  • 20260318_115051_064156.jpg
    20260318_115051_064156.jpg
    455.6 KB · Views: 28
OP
P

PWC Repair

Well-known member
Joined
Dec 27, 2012
Messages
3,188
Location
Arkansas
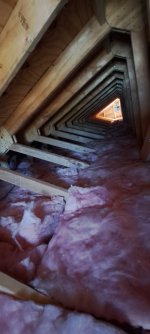
A great SUCCESS!! All the insulation is done! and my forearms are all itchy and rashed up from the 'glass!
 

Attachments

  • 20260320_124154_102214.jpg
    20260320_124154_102214.jpg
    308.3 KB · Views: 18
  • 20260320_124425_101958.jpg
    20260320_124425_101958.jpg
    642 KB · Views: 17
  • 20260320_124432_101906.jpg
    20260320_124432_101906.jpg
    426.7 KB · Views: 17
OP
P

PWC Repair

Well-known member
Joined
Dec 27, 2012
Messages
3,188
Location
Arkansas
Your son is very lucky to have you in his life.
Thank you. I appreciate that. He and I sometomes talk about how easy it is to find out HOW to do things these days with the internet. Alot of us never had that growing up. For me it's a cakewalk! If I don't already know how to do something..........just give me 5 minutes and I WILL LOL!!! He has learned how valuable it is to diy.
 
OP
P

PWC Repair

Well-known member
Joined
Dec 27, 2012
Messages
3,188
Location
Arkansas
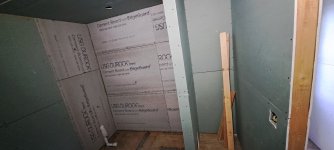
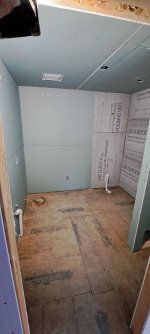
The upstairs bath is completely 'rocked and ready for mud. It's a little larger than it looks........that space is for a 36x72 tub.
 

Attachments

  • 20260327_182843_064202.jpg
    20260327_182843_064202.jpg
    342.4 KB · Views: 20
  • 20260327_182815_064140.jpg
    20260327_182815_064140.jpg
    271.3 KB · Views: 19
  • 20260327_182801_064103.jpg
    20260327_182801_064103.jpg
    368.1 KB · Views: 25
OP
P

PWC Repair

Well-known member
Joined
Dec 27, 2012
Messages
3,188
Location
Arkansas
The mini-split line sets came in so we ran those today. Those ones to upstairs were sure FUN!!!
I also decided NOT to use that thin corrugated drain hose they supply. I can only imagine that stuff rotting and the condensate just draining into the wall. Went ahead and ran PEX and will hook the drains to that.
 

Attachments

  • 20260330_160524_044629.jpg
    20260330_160524_044629.jpg
    348.7 KB · Views: 16
  • 20260330_160551_044720.jpg
    20260330_160551_044720.jpg
    433.6 KB · Views: 16
  • 20260330_161440_044757.jpg
    20260330_161440_044757.jpg
    461.1 KB · Views: 15
  • 20260330_163242_044830.jpg
    20260330_163242_044830.jpg
    487.6 KB · Views: 31
Last edited:
OP
P

PWC Repair

Well-known member
Joined
Dec 27, 2012
Messages
3,188
Location
Arkansas
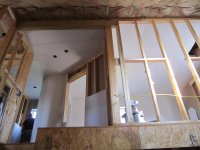
OK, so I opened my shop back up on the 1st and I've been pretty busy. Still got more drywalling done though. Some more careful ladder ON scaffolding work and most of the vaulted entry area is hung. The rest will be boxcar siding. I also managed to cut in and brace a laundry chute from the upstairs bathroom. It will just drop straight into a cabinet downstairs in the utility room.
 

Attachments

  • 20260418_163915_044518.jpg
    20260418_163915_044518.jpg
    404.4 KB · Views: 20
  • 20260418_160514_044615.jpg
    20260418_160514_044615.jpg
    278.7 KB · Views: 19
  • 20260418_163831_044546.jpg
    20260418_163831_044546.jpg
    519.3 KB · Views: 28
OP
P

PWC Repair

Well-known member
Joined
Dec 27, 2012
Messages
3,188
Location
Arkansas
I wanna rock......ROCK! Some more shee,eet-ROCK!

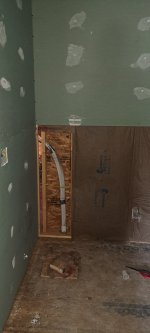
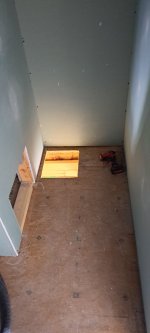
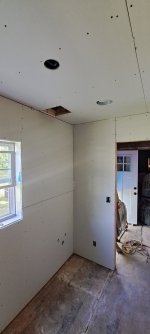
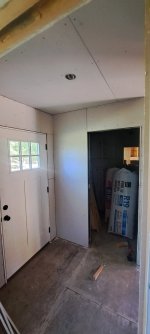
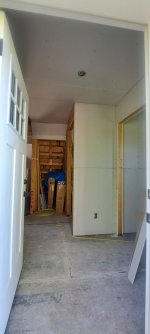
Utility room done. The chase and last joist bay will be plywood screwed on so as to be accessible in the future if need be. Top left in the second pic is that laudry chute. There will be a 36" cabinet there above the utility sink for the laundry to drop into.
 

Attachments

  • 20260419_155509_064841_copy_1350x3000.jpg
    20260419_155509_064841_copy_1350x3000.jpg
    395.6 KB · Views: 20
  • 20260419_155529_064923_copy_1350x3000.jpg
    20260419_155529_064923_copy_1350x3000.jpg
    376.5 KB · Views: 28
To avoid these ads, REGISTER NOW!
Top Bottom