To avoid these ads, REGISTER NOW!

Between 705 & 1200 SQ/FT The Texas Barn in PA

Workspaces between 705 and 1200 squarefeet.
OP
M

madison069

Well-known member
Joined
Nov 5, 2010
Messages
4,195
Location
Monroeville, PA
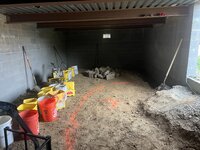
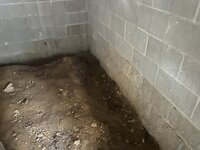
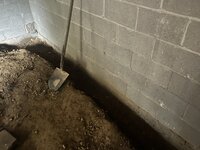
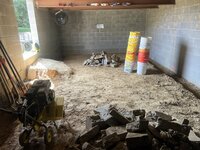
Close, but still more digging.

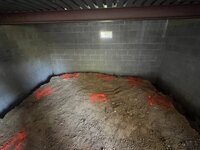
Decided to just go down 6” more overall and at the end I need to go 10” more. By going down 6”, it will ensure I have enough height for the future air compressor and I should be able to walk under the beams without hitting my head. I will have 14” of backfill and concrete on top of the footers so plenty of depth between the floor top and top of the footer. Only thing is I’ll have to have a concrete ramp poured to go from 17” drop to the floor. I think by pouring a 5ft long ramp, that will give me a 3.4” drop per foot ramp, and I will have 9ft between the wall and end of the ramp inside the bunker. Should be plenty of room for driving my riding mower in the bunker.

Here’s some progress photos
IMG_7968.jpeg
IMG_7965.jpeg
IMG_7969.jpeg

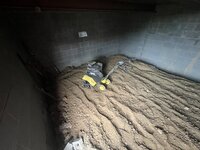
Once I get it to grade, I’ll clean the trenches out and then it’s time to pour 2b limestone in the trench to compact it, and then I’ll pour 4” of stone over the whole area for a 3.5” concrete pad/slab. Since I’m not driving a car in here, 3.5” concrete should be adequate.
 
To avoid these ads, REGISTER NOW!

devvar

Member
Joined
Sep 19, 2023
Messages
24
Location
Connecticut
Nice build! I'm in the dreaming/planning stages for a garage on my sloping property in CT and was just thinking a "bank barn" style building would be nice so I didn't have to bring in so much fill material. I'm really liking the bunker design you did, I'll be saving this thread for inspiration!
 
OP
M

madison069

Well-known member
Joined
Nov 5, 2010
Messages
4,195
Location
Monroeville, PA
Took a short weekend vacation this recent weekend so no progress on the Texas Barn till yesterday.

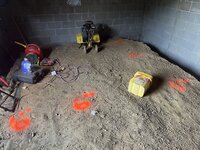
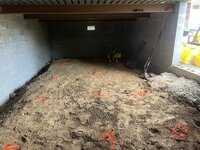
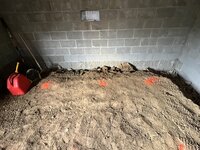
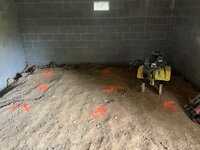
I took the time to break up the hard soil with a demolition hammer drill and a spade bit to make it easier for the tiller to till the dirt. then tilled the whole area at once. took roughly 2 hours to do the whole area.

IMG_8238.jpegIMG_8239.jpeg
Hopefully I can get someone to help just haul the dirt to the dirt pile. The goal is to get all of the loose dirt out tomorrow. I say the loose dirt is roughly 4" deep overall. We will see how deep it went once the loose dirt is cleared.
 
OP
M

madison069

Well-known member
Joined
Nov 5, 2010
Messages
4,195
Location
Monroeville, PA
Love this build! I appreciate the sweat equity, as that is how I do my projects. One foot step at a time.

Is the perimeter trench in the bunker just for drainage?
Thanks! I tend to do the work cause I’m cheap and broke most of the time. Seem our projects and goals drains our free money quickly.

The inner perimeter trench was initially dug for the footer, but I will be cleaning them out to put clean 2b limestone, which is 3/4”-1” size stone, in the trench. I have an exterior French drain around the garage footer with 2b stone on top for ground water drain. The drain pipe discharges inline with my downspout pipe over the hillside. I have been tossing the idea of putting a floor drain to let melted snow to go back into the ground. Just doing a simple stone pit in the middle to keep the water far from the wall as possible. Hopefully I grade the exterior ground properly and install a small grated drain at the door way when I get my pathway installed will prevent exterior water from going in the bunker through the doorway.
 
OP
M

madison069

Well-known member
Joined
Nov 5, 2010
Messages
4,195
Location
Monroeville, PA
Well, with the help of a young man we got 3/4 of the loose dirt out of the bunker. Unfortunately he was feeling the pain of moving all those buckets for me as I was filling them. Don’t get me wrong I got out there and unloaded those buckets too, but I mostly got the buckets outside and he carted them to the dirt pile. Then later I went back and finished the last 1/4 of the bunker so I could measure how far I went down.

After the dirt settled, it appears I went down 6” in some area and 4” in some. But there’s some area it just seems like I missed it when I was tilling! Could of swore I hit it all with the tiller.

So one good thing is now the whole bunker only needs to go down by a single digit instead of the double. Maybe I will get over there and till some more today or tomorrow.

IMG_8263.jpeg
IMG_8264.jpeg

This was in the 10” range but now it’s down in the 6 and 4” range.
IMG_8266.jpeg

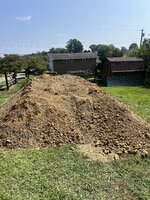
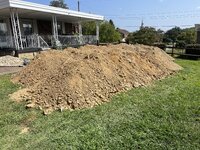
Dirt pile is steady getting bigger. IMG_8268.jpeg
 
OP
M

madison069

Well-known member
Joined
Nov 5, 2010
Messages
4,195
Location
Monroeville, PA
So did the tilling on Monday and was able to get 1/3 of the dirt removed yesterday with the help of the young man again. My arms are killing me today. But one good thing is the area I tilled and removed the dirt already shows to be at the grade I need it to be. there's some spot that's an inch high but that will be easy to fix.
IMG_8326.jpeg
IMG_8327.jpeg

Maybe I will piddle with it after work today, but I'm not sure yet. Will see how things go and decide from there.
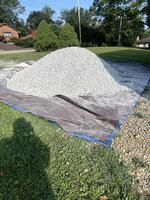
I got 6 tons of 2B stone being delivered on Saturday morning, so soon I will be putting stone in the bunker instead of taking dirt out!
 
OP
M

madison069

Well-known member
Joined
Nov 5, 2010
Messages
4,195
Location
Monroeville, PA
man...you're makin' me tired😩
Sorry about that! I promise to slow down soon on the digging. I stopped by today and was able to get most of the tilled dirt out. Unfortunately I didn’t take any photo from today’s session. A neighbor stopped by and chewed the fat some when I was finishing up and I got distracted. Seems like I’m at grade for most of the area, but one corner was 3” high. The rest was either at grade or 1” high. So tomorrow I’ll stop by and till the areas that high and get the rest of the dirt out of there. Along with start cleaning the trench out.
 
OP
M

madison069

Well-known member
Joined
Nov 5, 2010
Messages
4,195
Location
Monroeville, PA
I’m so close to being done with dirt removal!!

Looks like just the area in front of the opening needs to be graded. I’m leaving what’s there for a ramp but I’ll till around the ramp to get it to grade. What’s outlined by orange is what’s left to grade.
IMG_8351.jpeg
Overall area.
IMG_8345.jpeg
IMG_8346.jpeg

While cleaning the trench I had to remove these blocks. At the moment I’ve been kicking my past *** for believing I could keep the trench clean and so it’s no big deal to throw these chunks of concrete in the trench. 😡

IMG_8347.jpeg
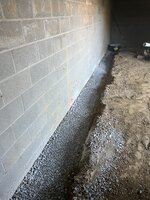
The cleaned out trenches.
IMG_8349.jpeg
IMG_8350.jpeg

Tomorrow morning I’ll work on the trenches some and hopefully get them cleaned out all the way. Then I’ll bust the concrete blocks some more before I throw them back in the trenches. I’ll till the area that needs to come down 2” to get ready to haul the stone in and fill the trenches first!
 

Attachments

  • IMG_8348.jpeg
    IMG_8348.jpeg
    774.3 KB · Views: 7
OP
M

madison069

Well-known member
Joined
Nov 5, 2010
Messages
4,195
Location
Monroeville, PA
Other than the dirt ramp, I’m pretty much done digging. Now it’s time for the stone. I will bust these blocks up better and lay them down flat in the trench. I’m thinking of putting a sump basin in one corner just incase. If water is a problem, at least I will have a place to push it to and pump it out.
Here is the overall shot of the bunker
IMG_8357.jpeg
Cleaned trench,
IMG_8358.jpeg
View from the other side.
IMG_8365.jpeg
Here’s the dirt pile.
IMG_8366.jpeg
IMG_8367.jpegIMG_8370.jpeg
Final count of 5 gallon buckets is 1,718. I went back to my numbers and saw I didn’t measure it the full size of the bunker due to the trenches and I also didn’t take in account of fluffing the dirt up with the tiller.

Looking at the 6 ton of stone, I think I’m going to be getting more delivered before it’s over with.
IMG_8354.jpeg

I’ll go back over there either tomorrow or later in the week and bust these blocks up and get those laid down flat in the trench.
 

larry4406

Well-known member
Joined
Jan 27, 2006
Messages
19,483
Location
Northern Virginia
Almost there.

Add 4 inches of stone to trench, then perf draintile, 4” more stone then geotech fabric. Crock on corner of your choosing based on where you want the sump to discharge.
 
OP
M

madison069

Well-known member
Joined
Nov 5, 2010
Messages
4,195
Location
Monroeville, PA
Almost there.

Add 4 inches of stone to trench, then perf draintile, 4” more stone then geotech fabric. Crock on corner of your choosing based on where you want the sump to discharge.
I’m not even sure if I will do the drain tile on the inside. With the exterior drain tile and not seeing water inside the bunker, I’m just not sure if it’s necessary. The crock in the corner idea was more for if it flooded inside the bunker from water coming in the doorway somehow, or if I washed the bunker out with water I have a spot to drop a pump in to discharge the water out of the bunker. One side of the garage will have a driveway for the car trailer and boat, which will have a curb on the neighbor side that will direct the water to an inlet that gets installed at the end of the driveway to direct the water to the hillside toward the street. The other side will have a 5’ concrete wide walkway and it’s to be sloped away from the garage. The front will have 40’ depth by 60’ wide of concrete driveway parking area that’s to be graded from the garage. So the garage is basically going to be surrounded by concrete that’s graded away from the garage.

Course, if it could happen it will happen to me.
 

larry4406

Well-known member
Joined
Jan 27, 2006
Messages
19,483
Location
Northern Virginia
I’m not even sure if I will do the drain tile on the inside. With the exterior drain tile and not seeing water inside the bunker, I’m just not sure if it’s necessary. The crock in the corner idea was more for if it flooded inside the bunker from water coming in the doorway somehow, or if I washed the bunker out with water I have a spot to drop a pump in to discharge the water out of the bunker. One side of the garage will have a driveway for the car trailer and boat, which will have a curb on the neighbor side that will direct the water to an inlet that gets installed at the end of the driveway to direct the water to the hillside toward the street. The other side will have a 5’ concrete wide walkway and it’s to be sloped away from the garage. The front will have 40’ depth by 60’ wide of concrete driveway parking area that’s to be graded from the garage. So the garage is basically going to be surrounded by concrete that’s graded away from the garage.

Course, if it could happen it will happen to me.
😬

One chance to ensure it’s always dry….
 

Lou's Garage

Well-known member
Joined
Feb 12, 2008
Messages
582
Location
Anderson, SC
What a tremendous amount of work but well worth it. I can truly appreciate your effort as I did something similar "way back when." When first married we lived in a mobile home adjacent to a wetlands preserve (fancy name for a swamp with duck hunting). The ground on which our trailer was planted had settled and now would be under water during extreme conditions. Every evening (after a 12 hour work day) I would bring home a pickup truck load of fill/top soil to put under the trailer and raise the ground level. After I raised the ground about 6 inches we raised the entire unit unti it was level. That was in the late 70's, that mobile home survived along the Hudson River until Superstorm Sandy.

Lou Manglass
 
OP
M

madison069

Well-known member
Joined
Nov 5, 2010
Messages
4,195
Location
Monroeville, PA
What a tremendous amount of work but well worth it. I can truly appreciate your effort as I did something similar "way back when." When first married we lived in a mobile home adjacent to a wetlands preserve (fancy name for a swamp with duck hunting). The ground on which our trailer was planted had settled and now would be under water during extreme conditions. Every evening (after a 12 hour work day) I would bring home a pickup truck load of fill/top soil to put under the trailer and raise the ground level. After I raised the ground about 6 inches we raised the entire unit unti it was level. That was in the late 70's, that mobile home survived along the Hudson River until Superstorm Sandy.

Lou Manglass
I know your challenge with doing that a load at a time. I’ve spent some time during college leveling single wide trailer homes and over size travel trailers. It was critical to get them level to keep from rolling out of the bed too easily. Those middle of the night floor bouncing wasn’t any fun.

Small update for the bunker.
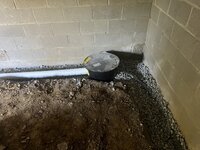
I got the sump basin, I had a stick of perforated pipe. I have some more perforated pipe at the other house. I just don’t want to dig the hole for the basin. But I’ll do it.
IMG_8385.jpeg

This wall is the one wall that will most likely get water if any of the bunker walls were to get water.


Maybe tomorrow I’ll bust the blocks up and dig the basin hole. Today was a long day of basketball games for the youngest.
 

drivesitfar

Well-known member
Joined
Oct 23, 2013
Messages
36,042
Location
Pacific Northwest
Madison: great work and even though I know it’s hard and every muscle in your being is sore you’re almost done.

Just curious how the 4 wheel cart is working compared to a wheelbarrow?
 
OP
M

madison069

Well-known member
Joined
Nov 5, 2010
Messages
4,195
Location
Monroeville, PA
Madison: great work and even though I know it’s hard and every muscle in your being is sore you’re almost done.

Just curious how the 4 wheel cart is working compared to a wheelbarrow?
The cart has been working out great! I usually load 7 5-gallon buckets on the cart and then wheel it to the side of the dirt pile to pick each bucket up and dump it on the high side of the pile so it can just roll down on the side. The bottom grate of the cart is a little deformed from being loaded heavily in a small spot, but it's still in good shape. I will probably go back to the wheelbarrow now to bring the stone in the bunker since I won't have to lift the stone high.
 
OP
M

madison069

Well-known member
Joined
Nov 5, 2010
Messages
4,195
Location
Monroeville, PA
Got the sump basin down. Drilled the holes and placed the pipes where they will go in at. I got a black corrugated 4” perforated pipe going along the side wall and the 10’ of the white solid pipe going along the middle wall. The sump basin is roughly 1/2” lower then the final grade of the concrete floor.

IMG_8393.jpeg
Then I filled the middle wall trench with stone and concrete pieces. Each layer I ran the plate compactor over the stones.
IMG_8394.jpeg
Before I left for the day I got the middle wall trench filled up mostly and will start compacting it when I come back to work on it.
IMG_8396.jpeg
IMG_8397.jpeg

Stone pile is slowly going down.
IMG_8398.jpeg
I’ll probably need another 6 tons if not 12 tons before it’s all over.
 
To avoid these ads, REGISTER NOW!

larry4406

Well-known member
Joined
Jan 27, 2006
Messages
19,483
Location
Northern Virginia
At your bunker area, are any of the perimeter walls waterproofed on the exterior dirt side?

If not, you might want to coat your inside walls with UGL Drylok or similar prior to pouring the slab. Having the waterproofing extending lower than the slab will ensure any seepage is below the slab and into your drain tile system.

The white color will also brighten up the space.
 
OP
M

madison069

Well-known member
Joined
Nov 5, 2010
Messages
4,195
Location
Monroeville, PA
At your bunker area, are any of the perimeter walls waterproofed on the exterior dirt side?

If not, you might want to coat your inside walls with UGL Drylok or similar prior to pouring the slab. Having the waterproofing extending lower than the slab will ensure any seepage is below the slab and into your drain tile system.

The white color will also brighten up the space.
Yep, they got waterproofed on the outside, and an insulation type material was applied to the outside where it's underground.

But I have been thinking of painting the inside of the bunker to brighten it up.
 
OP
M

madison069

Well-known member
Joined
Nov 5, 2010
Messages
4,195
Location
Monroeville, PA
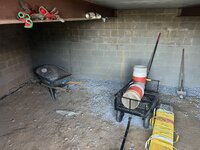
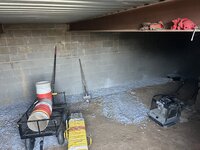
Progress on the bunker, got the load of stone in the bunker. With the help of my youngest, she spread the stone for me while I shoveled and wheeled the stone into the bunker.
IMG_8410.jpeg
IMG_8414.jpeg

We also snapped some chalk lines on the wall to guide us. I’ll bring a straight board with me next time to start leveling the stone across the floor better.
IMG_8416.jpeg
IMG_8415.jpeg

Now I need to call the local landscaper supply company and have some more stone delivered. Maybe this time I can get it dropped closer to the bunker door if I bring my truck to pull the delivery truck up if he gets stuck.
IMG_8417.jpeg
 
OP
M

madison069

Well-known member
Joined
Nov 5, 2010
Messages
4,195
Location
Monroeville, PA
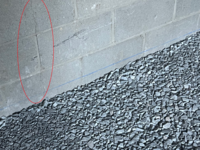
What are you going to do about the crack in the block wall?

1755077814663.png

This crack was noticed after the floor was poured so I talked to a couple of engineers I know in the trade. A little more information regarding this particular spot.

This particular wall is the center wall under the garage floor. The other side of this wall is filled with stone and is roughly 18 feet from the front. The center and rear wall was filled with concrete which made it a solid wall since these walls support the I-beams that support the floor. Above that wall is a 7" thick concrete floor. I talked to the design engineer and also a structural engineer about it and since it's the only crack present in the wall, they aren't concerned with it since the floor is fully cured and basically tying everything together structurally. Since it hasn't grown in the year since the floor was poured and there's no crack in the floor or any other point of the wall, it has been just a monitor and not worry about it.
 
OP
M

madison069

Well-known member
Joined
Nov 5, 2010
Messages
4,195
Location
Monroeville, PA
I’d be worried moisture would get in the crack and it could freeze and widen the crack or worse. Maybe some kind of goo in a tube might be a fix?

Stone Looks good though!

That’s really the only concern at this point, water from snow blower or anything I bring in wet from rain or snow getting to this crack. Since the floor was poured, these walls have been dry inside the bunker so a good sign that no water is coming from outside. I’ve been thinking of painting the wall with white paint cause it’s so dark down there and most likely it’s going to be drylok that’s going to be used. When I do the drylok I’ll either use some kind of sealant/filler or just put a couple of coat of drylok on the crack.
For now ive been monitoring it bare and since it’s not growing, there no concern. Once the stone is down, I’ll see if I can enlist my wife and youngest to paint the wall, since my wife can cut the paint around the beams better than me. Otherwise it might be after the concrete is poured then I’ll do the drylok.
 
OP
M

madison069

Well-known member
Joined
Nov 5, 2010
Messages
4,195
Location
Monroeville, PA
Oh look there’s a pile of stones down the hill in the back yard!
IMG_8441.jpeg

Wait, where did it go!!!
IMG_8443.jpeg

Oh there it is!
IMG_8444.jpeg
IMG_8445.jpeg
IMG_8446.jpeg

It was hot and humid while moving that pile of stones. I called it quit after getting the pile in the bunker. I’ll go back and start removing the dirt steps at the entrance and then finish spreading the stone in the bunker.

Might be next week, but progress is progress.
 
OP
M

madison069

Well-known member
Joined
Nov 5, 2010
Messages
4,195
Location
Monroeville, PA
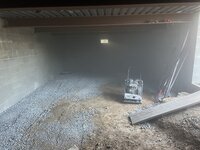
Today’s progress was just removing the dirt steps in front of the entrance to the bunker and leveling the gravel.

I took the time and level this 1/3 of the bunker using the straightest board with the level taped to it.
IMG_8570.jpeg

Then I worked on the other end of the bunker and I’m close to having it leveled. Still need to lower some and raise some spots on this end.
IMG_8571.jpeg
Got this side leveled as best I could.
IMG_8572.jpeg

Here is the entrance with the dirt steps missing.
IMG_8574.jpeg


I got most of the perimeter of the bunker leveled and at the right height.
IMG_8576.jpeg
It looks like I will be taking some of the stone out before I’m done. Hopefully it’s just a few wheelbarrow full.

I just have the center 1/3 of the bunker to level and also fine tune the right side of the bunker. Then I can clean up and wait for the concrete when my contractor comes back in October, I hope. In the meantime I’ll get some Drylok and get the inside walls painted. Along with start on the electrical on the inside and outside.
 
OP
M

madison069

Well-known member
Joined
Nov 5, 2010
Messages
4,195
Location
Monroeville, PA
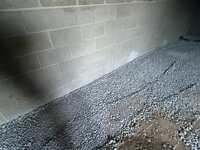
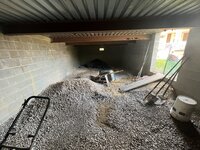
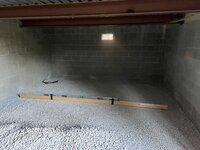
I think I’m done with the bunker til concrete can be poured. Well, paint the walls white, but done with the digging.
IMG_8583.jpeg
IMG_8584.jpeg
IMG_8585.jpeg

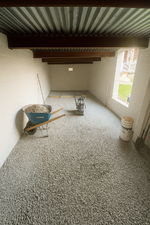
Here is what ChatGPT said it would look like painted white.
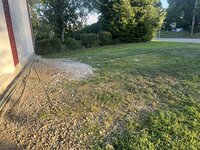
89A2D95B-6EFE-4BDC-B9F5-7E1A409021FC.png

I also installed a touch keypad on the man door. I need to bring a razor and window cleaner with me next time to get that sticker off the glass.
IMG_8594.jpeg


Now, it’s time to work on the electrical. That’s for another day.
 
OP
M

madison069

Well-known member
Joined
Nov 5, 2010
Messages
4,195
Location
Monroeville, PA
Nice work Cody!
Thank you! Been a long time coming.

That is looking great! After the concrete is poured, what will the floor to ceiling height be at the steel beams?
5’10”, which is perfect for me as I’m 5’10”. I didn’t feel comfortable going any lower as I was getting close to the footers.

Big improvement with the walls painted white, I'm curious about floor to beam height as well. I'll bet you're happy to put the shovel away. :bounce:

Yep, I’ll be painting the walls white for sure.
You’re not lying. I’m happy to put the shovel away for a little while. Unfortunately, I still have a date with that shovel in the future for the gas and water line. 🤦🏻‍♂️
 
To avoid these ads, REGISTER NOW!
Top Bottom