To avoid these ads, REGISTER NOW!

Between 705 & 1200 SQ/FT The Texas Barn in PA

Workspaces between 705 and 1200 squarefeet.
OP
M

madison069

Well-known member
Joined
Nov 5, 2010
Messages
4,195
Location
Monroeville, PA
After a 2.5hr work period of cutting measuring, finding tools, soldering, and testing I finally got the water line sorted out that went from the house to the garage.

I replaced the old shut off valve that was here with a new quarter turn ball valve.
IMG_3369.jpeg

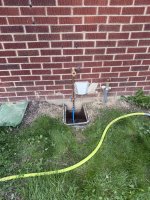
Outside I made the connection to the pex line and also raised the spigot to make it more comfortable to work with and put a new spigot.
IMG_3365.jpeg


And look at that! Water coming out of the spigot on the garage!
IMG_3367.jpeg

I had to shut the house water off since I needed to install a toilet shut off valve, so figured I would get this checked off my list of things to do. Just need to get some masonry sealant to seal the hole where I passed the pvc conduit through the cinder block wall for the copper pipe to pass through.
 
To avoid these ads, REGISTER NOW!
OP
M

madison069

Well-known member
Joined
Nov 5, 2010
Messages
4,195
Location
Monroeville, PA
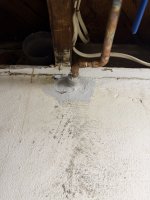
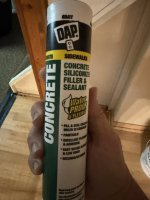
Got some concrete silicone filler and sealant for the cinder block wall to seal the gap where the water pipe went through.
IMG_3374.jpeg

A little finger action to ensure it’s sealed.
IMG_3376.jpeg


Then I got the inside wall too.
IMG_3377.jpeg

I guess I can call that little project complete.

Nothing else was done except clean up the house a little.
 
OP
M

madison069

Well-known member
Joined
Nov 5, 2010
Messages
4,195
Location
Monroeville, PA
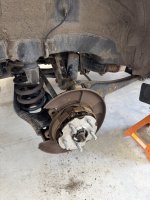
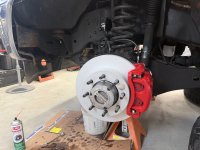
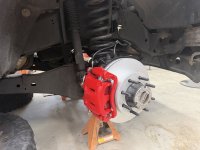
I got the rear hubs installed on the oldest’s car and so far it sounds better I think, but I’m waiting for a pair of ears.

Here’s the new hubs in.
IMG_3437.jpeg

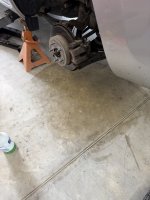
I even cleaned to floor, it cleaned up nicely with a little simple green and paper towel.
IMG_3436.jpegIMG_3438.jpeg

Could use a sweep and mop.
 
OP
M

madison069

Well-known member
Joined
Nov 5, 2010
Messages
4,195
Location
Monroeville, PA
Well I talked to my concrete guy and he has me in the rotation. He’s busy but will try to get started within the next 2 months. If he can’t do the whole project at once, he will atleast get sections of the project done when he can. First area is the spot between the house and barn.
IMG_3498.jpeg

Need to figure out a path and pad design that will provide a walkway to the bunker opening, designated grilling area, open walkway between the house and barn, and make it look nice.
The current narrow walkway will be ripped out and a 3ft wide sidewalk will be installed from the porch steps to this area. The original red pad will be left alone, just saw cut to clean the joint that’s close to the barn. A 5ft wide sidewalk will be installed to the right of the barn to provide a path to the front of the barn. That’s really the only details I have at this time as I keep thinking of how I want it to look here.

Then it will be the driveway to the left of the barn when looking at the back that will be poured so I can park the car trailer and boat beside the barn.
 
OP
M

madison069

Well-known member
Joined
Nov 5, 2010
Messages
4,195
Location
Monroeville, PA
Some progress over the weekend.

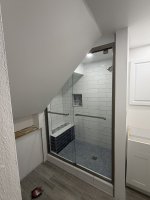
I got the shower done in the basement bathroom.
Those sliding glass doors are heavy.
IMG_3517.jpeg

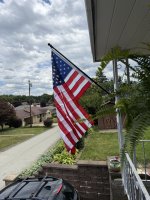
Got the American flag up in the porch post for 4th of July. In the end I’d like to put a pole up, but this is nice for now.
IMG_3521.jpeg

Went to a Kid Rock concert Saturday night, he was very patriotic and entertaining for a guy that’s been doing this for a long time. I would go again to another concert if he came through here.
IMG_3564.jpeg

Sunday before church I got the baseboard around the toilet installed and then put the toilet back in the bathroom. I still got some small details but it’s functional and can be used.
IMG_3583.jpeg

Wife wants to play with some colors around the sink so I put the sink install on hold for now. But atleast the sink is out of the living room for now.

Then after church I started cleaning the house. I’ve been by myself for 2 weeks while most of the family have been traveling to Uruguay and Argentina. Hence why I’ve been working on a lot of projects.

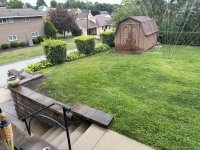
Filled in the hole by the retaining wall with some 2B gravel and then a piece of landscape fabric before I put topsoil and grass seed down. Here’s the yard after I cut the grass.
IMG_3587.jpeg
IMG_3589.jpeg

It’s not 100% grass, but coming from West Texas I’m happy to have a green yard!

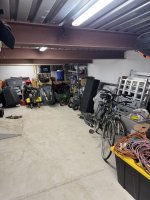
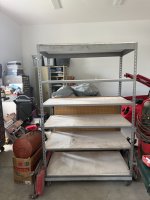
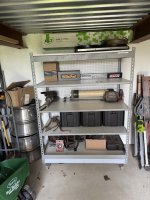
Then I got the bunker semi organized, now I can walk in the bunker and find stuff without tripping over stuff.

The gray cabinet and the totes are all empty. I need to figure out if I even need the totes before I toss them in the trash.
IMG_3591.jpeg
IMG_3596.jpeg

Overall I got a lot done so I’m happy with the progress I’ve made. Everything still needs more attention but that can wait another day.

Happy Father’s Day everyone!
 
OP
M

madison069

Well-known member
Joined
Nov 5, 2010
Messages
4,195
Location
Monroeville, PA
Not much has happened the past week except softball tournaments and spending time with family.

I did sneak in a little garage time.

Using the new paint markers, I marked the cut point for the uprights on these shelves. Seeing how I was recommending these paint markers figured I better tryout the new ones. They seem to work well, time will tell.
IMG_3662.jpeg

Here is the shelves assembled in the bunker.
IMG_3670.jpeg

Now I can move the shelves around in the bunker without hitting the I beams. Need to clear out a spot and start organizing stuff soon.
 
Last edited:
To avoid these ads, REGISTER NOW!
OP
M

madison069

Well-known member
Joined
Nov 5, 2010
Messages
4,195
Location
Monroeville, PA
Oh look! I got the other shelf assembly cleared off.

IMG_3720.jpeg

Put most of the stuff on the shelves in the bunker.
IMG_3721.jpeg

Then once I got the other shelves assembly cut down, cleaned, and moved I put all of the camping related gears on these shelves.
IMG_3723.jpeg

Now to keep clearing out and sorting stuff, get the 4 mowers I have in the garage repaired and sold.
 
OP
M

madison069

Well-known member
Joined
Nov 5, 2010
Messages
4,195
Location
Monroeville, PA
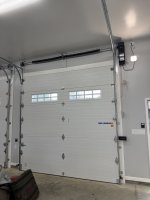
I have been researching the garage door opener world and after comparing and checking prices, I decided to get the RJO101 by Chamberlain. From what I’ve found comparing parts and numbers, these lifts are the same under the cover as the Liftmaster 98022. The difference between the two are Liftmaster is more geared toward professionals installation, has a fancier wall mount door opener, and has three buttons remote. The Chamberlain has a no lcd wall mount, single button remote, and is geared toward residential install. Warranty are the same but per the fine print Liftmaster models are supposed to be worked on by professionals but as some people have mentioned on here, they were able to call the company up and get the parts themselves after doing troubleshooting with the phone rep. Otherwise it’s the same warranty time period, same company ownerships, and same motor/control board/software between the two. Also the Chamberlain is $160 cheaper each.

So here are the two openers in the box.
IMG_3773.jpeg

I laid out one and inspected everything.
IMG_3775.jpeg

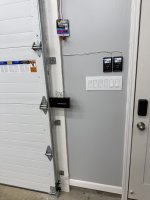
After reading everything I realized there was no printed insulation pages. Instead you had to download an app called BILT where they provided a 3D step by step instructions on how to install the opener. Overall I had no issues with using the app and it made understanding the instructions better cause it had short videos as they installed the parts.

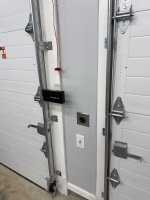
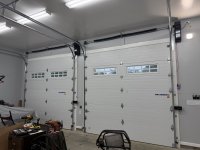
Currently I got the first one installed but I didn’t mount the wire on the wall. I will install the other opener and them I’ll secure the wiring to the wall once all of the wires are in place.
IMG_3777.jpeg

Overall it’s functioning properly and with finding tools, reviewing the instructions several times it only took me 2hours to install it. The second one should go quicker now that I got all of the tools gathered and know what to expect.
 

OutlawDrifter

Well-known member
Joined
Jan 20, 2015
Messages
3,886
Location
KS
Install looks good Cody!

If I ever start over, I'd definitely prefer the wall mount! That's actually what I had spec'd for the shop, but they installed the wrong one, and after explaining my displeasure, he ended up eating the cost of the opener rather than install what I had asked for...at the time it seemed like a good idea, but there have been times I'd rather have the overhead space.

When the screw type in the Mrs.'s garage went out, they had a model that dropped right in, so it made sense to replace it with the same updated model.
 

pima67

Well-known member
Joined
Dec 5, 2009
Messages
308
Location
Tucson, AZ
Haven't lately but on the way to the Tucson airport one passes by a large building labeled Chamberlain and Liftmaster.
Builder installed 3/4 hp LMs on both doors. The small door opener died and had it replaced with a 1/2 HP LM ( no control board available due to age).
When the large door one failed I had it replaces with the 98022 so a future owner could install a lift.
At my age not a DIY job for me.
 
OP
M

madison069

Well-known member
Joined
Nov 5, 2010
Messages
4,195
Location
Monroeville, PA
Install looks good Cody!

If I ever start over, I'd definitely prefer the wall mount! That's actually what I had spec'd for the shop, but they installed the wrong one, and after explaining my displeasure, he ended up eating the cost of the opener rather than install what I had asked for...at the time it seemed like a good idea, but there have been times I'd rather have the overhead space.

When the screw type in the Mrs.'s garage went out, they had a model that dropped right in, so it made sense to replace it with the same updated model.
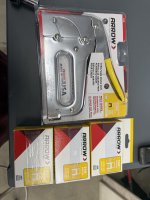
Thanks! If you have any experience with cable staple guns let me know, as I am looking into something to help ensure a clean install when stapling the wires to the wall. I don't think I currently have a cable staple gun, but I need to dig around in the attached garage where the staple items are located.

I can understand with just rolling with what they installed, they did give it to you so it's hard to justify changing it out when it's working.
Haven't lately but on the way to the Tucson airport one passes by a large building labeled Chamberlain and Liftmaster.
Builder installed 3/4 hp LMs on both doors. The small door opener died and had it replaced with a 1/2 HP LM ( no control board available due to age).
When the large door one failed I had it replaces with the 98022 so a future owner could install a lift.
At my age not a DIY job for me.
Seems like Chamberlain and Liftmaster is owned by a bigger corporation which isn't unusual these days. With the goal of installing a 4 post lift in the garage, that's the main reason why I went with a wall mounted garage opener. Granted I have to keep the door down when I raise the car on the lift, but atleast I have that little safety clearance with the opener not being in the ceiling.
 
OP
M

madison069

Well-known member
Joined
Nov 5, 2010
Messages
4,195
Location
Monroeville, PA
I'm thinking the Arrow T59 stapler with the insulated staples is going to be my best bet for a cleaner install compared to trying to hold the cable and staples with my hand while I try to hammer the staples in that came with the system.
 

OutlawDrifter

Well-known member
Joined
Jan 20, 2015
Messages
3,886
Location
KS
I'm thinking the Arrow T59 stapler with the insulated staples is going to be my best bet for a cleaner install compared to trying to hold the cable and staples with my hand while I try to hammer the staples in that came with the system.

Cody, I have no advice on this topic. I did mine the old-fashioned way with the hammer and a bag of "u clips".

1783526686758.png
 

pima67

Well-known member
Joined
Dec 5, 2009
Messages
308
Location
Tucson, AZ
To run the control wire on the ceiling from where the center opener was to the LM on the side next to the door, I used a single nail clip similar to what is shown above. Put the wire in the u shape plastic thingy and only had to hammer one nail. Didn't require a big hammer. Also had them on hand from some forgotten project. The installer was new to installing the 98022 and had to call his boss a couple of times. I had to suggest how to run the wire.
 
To avoid these ads, REGISTER NOW!
Top Bottom