I'm sure I've been boring ya'll a little because there hasn't been much actually getting done that is noticeable, but I've been putting in a lot of hours on different things around the house. First of all the end tables, I have the legs all rough sanded and will be starting on the tops and shelves today after work. No pictures as it is just sanding wood similar to what I showed earlier in the thread.
Now for The Berline Wall. The Berline Wall, what in the heck are you talking about? Yeah The Berline Wall, that wall I'm working on building shall henceforth be known as The Berline Wall. Okay, yeah got ya, but why The Berline Wall? Well sit back in your chair and I'll tell ya'll a tale ladies and gentlemen. You've read of many of the tools my grandfather has passed down to me, his name was simply Berline, no middle name, just Berline. Legend has it he was named after Berlin, Germany, he was born in 1922 before any of the Nazi happenings that were a dark time in our worlds history began. Then he was in the Army in WW2, fighting against the country in which his name was derived. Well I was named after both of my grandfathers and because my parents didn't want to show favoritism they simply call me JB. So there you have it, the story behind The Berline Wall.
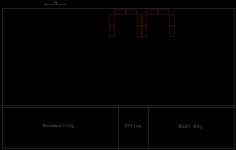
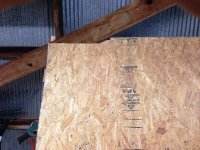
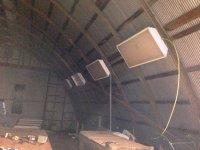
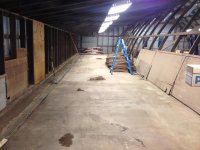
Now for progress and reasoning. I'm building this so I have a flat spot in this round walled obscenity that will actually be useable. I'll build some cabinets with work bench space in front of The Berline Wall and perhaps some overhead storage down the road as well. I'm simply installing the bottom board with Tapcons and adding OSB on the front of the studs on 16" (40.64cm) centers. This is about where I'm at now:
I have another 4' (1.2192m) complete but no OSB on that section yet, I need to get more material, but as mentioned I need to hold off on buying anything for a few more weeks to let the available funds catch back up with recent expenditures.
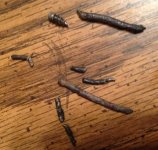
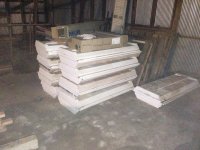
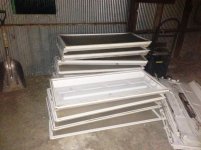
Those darn diagonal braces are a major torn in my side that are causing lots of fiddly work, but I'm slowly making progress between other projects. Here is a sampling of what I've had to do to overcome this area:

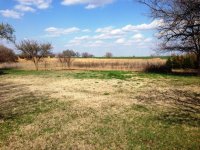
Now for the past couple of weeks I've been working on clearing the east side of our house. It has become overgrown with small trees, lots of them are less than an inch (2.54cm) in diameter, but others are close to 4" (10.16cm) in diameter. I was offered the use of a chainsaw this past weekend and decided to just get it done. Side note, I hate buying cheap power tools that I know I'll want to use a lot and not have to worry about so I'm not going to buy a Wal-Mart special. Sadly I have bought some lately in my HF shopping sprees, but I digress. Therefore I'm not ready to drop the amount of money on a good chainsaw just yet. Well I probably have 40 hours in clearing this area now that it is done. There were probably over 1,000 trees (metric **** tone) that had to be cut down, piled up and burned. Here is what it looked like before this weekend:
I've already cleared all of them up to where my truck is, and have burned a lot already.
A closer look of how many trees are in this little area:
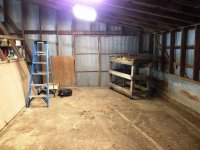
And what it looks like now:
I'm glad to have that behind me and will have a little more burning to do when the Oklahoma winds decide to cooperate. Then on to smoothing it out and letting the grass grow just in time to start mowing it with my old POS mower. (Another of those I'm just not ready to spend the few thousand dollars to get one that will fit my needs for years to come.)
Keep moving forward,
JB


 Hopefully that doesn't happen and I'm prepared to take my time and do it right. Have a great weekend, keep moving forward.


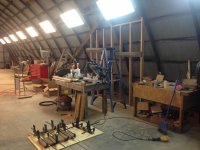
") Looks like you got plenty of space to work on just about anything, including big tractors'
Looks like you got plenty of space to work on just about anything, including big tractors' I love everything about your shop and would love to make it out that way sometime. The closest I'll get for a while is Vegas, I am joining my wife there in May for a conference, oh and it is a free trip too.


 Sure yeah that will work, I'm sure she would go for that in a heart beat. I think I need to make her some more tables first.