To avoid these ads, REGISTER NOW!

Between 485 & 705 SQ/FT The What Hut V3.0 along with some house updates eventually.

Workspaces between 485 and 705 squarefeet.
To avoid these ads, REGISTER NOW!
OP
P

PhantomEB

Well-known member
Joined
Feb 6, 2006
Messages
6,817
Location
Medicine Hat, AB, Canuckistan
Christmas here could be a good thing or bad. Family time and presents tend to take precedence to bronco progress but I do got new Dynomax Super Turbos on the way and flexible exhaust pipe as well some mandrel bent up pieces. Gonna try to see if shortening up the headers will make my vision possible here.
 
OP
P

PhantomEB

Well-known member
Joined
Feb 6, 2006
Messages
6,817
Location
Medicine Hat, AB, Canuckistan
Well shortening up headers was a failed project but new LS headers are on order to try out what others found worked. LS headers on a small block ford. Gets me bigger primaries for a bigger motor.

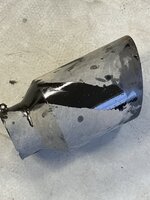
Now my Dynomax Super Turbo mufflers have come in, and I know where they are to sit outboard of my frame, tucked up in between the Rock Sliders….

I know I will have to notch the frame mounts for such sliders but I also need to incorporate the cage into them which I envision will keep the notched supports from folding up.

now as I await the headers to show up sometime before or after Christmas (hoping the former as I am off for 4 days at the Holidays) I will be cutting off scraps of exhaust tubing to just practice practice practice welding on thin metal.
 
OP
P

PhantomEB

Well-known member
Joined
Feb 6, 2006
Messages
6,817
Location
Medicine Hat, AB, Canuckistan
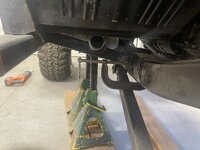
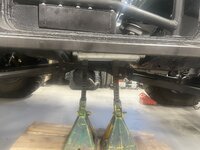
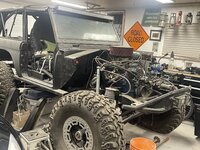
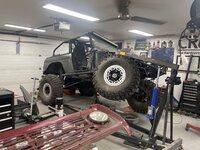
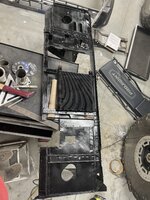
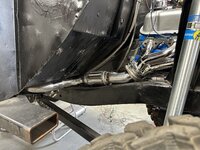
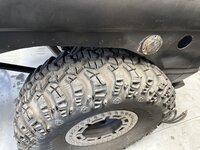
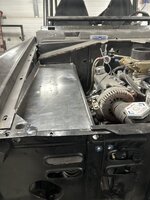
Cleared out everything from under and behind the bronco.

Then cut the sliders off after mocking up where my exhaust needs to run. Time to weld that side back in then route the exhaust with O2 sensor bung as far back as I can and do the same to the drivers side.

I also plan to run skidplates for the mufflers too.BB826F2F-5CE2-4088-B516-0E4444504008.jpeg3DD1B8E0-C5A3-4BCA-B85B-0209C149B91C.jpeg57CAAB35-78B5-4FA9-AF1F-BB160DD7D935.jpegBA3DD906-11B5-414A-B105-E6807CC41B6A.jpeg
 
OP
P

PhantomEB

Well-known member
Joined
Feb 6, 2006
Messages
6,817
Location
Medicine Hat, AB, Canuckistan
Time to do the other side as last weekend we went to the big city for a late Christmas with her family.

then the front clip can go back on, once it’s all done with custom inner fenders and Battery relocation, I will weld the front clips inner structure back on (PO cut and bolted it to be removable….i don’t like bolts where bolts ain’t supposed to be!
 
OP
P

PhantomEB

Well-known member
Joined
Feb 6, 2006
Messages
6,817
Location
Medicine Hat, AB, Canuckistan
966FE85D-B88B-411A-B2AB-FF434FC870E4.jpeg
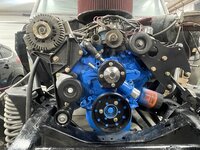
Inner front clip is cleaned out of inner fender wells, and Radiator put back in now the inlets and outlets are in the right configuration for this new water pump. 150$ under the table, back to me in just over a week, me happy.

now time to modify the fan shroud for the 16” electric fan and figure out my Radiator hoses and install block heaters before the headers get done.
 
OP
P

PhantomEB

Well-known member
Joined
Feb 6, 2006
Messages
6,817
Location
Medicine Hat, AB, Canuckistan
C346268B-D014-4B00-A07D-5012D81A5FCB.jpeg
Gotta love it when you walk into a parts store with an old rad hose, and say I need 3” out of the middle.

Dude comes back with this one and said this one might work? I take it and it’s a perfect fit! Now to head back there this week and tell him bring me in 2 more.
 
OP
P

PhantomEB

Well-known member
Joined
Feb 6, 2006
Messages
6,817
Location
Medicine Hat, AB, Canuckistan
61597CB6-6B51-46BF-8740-35583325F80F.jpeg
Cut up my old fan shroud that my buddy made up for the mechanical fan, no aluminum sheet kicking around but this caution sign was kicking around. Sourced it from my times working on the road. will be taking it into work to be welded out with my welder buddy and his new Plant purchased Miller Dynasty 300.
 
OP
P

PhantomEB

Well-known member
Joined
Feb 6, 2006
Messages
6,817
Location
Medicine Hat, AB, Canuckistan
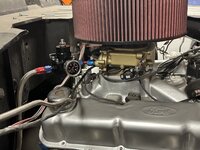
6A324C78-88D6-4F10-A374-C3177572503C.jpegInstalled a new regulator after the demand as I am one of those who likes to know everything is up to snuf.5AEF6C9C-7146-4BD5-9C8A-B346CFB2C938.jpegthat 16” 2400cfm fan should keep my engine and transmission cool.6F5F9FC8-D93C-4949-B026-5FFE27AE2F61.jpegnow time to fill all with synthetics except motor and radiator. They getting good old 10w30 and the green ****!
 
To avoid these ads, REGISTER NOW!
OP
P

PhantomEB

Well-known member
Joined
Feb 6, 2006
Messages
6,817
Location
Medicine Hat, AB, Canuckistan
30CA926E-7B65-464B-8187-5958C6B0393A.jpeg77C1B8DC-E9CB-4443-AC11-6C08DD94AEB6.jpeg
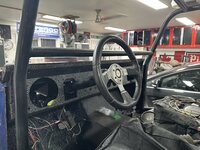
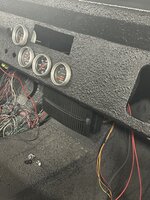
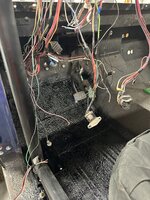
Pulled the windshield off So I could clean it up with a fresh coat of paint, steering column came out tooso dashboard could be removed.

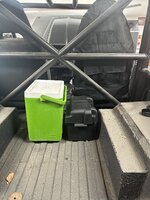
Time to redo this harness up to my standards as this truck was built pre-millwright days. Weatherpack connections will replace a few places here and there. I will be routing wires along the firewall and extending them where I need to for my Center console build that will house my switches, shifters and beer holders. I also plan a 12v outlet at the back for my 12v cooler.
 
OP
P

PhantomEB

Well-known member
Joined
Feb 6, 2006
Messages
6,817
Location
Medicine Hat, AB, Canuckistan
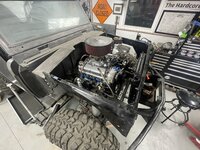
decided to stop trying to re-engineer half the truck and just build it!

ditched the LS with SBF flanges idea as it was just too tight to get bolts in and out.

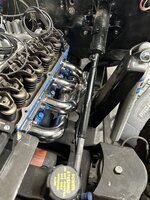
now the SBF headers showed up it took 25% of the time to put on and remove these ones as it took me just to pull one side of the LS ones. Now I need exhaust pipe with flanges for the new headers.6D4FD1D9-5F12-416B-AEBB-4CD406849519.jpeg
 
OP
P

PhantomEB

Well-known member
Joined
Feb 6, 2006
Messages
6,817
Location
Medicine Hat, AB, Canuckistan
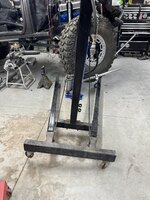
steering wheel is now attached to the box(the Fiancée was happy to assist holding the steering wheel straight as I fed the column down onto the shaft, it came out dead straight). Now to mount the ram onto the bottom of the frame but at the same time i need to cut and plate the crossmember for packaging. This weekend is to get exhaust buttoned up with the new SBF headers and some sheet metal back on, which means sheet metal clearancing with the suspension travel and big tires…..my jack and block is sketchy, and my engine crane is bent. Time for a new crane….4146D854-95A9-47D2-8926-4E35FF73746F.jpeg9D792268-55C5-4800-9FBA-310E60DEE3B5.jpeg713BBB14-97E8-4BB2-A134-CA33EFCE8A49.jpeg2183ABDA-876C-4D19-8E32-7BE50B88F382.jpeg7BF0563E-4B55-4DC7-B417-D5E90FAF06CD.jpeg
 
OP
P

PhantomEB

Well-known member
Joined
Feb 6, 2006
Messages
6,817
Location
Medicine Hat, AB, Canuckistan
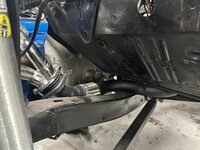
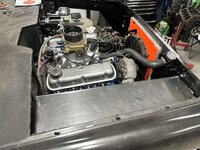
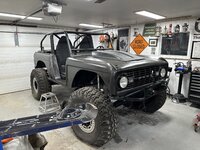
finally got one exhaust done and In place….it’s friggin tight but good enough to run for now. Other side today which needs an O2 bung removed for now along with hydroboost modification and install. Just need a coupling to finish my adjustable brake rod mod.

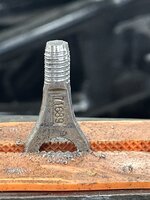
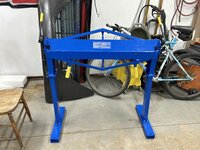
and brought72C75198-6891-4E03-8BC0-9ABD905E14FA.jpegF5D9B095-3F83-47B8-A101-59B3771B65EB.jpegB79FA028-8BF2-4FFD-94AD-7175506F4F35.jpeg42479E7D-276B-46E8-98B3-BACC4358690B.jpegA95B3E8D-C814-448D-905F-E20A3CD4BAC7.jpeg9CC14F12-932A-45FA-9DF1-23763ABA4416.jpeg4BF7CB17-01E1-44C9-A5BD-88F5E3561D63.jpeg some new toolage for the shop. Who else in town has their own personal sheet metal brake?
 
OP
P

PhantomEB

Well-known member
Joined
Feb 6, 2006
Messages
6,817
Location
Medicine Hat, AB, Canuckistan
336C9469-738C-4CF7-847D-C771F01D1B77.jpeg14F5C584-67DD-4838-A49C-CE96A6DC41BD.jpeg
Brake doesn’t really care for 16 gauge but at least it’s something to keep the water and mud out not to mention sticks n stones away from my engine. Time to do the other side.
 
OP
P

PhantomEB

Well-known member
Joined
Feb 6, 2006
Messages
6,817
Location
Medicine Hat, AB, Canuckistan
Putting the inner fenders on hold. Time to build something to hold my shifters up. Transmission shifter (Winters Sidewinder) be here later this week… may have to move radio to put switches there.F8FF0BEB-19C8-4C12-8920-304FE3EF83B4.jpeg
 
OP
P

PhantomEB

Well-known member
Joined
Feb 6, 2006
Messages
6,817
Location
Medicine Hat, AB, Canuckistan
all body panels back on with exception of windshield frame, Close enough to see if Haggerty will write a policy on this truck. Just need to put the chrome trim and script back on today. Then dig into my painless harness to label all wires front to back. 6 day long weekend coming up To really dig into this truck of mine.A6B43514-2C18-4D32-AC7F-6782DAF9DE7A.jpeg
 
OP
P

PhantomEB

Well-known member
Joined
Feb 6, 2006
Messages
6,817
Location
Medicine Hat, AB, Canuckistan
9D468E4D-4A02-4AD5-AD2B-F67ED67AEC01.jpeg
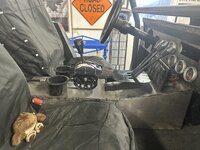
Michelle spotted this little Sasquatch on Amazon….little did she know that one was already in my cart! So I hit check out. Gonna get her aunt to sew on a little loop on the back of it to hang off my mirror.

anyways just mocked up a Center console so I know where switches and shifters will sit during wiring. Gotta have beer holders too eh?
 
OP
P

PhantomEB

Well-known member
Joined
Feb 6, 2006
Messages
6,817
Location
Medicine Hat, AB, Canuckistan
Life has taken some detours lately but seems to be levelling off again.

before I can finish off the Center console, I needed to get the heater back off the table and into the bronco. Now I can get back on extending wires to the new battery spot.

fuel cell will be ordered while I sell my home built tank to some less serious wheeler.2A15B7A6-0D7C-438C-97E1-682DF3D3D16C.jpeg
73C44D33-774A-476D-89D2-447F42608AD9.jpeg
 
To avoid these ads, REGISTER NOW!
Top Bottom