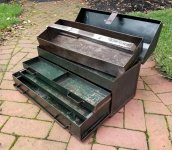
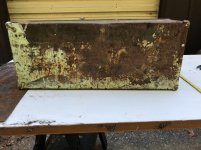
I think it looks terrific, Smoke. Very convincing. Like a tote tray that has been used but very well-maintained.
The one thing you could do, but I hate to even mention it, just in case you don't like the results, which I don't want to be responsible for, is to variegate the finish.
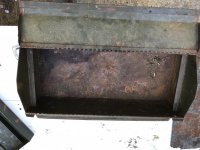
Right now it's very uniform. Yes, there are worn areas, where the steel or the brazing is showing through, but the battleship grey is the same hue and tone everywhere across the box, uniformly. The corners, the sides, the handles etc. Most boxes don't age that way. From handling and the environment they turn different shades of their original color over time, and often have other splotches and such on them. Especially handles and corners. See post #2, 3, 20, 27, and 53.
To achieve that look, I stain it. The stain is usually the first color with a little black added to it to make it slightly darker. And/or the same color but a different shade (oregano vs olive, etc). In this case, maybe a slate blue vs battleship grey. You need very little paint. Spray color 1 in the bottom of a container. Spray a little black into the same container. Same for a different color. Add paint thinner. Maybe 1 part paint, 2 two parts thinner. It is a stain. Picture a wood stain. It has to be very thin.
Ball up the corner of a shop rag or a t-shirt etc, dob that quickly into the stain, soaking it up into the balled-up rag. You don't want it to be dripping wet.
Then lightly sort of dab or press and swirl or stroke that in places you want to affect on the tote in haphazard patterns. The thinner will disturb the battleship grey coat and add the stain at the same time, drying almost instantaneously, in the shape and pattern that you applied the rag.
Experiment on the bottom until you get the look you want.
I have even gotten the stain on my hands and just handled the box here and there as a user normally would.
Then I either poly low gloss the whole thing and take down the shine with steel wool a little, or just rub paste wax over the whole thing.
But again, your box looks great. And these faux-antiquey house painter's tricks aren't for everyone, and some may even think it a little much, a little crazy, and I recognize that.