7echo
Well-known member
Off topic a second..
Hi kruegdr, I like the avatar you have. I see a sign like that almost daily.
Hi kruegdr, I like the avatar you have. I see a sign like that almost daily.


Nice job! I've considered going the HDPE route. How much did the slab cost?
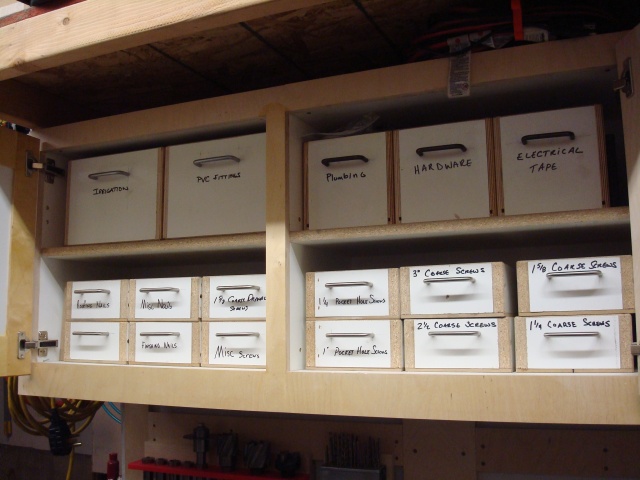
I think I got a 12x48 sheet for $80 all said and done. This first tray is 12x16 so I won't get three out of it.


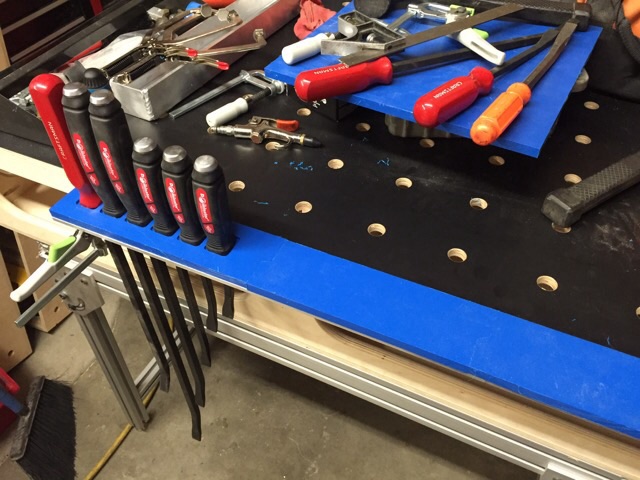
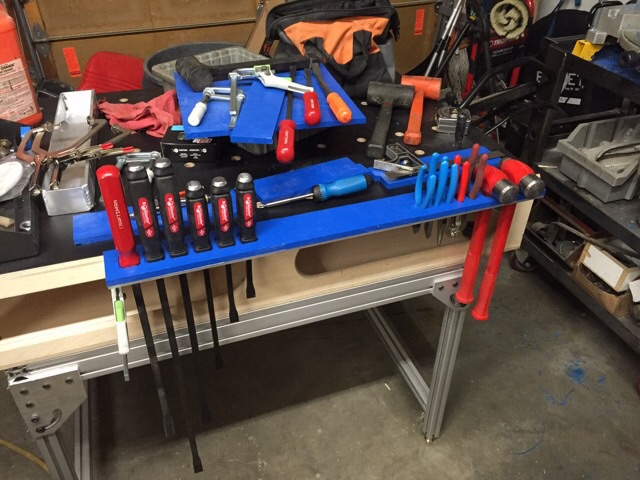
...I hate my plier draw in my tool chest. Every time I close it they all slide to the back and eventually even bunch enough to jam the draw. Thanks, will be doing this one.
Sent from my iPhone using Tapatalk
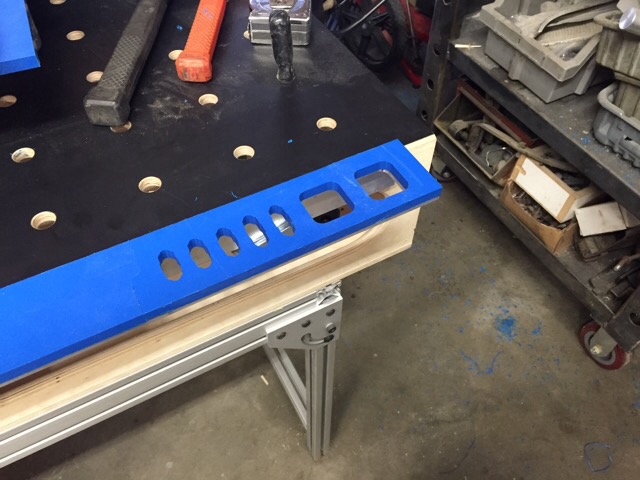
Got a little more time to spend on the pliers rack. Had a little misfortune with the 5/8-inch end mill on a .250 plunge cut. Been cutting plastic and aluminum with it for maybe 7 years now. Guess it was bound to happen some day. Kinda wish I coulda got another few years out of it.
you broke that cutting plastic? damn.
so i might be picking up a bridgeport clone for cheap with all tooling, what cnc conversion did you use for your setup?
<snip> You made a comment within the last page or so about the garage becoming a place you work verses building what you wish too build..or sumttin to that effect. I just wanted to say when my shop became a living for a period or time it lost it's appeal.
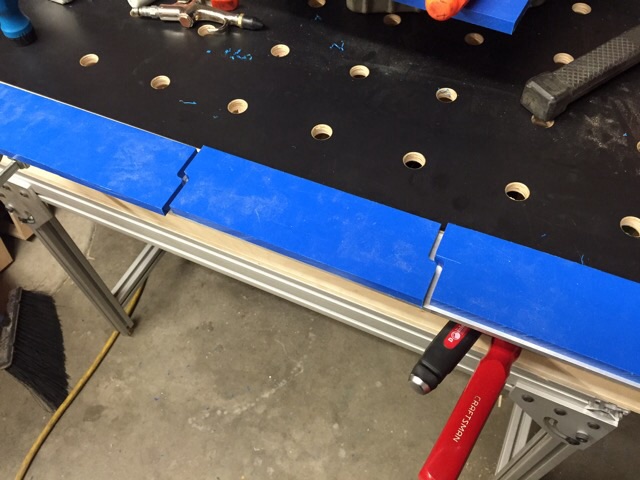
Had a little time today so I thought I'd knock out the clipboard rack I've been thinking about. Up until ow, the clipboard kinda floated between the top of the toolbox, the top of the lathe, the top of the mill...basically where ever I was last. It works well when I'm spending days in front of a given machine or location but ***** when I'm working all over the shop - either a project with many ops or a bunch of short projects. Anyway, I'd been planning on adding a rack to the center panel of the white door. iI's the first door I made when I thought I wanted white center panels and will need to be remade someday so it's perfect to try the rack idea on.

I grabbed some simple aluminum from the big box

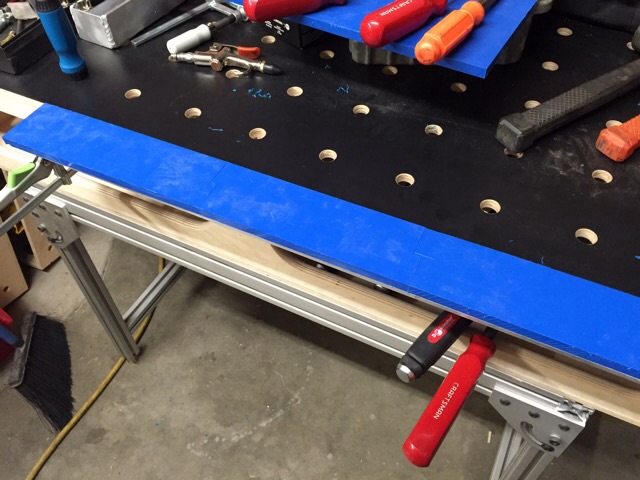
Cut two 8-inch strips and attached them to the center panel.

Cut a piece of the rod and drilled and tapped the end.


For the button head screws

And attached it to the angle on the door.

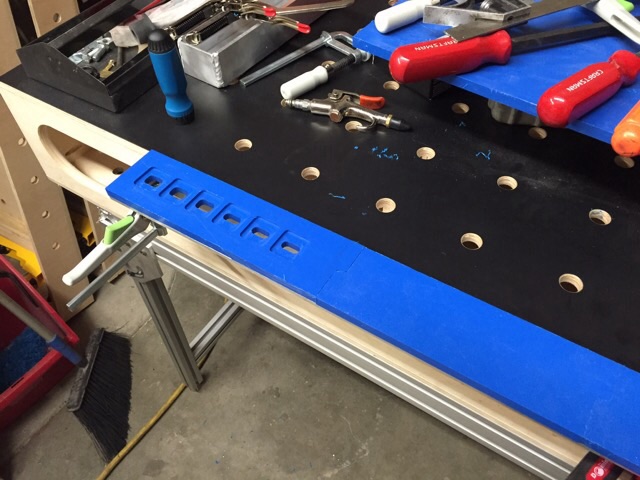
Now the clipboard has a home. Easy shop upgrade.


Hope you didn't take my previous post seriously. Just my attempt at sarcastic humor although there is some truth to it .I truly do admire your skills and incredible attention to detail but having A.D.D my ability to stay focused and on task totally ***** so I tend to stay busy procrastinating. As others have said thanks for taking the time to share your knowledge and mad skills. On yeah i was just going to say an extension spring like from a screen door makes a nice retainer to help keep paperwork from blowing away.
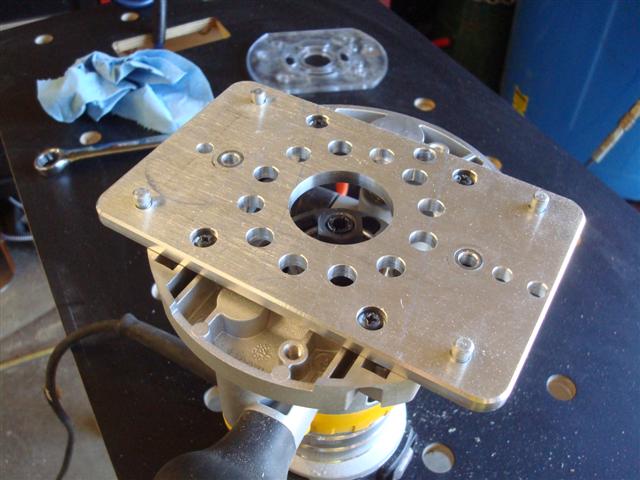
And the pair of "Router Buds"
For sure, there was a pilot hole. Personally, I would've used just glue and a biscuit.Is the 3/4 plywood thick enough such that it doesn't split when the screw goes in on the edge (like the two on the bottom) or do you drill a pilot hole?
Love your work!
Thanks!
Is the 3/4 plywood thick enough such that it doesn't split when the screw goes in on the edge (like the two on the bottom) or do you drill a pilot hole?
Love your work!
Thanks!


Thank you for your compliments. I've enjoyed documenting my projects more than I used to in the past because others are interested. As it turns out, this documentation has turned into a valuable way for me to work through the design and execution of my ideas.
Shadowing using foam is an excellent way to organize and I likely would have also gone that route had I not had this crazy idea that I'm now attempting to follow through to the end. I enjoying the machining process so using plastic is really just feeding that part of my addiction.
- Jack's space is one of my all time favorites
- Searching for organization ideas found his thread on GJ and I joined. He's the reason I'm here as far as I'm concerned.
- Given the choice, I'd prefer steel cabinets for durability reasons
- I very much respect his space optimization ideas and either considered many of them or used them as fuel to come up with my own
That being said:
I could not, no matter how I tried, adapt his type of solution to my space given space constraints. To have as much storage as I wanted I needed my cabinets to fit in every nook and crevice and you can't do that with a steel cabinet without heavy fabrication. Also, if a cabinet didn't work out as I imagined, I wanted to be able to change direction and build one that did fit what I wanted which makes fabrication more desirable to me. Also, assembling a garage like Jack's takes time. You have to find, and bring back to life, most of those treasures he has. I wanted a usable space as quickly as possible and, for the most part, labor was the only thing separating me from being where I wanted to be. Patience isn't one of my strong suits.
I spent many hours searching the net for ideas before I started down my path. I have found many inspiring ideas here and there and it was many of those seeds that helped me turn what I thought were crazy ideas into reality. If any of them can be used as fuel to feed someone else's idea engine, I'm all for it. In reality, something you may do may end up being what fuels my next idea so in many ways, I need you to get to work. LOL
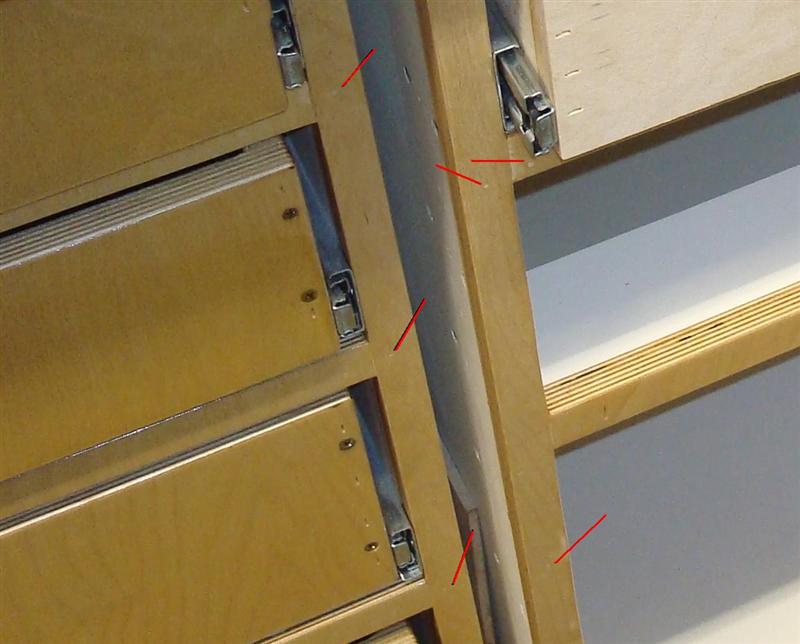
This question may be difficult to explain until the weather improves and I can build, and document, a cabinet but I'll try. There's face frame construction, there's faceless, and there's the approach I took. Since you already know the difference between the first two, I'll just attempt to explain mine. One of my observations pertaining to cabinets is that most of the construction of the cabinet is never seen by the layperson, it's hidden. I started down the path of building face-frames but I quickly found that it was a time consuming process. If I leveraged the fact that most of the assembly is hidden, I could easily build a facade (false front) that looked like a face frame but was actually just well finished trim. Consider this photo:

95 - 99% of the presentation of this counter is the drawer faces. I knew I could get a beautiful finish with the HVLP. Because you can barely see the frames I even stopped spraying them because it was easier and faster to brush them in place and you can't tell the difference unless you get too close. So...back to the facade. Let me introduce you to the man behind the curtain.

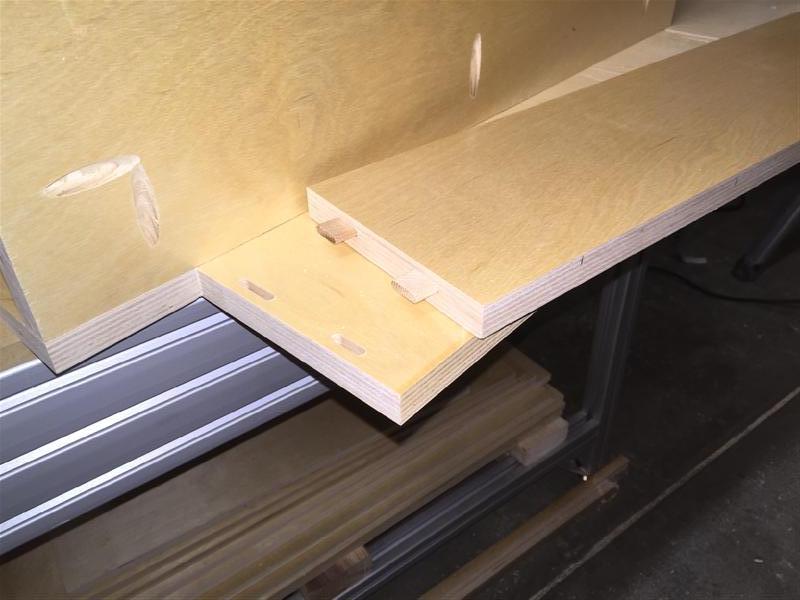
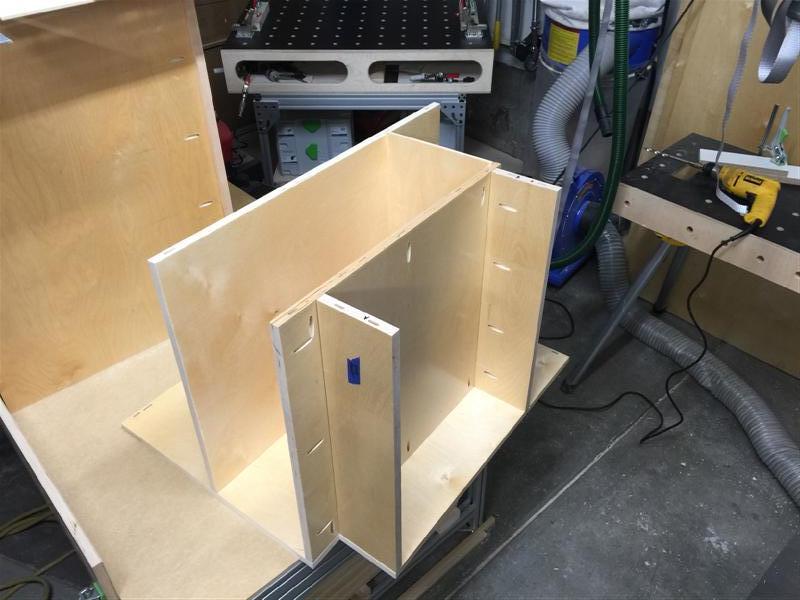
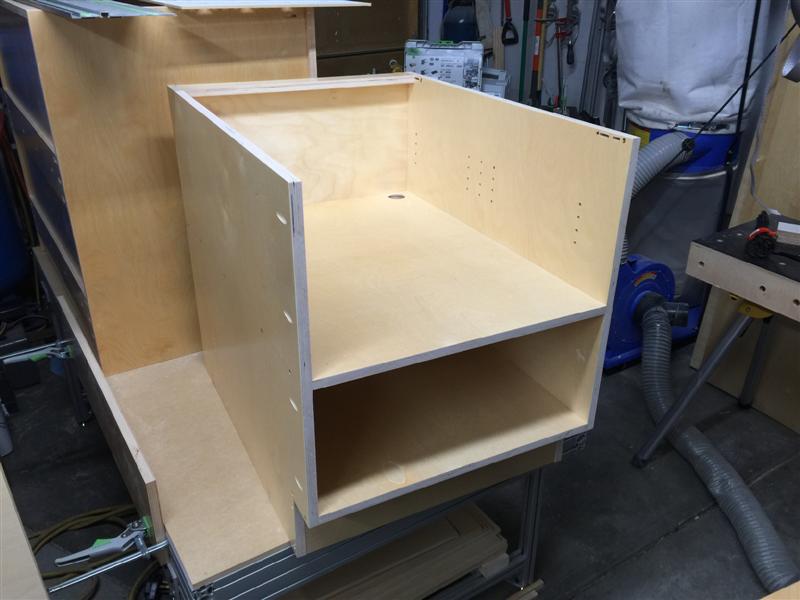
The cabinets have a top, bottom, two sides, a back, and the face. I use 3/4" melamine for the top, bottom and sides. The sides are dado'd for two reasons. First, it gives the glue a place to bite and makes it stupid simple to pre-drill the screw holes before assembly. Second, they help locate the drawer slides and are used to add additional cross-bracing which add strength to the cabinet and prevents the drawers from pushing out the sides of the cabinets. The backs are all 1/4" melamine and, when cut to the perfect size, they ensure the squareness of the cabinet during assembly. Basically I glue, assemble, pull the frame square to the backing, staple the back in place, and then hammer down with the screws.
Next is the face frame/facade which is extremely simple and fast. I cut strips, glue, and brad/staple them in place on all faces of the Melamine. These trim strips add strength to the cabinet and give the cabinet the illusion of having a face frame. By leaving the picture in high-res and cropping it down to a small section you can basically see the whole enchilada. Red circles show the brad holes that have been filled, sanded and then top-coated. I try to get all of the trim pieces as flush to each other as possible but slight differences can easily sand out as long as the difference isn't greater than the thickness of the top ply.

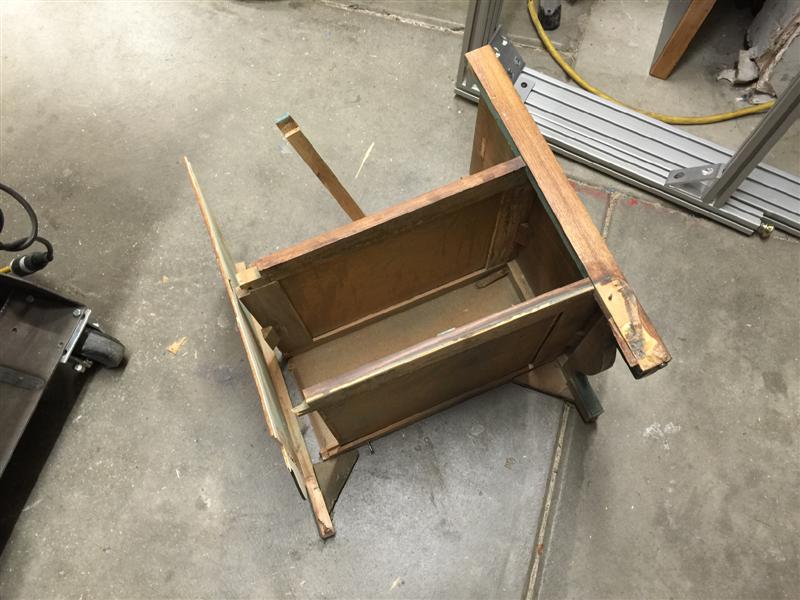
This particular cabinet was a serious re-design. I originally planned for it to be a tooling cabinet with many yery short drawers. I had a difficult time getting the dividers to work out without losing a mess of drawer space so I decided to cut out the braces and double the depth of the drawers. Even though it initially pained me to know it was such a bastardized cabinet, I honestly had forgotten it's ugly on the inside because I never see it now that it's assembled and in use.
Oh...and I break the edges on the plywood strips after sanding with a 1/8" quarter-round bit on a hand router to prevent the ply from splintering.
I realize that pictures on the web can hide imperfections that are otherwise obvious in person. I'm proud to say that in person they look equally as nice if not nicer. 95% of the people that look at them say they're nicer than the cabinets in their kitchen. Good enough for me. The finish exceeded my expectations.
Pocket screws are a nice way to join a pair of boards together however there are two problems with plywood. First, when you attempt to sink the pocket screw I found that many times it separates the plys and essentially blows out. At that point you either pitch the board or have new finishing problems/considerations. I started down the face frame path and built one complete cabinet using them. In fact, this cabinet has a full face frame and isn't a facade.
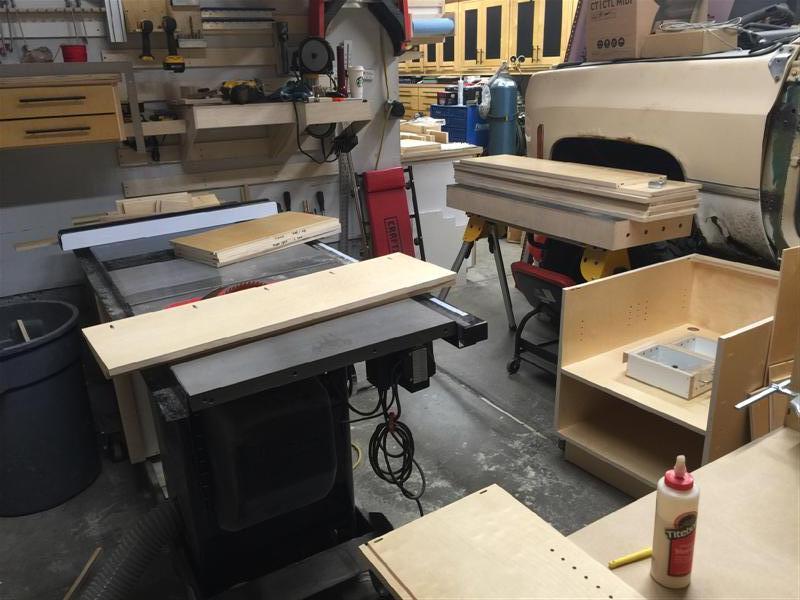
After building this particular cabinet I realized that, though nice, building real face frames was going to be the longest part of the process. By going to the facades, I was able to do the construction part of the cabinets in 3 weekends if I recall correctly. Finishing was another story which ended up taking months considering three coats + dry time between coats + real job + family mad because they wanted attention.

I assume a router bud is router buddy? also how did you square a plumb the portable bandsaw blade with the mount, with the table and t-slots?

")
Is the 3/4 plywood thick enough such that it doesn't split when the screw goes in on the edge (like the two on the bottom) or do you drill a pilot hole?
Sorry to quote the whole thing but this is what inspired me to build my own cabinets for the garage. That gave me the confidence to build more and more inside the house.
Happy to know the inspiration flows both ways!
Gregor
This thread is very inspiring and is full of great ideas.
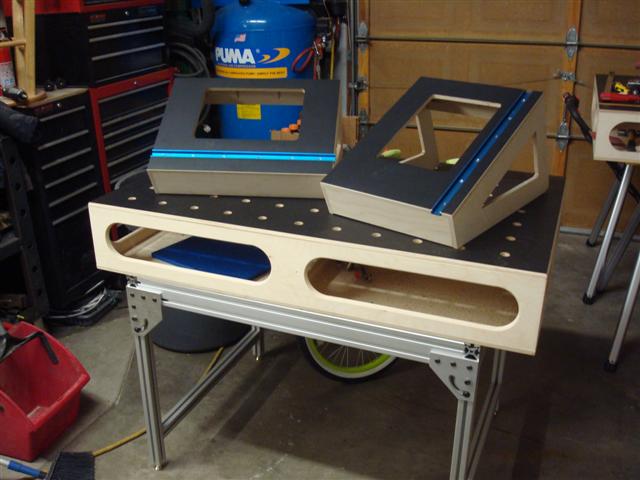
Got back to working with my CNC router table and tool foam.

You and Gregor make me want to go out in the garage and rip down everything (that I'm not even finished with yet)
...and sell my second child (due in June) to finance an impending collapse into festool/birch oblivion.
Great thread from start to finish.
What's your member name on FOG? I'd love to check out some of your threads there.
neil


 You just **** dude! You know why? From this point on whatever I do to organize my **** its not gonna be good enough and I'll know it. My life is now ruined so just go ahead and keep rubbin it in. I wish I'd never seen this thread!