To avoid these ads, REGISTER NOW!

Tundra bumper start

OP
K

koditten

Well-known member
Joined
Apr 10, 2008
Messages
5,528
Location
Midland, Michigan
If you are calling that flack, you are missinformed. That ain't nothin'. Hit me with your worst critiscism. I can take.

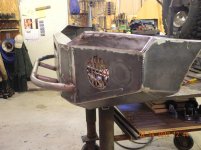
I'm stuck at work right now, and every time one of you post, I get a note to my phone. Then I have to get on this site with the computer. Then I have to look at my pictures of the bumper. Because I'm stuck at work and can't make any headway, it's driving me insane. There is so much I want to do and can't.

Later

Kirk
 
To avoid these ads, REGISTER NOW!

Ign

Well-known member
Joined
Jul 7, 2006
Messages
12,769
Location
Butte Peak ND
First: my condolences that you drive a Tundra ;)

I found this last nite and have followed w interest because I'm looking at doing something similar for a '12 Ram (not mine). The Ram is extra tricky 'cause the front "bumper" (read: decorative valance that passes for a bumper these days) goes behind the headlamps and then up above the lower plane of the headlamps a bit. Makes for more plate work and harder to make look good.

FWIW, I think you've done a great job, even if it is for a Tundra.

Did you use 1/2-13 or 3/4-9 expanded? Hard to tell on the screen.

Can't believe all the safety nonsense here, but typical GJ I guess. Good for you for not getting distracted and trying to deflect/ignore it.
 

Silver6.0

Well-known member
Joined
Sep 16, 2011
Messages
87
Location
N.E. Michigan
I know you said no to powder coating but just for an fyi theres a shop in gladwin that does powder coating, and other types of painting/ sandblasting. They were very reasonable too. Gladwin Metal Processing is their name.

Any way my truck came with an aftermarket bumber/grill replacement and when it got all rusty and chipped I sandblasted it and opted for the base coat clear coat(bc/cc) gloss black. My truck has somewhat of the "murdered" look so black worked well. I dont like the texture of bed liner and it does fade over time. Bc/cc will last a long *** time before it needs redone. Just my $.02 . It looks great and I'm sure it will be a great finished product when done.

Neil
 
OP
K

koditten

Well-known member
Joined
Apr 10, 2008
Messages
5,528
Location
Midland, Michigan
Ign: Tundra? I only wanted an American built truck. I'm sorry your truck came with a non functioning horn. It was nice that Chrystler wrote a warning across the front of the hood for pedestrians to read.:) regardless, I'm glad you enjoyed looking at my build.

Silver6.0: I admit the powder coated finishes look great! My goal when I set out to do this project was to build something myself with skills I have or can get. I really wanted to do all the work.

I am also honest enough with myself to know that this truck will be a work truck. If I put a scratch or ding in the thing, I am not going to lose a bit of sleep or shed a single tear.

I really see no need to put a "stellar" finish on this bumper for that reason alone. Additionally, Toyota paint jobs are **** from the factory. I already know that whaterver finnish goes on the bumper will out last the body finnish. Yes Toyota paint is that bad.

Thanks, fellow Michigander Keep sending the comments my way. I might be up your way on Tuesday. Have to head up to Gaylord for some buisiness.

Kirk
 

toolmaker1

Well-known member
Joined
Oct 3, 2010
Messages
533
Location
Northwest Pa
Ign: Tundra? I only wanted an American built truck. I'm sorry your truck came with a non functioning horn. It was nice that Chrystler wrote a warning across the front of the hood for pedestrians to read.:) regardless, I'm glad you enjoyed looking at my build.

Silver6.0: I admit the powder coated finishes look great! My goal when I set out to do this project was to build something myself with skills I have or can get. I really wanted to do all the work.

I am also honest enough with myself to know that this truck will be a work truck. If I put a scratch or ding in the thing, I am not going to lose a bit of sleep or shed a single tear.

I really see no need to put a "stellar" finish on this bumper for that reason alone. Additionally, Toyota paint jobs are **** from the factory. I already know that whaterver finnish goes on the bumper will out last the body finnish. Yes Toyota paint is that bad.

Thanks, fellow Michigander Keep sending the comments my way. I might be up your way on Tuesday. Have to head up to Gaylord for some buisiness.

Kirk

I agree that paint will be fine, the best part of paint is that you can easily touch it up at any time with a little sanding and masking.
 

Ign

Well-known member
Joined
Jul 7, 2006
Messages
12,769
Location
Butte Peak ND
Ign: Tundra? I only wanted an American built truck. I'm sorry your truck came with a non functioning horn. It was nice that Chrystler wrote a warning across the front of the hood for pedestrians to read.:) regardless, I'm glad you enjoyed looking at my build.

Too distracted at work eh?

1 - I said the Ram is "not mine"

2 - I don't know anything about non-functioning horns??? and I said nothing about what vehicles I own.

3- Probably Chrysler, not Chrystler

4 - I'm sincere in my praise of your build

5 - still had a question on the expanded but I guess it's not important.
 
OP
K

koditten

Well-known member
Joined
Apr 10, 2008
Messages
5,528
Location
Midland, Michigan
Your right about the distractions. I didn't even see the question abut the expanded steel. (exp. Fe)

Yeah I did catch the part about the Dodge not being yours. I just got carried away with the joke about pedestrians "dodging" because the horns don't work.

Please repost the ? about the exp. Fe.
 

blue dog

Banned
Joined
Jul 4, 2010
Messages
4,051
Location
Culver City Ca.
Build what you want and screw the rest. Your bumper is coming out great and you have the satisfaction of doing it all yourself.
The bumper is clean, thought out and will protect the front of the truck, as well it will shove a prius out of the way with ease.
 
OP
K

koditten

Well-known member
Joined
Apr 10, 2008
Messages
5,528
Location
Midland, Michigan
First: my condolences that you drive a Tundra ;)

I found this last nite and have followed w interest because I'm looking at doing something similar for a '12 Ram (not mine). The Ram is extra tricky 'cause the front "bumper" (read: decorative valance that passes for a bumper these days) goes behind the headlamps and then up above the lower plane of the headlamps a bit. Makes for more plate work and harder to make look good.

FWIW, I think you've done a great job, even if it is for a Tundra.

Did you use 1/2-13 or 3/4-9 expanded? Hard to tell on the screen.

Can't believe all the safety nonsense here, but typical GJ I guess. Good for you for not getting distracted and trying to deflect/ignore it.

I found the question you asked Ign.

I have no idea what the number of that ex st is. It was in my scrap pile and it looked like it would work. Won't really know until the lights are installed, aimed and tested at night.

The only thing I can tell you is it is the same stuff that you see used on the flip up tailgates for utility trailers. Fretty stiff stuff.

Kirk
 
OP
K

koditten

Well-known member
Joined
Apr 10, 2008
Messages
5,528
Location
Midland, Michigan
Here is the latest.

Took som 1.5 tubing and bent it to span the front of the bumper. learned that tubing bending is not one of my skills. Left a few kinks that I'm not really happy with. Hopefully the texurized final finish will hide much of this.
 

Attachments

  • tundrabumperprogressIII 009.jpg
    tundrabumperprogressIII 009.jpg
    141.6 KB · Views: 195
OP
K

koditten

Well-known member
Joined
Apr 10, 2008
Messages
5,528
Location
Midland, Michigan
Here is a couple of shots of the welds. I really like welding tubing. The first shot is with the camera set for standard, the second was when I rememmered to switch it to macro setting. Please feel free to comment.

Kirk
 

Attachments

  • tundrabumperprogressIII 011.jpg
    tundrabumperprogressIII 011.jpg
    132.5 KB · Views: 132
  • tundrabumperprogressIII 010.jpg
    tundrabumperprogressIII 010.jpg
    133.6 KB · Views: 141
OP
K

koditten

Well-known member
Joined
Apr 10, 2008
Messages
5,528
Location
Midland, Michigan
I tossed in a couple of braces. Not really sure if I needed them. The light pearch was plenty strong without these braces. Regardless they look good to me.
 

Attachments

  • tundrabumperprogressIII 013.jpg
    tundrabumperprogressIII 013.jpg
    135.8 KB · Views: 161
OP
K

koditten

Well-known member
Joined
Apr 10, 2008
Messages
5,528
Location
Midland, Michigan
Here is a shot from the side. Did anyone notice that I switched the orientation of the mesh over the driving light cutouts?

Kirk
 

Attachments

  • tundrabumperprogressIII 014.jpg
    tundrabumperprogressIII 014.jpg
    140 KB · Views: 74
OP
K

koditten

Well-known member
Joined
Apr 10, 2008
Messages
5,528
Location
Midland, Michigan
Here are a few of the bumper after I got done throwing some primer paint on it. Starting to look like an actual bumper now.

Kirk
 

Attachments

  • tundrabumperprogressIII 019.jpg
    tundrabumperprogressIII 019.jpg
    134 KB · Views: 100
  • tundrabumperprogressIII 018.jpg
    tundrabumperprogressIII 018.jpg
    136.1 KB · Views: 94
  • tundrabumperprogressIII 017.jpg
    tundrabumperprogressIII 017.jpg
    140.8 KB · Views: 99
OP
K

koditten

Well-known member
Joined
Apr 10, 2008
Messages
5,528
Location
Midland, Michigan
Tossed the bumper back on the truck for now. I have the bedliner spray ordered. I wont have a chance to work on the bumper for about 8 days. Hopefully a week from now, or so, I can shoot the final coat.

Maybe with the overtime coming I can get my lights. I can just imagine the lights perched on the bar. Need to decide if I want to go with 2 or 4 lights.

Thanks for following my build. I have enjoyed this tremendously.

Kirk
 

Attachments

  • tundrabumperprogressIII 023.jpg
    tundrabumperprogressIII 023.jpg
    142.5 KB · Views: 149
  • tundrabumperprogressIII 022.jpg
    tundrabumperprogressIII 022.jpg
    138.1 KB · Views: 128
  • tundrabumperprogressIII 021.jpg
    tundrabumperprogressIII 021.jpg
    136.8 KB · Views: 132
  • tundrabumperprogressIII 020.jpg
    tundrabumperprogressIII 020.jpg
    139.1 KB · Views: 134

RoadTraveler

Well-known member
Joined
Jul 4, 2011
Messages
68
I prefer the lines of the bumper without the lower tube, but maybe it will help keep the car and deer away.

Nice work, I wish fabrication was one of my skills.
 

Tom_20m

Well-known member
Joined
Nov 23, 2011
Messages
45
Nice bumper, Don't worry about what people say about it. I like big bumpers. Bumpers were originally designed to take the impact of a hit or most of the impact, not crumble like they do now a days. I've had this bumper on my old truck in the pictures and I kept the bumper for my newer truck, which it is on now. 2 accidents where people pulled out in front of me in the last 10 years, My truck 2 there cars 0 lol and nothing was ever said about the bumper. It's made out of 3/16 steel box steel and 3/16 flat plate. The picture is old, but you can see the picture of the bumper. Keep the picture of your build coming, it looks good so far.

Those old steel bumpers are the real deal. You could run it thru a brick wall and it would still hold up. I thought about some rail road ties cut down or 4inch pipe with concrete filler as a bumper. These newer cars would not even put a dent in one if you were to hit them with it.
 
OP
K

koditten

Well-known member
Joined
Apr 10, 2008
Messages
5,528
Location
Midland, Michigan
I'll have to wait until I get the lights moiunted on that bar. If I don't like it either, I can get rid of it pretty easy.

Appreciate the opinions. Keep them coming.

Kirk
 

GirlnAgarage

Well-known member
Joined
Jan 21, 2011
Messages
4,668
Location
Texas
I'm not a fan of the bar either. I'm not much for prerunner type bumpers, but if you move the bar up in front of the grill it'll give your lights a better perch.

Putting them down low is asking for those idiots in parking lots to tear the lights off when they park the long nose of their car over the line in the parking spot.

Anyway, looking forward to seeing it with the lights. They might change the look a little bit.
 
To avoid these ads, REGISTER NOW!

dirttracker18

Well-known member
Joined
Aug 10, 2009
Messages
3,191
Location
Slate River, ON
Nice build.

First, its not you, bending tubing without kinks is not easy without good equipment. I am thinking you have one of those HF type pipe benders? Just guessing as I have that type and I use it when building cages. Kinks are part of the deal :( Some lubricant on the rollers can minimize that but it is what it is.

Second, you should have made some mounting tabs for your lights prior to priming. Just my $0.02 but I don't see a mount and most lights don't have a long enough bolt to reach through that tube.

I also agree with the others, I would have put the tube at the top of the bumber. once again just me though.

Nice work and it won't get dented when the first douh head in the parking lot backs into you. Although I think I already see a dent on the passenger side ;)
 
OP
K

koditten

Well-known member
Joined
Apr 10, 2008
Messages
5,528
Location
Midland, Michigan
You are very correct in the dent in the passenger side. Both doors work fine, but are not very easy on they eyes, if you get what i'm saying. Those will be replaced as my financial situations allow.

As for the tabs: I will put those on before the final coating. I just wanted to get some primer on to hold off any surface rust from developing. Not a big job.

As for the location of the bar: I wanted it low so if I did hit a deer, the lights don't push thru the grill and into radiator. In addition, I will be doing quite a bit of towing and want as much air flow as possible.

I like the simpler looking bumpers, some of the "prerunner" bumpers just look too buisy to my eye. Thats just how I roll.

Thanks for letting me know that the HF tube bender should be called a "tube dent maker".

This is a work truck. I will get dents, I guess if it is pre-dented, I'm just getting a head start.

Thanks for the comments.

Kirk
 

bad_idea

Well-known member
Joined
Jun 11, 2011
Messages
4,332
Location
Pasquotank, NC
Sharp looking bumper. As far as the rippling in the pipe. I'm not a pipe fitter but I work with enough of them. I know when they bend pipe and rippling is an issue they pack the pipe full of sand. Put a plug in one end and start pouring sand in and packing it tight. Keep packing till no more will fit. Then bend the pipe and rippling will not be an issue.
 
OP
K

koditten

Well-known member
Joined
Apr 10, 2008
Messages
5,528
Location
Midland, Michigan
I'v heard of this methode. I've heard it works well. I'll be honest and admit that I just don't see myself taking the time. The dents aren't too bad. I just wasn't expecting them. Thanks for the compliment.

Kirk
 
OP
K

koditten

Well-known member
Joined
Apr 10, 2008
Messages
5,528
Location
Midland, Michigan
Finnaly got the bedliner material and a bit of time to spray it. I really like the texture of this stuff. This stuff hides lots of imperfections. The coating appears and feels to be really tough.

The real questrion will be how it fares with Michigan winters and our love affair with road salt.

Kirk
 

Attachments

  • tundrafinalcoat 001.jpg
    tundrafinalcoat 001.jpg
    145.1 KB · Views: 97
  • tundrafinalcoat 003.jpg
    tundrafinalcoat 003.jpg
    145.7 KB · Views: 94
OP
K

koditten

Well-known member
Joined
Apr 10, 2008
Messages
5,528
Location
Midland, Michigan
Here are a few shots of what it looks like on the truck. One thing I can say, no one else has the same bumper. I really like the contrast of the black and the white.

The only thing left is get some lights mounted in and on it.

Stay tuned for the lights.

Kirk
 

Attachments

  • tundrafinalcoat 004.jpg
    tundrafinalcoat 004.jpg
    146.9 KB · Views: 146
  • tundrafinalcoat 005.jpg
    tundrafinalcoat 005.jpg
    135.5 KB · Views: 114
  • tundrafinalcoat 006.jpg
    tundrafinalcoat 006.jpg
    143 KB · Views: 109

bad_idea

Well-known member
Joined
Jun 11, 2011
Messages
4,332
Location
Pasquotank, NC
Nice work. I know that feeling of satisfaction when a job is completed well, it is a good feeling. Looks nice on the truck.
 

marrt

Well-known member
Joined
Sep 23, 2007
Messages
111
Location
Northern VA
In the voice of Borat: "Very Nice!"

I'm starting to wonder if you shouldn't replace that stock grill too. :)
 

jack stand

Well-known member
Joined
Feb 29, 2012
Messages
3,305
Location
Lakes Region Maine
Real nice build, now you got to go to the back and cover your ***! I built this after momma backed into a traffic ballard (1-2mph?) at a toco bell, the factory bumper folded ito the qrtr panel. That won't hapen again. 4x8 structural tube! The horseshoes are (goodluck) for the guy that runs into it.:beer:
 

Attachments

  • April snow& graderblade 045.jpg
    April snow& graderblade 045.jpg
    99.8 KB · Views: 125
OP
K

koditten

Well-known member
Joined
Apr 10, 2008
Messages
5,528
Location
Midland, Michigan
Bumper is off to a good start. What size plate are you using?
__________________
ht3.jpg
jh.jpg
bh.jpg

3/16 sheet steel.

Should hold up much better than stock steel/plastic. Time will tell. Of course I don't want to hit a deer, but **** happens and I hope this effort will reduce the damage when/if that happens.

Good luck on the pictures. Make sure your camera is not set to the highest # of pixels, this was my problem in the beginnig.

KO
 
OP
K

koditten

Well-known member
Joined
Apr 10, 2008
Messages
5,528
Location
Midland, Michigan
In the voice of Borat: "Very Nice!"

That is a replaced grill. I went back and fourth trying to decide if I wanted a black, white or original chrome. I couldn't make up my mind and just tossed in what that truck came with original. I hate making decisions when rebuilding a vehicle.

KO

I'm starting to wonder if you shouldn't replace that stock grill too. :)

I couldn't make up my mind.
 
To avoid these ads, REGISTER NOW!
Top Bottom