To avoid these ads, REGISTER NOW!

west of Philly - barn saving

To avoid these ads, REGISTER NOW!
OP
R

rieferman

Well-known member
Joined
May 18, 2009
Messages
2,586
Location
Collegeville PA (30 min west of Philly)
Thanks Jim! :)

----

This week is the 2 year anniversary of the start of the barn project. And thus, a mega picture tour. I'm not going to even attempt to explain it all. But, if you're reading and would like to comment or question, I'll respond best I can.

Basically, I hit a point where I just feel like I'm soooo close to starting, and my confidence in my plans is growing each day.

Anyways, Happy Holidays and Happy New Year!!!!!

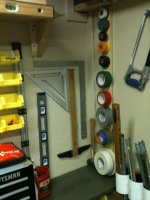
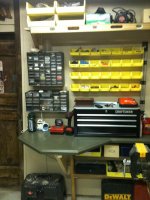
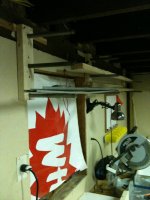
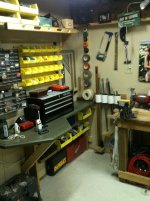
edit: so what we have here is the sorting/tool station along with rod storage and tape center.
 

Attachments

  • Image1.jpg
    Image1.jpg
    140.9 KB · Views: 526
  • Image2.jpg
    Image2.jpg
    141.3 KB · Views: 513
  • Image3.jpg
    Image3.jpg
    141.1 KB · Views: 492
Last edited:
OP
R

rieferman

Well-known member
Joined
May 18, 2009
Messages
2,586
Location
Collegeville PA (30 min west of Philly)
mega picture tour continued

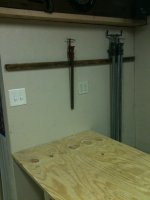
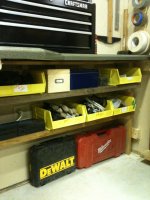
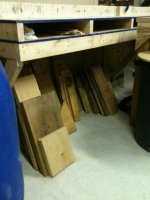
edit: Here's more of the sorting/tool station including under the counter storage. And, across the room by the assembly table, the clamps rack is the stringer from my old hammock that died this year. It'll be filled up with lots more clamps soon, and I have several other clamp storage ideas in mind (you can never have enough clamps in woodworking)
 

Attachments

  • Image7.jpg
    Image7.jpg
    141.4 KB · Views: 248
  • Image6.jpg
    Image6.jpg
    145.3 KB · Views: 266
  • Image5.jpg
    Image5.jpg
    142.3 KB · Views: 256
  • Image4.jpg
    Image4.jpg
    142.2 KB · Views: 283
Last edited:
OP
R

rieferman

Well-known member
Joined
May 18, 2009
Messages
2,586
Location
Collegeville PA (30 min west of Philly)
this is a really mega picture tour I tell ya

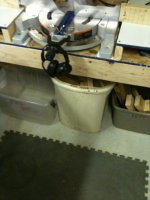
edit: Under my miter station there are bins labeled "fire pit" (for PT or painted cut offs), "wood stove" (stuff suitable for the family fireplace), and "keep" (stuff that's long enough to become something else someday). Also, I use the space to store all sorts of scrap - although some lumber racks are in order under there eventually. Since the top of the miter station is two levels, the opening is a great spot to store odds and ends that are needed frequently in that area of the shop (e.g. miter guage, square, tape measure, pencils etc.) The fence for the saw is decidedly low-tech. And some old hand me down cabinets provide lots of storage.
 

Attachments

  • Image8.jpg
    Image8.jpg
    146.3 KB · Views: 233
  • Image9.jpg
    Image9.jpg
    143.6 KB · Views: 226
  • Image10.jpg
    Image10.jpg
    144.7 KB · Views: 233
  • Image11.jpg
    Image11.jpg
    142 KB · Views: 268
Last edited:
OP
R

rieferman

Well-known member
Joined
May 18, 2009
Messages
2,586
Location
Collegeville PA (30 min west of Philly)
in fact, this is getting ridiculous

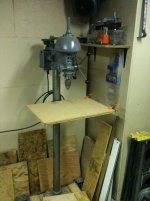
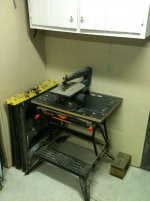
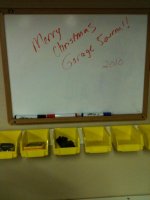
edit: The white board comes in handy for greeting you guys, and for jotting down ideas or measurements. Underneath, some home made slat wall and bins for whatever ends up being around. Above the miter counter, some pipe I had laying around was turned into a cheap/strong lumber rack system. The scroll saw and walker-turner drill press have their own spots.
 

Attachments

  • Image15.jpg
    Image15.jpg
    142.4 KB · Views: 243
  • Image14.jpg
    Image14.jpg
    141.5 KB · Views: 219
  • Image13.jpg
    Image13.jpg
    140.7 KB · Views: 214
  • Image12.jpg
    Image12.jpg
    151.1 KB · Views: 251
Last edited:
OP
R

rieferman

Well-known member
Joined
May 18, 2009
Messages
2,586
Location
Collegeville PA (30 min west of Philly)
I have a bunch more

edit: So the nook under the stairs is definitely better suited as an office space. All of my product manuals, idea books, notes etc. are stored here. Space to draw and design and keep track of things. My shop computer (which is yet to exist) will live here eventually.

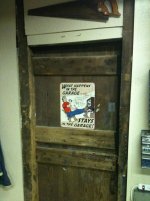
Garage sign from my dad.

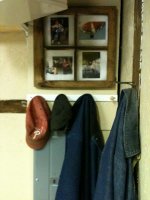
Coat hanging area with a cheap/rustic frame with pics of my wife and kids.

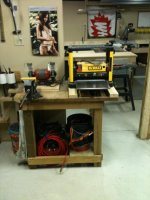
Looking the other way past my planer/vice/grinding area. Air compresser is nicely out of the way underneath.
 

Attachments

  • Image16.jpg
    Image16.jpg
    139.5 KB · Views: 333
  • Image17.jpg
    Image17.jpg
    143.6 KB · Views: 368
  • Image18.jpg
    Image18.jpg
    145.3 KB · Views: 336
  • Image19.jpg
    Image19.jpg
    138 KB · Views: 371
Last edited:
OP
R

rieferman

Well-known member
Joined
May 18, 2009
Messages
2,586
Location
Collegeville PA (30 min west of Philly)
ok, I think this is it, I hope you enjoyed the tour :)

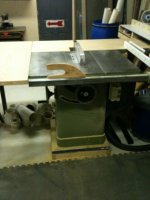
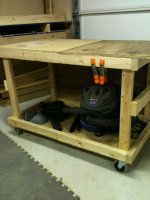
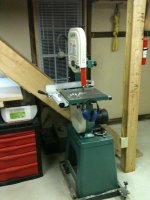
edit: the bandsaw next to some repurposed drawers. My $11 cart that will probably last longer than I do. The Griz 1023 table saw with surround (which will eventually have storage underneath). A close up of my reading material (most notably the "Idiot's Guide to Woodworking"... just my speed!). And a remembrance of when this thread was on the Garage Journal homepage - that was quite an honor.
 

Attachments

  • Image25.jpg
    Image25.jpg
    140.2 KB · Views: 343
  • Image24.jpg
    Image24.jpg
    143.2 KB · Views: 266
  • Image23.jpg
    Image23.jpg
    145 KB · Views: 246
  • Image22.jpg
    Image22.jpg
    142.4 KB · Views: 257
  • Image20.jpg
    Image20.jpg
    141.4 KB · Views: 238
Last edited:

onewaydave

Well-known member
Joined
Sep 28, 2009
Messages
961
Location
Down the road from Dorothy and Toto
If you persist in this foolishness, you're gonna want a bunch more bar/pipe clamps. I built a frame base about 2x3' square and put casters under it. Then framed an "A" frame structure up about 6' , so maybe a 10' cast to each side. I hang my clamps on that and hold 'em up there with bungie cords. The rack can roll over to the project table for use and out of the way (if you have space) when not needed.

You've gone gangbusters getting into wood working since outing the idea here, what a year ago?

Dave.
 
OP
R

rieferman

Well-known member
Joined
May 18, 2009
Messages
2,586
Location
Collegeville PA (30 min west of Philly)
Hey Dave, Persisting with foolishness is my specialty. :) I edited my posts above with explanations, including talk of clamps. Lots and lots of them are on the horizon, and storage will evolve for them as needed. Luckily I have a dedicated assembly area so transporting clamps around the shop will not be needed often. This whole barn build was centered around getting into woodworking - quite a leap of faith considering I had no construction and no woodworking experience at the start of this project. But yeah, I'm in way deep now and soooooooo excited to start making furniture instead of making the space to work in. Thanks for stopping in!
 
OP
R

rieferman

Well-known member
Joined
May 18, 2009
Messages
2,586
Location
Collegeville PA (30 min west of Philly)
Got the dust collection setup today. 2 hp unit from harbor freight, one of the relatively few gems that can be found at that store.

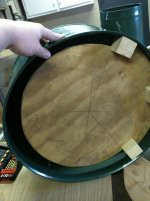
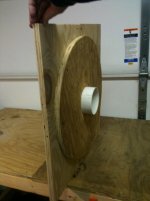
I modded mine with a "Thien Baffle" (thanks to Phil Thien for his research on dust collection!). Essentially, the intake on the dust collector takes the dust from the machines, and then pushes it through a baffle design. Gravity and a cyclonic type of action results in the chips and dust falling into my collection bag to be discarded later. All the invisible dust (aka the dust that's horrible for your lungs) can then either be filtered or vented outside. I will be venting outside, but I'll have to show you that setup in a week or two when the duct work is finished.

Anyways, here's the baffle portion:
 

Attachments

  • dust control baffle.jpg
    dust control baffle.jpg
    141.3 KB · Views: 125
  • dust control baffle 2.jpg
    dust control baffle 2.jpg
    144.7 KB · Views: 123
  • dust control baffle 3.jpg
    dust control baffle 3.jpg
    144.5 KB · Views: 123
OP
R

rieferman

Well-known member
Joined
May 18, 2009
Messages
2,586
Location
Collegeville PA (30 min west of Philly)
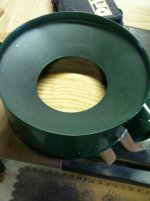
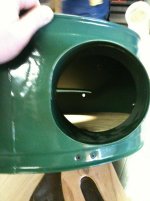
After the air/dust is pushed past the baffle, it then needs to exit somehow. Since I'm venting outside, I build a lid to accept 4" PVC. (to dust collection experts: yes, I'm aware 6" is preferable... budget is of concern to me, and 4" is affordable at this time. but thanks for your concern :) )
 

Attachments

  • dust control lid 3.jpg
    dust control lid 3.jpg
    141.9 KB · Views: 97
  • dust control lid 2.jpg
    dust control lid 2.jpg
    147.1 KB · Views: 97
  • dust control lid.jpg
    dust control lid.jpg
    147.9 KB · Views: 100
OP
R

rieferman

Well-known member
Joined
May 18, 2009
Messages
2,586
Location
Collegeville PA (30 min west of Philly)
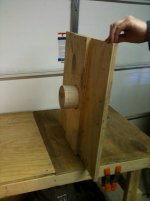
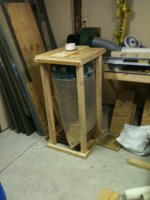
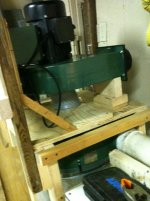
The flimsy stand they give you with the blower isn't what I had in mind, I wanted the unit mounted on the wall. Also, I wanted straight runs to my machine, and straight runs into the baffle to reduce resistance as much as possible to improve performance. Finally, I built the stand to hold the baffle assembly and bag securely. The top of that assembly will then be ducted out through the wall. All dust/chips will be collected in the bag, while the invisible stuff that's horrible for your sinuses and lungs will be expelled outdoors.

oh, and my helper (Dad) and buddy (Jim, intimidatorsquizz on this forum) lended a hand too. :beer:

HAPPY NEW YEAR GARAGE JOURNAL!!!!!!!!!!!!
 

Attachments

  • dust control blower.jpg
    dust control blower.jpg
    143.9 KB · Views: 320
  • dust control bag holder.jpg
    dust control bag holder.jpg
    141.8 KB · Views: 320
  • dust control dad.jpg
    dust control dad.jpg
    143 KB · Views: 387
  • dust control jim.jpg
    dust control jim.jpg
    139.7 KB · Views: 460
OP
R

rieferman

Well-known member
Joined
May 18, 2009
Messages
2,586
Location
Collegeville PA (30 min west of Philly)
Originally, my plan was to stack the dust control assembly, and empty it into a barrel (instead of a bag) to reduce the footprint.

But when we were working on it the other day, I was convinced that I should consider a different style so that the dust collector would blow through a bag (instead of sucking through a barrel). The main benefit being that you can then just tie off the bag and toss it out when it fills up.

That solution (pics above) was gnawing at me. I wanted best of both worlds, small footprint and easily discarded dust.

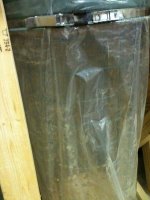
So, I modified the original design to a stacked assembly. This now ***** the dust through the bag and baffle, and exhausts directly out the wall. However, the issue is that this will implode the bag when you turn it on. So, I took some old plastic coated fencing, and made a cage that sits inside the bag so it keeps shape when the vacuum is running. When the bag is full, I'll shimmy the cage out, tie off the bag, discard the dust. Place the cage in my next bag and off I go again.

Tests were successful, and I have my reduced footprint. NOW, on to ductwork. Sometimes it takes two tries to get it right but you just have to be OK with undoing your own work and admitting you may have gotten it wrong to begin with (a trend in this thread lately!!!).
 

Attachments

  • dust control cage.jpg
    dust control cage.jpg
    144.5 KB · Views: 192
  • dust control stacked assembly 2.jpg
    dust control stacked assembly 2.jpg
    144.6 KB · Views: 192
  • dust control stacked assembly.jpg
    dust control stacked assembly.jpg
    142.6 KB · Views: 195
OP
R

rieferman

Well-known member
Joined
May 18, 2009
Messages
2,586
Location
Collegeville PA (30 min west of Philly)
Here's a short video of the dust collector in action. The baffle that I installed makes it so that all the dust drops into the collection bag, while just the smallest dust (less than 5% of the collected amount) will be exhausted directly outside (although in this video it's exhausting inside because I haven't cut the vent hole yet).

dust collector in action
 
OP
R

rieferman

Well-known member
Joined
May 18, 2009
Messages
2,586
Location
Collegeville PA (30 min west of Philly)
More boring woodworking stuff coming right up :lol_hitti


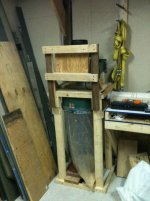
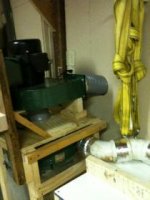
Traded some help with Jim this weekend. Got the exhaust hole out of the building and the PVC runs to the machines hooked up. It went relatively smoothly. I have to install blast gates and a couple feet of flex pipe at each machine next paycheck.

I miscalculated and need to get 2 more fittings to finish up - I only note this because it marks the end of a very good run in my estimating skills. I mean, it's uncanny that I've had like a year straight of ZERO extra trips to the hardware store. I HOPE this doesn't start a new trend! ha ha

I also fitted the cabinet of my table saw with a ramp made up of some old vinyl flooring and scrap plywood. The sawdust has no choice but to ski down the ramp directly into the PVC port. Should work nicely.

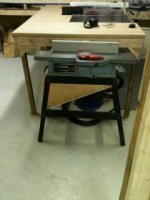
And, I built the enclosure for the jointer out of more scrap that I had laying around. Again, the dust has no choice but to ski down a ramp into the collection pipe. I also left a hinged access in case it clogs ever etc.

And I made a box fan air filter.

And I rearranged so that the bandsaw dust collection run is 10+ feet shorter than before.

And watched a little football :)
 

Attachments

  • DC setup exhaust outside.jpg
    DC setup exhaust outside.jpg
    10.7 KB · Views: 187
  • DC setup jointer enclosure small.jpg
    DC setup jointer enclosure small.jpg
    10.3 KB · Views: 192
  • DC setup planer and dp connect small.jpg
    DC setup planer and dp connect small.jpg
    12.1 KB · Views: 202
  • DC setup air cleaner small.jpg
    DC setup air cleaner small.jpg
    10.9 KB · Views: 230

jawdoc

Active member
Joined
Jul 28, 2010
Messages
39
do you have any pics of the doors?

We are trying to decide the style for our barn
 

intimadatorsquizz

Well-known member
Joined
Feb 12, 2010
Messages
245
Location
Telford,PA
Glad i could help Bob.
it turned out very nicely
Let me know when you get the gates I'll come up and help and or just come to drink your beer..lol
 
OP
R

rieferman

Well-known member
Joined
May 18, 2009
Messages
2,586
Location
Collegeville PA (30 min west of Philly)
Mini-project last night. Another "built from scrap materials for free, not pretty but very effective" solution by rieferman. It's my specialty. ha ha

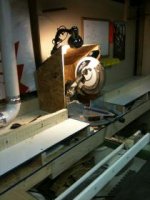
This is the miter saw hood. It contains the spray of dust so that it can fall into the dust collection pipe behind the saw. It also allows me to mount my task light in a nice position.
 

Attachments

  • miter hood dc connection.jpg
    miter hood dc connection.jpg
    10.8 KB · Views: 205
  • miter hood.jpg
    miter hood.jpg
    12.1 KB · Views: 252
OP
R

rieferman

Well-known member
Joined
May 18, 2009
Messages
2,586
Location
Collegeville PA (30 min west of Philly)
Barn stuff is on hold :(

Our kitchen got flooded due to a faulty dishwasher valve, so it has to be gutted (that fun starts this weekend). The good news is that insurance coverage, plus my sweat equity (and major help from buddies, most notably Jim), will allow for an entirely new kitchen at minimal cost to me. The bad news is that barn stuff and everything else in life is pretty much on hold in the meantime.

So that I don't get too bummed about that, here's my immediate upcoming barn list:
- install dust collection blast gates and flex hose
- new jointer knives
- tune all machines, and begin making furniture!!! (will start easy with yard and porch furniture for our own home)

That's an exciting milestone. From what was once such a long list, we're down to three more steps. Oh man!

And the spring/summer list looks like this:
- frame second story including new windows
- setup pump jacks
- tighten up sheathing by screwing to posts and to new framing from exterior
- install house wrap, siding, trim, soffit, gutters
 
To avoid these ads, REGISTER NOW!
OP
R

rieferman

Well-known member
Joined
May 18, 2009
Messages
2,586
Location
Collegeville PA (30 min west of Philly)
well, in the spirit of crazy amounts of sweat equity being spent at my abode, here's some kitchen news. Yeah, it's not a garage post, but whatever.

For starters, without my buddy Jim, there's no way in hell this project would get done as nicely as it will get done. My skills are more of the barn building variety. That said, I know a decent amount and am more than willing to learn. And I work hard, so I don't think I've been a bad apprentice :)

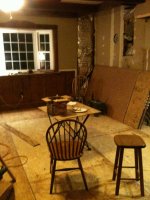
To start with, I hired a young guy to help me demo the space. 6 layers of flooring, a fireplace, all cabinets etc.

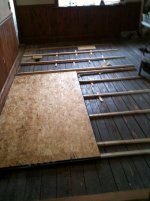
Then, I custom cut sleepers to level the floor, and we installed 3/4" subfloor throughout. The floor was out over 2 inches!!!! (but it's not settling anymore, that problem was resolved long before I became owner of the home).

While I was busy doing that, Jim fixed the plumbing and venting from the adjacent wash room. He did a PRO job for sure.

After this day of work, it was time to run the new electrical scheme. We fished wire for new pendants above the island-to-be, a new light above the new kitchen table location, for can lights in two locations. Jim wired a 4 gang box with dimmers so my wife can control all the zones in the room from one spot. I wired countless outlets.

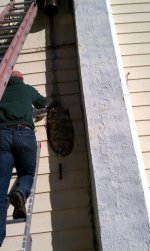
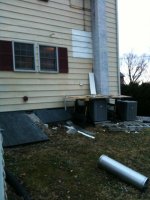
We also had to rip the metal triple-wall chimney out through the building's wall since the fireplace is no longer in the room. We used Jim's metal brake to bend a patch for the steel siding (yes, steel siding) out of flashing material. We framed over the hole, re-sheathed, weather proofed, and then I used pop rivets to install the new siding. Lots of time spent on a ladder.

Finally, we drywalled.

----

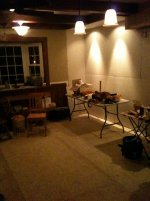
Flooring goes in this week, and cabinets arrive in two weeks. In the meantime, I'm mudding, wainscotting, and trimming out the room. Wife will help paint. I can also build the kitchen island, and the matching prep station. Both of those will be topped with butcher block to offset the granite counter tops.

--
ok, some pics so far:
 

Attachments

  • new subfloor.jpg
    new subfloor.jpg
    144.7 KB · Views: 377
  • new subfloor old dog.jpg
    new subfloor old dog.jpg
    144 KB · Views: 363
  • big hole in house.jpg
    big hole in house.jpg
    77.6 KB · Views: 373
  • patched siding.jpg
    patched siding.jpg
    139.7 KB · Views: 392
  • gettting there.jpg
    gettting there.jpg
    144.2 KB · Views: 433
Last edited:

4StarCstms

Well-known member
Joined
Mar 14, 2008
Messages
938
Location
Kentucky
Sorry about the luck of flooding the kitchen, but ... its one thing off the honey-do list and Ya cant beat the insurance paying for the majority of it.

Looks great!

Workshop (barn) does too.
 

birdman1

Well-known member
Joined
Jul 10, 2008
Messages
74
Location
Erwin, N C
Man , a shop/barn with great character. What you are doing and planning is looking good. Keep us posted with plenty of pics--thanks for sharing
Mike
 

clutch93

Well-known member
Joined
Jan 10, 2011
Messages
373
Location
Sacramento
Just came across this thread today. Went through the whole thing! It's incredible what you've done with the barn! Very cool that you resurrected it instead of tearing it down, it's a really nice space you've made. Sorry to hear about your kitchen, glad your insurance is footing the bill. Good luck with it and keep us updated on the barn AND the kitchen!
 

shopnut

Well-known member
Joined
Feb 22, 2006
Messages
4,237
Location
Florida
Barn stuff is on hold :(
Sorry to hear about the flood rieferman.

Don't worry though, that barn and the projects inside it aren't going anywhere. Knowing how fast you work, it will be no time at all before you're back at it in the shop and you'll have a freshly remodeled kitchen to enjoy.

Our kitchen is in need of a makeover and I'm dreading it :(
 

fergus

Well-known member
Joined
Oct 4, 2009
Messages
1,620
Location
Yolo County CA
Dude, you know we're reading this thread. You got mad barn-fixin skills. Plus you got the vision to become a pro woodworkin man. That's pretty ballsy. This thread is one of a few I'm always looking for updates.
 

Bull

Super Moderator
Joined
Dec 12, 2005
Messages
16,189
Location
MA
Do you happen to have any pics of the floor leveling/sleeper phase of the kitchen project?

I can't even recognize the pics of your barn anymore. It looks like a bright, clean, dry, modern space in there. Hard to believe it started out as an old barn. One day...one day!
 
OP
R

rieferman

Well-known member
Joined
May 18, 2009
Messages
2,586
Location
Collegeville PA (30 min west of Philly)
Well good, I'm very happy to know people are reading! :)

Bull, here's the only pic I have of the sleepers effort..

How I did it:
I pulled a string tight from one end of the room to the other at the start and at 8 feet (the length of the 2x4's I had on hand). I measured the distance between string and dipped floor in both spots, transferred the measurement to the 2x4's and ripped them with circ saw. Shimmed as needed when fastening to the existing studs (which were 24 OC so we had to add extra sleepers not pictured here to reduce deflection on the 3/4" subfloor).

How I'll do it in the other room in the future:
Lay 2x4's the entire width of the room every16 inches. The 2x4's are sitting on their thin side.
Screw a cross member to all 2x4's at both sides of the room to hold them steady and make them easier to level as a group.
Using whatever shims, level the entire grid.
Set compass to width of the 2x4 (so, 3.5") and scribe each one.
Undo the grid, rip all 2x4's on the scribed lines, fasten.

This method would be much more perfect than how I did it the first time, but I didn't think of the method until I was done with the kitchen floor already (which turned out great anyways, just not as great as it could have).
 

Attachments

  • leveling the floor.jpg
    leveling the floor.jpg
    142.6 KB · Views: 268

intimadatorsquizz

Well-known member
Joined
Feb 12, 2010
Messages
245
Location
Telford,PA
glad i can help Bob
it is alot of work, but it's turning out freaking sweet.
You are a good learner and are picking things up very fast.

but next time you start being a smart *** i'll let you wiring up the 4 light switches...lol

can wait to get the cabinets in and see how it all turns out.

i don't think Meg knows how much this dinner party will cost her...
 
OP
R

rieferman

Well-known member
Joined
May 18, 2009
Messages
2,586
Location
Collegeville PA (30 min west of Philly)
Well, to continue with my non-garage talk awhile longer, I got a TON done last week and this past weekend. Yesterday, I worked 7:30 a.m. until about midnight. Cabinets and appliances arrive this week, and Jim and I are doing the installation next week, so I really had to get stuff done.

So, we painted (wife did the cut in for everything wonderfully!). We LOVE the color, and once again I came away impressed with the Behr 2 in 1 (primer and paint) product.

I had cut and dry fit all the trim for the room, and we'd stained it already too. With a chair rail, wainscotting, and a 3-layer base molding, it was a pain in the neck, but it all turned out very nicely. So, with the paint dry, I installed all of that, and it matches the original materials very nicely.

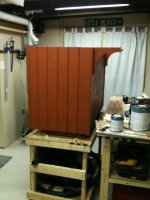
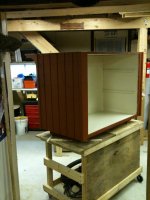
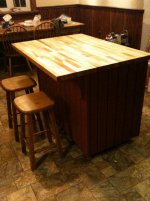
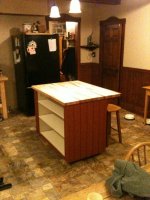
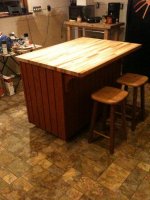
Then, yesterday, I built the kitchen island. I'll have to post again in a couple days when the butcher block top is on it (I have to install that inside else it won't fit through the door). Anyways, there are three open shelves for storage, all painted the same color as the cabinets. The exterior is a rustic red, and the top is a maple butcher block (John Boos). There is seating for 2 on stools, and I ran electrical outlets on the interior for plugging in laptops or crock pots or whatever she wants to plug in there. I'm very happy with how it turned out. I wanted the whole thing to be 36 inches tall to match standard countertop height... I ended at 36 and 1/16th. Not bad.
 

Attachments

  • island corbels.jpg
    island corbels.jpg
    138.5 KB · Views: 317
  • island interior.jpg
    island interior.jpg
    141.4 KB · Views: 321
  • trim wainscotting and paint done.jpg
    trim wainscotting and paint done.jpg
    143 KB · Views: 345
OP
R

rieferman

Well-known member
Joined
May 18, 2009
Messages
2,586
Location
Collegeville PA (30 min west of Philly)
Well, with your encouragement, I decided to get off my lazy **** and do something last night, so I got the island finished and moved. Still need to hookup the electrical and screw it to the floor this weekend, but it worked great for eating breakfast with my boy this morning before work. :thumbup:
 

Attachments

  • island finished.jpg
    island finished.jpg
    143.3 KB · Views: 344
  • island finished 2.jpg
    island finished 2.jpg
    145.8 KB · Views: 329
  • island finished 3.jpg
    island finished 3.jpg
    144.8 KB · Views: 334

ct96ek

Well-known member
Joined
Sep 13, 2007
Messages
175
The barn is looking great. I like seeing another guy reworking something older with some history and character. I can't wait to steal some of your organizational ideas as I get closer to finishing.
 
OP
R

rieferman

Well-known member
Joined
May 18, 2009
Messages
2,586
Location
Collegeville PA (30 min west of Philly)
Thanks ct96ek :) Once again, cool to see your rebuild effort, and to meet a guy that knows my home town!
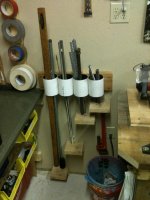
-----

Jim and I kicked some major **** this weekend. Essentially, the kitchen project is "done". Counter top installer still needs to come, I have to tack the crown detail up, the wife and I will install the backsplash, and Jim and I can make final faucet connections, but that's it. WOW. So, here's a teaser picture. One more to come with countertops soon, and then back to your previously scheduled programming (i.e. barn stuff).
 

Attachments

  • almost there.jpg
    almost there.jpg
    143.1 KB · Views: 493
Last edited:

ct96ek

Well-known member
Joined
Sep 13, 2007
Messages
175
Kitchen is looking good. I like the flooring and the wainscoting. My wife has been asking me to refinish all of our cabinets white and I am dreading all that sanding. What type of counter top are you going with? Color?
 
OP
R

rieferman

Well-known member
Joined
May 18, 2009
Messages
2,586
Location
Collegeville PA (30 min west of Philly)
Thanks! The loml is very happy and thus, all of us are happy :)
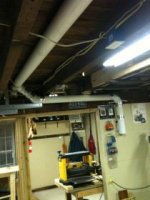
We have granite on order (otherwise I'd install myself). It's a similar color pallet as the flooring. Specs of earth tones etc. So it'll offset the lightness of the cabinets nicely.

One detail that I really am happy with is that the cabinet pulls are matched to the knobs are matched to the lighting fixtures are matched to the faucet.
 
To avoid these ads, REGISTER NOW!
Top Bottom