
You are using an out of date browser. It may not display this or other websites correctly.
You should upgrade or use an alternative browser.
You should upgrade or use an alternative browser.
Woodworking 101--Tools and Tips
- Thread starter jimreed2160
- Start date
OP
jimreed2160
Well-known member
Me--Shop layout really is about what you do and how you can make it convenient and efficient. So that varies for most. I have set up many shops during my moves and I keep moving things around in my current shop. So I do have some strong opinions about the subject.
I use my bench the most so it sits in the middle of the floor. It is surrounded by specialized work tables. That is because I work on a variety of projects. Once I had limited space and I made a convertible top for my workbench. It was just a piece of plywood with a cleat--I fastened the cleat into the end vise. That converted my woodworking bench into a "get it dirty" rust cleanup bench. It only took a few seconds to remove the plywood and convert the bench back. Since your space is limited, maybe you can design similar multipurpose work areas.
I use my bench the most so it sits in the middle of the floor. It is surrounded by specialized work tables. That is because I work on a variety of projects. Once I had limited space and I made a convertible top for my workbench. It was just a piece of plywood with a cleat--I fastened the cleat into the end vise. That converted my woodworking bench into a "get it dirty" rust cleanup bench. It only took a few seconds to remove the plywood and convert the bench back. Since your space is limited, maybe you can design similar multipurpose work areas.
mefast
Well-known member
EZ, eba and Zach,
My plan was only to have the castors touching the ground when it's moving, exactly like the photo. My other idea was to have fixed castors and use floor locks to raise the bench once moved. Still deciding on a design, but when the benches are being used, the wheels won't be touching.
My plan was only to have the castors touching the ground when it's moving, exactly like the photo. My other idea was to have fixed castors and use floor locks to raise the bench once moved. Still deciding on a design, but when the benches are being used, the wheels won't be touching.
jar944
Well-known member
jar
I have that same sander. Never bothered to assemble the 'stand' for it but I did take the rubber feet and 4 bolts it came with and attached the feet to the cast iron base. Does yours dance or if you lean in do you move it? I know it's not light, but mine had that issue before I put the rubber feet on like that.
Doh! That would have been the smart thing to do. Now I need to remember where I put the feet.
shortykorte
Well-known member
Finally finished up my bathroom remodel. Complete tear out of drywall. Built a new vanity from cherry and stained it. 72". Wife loves it.
Sent from my Pixel XL using Tapatalk


Very nice. Did you photo document the vanity build?
Thank you. I added a few more photos in a later post. I might have some more if needed.Very nice. Did you photo document the vanity build?
Sent from my Pixel XL using Tapatalk
I think Ryan of shopbuilt on YouTube did a video w something like that a few years ago. I'd check it out.maybe something simple like this.........

Sent from my Pixel XL using Tapatalk
I think Ryan of shopbuilt on YouTube did a video w something like that a few years ago. I'd check it out.
You might want to look at Matthias Wandel's website for another example of a castor lifting mechanism:
https://woodgears.ca/mobile_base/jointer.html
there are links on that page to other mechanisms that people have built.
OP
jimreed2160
Well-known member
Tote repair
It is common to find handplanes in the wild with damaged totes. The direction of the grain leads to breaks under stress. But we are woodworkers and should be able to repair something as simple as a tote. Here is a Stanley Bedrock that I found.

One bounce on the floor will usually result in a cracked casting (fatal) or a cracked tote horn (bad, but repairable).
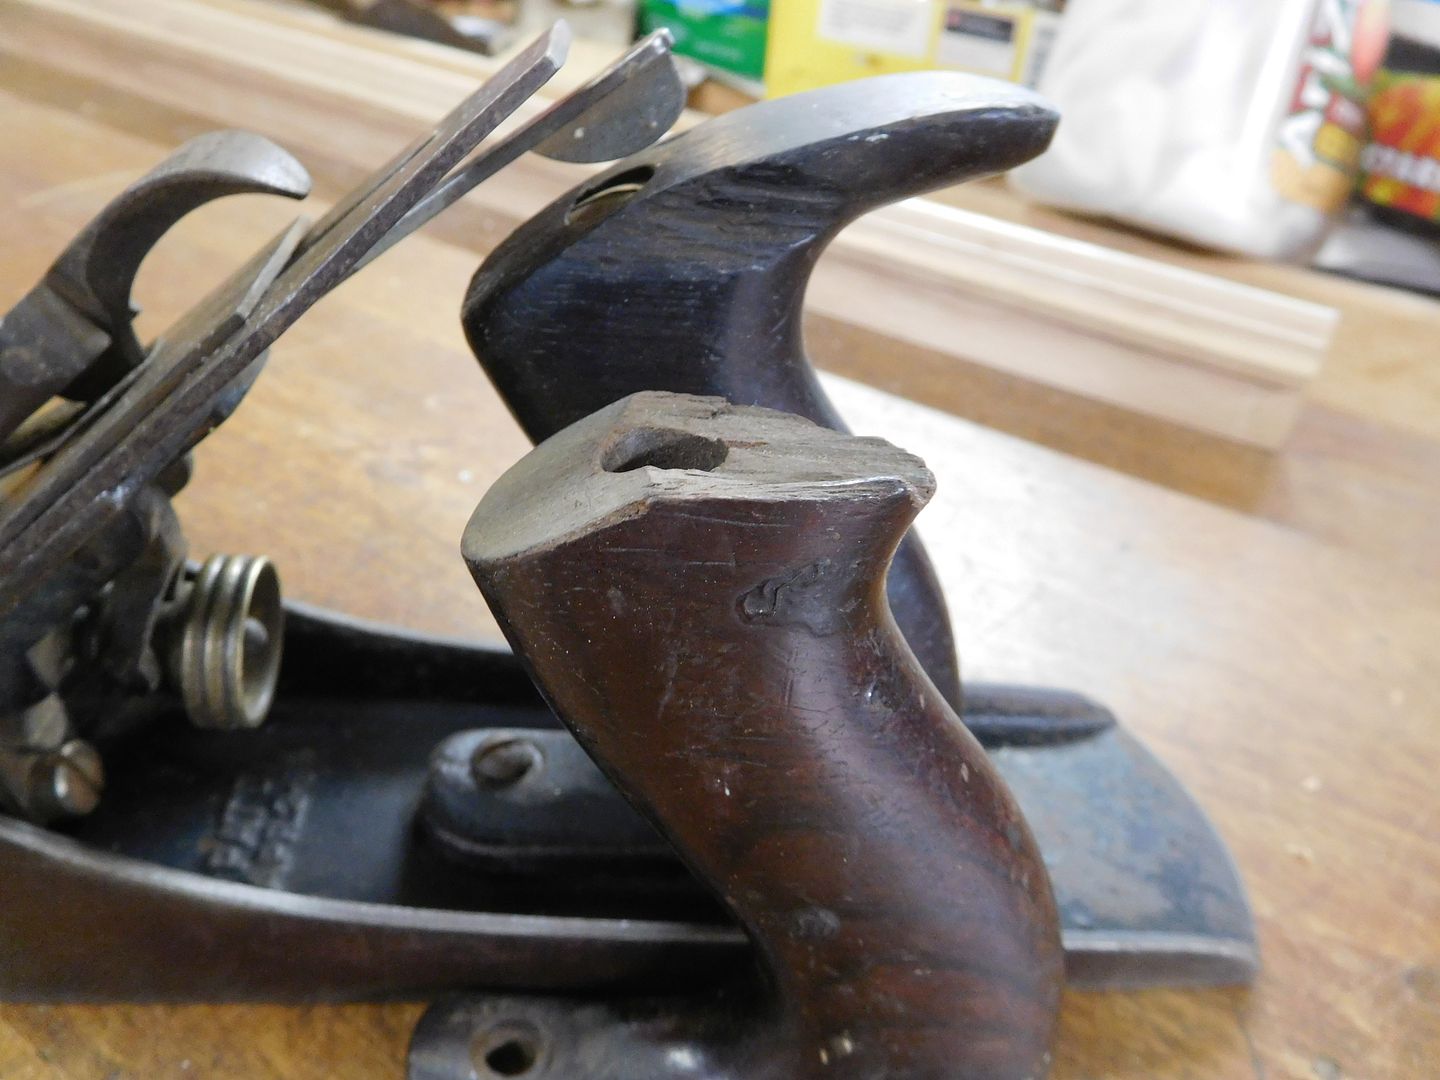
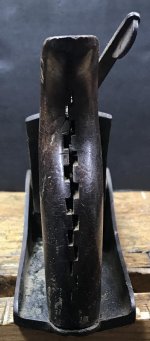
The first step is to remove the tote and examine the break.

It sheared off unevenly along the grain lines. It has quite a bit missing and that part of the horn is important. The curve in the horn catches the web between your thumb and index finger and prevents you hand from riding up the tote. Sheared tote horns might seem minor but they seriously affect control and use of the plane.
Mr bandsaw helped by making the break into a clean cut.
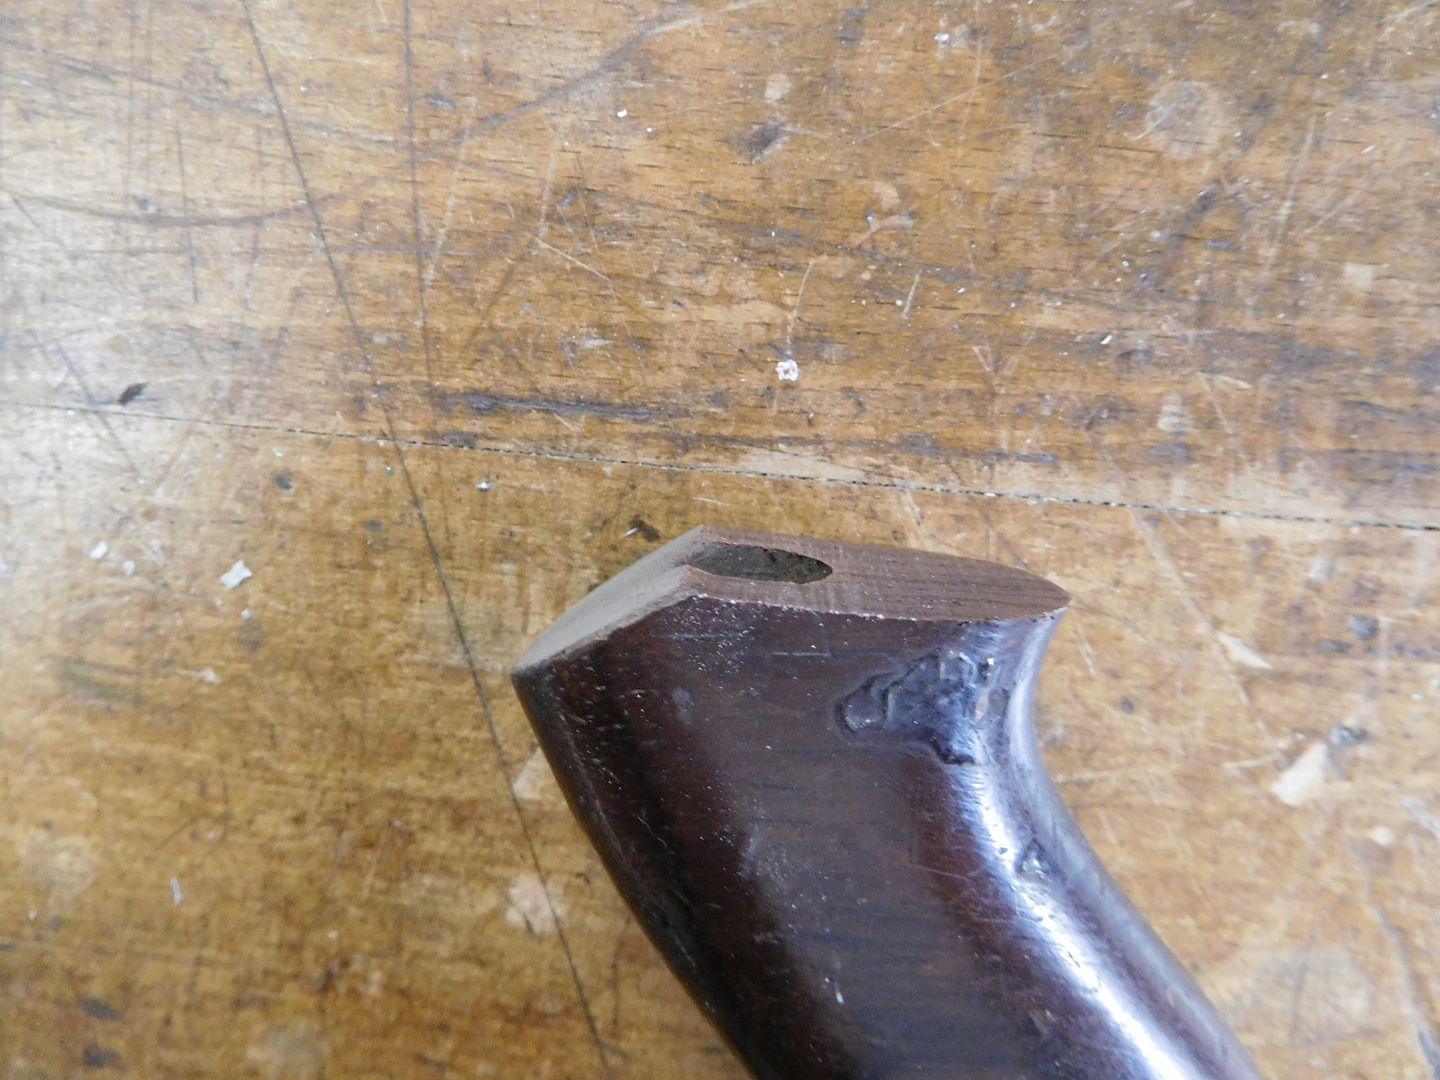
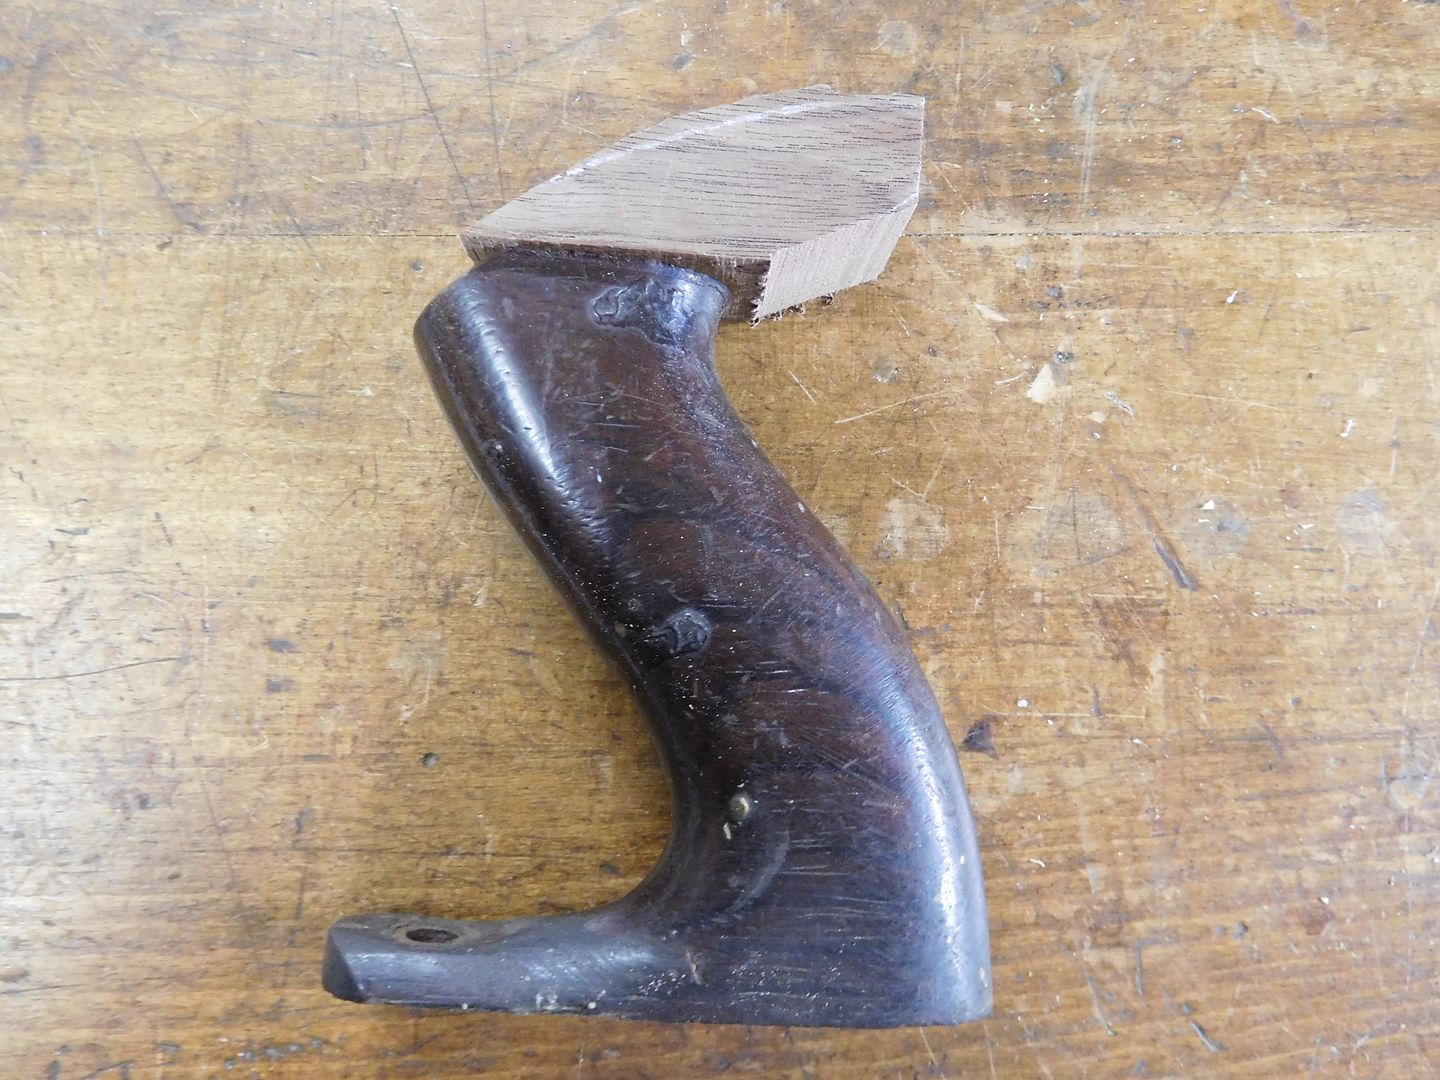
Here is the tote alongside some donor wood and covered by a pattern tote. Rosewood is hard to find and I am allergic to it anyway. Walnut makes a nice substitute.

And here is the glue up.
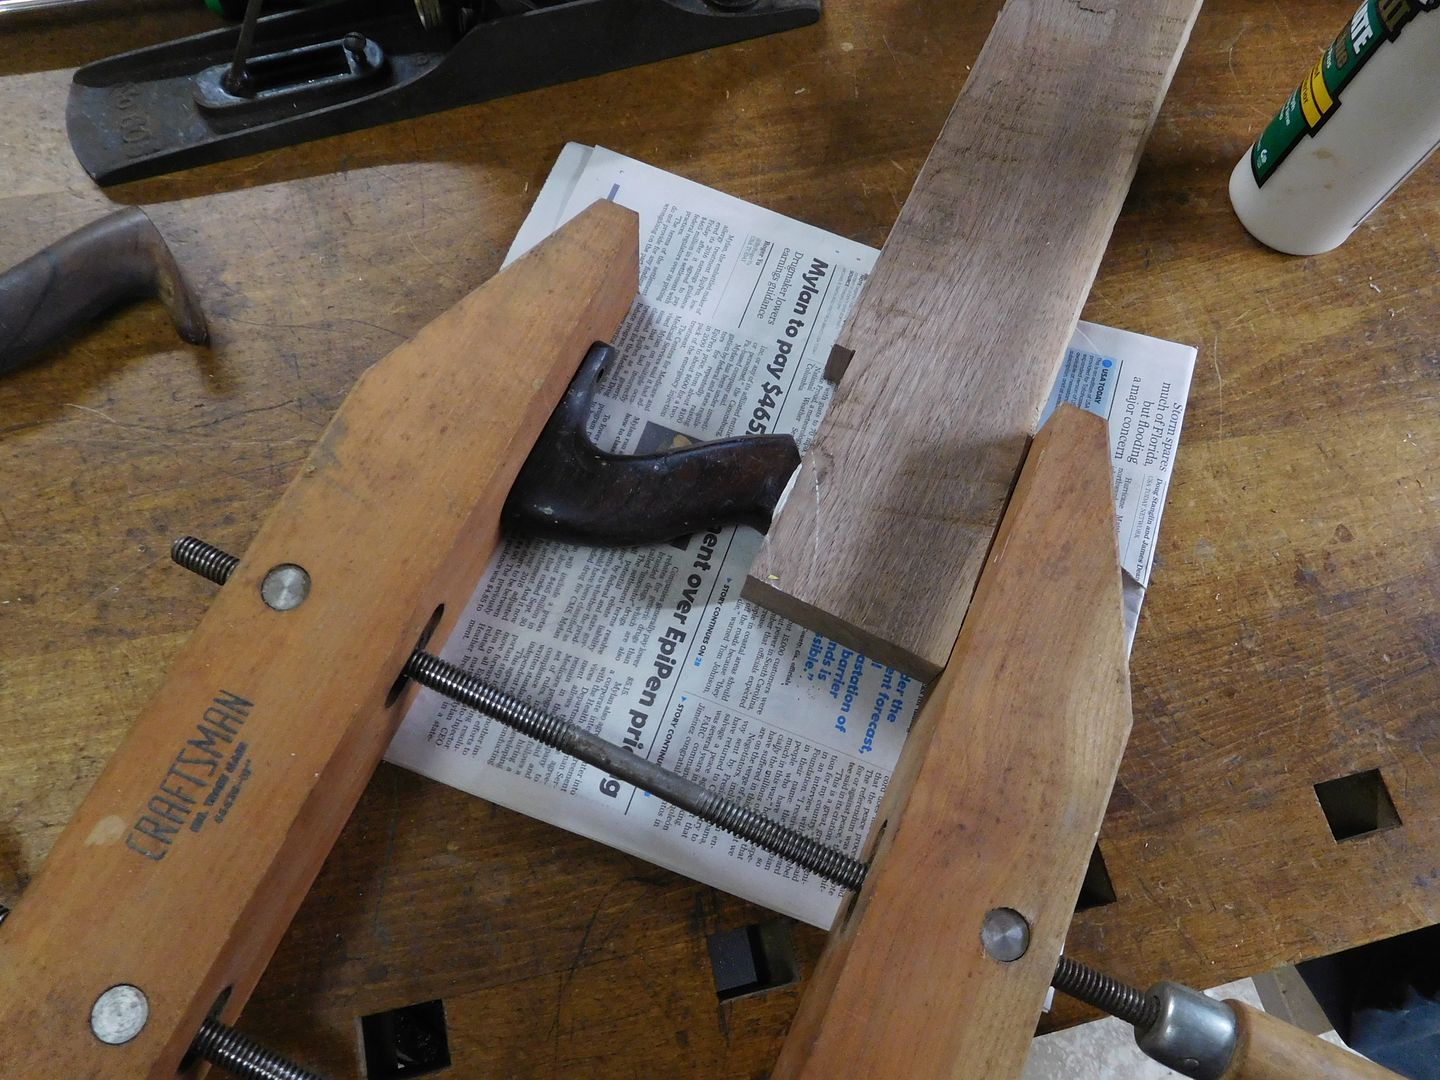
I use Titebond III for gluing totes and have been happy with my results. Others prefer epoxy. There are a few tricks I use for a good bond. First, I make sure the parts fit well. Sometimes broken totes have been used for years and the pieces do not fit well together. These generally make a poor bond unless they are carved or cut to fit. Flat surfaces work better. In addition, I let the glue soak into the rosewood before clamping. Titebond has a solvent (water?). Rosewood is dense. If you clamp before the glue has soaked in, you will starve the joint. I let it sit for five to ten minutes. Sometimes I even add more glue to the surface. Anyway, the true test to the glue joint is working it. If it stays in place while you work the piece down to size, then the glue joint will hold during use.
After drying overnight in the woodscrew clamp, here is what we have.
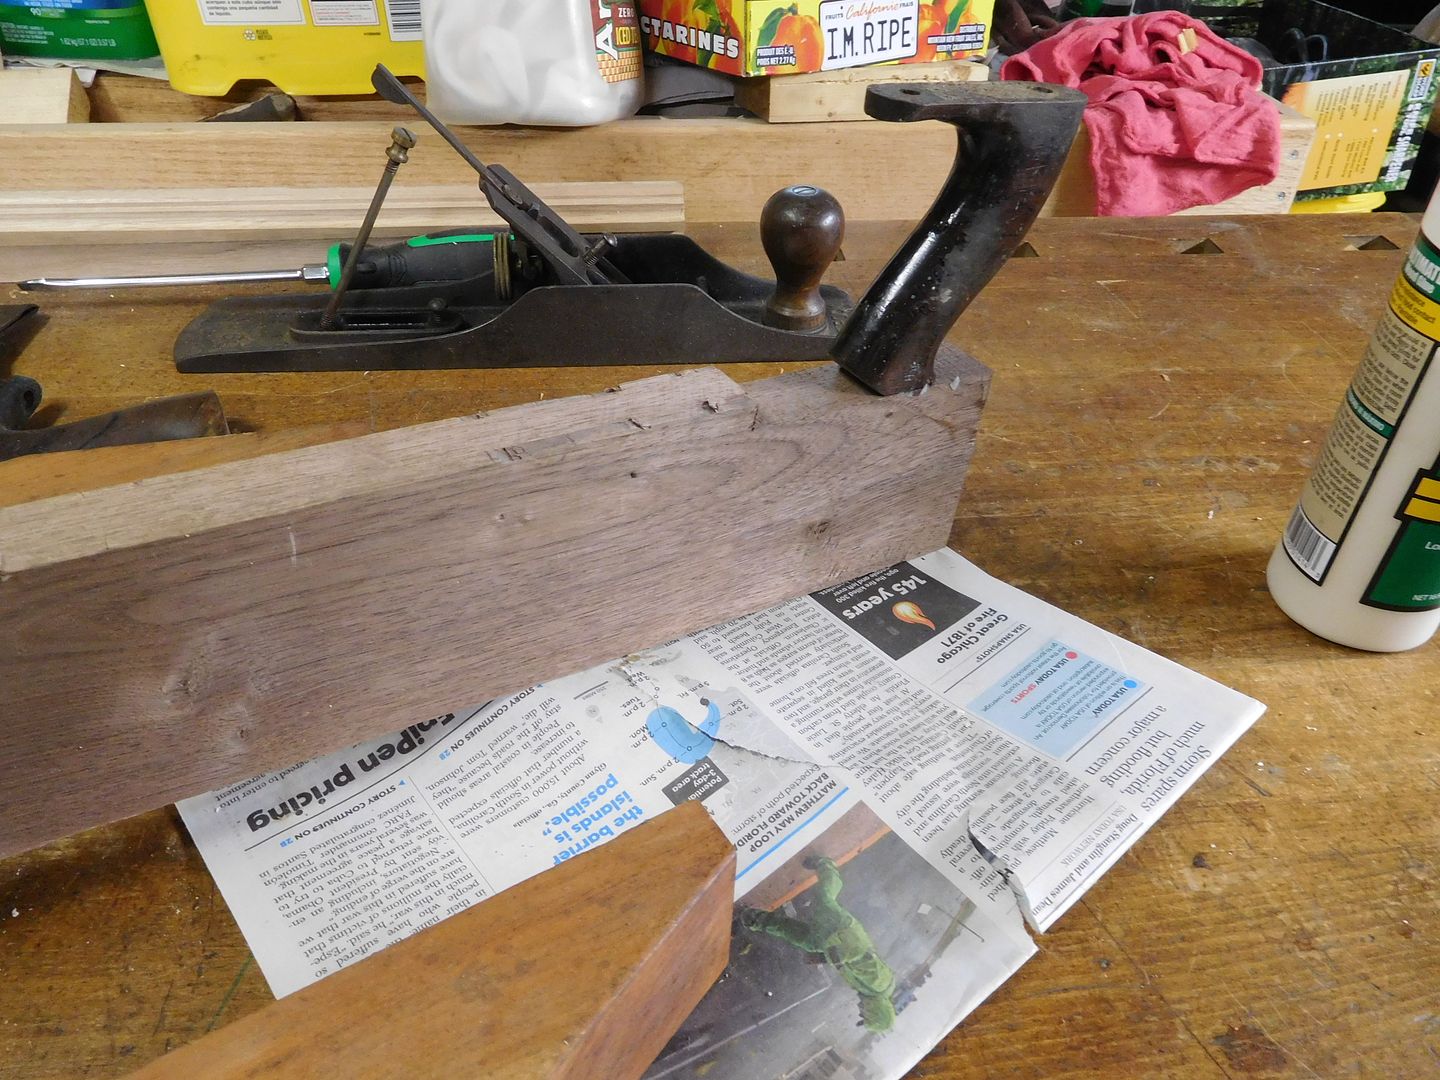
That's a pretty big stick for sure. But a larger piece is easier to clamp and more importantly, a large piece means less waste of the donor material. Mr bandsaw helps liberate the tote.

So here is where we leave our tote repair. I will continue shaping this afternoon but first, I need to take a nap. Stay tuned.
It is common to find handplanes in the wild with damaged totes. The direction of the grain leads to breaks under stress. But we are woodworkers and should be able to repair something as simple as a tote. Here is a Stanley Bedrock that I found.
One bounce on the floor will usually result in a cracked casting (fatal) or a cracked tote horn (bad, but repairable).
The first step is to remove the tote and examine the break.
It sheared off unevenly along the grain lines. It has quite a bit missing and that part of the horn is important. The curve in the horn catches the web between your thumb and index finger and prevents you hand from riding up the tote. Sheared tote horns might seem minor but they seriously affect control and use of the plane.
Mr bandsaw helped by making the break into a clean cut.
Here is the tote alongside some donor wood and covered by a pattern tote. Rosewood is hard to find and I am allergic to it anyway. Walnut makes a nice substitute.
And here is the glue up.
I use Titebond III for gluing totes and have been happy with my results. Others prefer epoxy. There are a few tricks I use for a good bond. First, I make sure the parts fit well. Sometimes broken totes have been used for years and the pieces do not fit well together. These generally make a poor bond unless they are carved or cut to fit. Flat surfaces work better. In addition, I let the glue soak into the rosewood before clamping. Titebond has a solvent (water?). Rosewood is dense. If you clamp before the glue has soaked in, you will starve the joint. I let it sit for five to ten minutes. Sometimes I even add more glue to the surface. Anyway, the true test to the glue joint is working it. If it stays in place while you work the piece down to size, then the glue joint will hold during use.
After drying overnight in the woodscrew clamp, here is what we have.
That's a pretty big stick for sure. But a larger piece is easier to clamp and more importantly, a large piece means less waste of the donor material. Mr bandsaw helps liberate the tote.
So here is where we leave our tote repair. I will continue shaping this afternoon but first, I need to take a nap. Stay tuned.
CRSINMICH
Well-known member
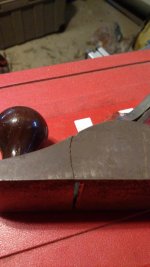
jim: I bought this No.3 for $5 as a What-the-Heck addition to some items I bought from a retired machinist. I have never seen a tote like this one. I believe it's rosewood. The knob certainly is. This tote is currently in a clamp under very slight pressure. My plan is to leave it in the clamp and every few weeks increase the pressure a little more. I'm in no hurry since I have a few more No.3s that I can play with. Do you, or does anyone else, have other suggestions? Steam? Soaking? Microwave?
If I had to guess (and I do), I'd say that this was some attempt at economizing on dwindling stocks of rosewood. I'll have to look at it under magnification to see if the grain of the wood runs across the box joint separation.
Thanks!
If I had to guess (and I do), I'd say that this was some attempt at economizing on dwindling stocks of rosewood. I'll have to look at it under magnification to see if the grain of the wood runs across the box joint separation.
Thanks!
Attachments

Last edited:
OP
jimreed2160
Well-known member
CRS--I have seen hundreds of Stanley, Ohio, Sargent, and other vintage bench planes in the wild
BUT
I have never seen anything like that tote. My guess is that it is a user made tote that was made in two pieces and later split apart. I would look for a tote donor. Otherwise, I would clean the inside, slather it with glue and then clamp the cr@p out of it. You can drill out the rod hole afterward.
Good luck with your repair. I really like #3 sized planes--especially as I get older. They are easy to push.
ez-duzit
Well-known member
Inject thickened, white pigmented epoxy to make a decorative effect. ")
OP
jimreed2160
Well-known member
Tote repair continued
Well I got lunch but no nap. The workshop was calling and the basketball tourney is on at 4. I had to go back to work. I made one more small cut on the underside with the bandsaw. Here is what we were left with.
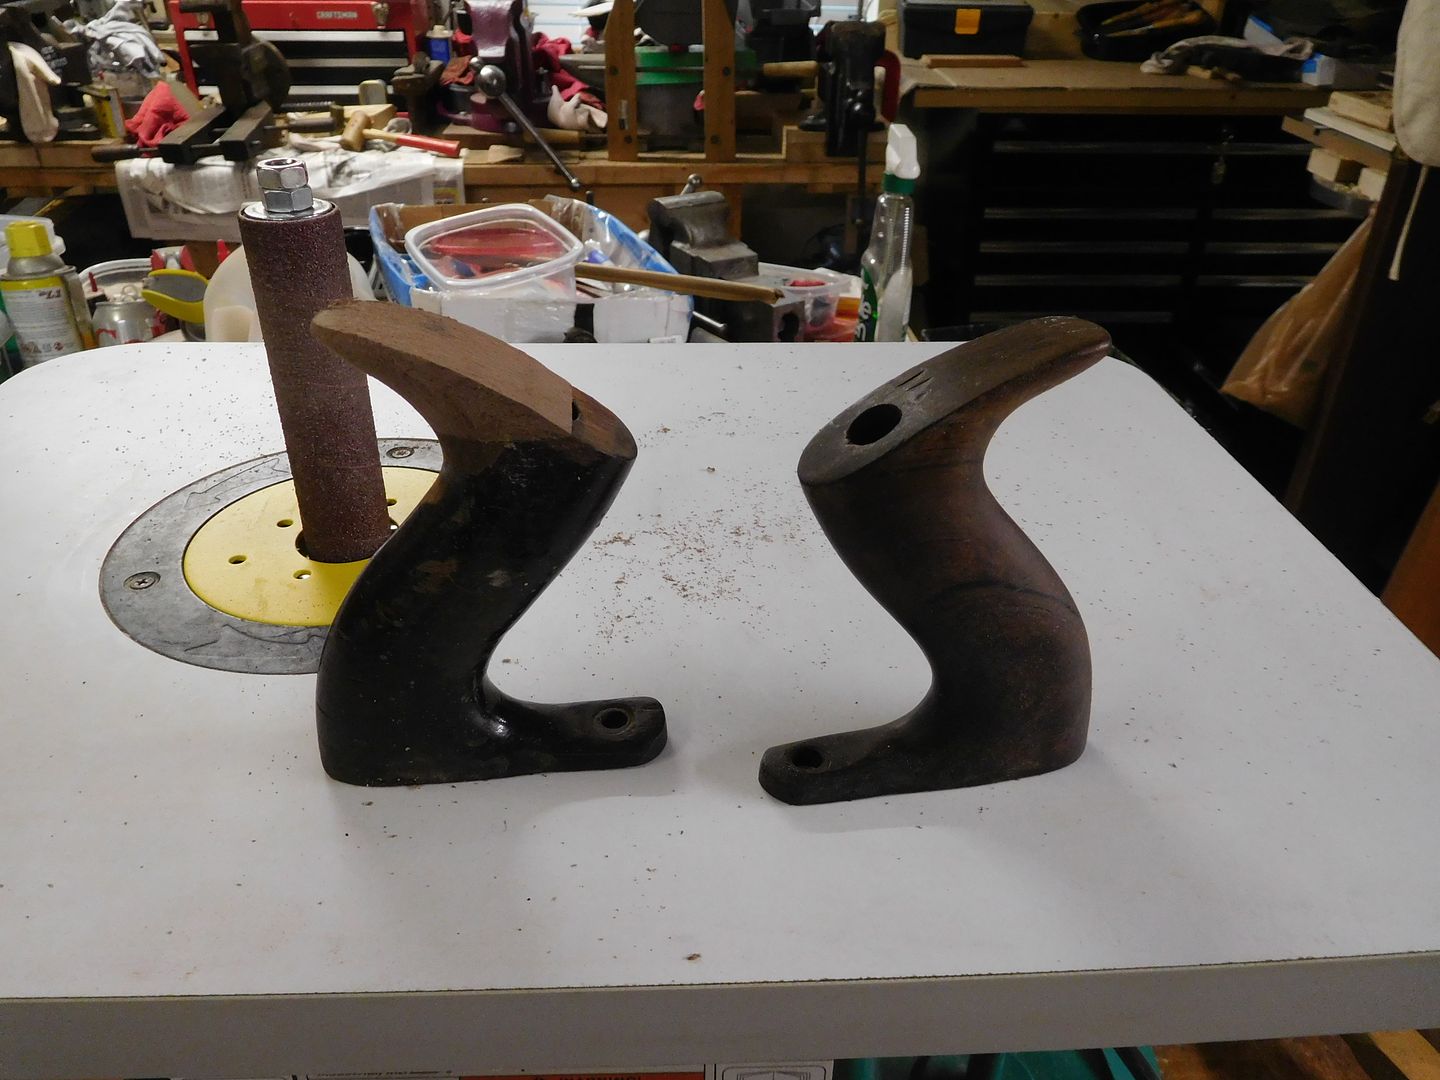
This is a job for the oscillating spindle sander. #80 grit.

Looking good.

Done. I like to have a pattern tote nearby to compare it to while I am sanding. This little horn repair came out pretty well.
Now we need to drill the tote rod hole. It is nice to have part of the old hole there as a reference.
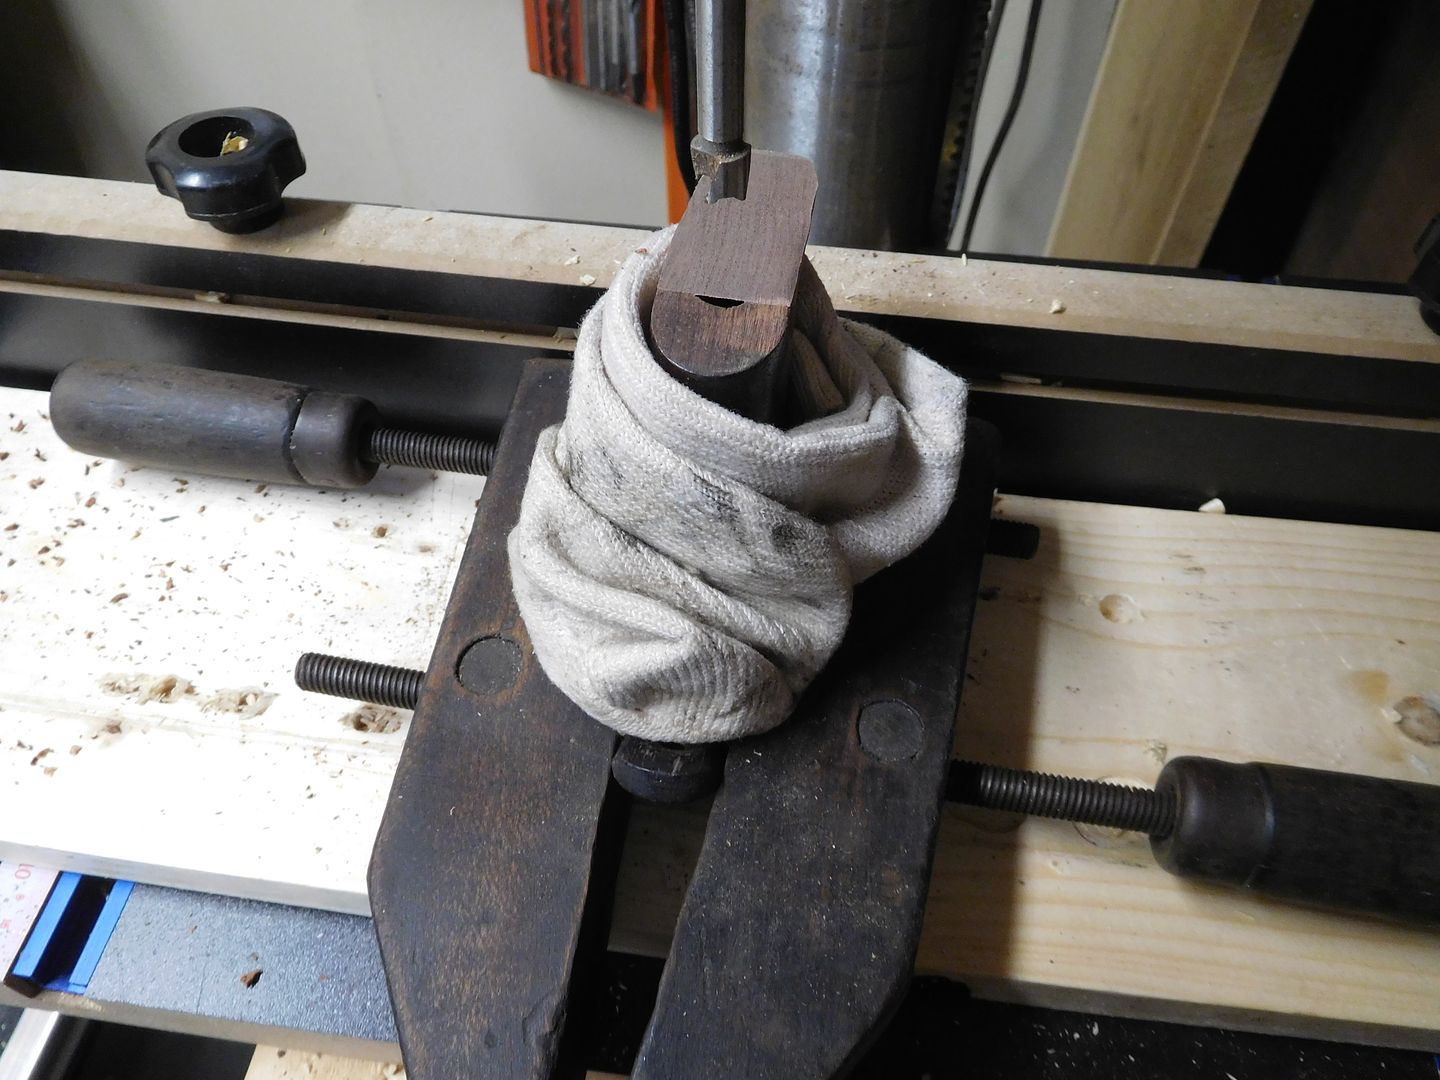
Do you have a chip carving knife? If not, you need one. I drilled the hole slightly undersized so I could finish it by hand. The chip carving knife is perfect for this job.
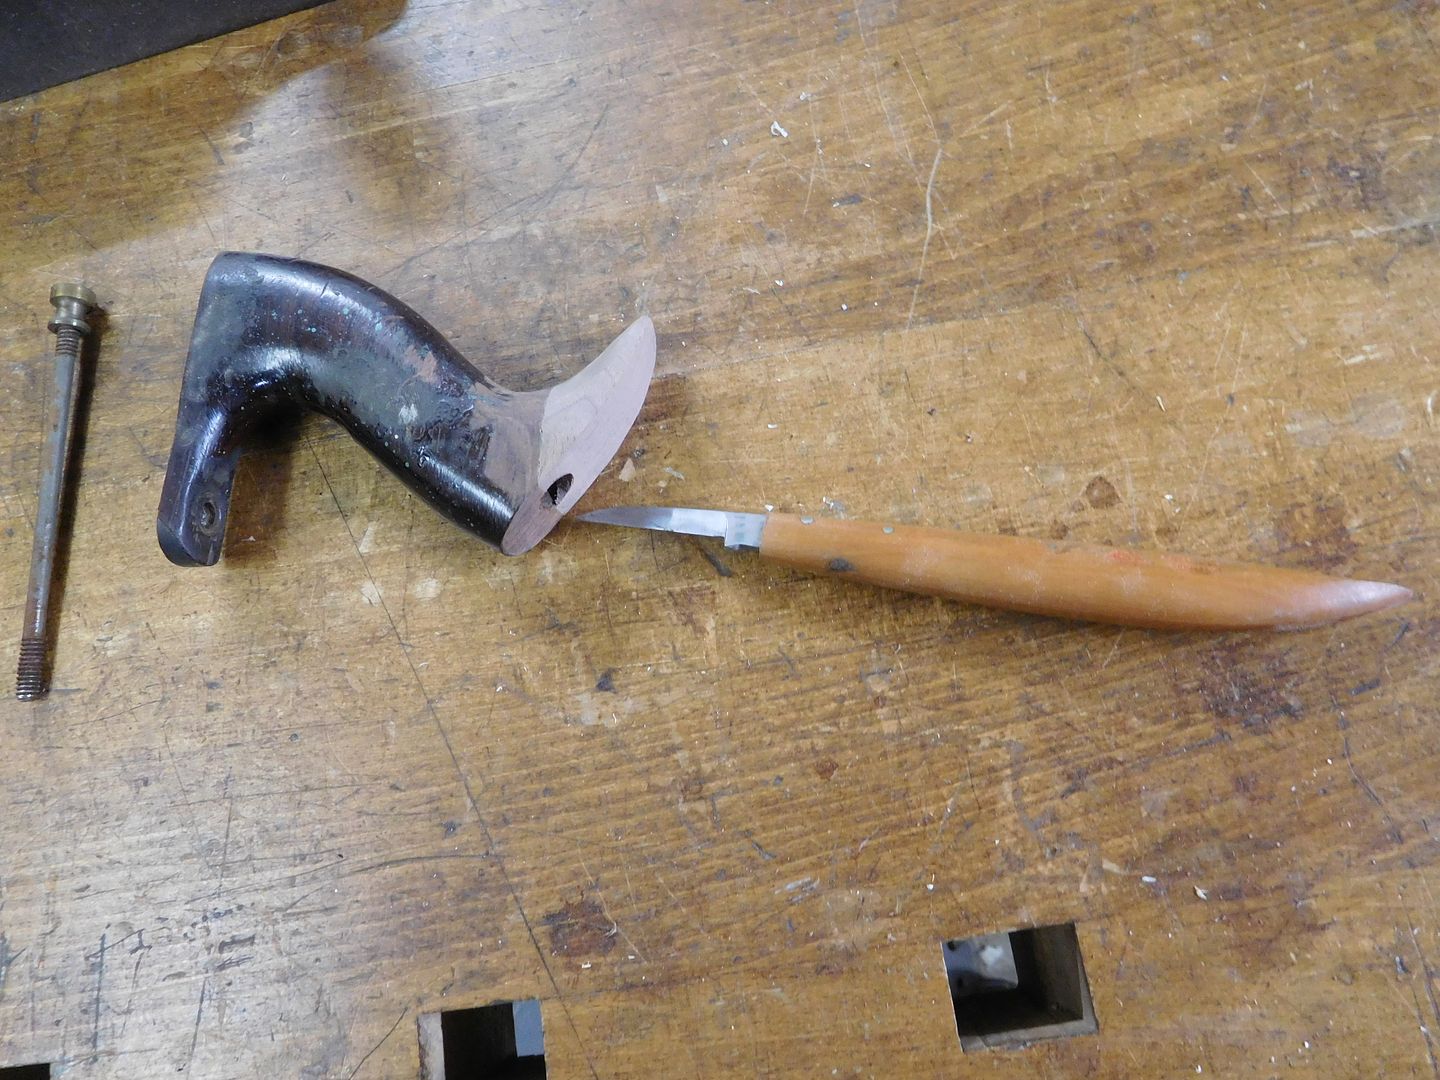
And here is the test fit. Note the splotches of green paint.

From the top.

Most of these vintage totes are found with their original shellac finish. I stripped this one down with sandpaper. It removed the finish along with the green paint drops and dirt. Now the new finish will look better. After sanding, I wiped it down with turpentine. It is pictured along with another tote that got a repaired foot.
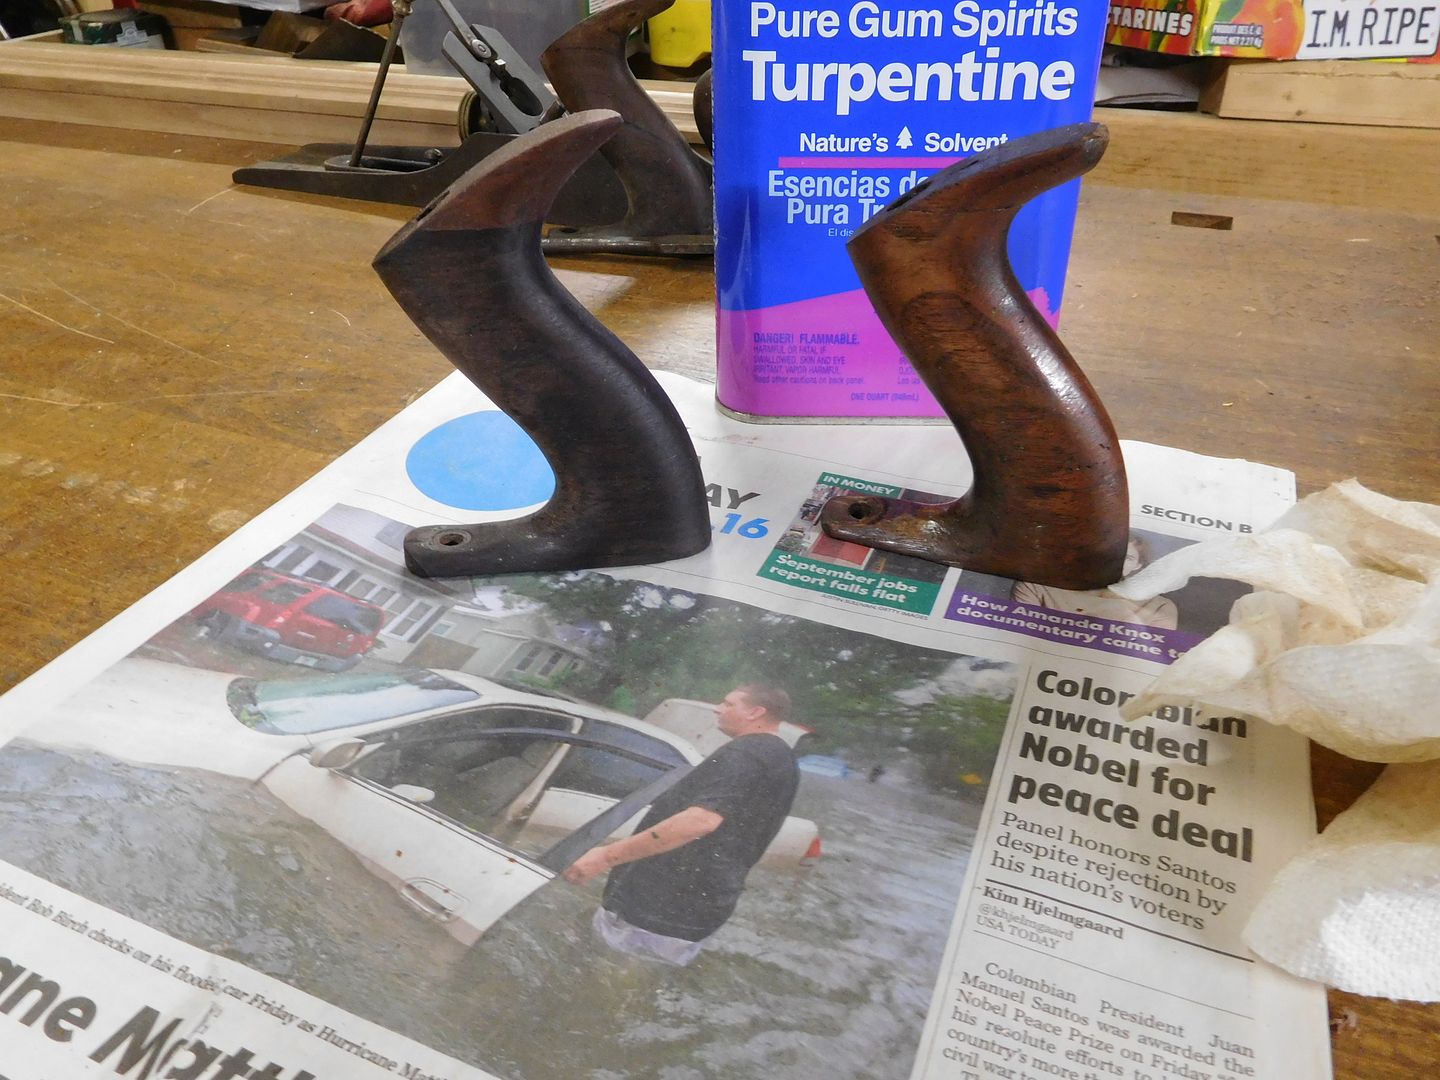
Here are the three of them together. Far right is the good pattern tote. Center is the repaired foot. Left is the repaired horn. Next step is to put some stain on the repair so t will blend in better. Once the turps dries I will give them both a shot of rattle can poly semi gloss.
You can clearly see the restored part of the tote. I am always amazed when I see these repairs because the missing horn is always much larger than I imagined. As I said before, it really makes a difference when you use the plane. If you have missing horns, replace them. You will enjoy using the repaired plane.
Well I got lunch but no nap. The workshop was calling and the basketball tourney is on at 4. I had to go back to work. I made one more small cut on the underside with the bandsaw. Here is what we were left with.
This is a job for the oscillating spindle sander. #80 grit.
Looking good.
Done. I like to have a pattern tote nearby to compare it to while I am sanding. This little horn repair came out pretty well.
Now we need to drill the tote rod hole. It is nice to have part of the old hole there as a reference.
Do you have a chip carving knife? If not, you need one. I drilled the hole slightly undersized so I could finish it by hand. The chip carving knife is perfect for this job.
And here is the test fit. Note the splotches of green paint.
From the top.
Most of these vintage totes are found with their original shellac finish. I stripped this one down with sandpaper. It removed the finish along with the green paint drops and dirt. Now the new finish will look better. After sanding, I wiped it down with turpentine. It is pictured along with another tote that got a repaired foot.
Here are the three of them together. Far right is the good pattern tote. Center is the repaired foot. Left is the repaired horn. Next step is to put some stain on the repair so t will blend in better. Once the turps dries I will give them both a shot of rattle can poly semi gloss.
You can clearly see the restored part of the tote. I am always amazed when I see these repairs because the missing horn is always much larger than I imagined. As I said before, it really makes a difference when you use the plane. If you have missing horns, replace them. You will enjoy using the repaired plane.
Last edited:
CRSINMICH
Well-known member
jim: I just looked at it more closely. It was definitely two separate pieces spliced together and each piece was machined to within an inch of it's life, or rather, to within a thousandths of an inch. I did say that I bought it from a machinist.
I enjoyed the tutorial on repairing the horn. I've never done it myself so it's good to see how to approach it. Just in case.
Sorry you missed your nap. Mine was only one hour long. I highly recommend afternoon naps.
EZ: White epoxy is a great idea. The split creates a bulge that fits my hand well. If I don't get it to close I'll give that a try and I'll have another conversation piece.
Last edited:
Spent today with my porcelain tile, 320 grit sandpaper and some music. halfway through the day had to move from the stainless bench to the one closer to the fireplace. Been lapping this 'no 33' HF plane off and on all day.Here is a proposal for some really inexpensive plane knowledge...Go to HF and get one of their handplanes. For $15 you will receive a #3 size plane. Here is mine alongside a Stanley Bedrock #603.

Forgot to get a photo before I started, but this was not too long after starting maybe 10 mins in.

Each photo from here was between sheets, give or take or food/drink breaks.


And this is after 5 sheets, got the start of a real nice mirror finish on a lot of it. How much more would you do from here? The remaining grooves are still pretty deep but I think with another 3-4 sheets I'll have the valleys mostly smooth and they will probably be mostly lines.

OP
jimreed2160
Well-known member
Cheechi--Great work on the sole. Looks done to me. A shallow hollow in the center of the sole will not affect its use but may make it ever so easier to push. Good luck with the blade. You should be pulling wispy shavings soon.
mefast
Well-known member
While we're back on the topic of bench planes, Lee Valley called yesterday afternoon and said my book had arrived:
View media item 69092
After reading the first few pages last night, I was inspired to start restoring my No. 5:
View media item 69097
Since this plane is the first one I'll be using to clean up some rough cut lumber I bought recently, it made the most sense to start getting it in tip top shape first.
I quite like the Sweetheart logo on it:
View media item 69096
Hopefully I'll be able to post an 'after' photo before too long to show how the rust removal went.
I only got the plane disassembled and hand scrubbed with dish soap for tonight:
View media item 69095
The plan is to use Evapo Rust to get rid of the majority of the rust, prep and paint, then true up the sole and side before finally getting the blade cambered, sharpened and adjusted. At the rate that I've been going at things lately, it will be Christmas before this plane is back together.
CRSINMICH
Well-known member
mefast: Good luck on the restoration. Those Sweetheart logos are cool. If the black coating on the bed isn't in bad shape you might want to leave it on. It's probably japanning and not paint. I know I've recommended Paul Seller's You Tube videos before but he has two good ones on restoring hand planes.
OP
jimreed2160
Well-known member
Mefast--I am pretty sure your plane is a type 12. Those were made from 1919-1924. The SW logo was used from 1920-1934. Assuming everything is original to the plane, it was made sometime between 1920 and 1924. Woodrow Wilson was president then and the Stanley Tool Works was cranking out some of its highest quality handplanes. Type 12s are prized by collectors and users alike. So you have a plane with an outstanding vintage that seems to be in pretty good shape. Good luck with your rehab. I am sure you can have it making shavings quickly.
CRSINMICH
Well-known member
mefast & jim: I knew that the sweetheart logo was only used for a few years and that even in that short time there were variations so I went looking. I found this site that shows many Stanley logos in general and sweethearts specifically. mefast, I think this 1922 Canadian Sweetheart logo must be the one on your plane. Here's a link to the site: https://virginiatoolworks.com/2015/02/16/stanley-trademark-stamps/
Attachments

ez-duzit
Well-known member
CR--thanks for the link.
madison069
Well-known member
Went to a garage sale and found this Craftsman 4CBB plane, it was in good shape but unfortunately it has a crack in the bed/sled and I'm not sure if it's still usable. What is the verdict of the population of this thread? If it's not usable as it, what other brand/style can I use the good parts on? He wanted $5 but when I showed him the crack he said take it since I bought all of his fishing lures.
Attachments


ez-duzit
Well-known member
Good for the parts only.
CRSINMICH
Well-known member
Went to a garage sale and found this Craftsman 4CBB plane, it was in good shape but unfortunately it has a crack in the bed/sled and I'm not sure if it's still usable. What is the verdict of the population of this thread? If it's not usable as it, what other brand/style can I use the good parts on? He wanted $5 but when I showed him the crack he said take it since I bought all of his fishing lures.
Madison: The crack could be repaired but it's probably not worth the effort unless you do brazing. The parts could probably be sold. Just like the Stanley logos in my post above, Craftsman logos changed over the years too. The logo on the lever cap could likely be used to date the plane. There probably is a collector somewhere who's been looking for one like that.
Last edited:
OP
jimreed2160
Well-known member
Madison--The key to value is on the buy. According to that rule, you win. The remaining parts look like they are in good shape. I think the plane was made by Miller Falls. The MF and Craftsman branded planes are common so just find one for a donor sole.
madison069
Well-known member
The logo puts it in the 30's era, that much I know.
One of the reason I wanted it cause I knew it's a Miller but I'm not certain if I swapped it for a Miller or will I need to find the specific Craftsman model for the base to put it back in use.
One of the reason I wanted it cause I knew it's a Miller but I'm not certain if I swapped it for a Miller or will I need to find the specific Craftsman model for the base to put it back in use.
madison069
Well-known member
Thanks Jim, I guess I'm on the hunt for a Miller /Craftsman size 4 plane. Being a newbie, is there different styles of number 4 or is that the standard style when I say number 4. I'm thinking of possible different angles or something that won't allow the parts fit when I swap it all over.
OP
jimreed2160
Well-known member
Totes continued
It is a pretty day here so I cranked up the spray booth.

First coat.

Drying on the table o' vises.

The repairs blend pretty well. Should look great sitting on the workshelf.

I have a few dozen totes that need horns. It might be more efficient to do them in a batch.
It is a pretty day here so I cranked up the spray booth.
First coat.
Drying on the table o' vises.
The repairs blend pretty well. Should look great sitting on the workshelf.
I have a few dozen totes that need horns. It might be more efficient to do them in a batch.
madison069
Well-known member
OP
jimreed2160
Well-known member
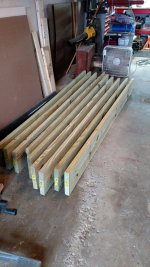
Totes look good, I'm jealous of the weather you have though. I'm drying out my PT wood that I left on the back porch last night. It snowed and the snow covered the boards even though it was on the porch.
I thought the spray booth picture might be welcome eye candy for those GJ'ers in the northeast. Downside is that I just got in from cutting the grass.
I am not an expert on the MF planes since I have had only a few. From what I have seen, the parts did not change a lot. My original go to jointer was a #7 sized Craftsman. Like a girlfriend from the wrong side of the tracks, I kept it out of sight. But I worked it pretty hard. It was a good plane.
CRSINMICH
Well-known member
madison069
Well-known member
Cousin of mine wants to start buying planes and was wondering what would be the right one to start with? His goal is to plane table top flat after joining boards together. Any suggestions?
madison069
Well-known member
Nevermind, he decided on a number 5 Stanley since he found a deal for it a block plane, sharpen stone and a jig for $89 on amazon
Here is a good link with graphs to show equivalent planes for manufacturers as well as info for dating planes. Link is for Sargent's but have other brands like Miller's falls and Craftsman.
http://www.timetestedtools.net/2016/01/31/sargent-plane-sizes/
Sent from my Pixel XL using Tapatalk
http://www.timetestedtools.net/2016/01/31/sargent-plane-sizes/
Sent from my Pixel XL using Tapatalk
OP
jimreed2160
Well-known member
Spokeshave rehab
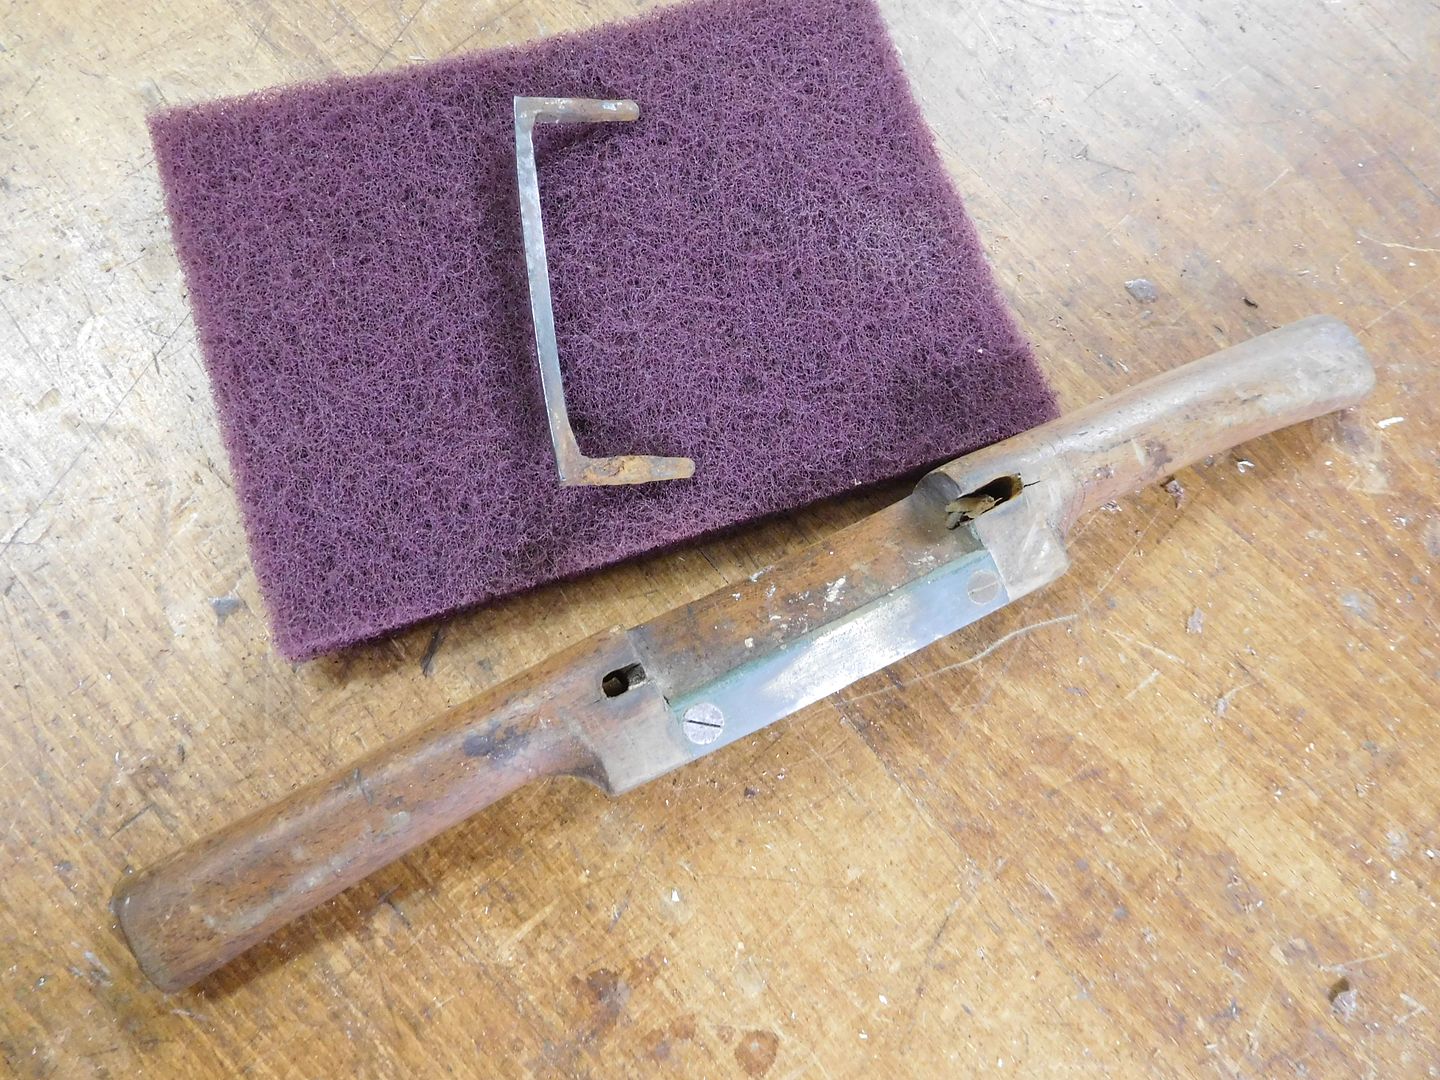
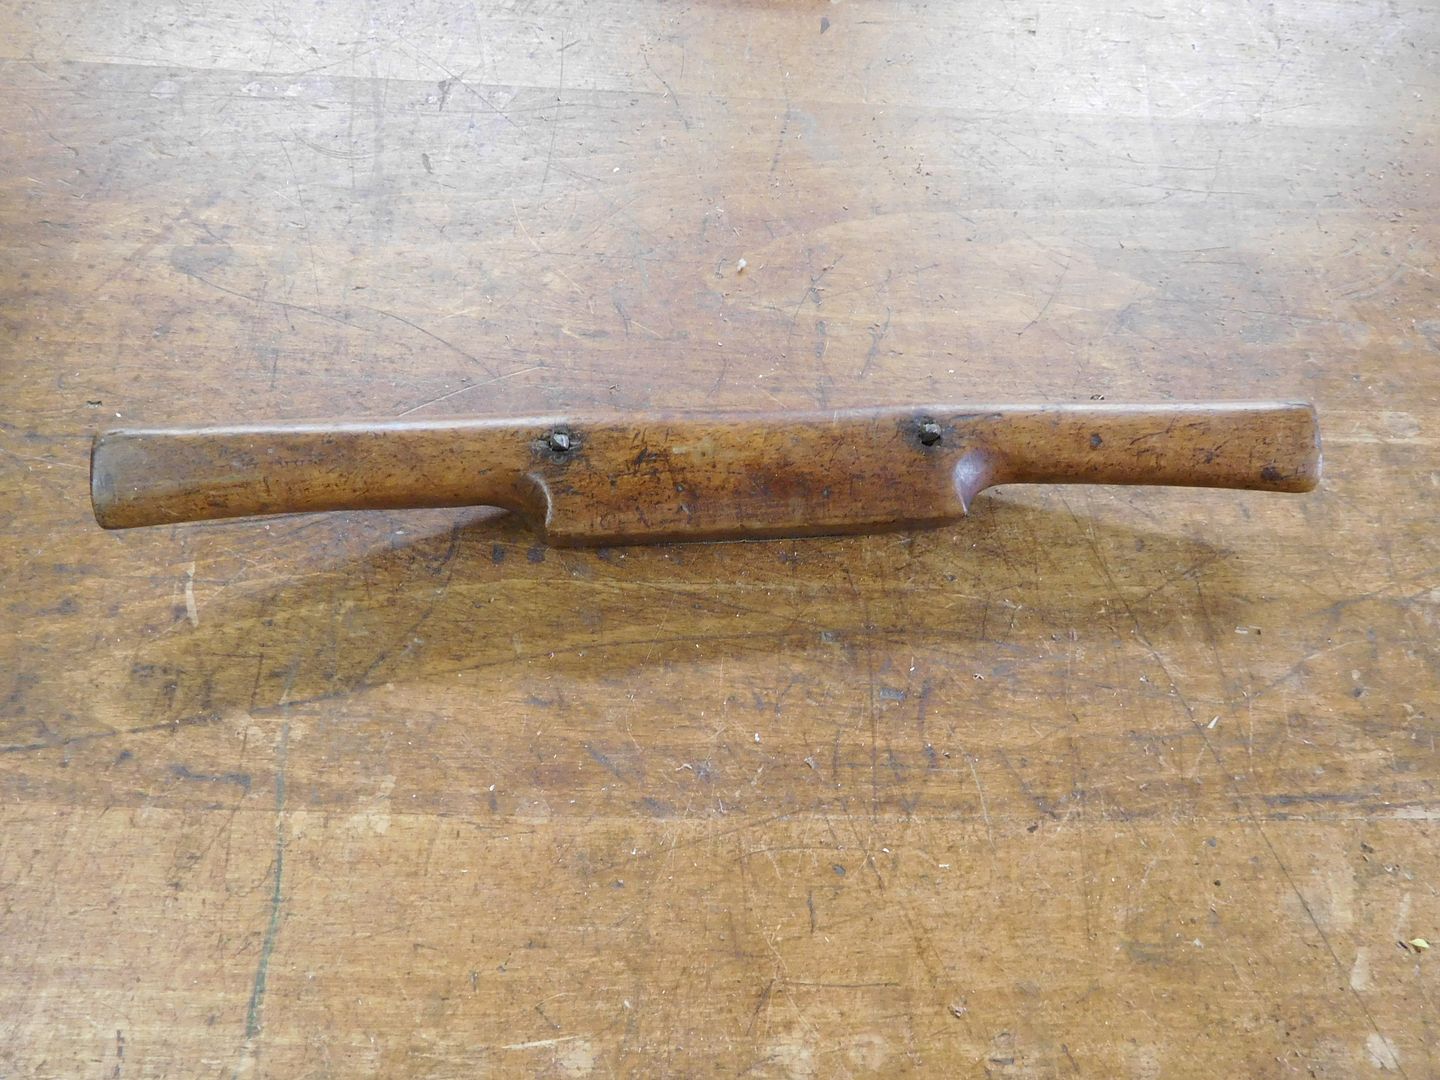
A pair of spokeshaves arrived on my doorstep this week. Here is the first sad one.
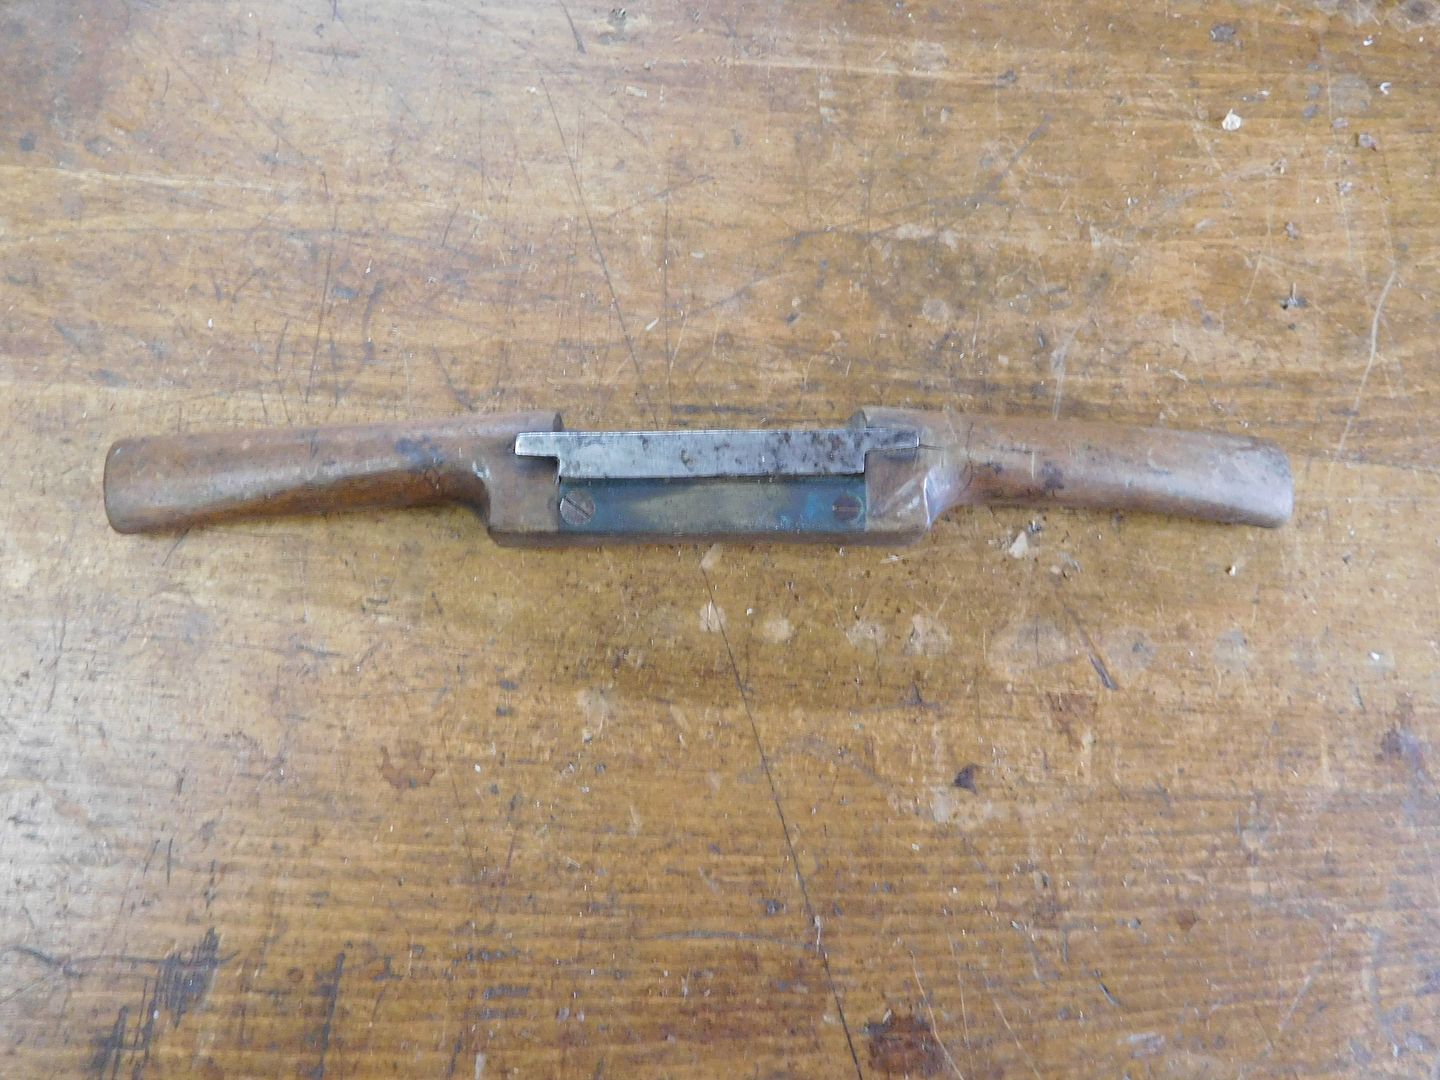
Dirty and dull--just what I like. The first challenge is to get the corroded blade out of the handle. I think I will use a nail punch.
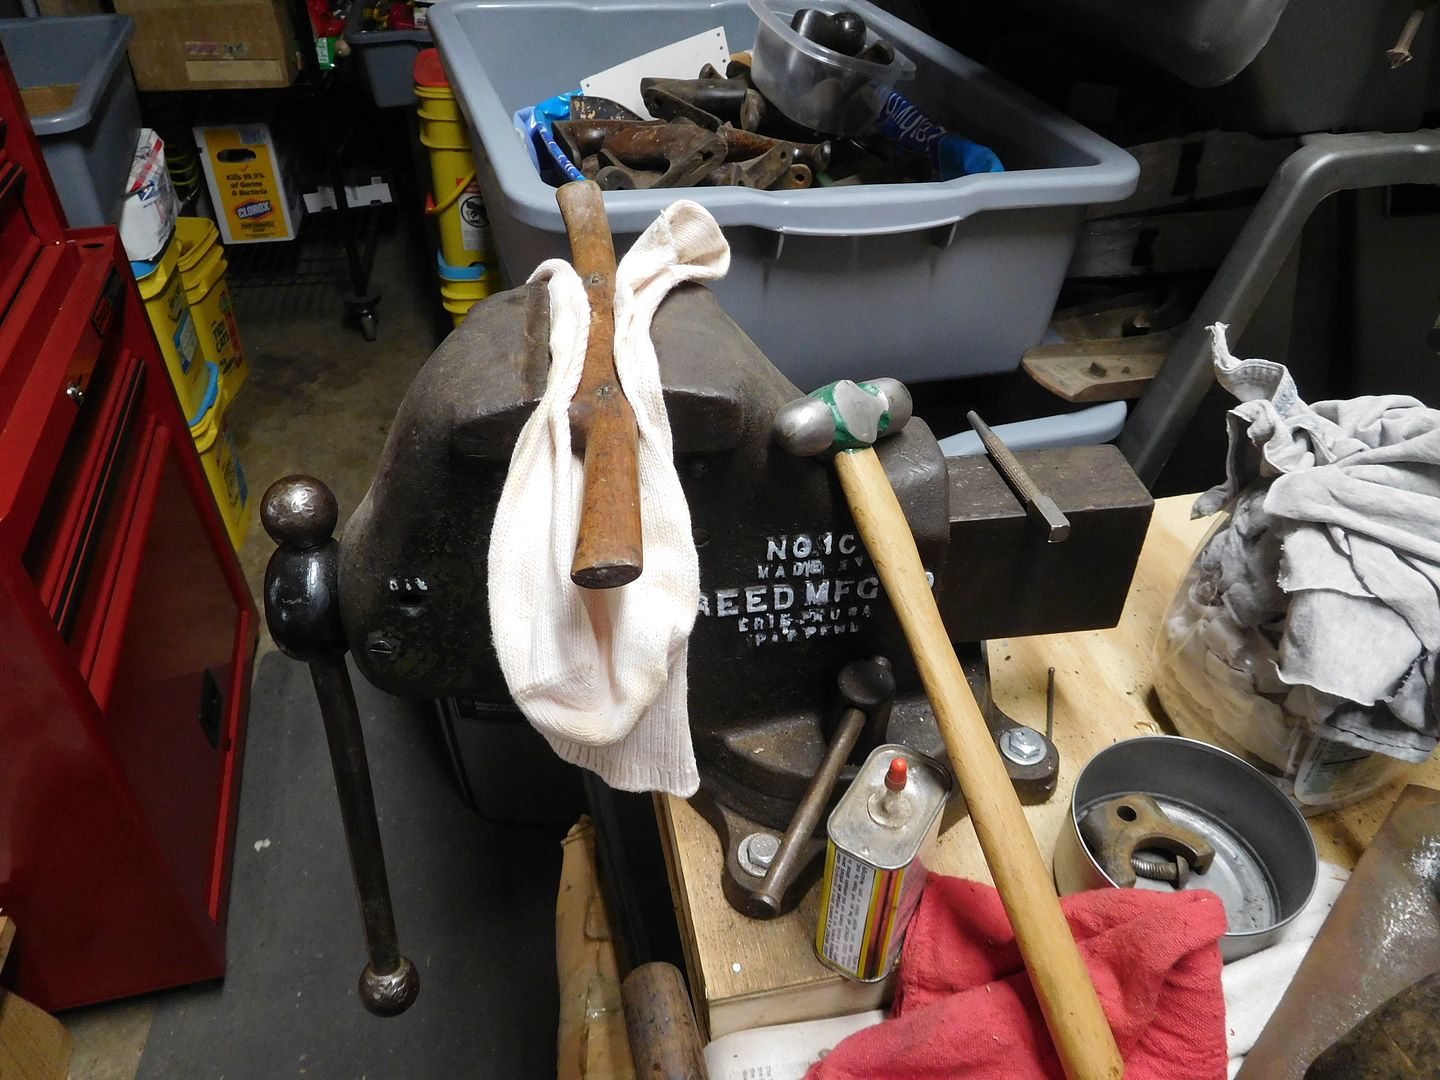
The blade was reluctant to move but I can be very persuasive with a ball pein hammer. Next step is to clean everything up.
I started by honing the bevel of the blade.
And then the flat side.

The blade sharpened pretty easily.
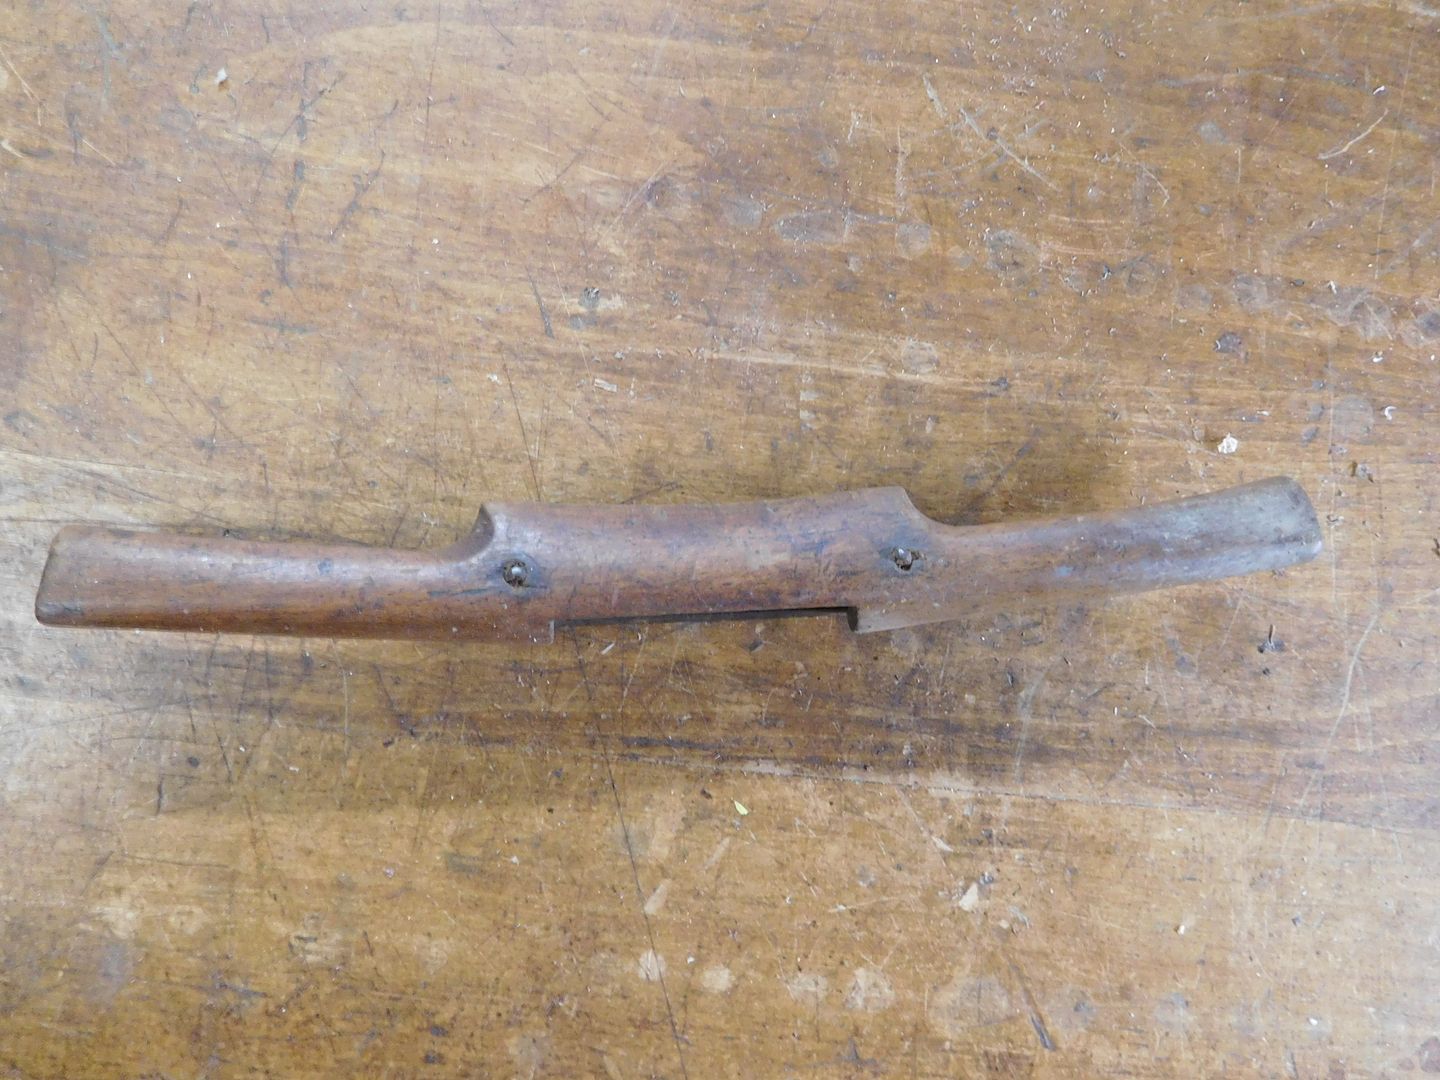
I cleaned and waxed the handle. It is maple or beech.
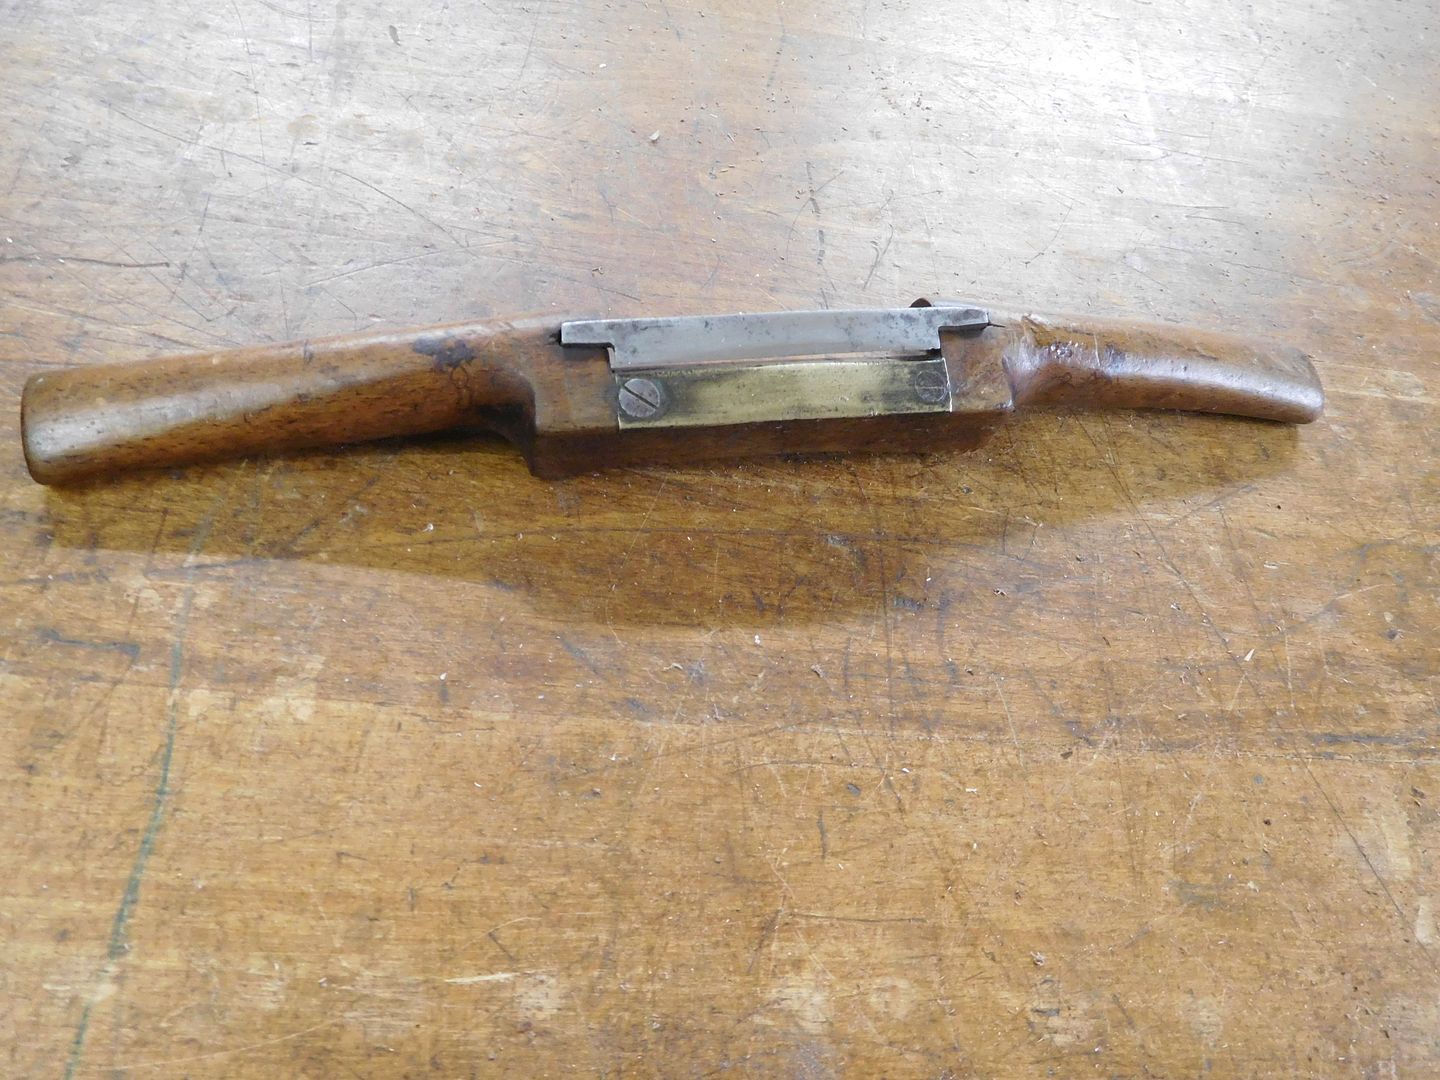
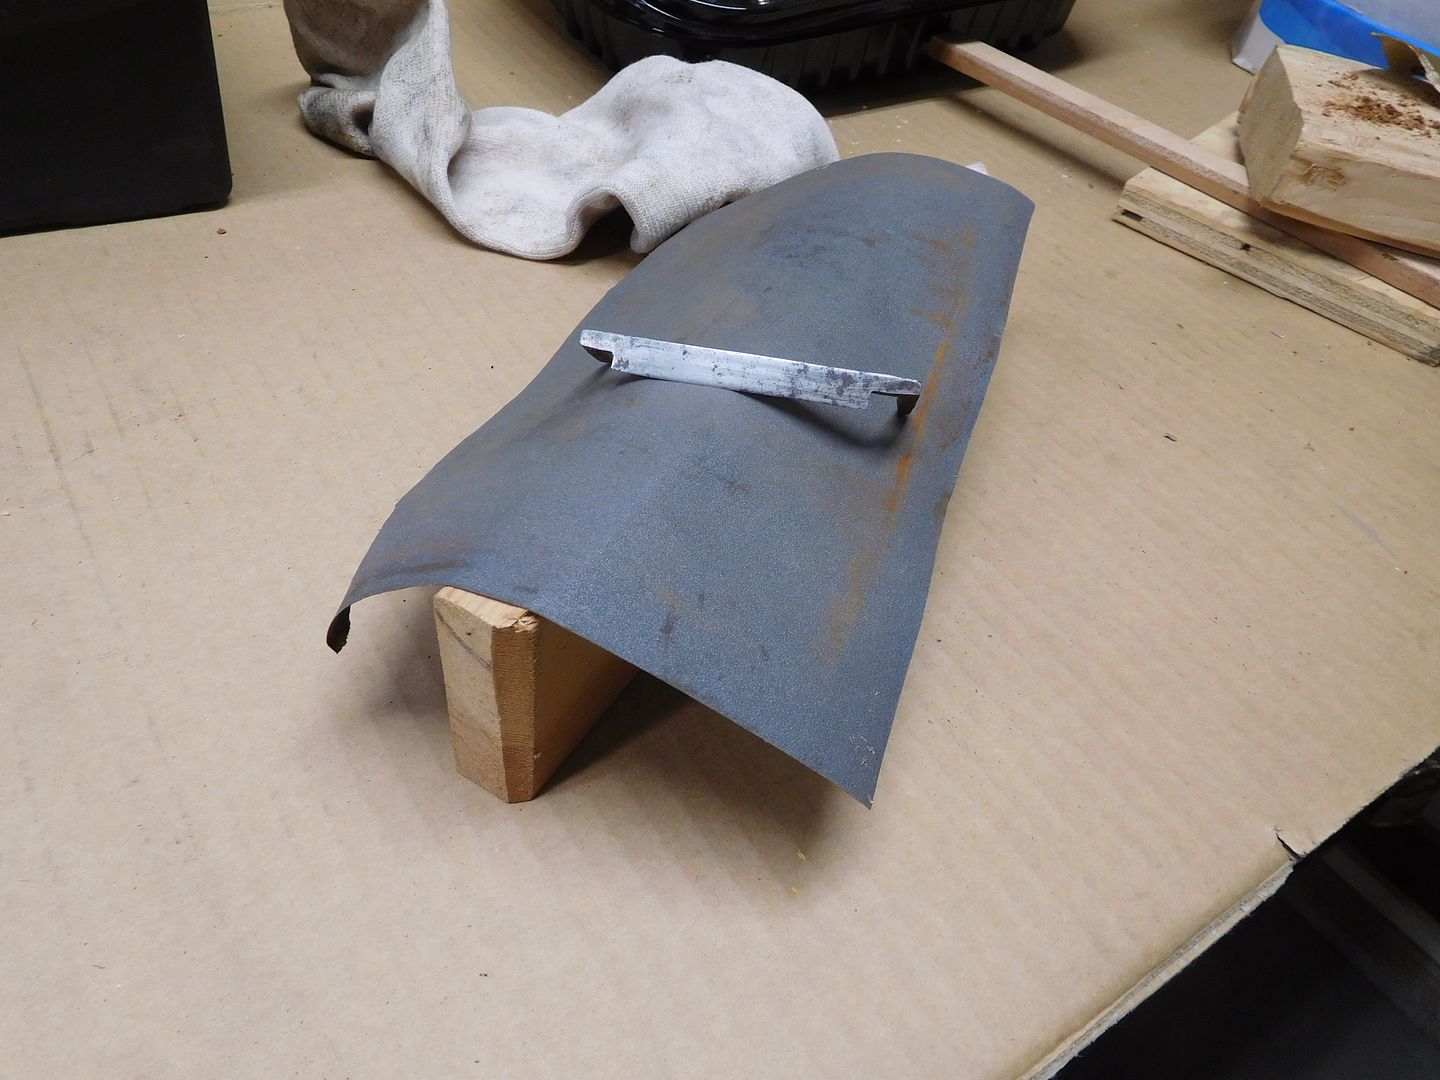
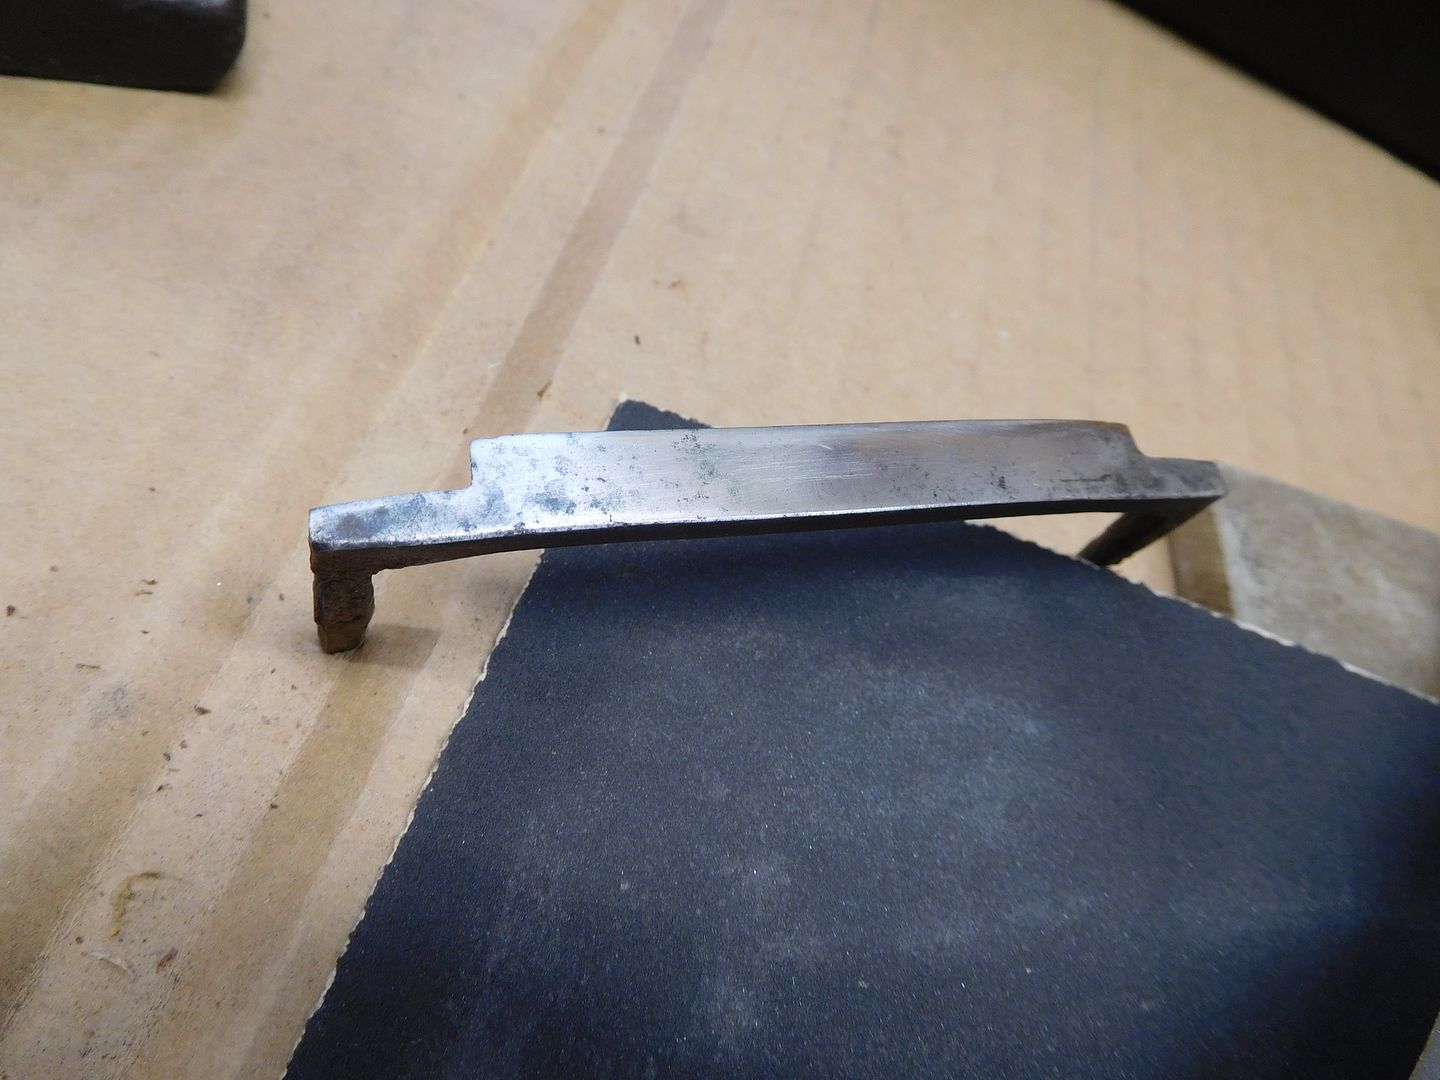
The important thing about a spokeshave it this little nubbin of the blade tip.

It is easy to adjust the blade when using a spokeshave. Just hold one end of it and rap the blade nubbin on a hard surface. That makes the blade advance. Rap the bottom to make the blade retreat. Do this on both sides to get the blade right. I like to set up my blade to be aggressive on one side and tight on the other end. That way I can move the contact point of the blade from one side to the other and vary the cutting aggressiveness.
Spokeshaves are like a drawknife "mini-me". They work the same but the spokeshave has a more controlled shaving. This one works well.
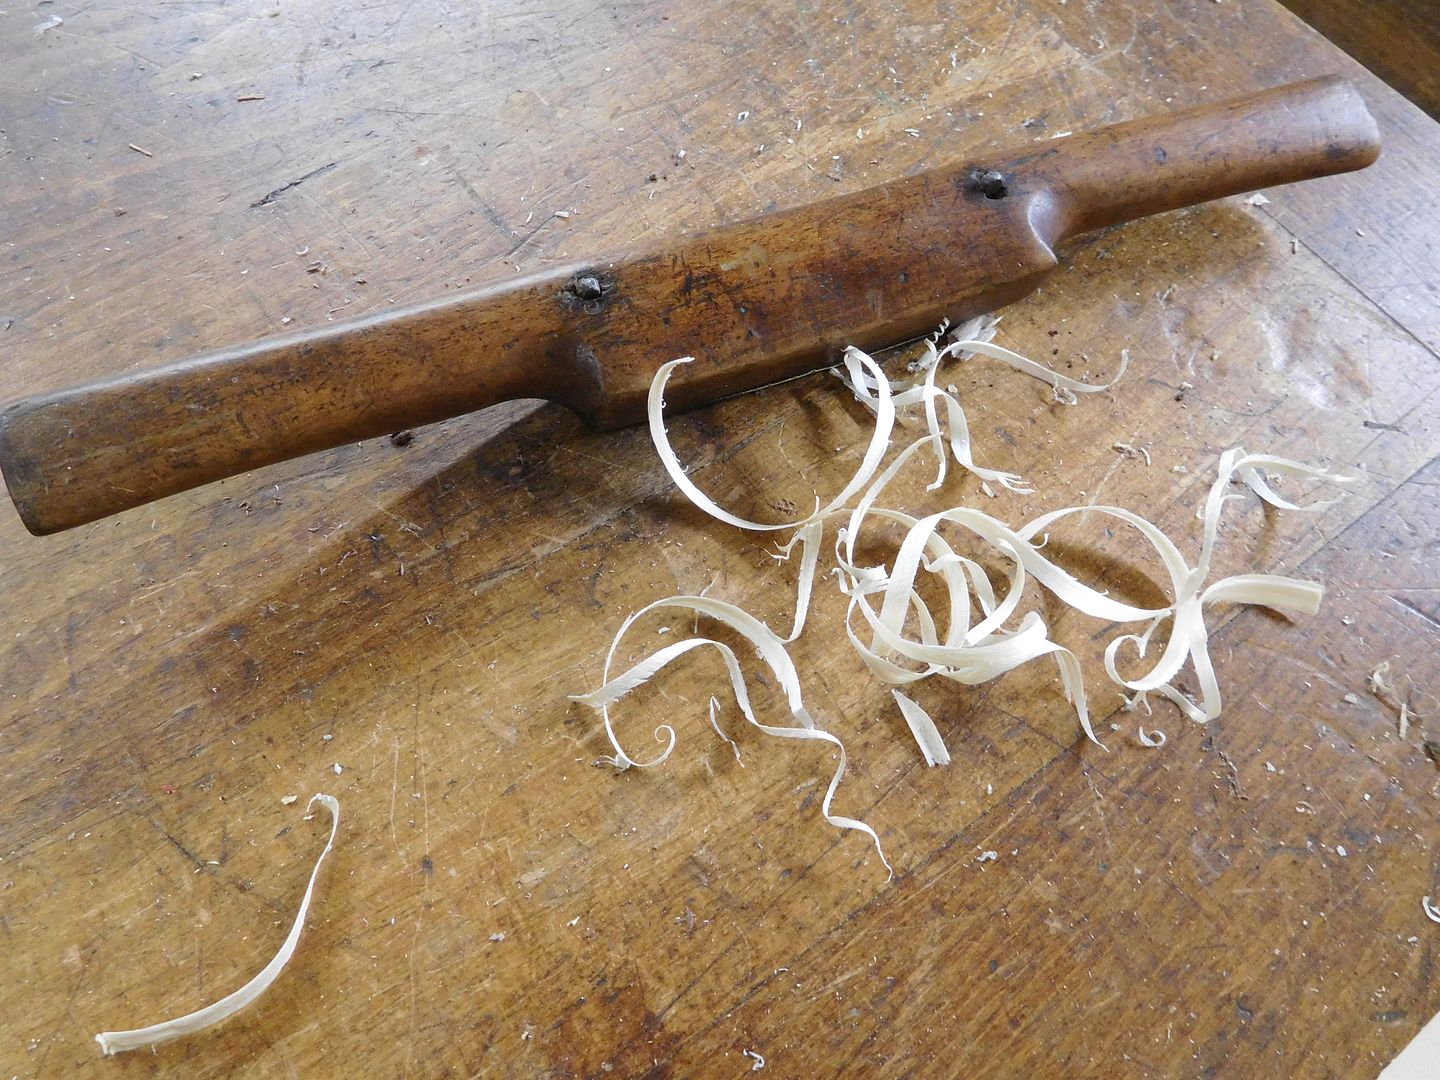
Here is the rounded edge that I was working on.

And now his little brother also wants the spa treatment.

If you find these in the wild, look for brass wear plates and a blade that is straight across. Many wooden spokeshaves are chewed up or ravaged over time. It can be hard to rehab those that are too far gone.
A pair of spokeshaves arrived on my doorstep this week. Here is the first sad one.
Dirty and dull--just what I like. The first challenge is to get the corroded blade out of the handle. I think I will use a nail punch.
The blade was reluctant to move but I can be very persuasive with a ball pein hammer. Next step is to clean everything up.
I started by honing the bevel of the blade.
And then the flat side.
The blade sharpened pretty easily.
I cleaned and waxed the handle. It is maple or beech.
The important thing about a spokeshave it this little nubbin of the blade tip.
It is easy to adjust the blade when using a spokeshave. Just hold one end of it and rap the blade nubbin on a hard surface. That makes the blade advance. Rap the bottom to make the blade retreat. Do this on both sides to get the blade right. I like to set up my blade to be aggressive on one side and tight on the other end. That way I can move the contact point of the blade from one side to the other and vary the cutting aggressiveness.
Spokeshaves are like a drawknife "mini-me". They work the same but the spokeshave has a more controlled shaving. This one works well.
Here is the rounded edge that I was working on.
And now his little brother also wants the spa treatment.
If you find these in the wild, look for brass wear plates and a blade that is straight across. Many wooden spokeshaves are chewed up or ravaged over time. It can be hard to rehab those that are too far gone.
ez-duzit
Well-known member
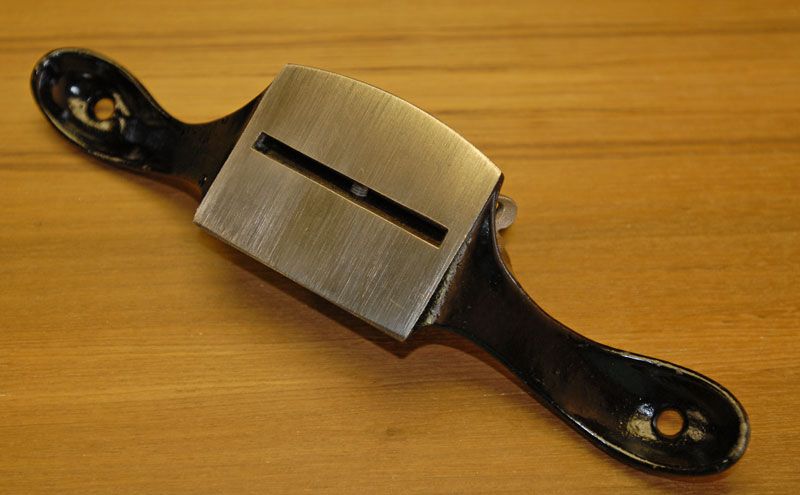
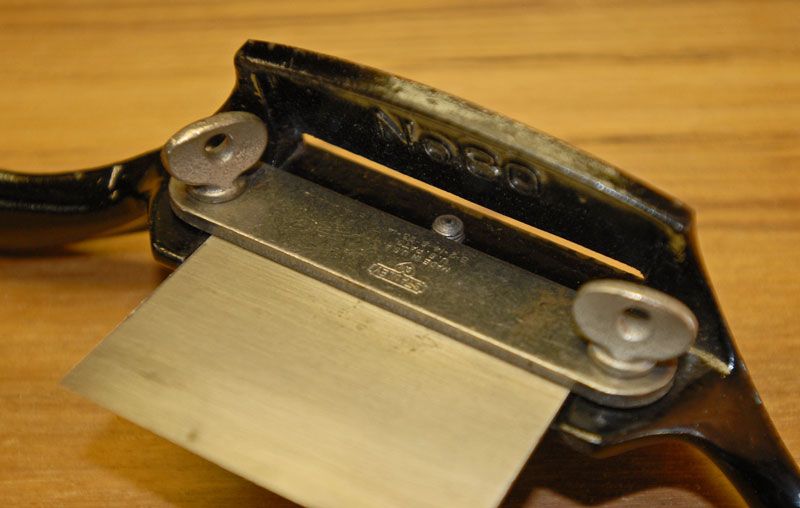
Found a brand new (unused) Stanley #80 SW Sweetheart to supplement my Lie Nielsen scraper planes. Still has a perfect, original burr on the blade. I could tell from the sellers photos that it was in nice condition, but was surprised to find that it was unused.

OP
jimreed2160
Well-known member
EZ--Good score on the #80 scraper. I hear they perform really well. Yours looks like it was made just yesterday. 