To avoid these ads, REGISTER NOW!

Woodworking 101--Tools and Tips

OP
J

jimreed2160

Well-known member
Joined
Aug 7, 2016
Messages
3,589
Location
Tallahassee FL
Thanks Knyte for sharing your experience with Titebond III. It is surely my favorite. You are a real volume user. Some of us don't use it as quickly. Back when I had a day job, it was hard to keep up with things and sometimes my glue would go bad from age. I started writing the purchase date in sharpie on the bottle. Then I could refresh my glue every two or three years.
 
To avoid these ads, REGISTER NOW!

Karvette

New member
Joined
Oct 10, 2015
Messages
2
Location
North East, Maryland
I came across this thread about a week ago. I have just completed reading all 1166 post.

Thanks to all who have shared their knowledge over the past couple of months. I will continue to follow this thread, and look forward to a long life of this thread.

Karl
 
OP
J

jimreed2160

Well-known member
Joined
Aug 7, 2016
Messages
3,589
Location
Tallahassee FL
Karvette, and other new readers, welcome aboard.

Fixing a Japanese chisel
At one time my wife and I had four cats. All were rejected rescues. Just like most of the tools I pick up. The previous owner gave up on this new set of four Japanese chisels when he chipped the blade on the largest. Ouch! Believe it or not, edge chips are common in new chisels. My theory is micro fractures from heat treating and/or factory sharpening. Usually these flaws are limited to a small area and can be eliminated by sharpening. So don't be dismayed when your brand spanking new chisel develops a big dinger. Just hone up on your sharpening skills (see what I did there?). :bounce:

It is a wide chisel and the defect is in the middle of the blade.

DSCN1673.jpg


It looks worse from the back.

DSCN1674.jpg


We know from previous posts how to begin and that hurts a bit. Yes, we have to grind off the edge (OUCH!) at a right angle and then restore the bevel. Since this is a Japanese chisel, we also have to taper-flatten the back of the chisel.

To flatten out the edge and remove the defect, I used a Norton white stone and just jabbed the chisel in there freehand. It took three stabs and three water dunks. For the bevel, I used a fine pink stone and ground free hand again. I was also generous with the dunking. I keep a Cool Whip tub on the grinder stand and it is filled with cold water.

Some of you may feel a bit queasy about grinding a Japanese chisel free hand on a high speed grinder. I did at first also. But I have lots of experience from my blademaking days. I have ground thousands of plane blades and have developed a good touch over the years.

Here is the edge after grinding past the defect.

DSCN1675.jpg


Here is the back.

DSCN1677.jpg


It takes while to restore the bevel. I do that freehand with frequent dunks. And then it is on to the sharpening stand and sandpaper. A few minutes on the paper yields a flat back.

DSCN1681.jpg


And a few swipes yields a nice and sharp bevel.

DSCN1680.jpg


The proof is in how it works. These little curlies say it is good.

DSCN1683.jpg


I know some people swear by their Waterstones and I have seen really good results with Waterstones. But they are a little slow for me. YMMV
 
Last edited:
OP
J

jimreed2160

Well-known member
Joined
Aug 7, 2016
Messages
3,589
Location
Tallahassee FL
New project

I pulled this plane out of the closet today. It seems like a good candidate for a restore.

DSCN1661.jpg


This is a Stanley #50 Miller 1882 patent plane that was reproduced about 20 years ago by Paul Hamler. I corresponded with Paul when he was making these planes and made several sets of blades for them. He had no interest in the blades and I thought it would be a shame to have such a wonderful plane without a blade set for it.

I purchased this one from him as a kit and finished it out years ago. Then I kept selling the blade set that was with it. Now I need to put some finish on that knob and fix up a set of blades to keep with this plane.

Here is the blade set. They just need final grinding and sharpening.

DSCN1662.jpg


Not much is known about these original planes as very few were made. We both speculated about the blade set and decided that the set was probably what was with the more common Miller plows. I added the 1" blade as a whimsy because I thought it was cool. That seating groove on the bottom was not an easy machining task.

DSCN1663.jpg


He added lots of detail on his castings. Looks like I need to clean out some casting sand from the handle.

DSCN1664.jpg


DSCN1665.jpg


Silicon bronze and a real beauty.

DSCN1666.jpg


I did some redneck engineering and managed to fasten the cocobolo knob in my pen mandrill.

DSCN1667.jpg


I feathered it with some very fine sandpaper and then finished it off with a scotchbrite pad.

DSCN1668.jpg


Using my pen supplies to make it shine.

DSCN1669.jpg


Here is what it looks like after spinning wax on it.

DSCN1670.jpg


After polishing the wax.

DSCN1671.jpg


Now it is looking better.

DSCN1672.jpg


Time to get working on those blades.
 
OP
J

jimreed2160

Well-known member
Joined
Aug 7, 2016
Messages
3,589
Location
Tallahassee FL
Greaves chisel

My hope is that more tools leave the shop than enter. Some weeks that is true but tools do seem to slip in anyway. Here is a nice chisel that I found for $3. It is not what it seems.

DSCN1684.jpg


It is marked "Sheaf Works" and "Wm Greaves & Sons", "Cast Steel".

DSCN1685.jpg


DSCN1686.jpg


Greaves was a well known steelmaker and toolmaker in Sheffield. He began making tools in 1775 and later opened the Sheaf iron works alongside the newly dug canal. The name "& Sons" was added in 1821. The company went out of business in 1850 due to deaths of the principals and the trademarks were sold to Thomas Turton & Sons.

So it is difficult to date this chisel. I am guessing 1875-1900 but it could have been made earlier. Anyway, it first looked like a file that was made into a chisel. I have had good luck with 19th century UK chisels marked "Cast Steel". Most were made of high quality steel and make good user chisels. I planned to regrind the tip and add it to the random chisel pile.

When the chisel arrived, however, I made a discovery. Closer inspection revealed that it is a skew chisel made for turning. The replacement handle made it imitate something entirely different. Here it is alongside my user skew.

DSCN1687.jpg


Here is a close up of the edge profile of both.

DSCN1688.jpg


So it seems to have begun life as a turning chisel and somehow got separated from its handle. Then a previous owner stuck the tang into a spare handle and put it to work.

I needed a smaller skew for turning and this one just fits the bill. A few swipes on the paper and that edge is ready for cutting. I will use it a bit to see if I need to turn a longer handle for it. Maybe I can use it to turn its own handle. That would be cool.

So this one turned out to be a diamond in the rough. :thumbup:
 
OP
J

jimreed2160

Well-known member
Joined
Aug 7, 2016
Messages
3,589
Location
Tallahassee FL
Mystery box arrives

The mailman dropped this on my doorstep yesterday.

DSCN1689.jpg


It is pretty heavy.

Good news! The seller packed everything well.

DSCN1690.jpg


Mystery solved. The box contained three Stanley #45 planes. All are mostly complete and in good shape (no broken castings). The two more recent planes are missing their fence knobs, but, hey, I have a lathe.

DSCN1692.jpg


The older one, however, is a real prize. Check it out. It lacks the blade adjuster and it has brass screws. And just lookit the fence--full floral!

DSCN1693.jpg


DSCN1694.jpg


The blade looks user made. It is an odd size--29/64--just a tad over 7/16. And it has relief grinding on the sides--probably 15-20 degrees. Old timers did that to keep the blade from binding in grooves.

Stanley introduced the #45 combination plane in 1884. It was a popular seller and they improved it quite a bit. The fence makes this a Type II and dates its manufacture to 1886-1887. These Type II planes are popular with collectors because of their decorative castings.

This plane deserves to get a make over. I will add it to the projects shelf.
 

Knyte Tyne

Well-known member
Joined
Apr 23, 2014
Messages
197
Location
Johannesburg South Africa
Its funny how we refer to something as becoming a "Lost Art"...

And yet if you look at those old planes compared to new age tools. Even Vintage tools and Machines... We have literally 'lost' the art ON our tools...

I think I now understand why certain tools become collectors pieces... its not all about WHAT they did... but also HOW they looked doing it. In our modern day of CNC and Laser Cutting, precision ground and Diamond tipped, 5 Axis and CAD aided, I think there is a lot of 'Art' that has been lost in many trades.
 

hunterguy86

Well-known member
Joined
Jan 22, 2012
Messages
168
Location
Central Texas
Mystery box arrives


The mailman dropped this on my doorstep yesterday.


DSCN1689.jpg


It is pretty heavy.


Good news! The seller packed everything well.


DSCN1690.jpg


Mystery solved. The box contained three Stanley #45 planes. All are mostly complete and in good shape (no broken castings). The two more recent planes are missing their fence knobs, but, hey, I have a lathe.


DSCN1692.jpg


The older one, however, is a real prize. Check it out. It lacks the blade adjuster and it has brass screws. And just lookit the fence--full floral!


DSCN1693.jpg


DSCN1694.jpg


The blade looks user made. It is an odd size--29/64--just a tad over 7/16. And it has relief grinding on the sides--probably 15-20 degrees. Old timers did that to keep the blade from binding in grooves.


Stanley introduced the #45 combination plane in 1884. It was a popular seller and they improved it quite a bit. The fence makes this a Type II and dates its manufacture to 1886-1887. These Type II planes are popular with collectors because of their decorative castings.


This plane deserves to get a make over. I will add it to the projects shelf.


Those 45's are sweet! I'd love to have a 45 or 55 one day.

I'm going to get a #4 1st. I've been using my #5 jack plane as a smoother because it's the smallest one I've got besides a block plane.


Sent from my iPhone using Tapatalk
 
OP
J

jimreed2160

Well-known member
Joined
Aug 7, 2016
Messages
3,589
Location
Tallahassee FL
Its funny how we refer to something as becoming a "Lost Art"...

And yet if you look at those old planes compared to new age tools. Even Vintage tools and Machines... We have literally 'lost' the art ON our tools...

I think I now understand why certain tools become collectors pieces... its not all about WHAT they did... but also HOW they looked doing it. In our modern day of CNC and Laser Cutting, precision ground and Diamond tipped, 5 Axis and CAD aided, I think there is a lot of 'Art' that has been lost in many trades.

How true! Many tools made from 1850--1875 were outstanding examples of embellishment. Lacking sophisticated mass media advertising, I guess the mfg had to make the tools "speak" for themselves.
 

cheechi

Well-known member
Joined
Feb 29, 2012
Messages
4,384
Location
Triad, NC
in those days you would kill to be a guy tasked with making castings like that. beats lifting heavy **** or working with disease-ridden everything else in the world, which was kind of your two other options.
 

kwoswalt99

Well-known member
Joined
Oct 24, 2015
Messages
701
Location
Detroit
in those days you would kill to be a guy tasked with making castings like that. beats lifting heavy **** or working with disease-ridden everything else in the world, which was kind of your two other options.

:headscrat Sure... only two other options...
 
OP
J

jimreed2160

Well-known member
Joined
Aug 7, 2016
Messages
3,589
Location
Tallahassee FL
Correction: Type 1 planes had the full length floral design, and didn't have Stanley, or 45 on them.

I might have been a little exuberant in my description of the casting. :willy_nil

Here is what Blanchard says in his type study:

Type I 1884-1885
The floral decoration runs the entire length of the outside of the fence.

Type II 1886-1887
Fence is marked on the outside ends of the fence Stanley 45. This marking is cast into the metal and flanks the floral decoration.

Type III 1888-1889
The vine decoration on the fence has been ground flat.

And thus the plane is a solid Type II and worthy of restoration. I like to restore them and leave natural patina but this one might have rusted way beyond that point. Either way, the first step is rust removal.
 

crguy

Well-known member
Joined
Jan 24, 2016
Messages
2,650
Location
SW Washington
I might have been a little exuberant in my description of the casting. :willy_nil

Here is what Blanchard says in his type study:

Type I 1884-1885
The floral decoration runs the entire length of the outside of the fence.

Type II 1886-1887
Fence is marked on the outside ends of the fence Stanley 45. This marking is cast into the metal and flanks the floral decoration.

I believe that's just what I said. :)

Also: Roger Smith & Dave Heckel did the type studies on Stanley 45s. Others just copied their work.
 
OP
J

jimreed2160

Well-known member
Joined
Aug 7, 2016
Messages
3,589
Location
Tallahassee FL
Infill plane knob--Finally!

If you have been enjoying the posts on this project, then God bless you. I was very happy to see it end. I had to send it back to rework because it failed its performance tests. That turned out to be good because I was able to fix a few other issues. One was the bright screws. I soaked them overnight in Diet Coke and got just a little gray. Then I soaked them in vinegar for a morning and they got more grey. Then I dipped the heads in salt paste to see if I could rush things along. I sure wish I had some tools made out of this screw steel. They did not want to rust much. Here is what I ended up with.

DSCN1702.jpg


At least they are not gleaming anymore. Back to the plane. When I removed the knob, I discovered a puddle of glue at the base. Apparently the first owner got it right when he used generous amounts of plaster of Paris. I decided to make a filler paste from sawdust. This was carefully harvested from the floor under my tablesaw.

DSCN1703.jpg


I felt like Mario Batali making pasta.

DSCN1704.jpg


Here it is after a trial fit. The paste was too dry so I added glue to the top of it.

DSCN1705.jpg


Here is the trouble spot.

DSCN1706.jpg


I packed more paste in the void and it ended up looking like this.

DSCN1707.jpg


After the glue dried overnight, I took it for a test drive on some walnut and things went GREAT!

DSCN1718.jpg


DSCN1719.jpg


Just look at how it has started taking those sawmarks out of the board.

DSCN1720.jpg


So I am declaring this project a success and will move the plane to inside storage. It feels good to get a proud old tool back onto its feet. This Scottish Mathieson infill is ready for another 130 years.
 
OP
J

jimreed2160

Well-known member
Joined
Aug 7, 2016
Messages
3,589
Location
Tallahassee FL
New project--workbench top

The project to upgrade my shop is in full swing and now I am back to the new workbench. Faithful readers will remember the dark corner over by the breaker box. I needed to keep that area open for obvious reasons but did improve it by cleaning up the mess and adding the Husky mobile workbench. The first problem was lighting, or rather, lack of. I solved that with a pair of lights from Costco. They are $19 fixtures that daisy chain. Now my tired eyes are happy.

DSCN1709.jpg


It is getting better but the workbench top still bothers me. It is thin and slick. The gaps between the top and the wall bother me. And things roll off the bench into nowhere. I need a larger top with an overhang. It needs to look substantial, feel good, and have a tall lip. It looks to me like woodworking time!

I make a few quick calculations and head out to HD. I brought back four nice 2x8s for the top. Since the garage interior is "space challenged" I decided to do my marking outside.

DSCN1713.jpg


The workbench top is 46" and I need four 55" pieces. That means that I need to rough cut these and leave some nice cutoffs for vise mounting.

The first thing to do is study each board. I picked through the stock at HD and found four of the best that were near the top. I was looking for fewer defects, straightness, and pleasing looking grain. But this is low grade #2 common construction lumber to begin with--that is why the boards were so inexpensive. Anyway, each one has a really good end and a not so good end. Once I find the good end, I mark for cutting. I have found over the years that witness marks help me from making mistakes.

DSCN1712.jpg


I marked the cut with a square and put an "X" on the waste piece. Some of the boards had defects that were easy to find.

DSCN1715.jpg


But where do I perform this lumber surgery? These are large and heavy boards. I really don't want to wrestle this stuff on my table saw. And my chop saw is not set up for something this big. This looks like a perfect job for my sawbench. I made this bench specifically for crosscutting long boards. Normally I use a handsaw but I can adapt. Saw benches were common tools of yore used by carpenters. The height is perfect for crosscutting. Just put the board on it, plop your big boot on it to hold it in place, and then saw away.

DSCN1710.jpg


My addition to the common sawbench was the "Board Bud". I was named a Jr at birth but my dad called me "Bud". My job as a carpentry assistant was to hold the offcuts to keep them from breaking off or binding the saw. Not having a "Bud" of my own, I had to improvise. My Bud certainly has less of the grumbling and back talk of his Bud. :lol_hitti

So the board is marked and positioned for a cut.

DSCN1714.jpg


After the setup, the cuts went well. I used my portable saw.

DSCN1717.jpg


Position the boards, make the cut, put in stack, rinse and repeat. Then I had to match the boards. Hey, if I am going to look at this top I want it pleasing to my eye. Some of these boards have pinkish red heartwood. I will use those at the rear. Here is the layout I like.

DSCN1721.jpg


This is just a utility surface but I think it will be a big improvement on the factory job. I need to joint the boards and glue them up. Then I need to apply the lip and attach the top to the base. Stay tuned for the build.
 

Blue Frog

Well-known member
Joined
Jun 22, 2014
Messages
363
Location
Lynn Haven, FL
Grandson #2 and his wife are expecting their first child in April. They're coming over today to lay out plans for the crib they want for the baby. I'll be posting pictures as we progress, just as Jim Reed has done in some of his posts. There are no firm plans available for this crib though it was adapted from another set of plans so we'll also give some step-by-step instructions. Wish me luck- this is the first piece I'll be making for a great-grandchild.

Here's the picture of the desired crib.


Blue Frog
 
OP
J

jimreed2160

Well-known member
Joined
Aug 7, 2016
Messages
3,589
Location
Tallahassee FL
Blue--That is an ambitious project--get out your big boy pants when you start. Good luck making shavings and be sure to post your progress shots. And BTW, congratulations on the great-grand. Looks like it will be born in the lap of love.
 
To avoid these ads, REGISTER NOW!

drivesitfar

Well-known member
Joined
Oct 23, 2013
Messages
36,006
Location
Pacific Northwest
JIM: best of luck with the work bench and love your saw horse's buddy. keep up your tutorials and love all the cool old tools you have and are showing us. also remember when we had 3-5,000 views and i said it was just the beginning? well the WOODWORKING 101 thread is turning the 70,000 views mark and there is no slowing down yet or lack of enthusiasm or questions to ask and still plenty to learn too.

ALL: i've decided i'm going to make this old WWII ship hatch a bench in my shed and since it's been white washed i'm wondering what any of you would do to spiff it up?

i'd like natural wood like a few of your cool workbenches look like so i can just oil it as needed and it won't get a ton of use, but i'd like it to be maybe the first bench i don't pile STUFF on to maybe start my FSD (flat surface disease) cure.

any thoughts? also if i did take the metal trim off i'm guessing to use the same old screws i'd probably have to put some glue, caulk or a glue/sawdust mixture in the hole so the screw would grab. or do toothpicks really work? or what is the best method for using the same screw in the old screwhole to make it as tight or tighter than it was?

thanks everybody in advance!!
 

Attachments

  • 00707_5sMHzKG86L2_1200x900.jpg
    00707_5sMHzKG86L2_1200x900.jpg
    150 KB · Views: 62
  • 00505_bRnfX3qgkQu_1200x900.jpg
    00505_bRnfX3qgkQu_1200x900.jpg
    150.1 KB · Views: 60
OP
J

jimreed2160

Well-known member
Joined
Aug 7, 2016
Messages
3,589
Location
Tallahassee FL
The new workbench top is moving along. After rough sizing the stock, I needed to joint the edges. Construction lumber rarely comes flat enough to glue up. Do I need the electric jointer?

DSCN1728.jpg


Or the Poppie powered jointer?

Well, this is soft wood and I like to use the LN #7C jointer plane. So I guess the LN wins the day.

Edge #1 is typical.

DSCN1730.jpg


And the first pass picks up random pieces. At least the blade depth is set properly. Thin shavings are better than thick splinters and extra passes are not that hard to do.

DSCN1731.jpg


By the fourth pass, the shavings are starting to look pretty good.

DSCN1732.jpg


The jointer plane is enjoying its workout.

DSCN1733.jpg


And the shavings are starting to pile up.

DSCN1734.jpg


I thought this might be a good time to use my large level. It makes a pretty good straightedge.

DSCN1738.jpg


I use a notecard to find the extent of the dip. The card is very loose in the middle and got stuck here near the edge. I ripped off a shaving there.

DSCN1740.jpg


Notice how the shaving starts narrow and wispy on the right. But as it goes left, it gets wider and thicker. The end at the left is really thick.

OK. Now that the edges are jointed, I need to put a special edge on the front side. Since I will be working on that side, I would like a nice chamfer to soften up the edge. For that, I need the Stanley #72 chamfer plane.

DSCN1735.jpg


Chamfer plane shavings start out thin and get gradually thicker as the chamfer widens.

DSCN1736.jpg


Here is a close up of the finished edge.

DSCN1737.jpg


This was a productive session. I was able to joint all of the boards and also put a chamfer on the leading edge. Next step is glue up so I need to raid the clamp stash.

:3gears:
 
OP
J

jimreed2160

Well-known member
Joined
Aug 7, 2016
Messages
3,589
Location
Tallahassee FL
Drives--That hatch cover would make a great benchtop. I would leave the band in place, finish the wood around it, and then paint it black. Don't worry about reusing the screws as they are probably too rusted. And the wood around them is punky. If you do remove, then you probably need to drill out the punky wood and replace with a 1/4 or 3/8 dowel. Glue it in place, cut it flush, and then drill a new pilot hole.

Good luck.
 

turbowoodworker

Well-known member
Joined
Mar 18, 2012
Messages
3,522
Location
Apex NC
Nothing more satisfying than fine shavings from soft pine, Jim. Nice work.

Drives, May I suggest that when you remove the vintage screws, you will have a small hole marking a target. That area will be covered by the metal batten once it is replaced. Why not consider drilling that center with a 3/8" brad point and then drive in a dowel. Once trimmed, the old screw will have new wood to bite into. Keep us posted, as I'm sure you will.
 
OP
J

jimreed2160

Well-known member
Joined
Aug 7, 2016
Messages
3,589
Location
Tallahassee FL
Woodworker's dreams

From the beginning of this project, I have been dreaming about using my favorite set of clamps. I found these 48" Jorgenson clamps at a store near my house back in the day and fell in love with them. They were so expensive at the time that I could afford only a pair each month. But two months later I had my set of four and was ready for those big projects. They are a dream to use and I have used them for large tables and for case goods. I even made a redneck press and straightened out a few vise handles. So I eagerly dug them out of clamp city this morning.

So here is a 48" clamp on a 24" workbench. It is not a pretty sight. The end protrudes into the next bench and it is covered with junk. In addition, the clamps do not sit flat on the bench. :willy_nil

And I am off to alternate plan #2. Sadly I replace my favorite Jorgies with the Besseys.

The 24" Besseys are much more practical for this glue up.

DSCN1743.jpg


Thus begins the tedious glue up. I put down a generous bead of glue and then use my finger to spread it.

DSCN1745.jpg


Here is a close up. Notice where the wood is glue starved. Those spots need more glue.

DSCN1746.jpg


Two down and two to go.

DSCN1748.jpg


The stack is getting a little precarious.

DSCN1749.jpg


But they are together at last.

DSCN1750.jpg


Here is the final clamp up.

DSCN1751.jpg


I checked the corner for square using an old rafter square.

DSCN1752.jpg


There was excess glue everywhere but that is what cotton socks in the workshop are for. It took two socks to mop everything up. I wet one for the final clean up on the top.

This is a workbench top and I pretty much just slapped it together. If it had been fine furniture, I would have taken more care. The most careful way is to glue up a large surface one board at a time. It is easier to manage just two edges at once. Just wait for the glue to set (usually 3-4 hours), open the clamps and add the next board.

I will let this top sit undisturbed for about 3-4 hours and then I will go clean up the spilled glue before it gets hard. Then I will leave it in the clamps until tomorrow.
 
OP
J

jimreed2160

Well-known member
Joined
Aug 7, 2016
Messages
3,589
Location
Tallahassee FL
The rafter square I used in the last post is a handy tool to have around. Back in the day, every framing carpenter had one and treasured it. I used my dad's as a boomerang one time and he saw that as an excellent teaching moment. I have revered the tool ever since.

These squares are great for checking square on table tops and case goods. Not many of us need to make steps or rafters these days so the scales are not used. One could teach a day long class in how to use these squares and how to interpret the scales.

DSCN1755.jpg


This one was made by Sargent.

DSCN1754.jpg


From the looks of the Times Roman typeface, I guess it was made sometime from about 1880-1920.
 
OP
J

jimreed2160

Well-known member
Joined
Aug 7, 2016
Messages
3,589
Location
Tallahassee FL
Workbench top, continued

I love my wife but sometimes it is nice to retreat to the shop. :eyecrazy:

This is one of those times. Anyway, I needed to clean up the glue squeezeout before it got too hard. Here is what I found.

DSCN1756.jpg


Ugh! What a mess. I grabbed a beater Craftsman chisel and went to work.

DSCN1757.jpg


The soft, gooey mess came up easily and I rubbed it into a sock. I treat the benchtop about every six months with BLO (80% turpentine and 20% boiled linseed oil). It keeps the top a tad slick and glue has a hard time finding purchase.

DSCN1758.jpg


While the top is still in clamps, I can take time to work on the backsplash. Here is a mock up.

DSCN1759.jpg


I don't like the sharp corners so I searched for a roundover pattern. Found it nearby.

DSCN1760.jpg


DSCN1761.jpg


This is a job for my bandsaw--but not like you might think.

DSCN1762.jpg


I am not about to change the wide blade just to cut two hinky little corners. I will use the bandsaw table and cut with my coping saw. Every ww should have one of these.

Every ww needs to decide how to cut marks. Normally I like to split the line. In this case, however, I left a little meat so I could finish up with sandpaper.

DSCN1763.jpg


DSCN1764.jpg


There it is. Looks much better.

DSCN1765.jpg


Here is the other one. I forgot about the chamfer. Maybe I should have stopped it with a lamb's tongue or something. I guess the best fix is to move it back a bit to the edge of the chamfer. It looks better that way.

DSCN1766.jpg


I am done until the glue dries and I can attach the backsplash. In the meantime, I can patch the wall behind where it is going. I hate to hide the defects back there.

DSCN1767.jpg


DSCN1768.jpg


Some spackle will take care of that and put my mind at ease.
 

turbowoodworker

Well-known member
Joined
Mar 18, 2012
Messages
3,522
Location
Apex NC
I will also make a habit of running a strip of cheap masking or blue tape on top of the clamp bars. Not much is a bigger PITA than finding dried glue on bar next time you use them.

Nice top and backsplash.
 

Teenager with old tools

Well-known member
Joined
Jun 3, 2015
Messages
595
Location
riverside california
dd65e601919205b502cc082221301426.jpg7e21a875af2bcb2264b802c7c5b4038b.jpg not the same kind of woodworking as in most of this forum but my ten year old brother using his new gouge to make me a carving chisel handle. First time he's really turned something. I told him I'd teach him but I needed the handle done so he chose to help with it instead of his first project being something for him. He is getting the hang of the skew for the rounding of the **** of the handle and is good with his gouge. I think by Friday I may document a few projects to start a woodturning thread that we can talk about turning like woodworking is discussed here and there's the machining thread in the fab section. Would anyone be interested in a thread like that?


Sent from my iPhone using Tapatalk
 

Attachments

  • dd65e601919205b502cc082221301426.jpg
    dd65e601919205b502cc082221301426.jpg
    555.4 KB · Views: 0
  • 7e21a875af2bcb2264b802c7c5b4038b.jpg
    7e21a875af2bcb2264b802c7c5b4038b.jpg
    847.4 KB · Views: 0

ez-duzit

Well-known member
Joined
Jun 24, 2013
Messages
5,095
Location
Marina del Rey
Under glue-ups I place a reusable sheet of polyethylene, to keep the benchtop always free of glue. A lot quicker than cleaning up a big mess afterwards. Then you just run the poly sheet across a the sharp edge of the bench to knock off the dried glue.

Clamps are easy to clean after the glue dries.
 

Knyte Tyne

Well-known member
Joined
Apr 23, 2014
Messages
197
Location
Johannesburg South Africa
Under glue-ups I place a reusable sheet of polyethylene, to keep the benchtop always free of glue. A lot quicker than cleaning up a big mess afterwards. Then you just run the poly sheet across a the sharp edge of the bench to knock off the dried glue.

Clamps are easy to clean after the glue dries.

Is that like the See through Plastic "Table Cloths" that you tend to find at cheap beach side Restaurants? I use the Plastic Table Cloths to make Custom Vacuum Bags when I vacuum form my longboard decks... I've discovered that very few glues actually stick to it... I now keep a sheet when I do Glue Ups... Even with contact adhesive let it dry and it peels off no hassle at clean up... Ive reused my single sheet PLENTY of times in this manner...
 

ez-duzit

Well-known member
Joined
Jun 24, 2013
Messages
5,095
Location
Marina del Rey
Any of that will work better than making a mess of your workbench every time you do a glue-up. The material I use is translucent, heavy duty, maybe 5-7 mil (?) ; comes in a 20' wide roll and is available at places like Home Depot.
 

HCNDM

Well-known member
Joined
Oct 20, 2015
Messages
682
Location
Netherlands (tiny little country in western Europe
the cheap solution is to use wax bags that come from cereal boxes. Lay them out and toss them when they get too messy


I used precut sheets of oven paper. The stuff you lay under baking goods. Nothing sticks to it and it's cheap.

I love this thread though admittedly I'm better with metal than wood. Wood always does exactly the opposite of what I want it to. Metal on the other hand... my mind sees the welding bead start to flow and where it wants to go before it does.

Hoping to scrounge loads of tips and tricks here to make my wood work a little less terrible.


Sent from my iPhone using Tapatalk
 
OP
J

jimreed2160

Well-known member
Joined
Aug 7, 2016
Messages
3,589
Location
Tallahassee FL
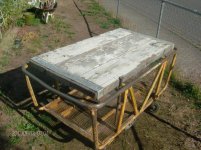
Workbench top continued

Twenty hours in the clamps should be enough--I am anxious to keep moving. This morning I got to use all four bench dogs. WooHoo. It is a 22 1/2" wide benchtop on a 24" workbench. Four dogs should keep it in place while I work on it. The first order of business is the make the bottom flat.

DSCN1771.jpg


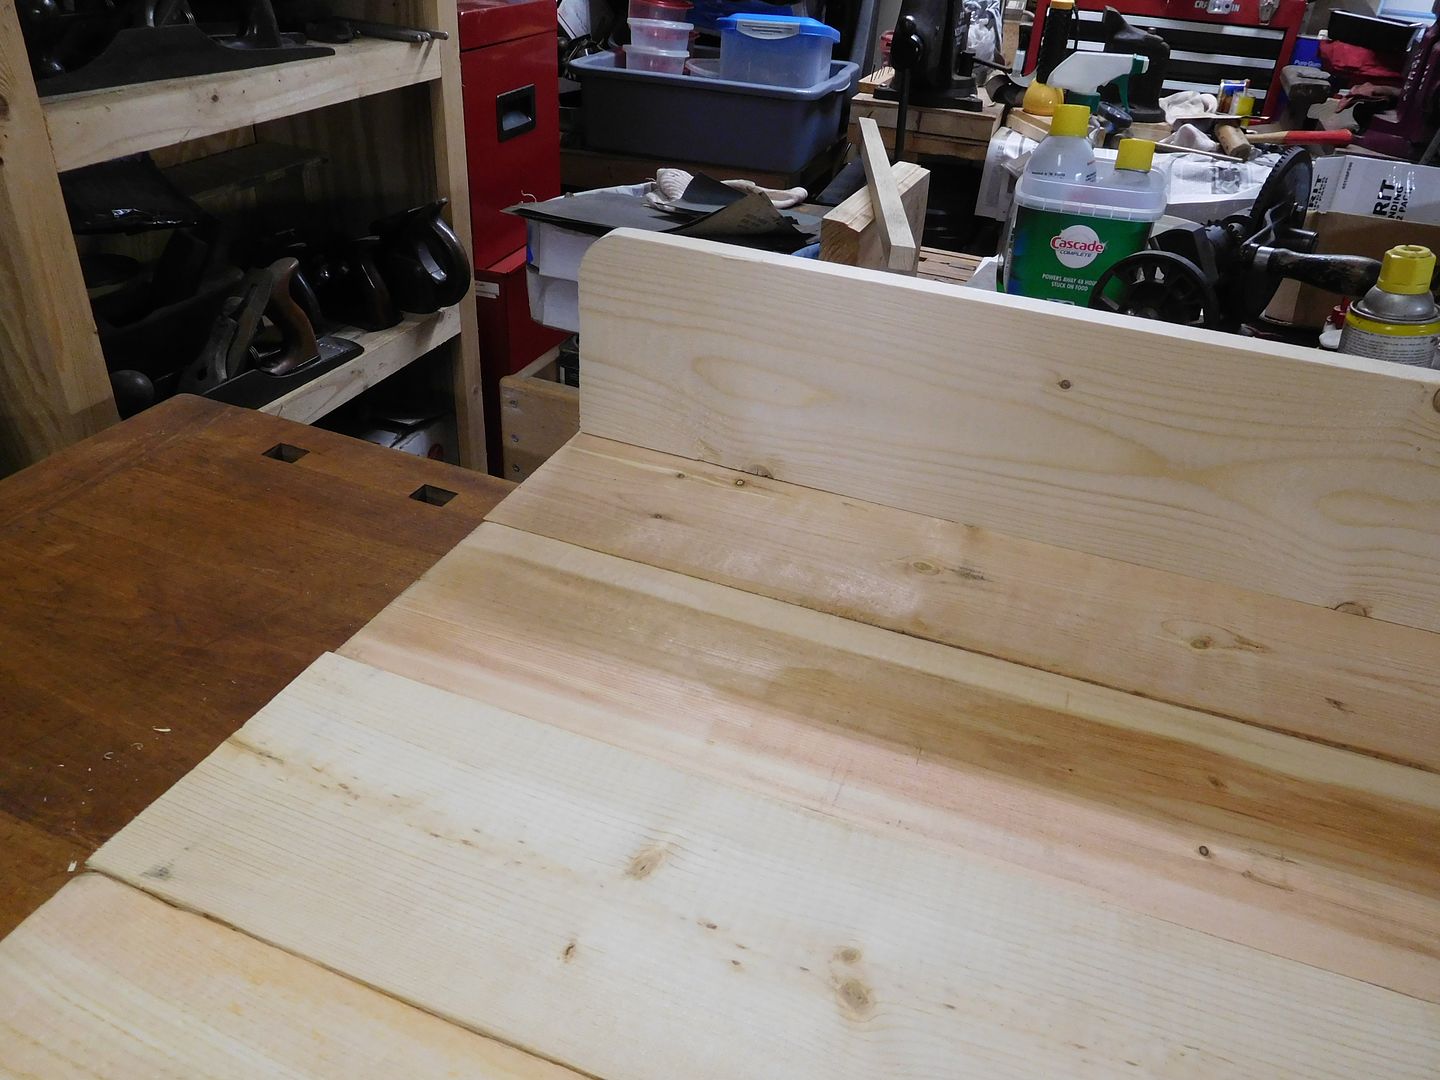
Here is a close up of what I am dealing with.

I think those guys over in the fab shop don't care about us finishers. :dunno:

Anyway, I will start with a flat bottom and use it as a reference. The bottom is flatter than the top because it was referenced to the benchtop through the clamps. Even so, it wobbles a bit. I will take that out--it's time for the big guns.

DSCN1772.jpg


That is my LN #7 and my Stanley Bedrock 608C. Rocking a 24" length, the Bedrock #608 and its Bailey cousin the #8 were the largest bench planes made by Stanley. If you want a large flat surface, the #608 is your go to guy.

Right off the shelf the #608 is taking some light and fluffy shavings.

DSCN1774.jpg


DSCN1775.jpg


If your bench plane pulls shavings like this, then its blade is sharp and its depth of cut is set up properly.

It only took about 15 minutes to take the wobble out of the bottom. Now it should sit tightly on that slick factory bamboo top.

DSCN1776.jpg


Time to flip it and work on the top. It looks OK at a distance.

DSCN1777.jpg


But then it gets nasty up close in places.

DSCN1778.jpg


DSCN1779.jpg


It will take forever to take this thing down with fluffy shavings. I need some help from Mr Scrub.

DSCN1780.jpg


This LN scrub plane is based on the Stanley #40 scrub plane. Those were popular with ww back in the days of yore--especially with trim carpenters. Let's say you are on a jobsite and the new guy just ruined your last stick of 3" door casing. It is late in the day and the lumber yard is closed. Without the door trim you will have to return to the jobsite tomorrow and finish the job. But wait, this is a jobsite and you have lots of whitewood lying around. There is some subfloor over there but it is 6" T&G. Ripping it with your handsaw will take an hour of hard labor. And the new guy will screw it up. But you are the lazy carpenter and you have a scrub plane in the bottom of your tote. The new guy is amazed as he watches you take it out and put it together. You see, the scrub blade is made for frequent sharpenings and it is very long. So long, in fact, that most carpenters remove the blade in storage. Years later, those same workers will be cursed by collectors who find #40 planes with their blade AND lever cap missing. So you have the new guy bring you a brick. You spit on it, hone the rust off your scrub blade and go to town. You make long passes down the T&G board and long splinters are flying. Two passes with your #5 and the edge is ready for display. Ten minutes pass and you have a perfect 3" trim board. The job is finished with a few nails and the new guy is buying beer tonite.

The scrub has a big mouth, just like my first girlfriend. And the blade is cambered with a radius.

DSCN1781.jpg


The scrub is made to be used at 45 degrees to the grain. It hogs off wood quickly and leaves it dished.

DSCN1784.jpg


No wispy shavings here--just tight and thick shavings.

DSCN1785.jpg


DSCN1786.jpg


It is a good time to clean up a bit and go back to the #608 and #7.

DSCN1787.jpg


The top is now flat but I need to remove all of these marks.

DSCN1788.jpg


But that is a chore for another time. The hairdresser just called and I need to pick up her majesty. Then lunch. All of this scrubbing picked up my appetite. More chores for the afternoon.
 

Ty.

Well-known member
Joined
Dec 21, 2015
Messages
171
Location
Northern Wi
amazing! it is so interesting to watch someone work with hand planes that actually knows what they are doing. Keep up the good work!
 
To avoid these ads, REGISTER NOW!
Top Bottom