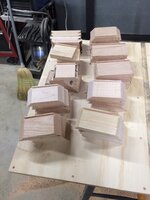
Well over Christmas shut down I did some little projects. Just odd things using some scrap wood I had.

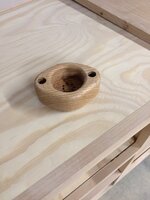
Just a pencil holder that can sit on any side and be used

A spice cellar

A cheese board


Two different holders - kind of just did these on a whim

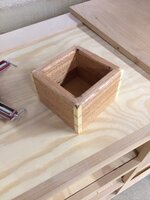
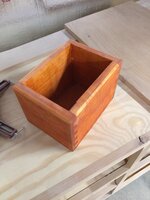
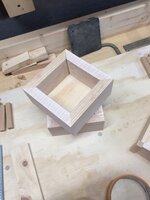
A box I built to try out the dovetail jig I bought with half blind dovetails. Turned out pretty nicely

Another box I made to try out a corner miter jig I made.

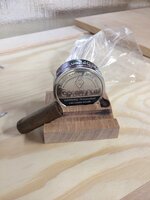
Something I made to hold a dip can and has a line for cigar to rest. It's not a healthy habit but we all have our vices.

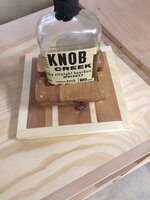
Then a bottle display center piece. My grandfather is turning some shot glasses for me that go with this. For me I like a good bourbon.
Zach
Just a pencil holder that can sit on any side and be used
A spice cellar
A cheese board
Two different holders - kind of just did these on a whim
A box I built to try out the dovetail jig I bought with half blind dovetails. Turned out pretty nicely
Another box I made to try out a corner miter jig I made.
Something I made to hold a dip can and has a line for cigar to rest. It's not a healthy habit but we all have our vices.
Then a bottle display center piece. My grandfather is turning some shot glasses for me that go with this. For me I like a good bourbon.
Zach
Attachments
-
 5f8ab12b2aed7fa98be1d81f00cbc1f2.jpg419.7 KB · Views: 1
 -
 9a98a50118673a51365258ae66c7d612.jpg401 KB · Views: 1
 -
 4797496ec003f4d8a7cc8969edbdef76.jpg415.9 KB · Views: 1
 -
 1458bbdc847b41dc149486725d5e7235.jpg384.6 KB · Views: 1
 -
 cca9fbc1232351e33de783457e1fd08f.jpg389.4 KB · Views: 1
 -
 4d47174ecade3e681b20250f9378da65.jpg362.5 KB · Views: 1
 -
 c6df7b1e76eb6d316de02be987d1f175.jpg430.6 KB · Views: 1
 -
 5b2d1eebfee7fe51e2baca9ee8b1c7be.jpg336.7 KB · Views: 1
 -
 b739e4412731c2a6f3f5aadf5955494c.jpg338.5 KB · Views: 1


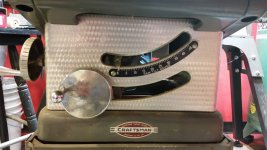
") Got the slots aligned to within 0.001" across the face of a 10" blade which I estimate the error to be less than 0.4*. Problems went away!
Got the slots aligned to within 0.001" across the face of a 10" blade which I estimate the error to be less than 0.4*. Problems went away!


 I am hoping for some shop time today.