To avoid these ads, REGISTER NOW!

Woodworking 101--Tools and Tips

drivesitfar

Well-known member
Joined
Oct 23, 2013
Messages
36,007
Location
Pacific Northwest
ACER: happy to help and if you build it or find a better one post it up.

CAP: I have FSD (flat surface disease) and it sounds like you might also. of course until i'm cured and leave my benches clean and ready to work on i can usually plan on spending 15-30 minutes doing clean up before starting any of my projects. a sort of TO DO before the actual TO DO so to speak.

ALL: i recall seeing a bench where the table saw was lowered and a piece of plywood would cover it so you could use the entire bench top until the table saw was actually needed. unless i find a lot or buy a fixer to build a new home and shop i can't imagine using a table saw a lot, but like was said earlier when you NEED ONE YOU NEED ONE so having one ready to use would be nice.

I think these old Craftsmans are only 8 inch blades, but since it's got a 1 HP motor i think i'll rewire it for 220 and get a really nice blade for it to do some fine woodworking some day.

anybody else own one of these old 1940's to 1960's Craftsmans? would love to hear the PROS & CONS about them.
 
To avoid these ads, REGISTER NOW!

madison069

Well-known member
Joined
Nov 5, 2010
Messages
4,150
Location
Monroeville, PA
I was watching woodworking and they used 2x4 or 2x6 for a push stick but this also allowed the wood to get cut so you hold both the piece and wast down while going through the blade. This will keep your fingers away from the blade and hold your piece down at the same time.

We all got waste 2x4 and 2x6 in the corner of our bins so this should be easy to acheive. Just cut 1/2" off the bottom but leave a lip at the back side so it catches the piece and push it across the blade. Their block looked to be 10" long I think from just seeing it on TV and the lip was 1" long on the back.

This is a quick google but I didn't see a metal handle on their's.
 

Attachments

  • woodworkingtips-push-block.jpg
    woodworkingtips-push-block.jpg
    19.1 KB · Views: 65
Last edited:
OP
J

jimreed2160

Well-known member
Joined
Aug 7, 2016
Messages
3,589
Location
Tallahassee FL
Thanks for the well wishes. I had a PDT to the face where they make your skin photosensitive and then zap you with a blue laser. It is used to remove pre-cancerous lesions. What it does is give you one big sunburn! I am in the dark today enjoying my tomato face. Some people experience lots of pain but not so much for me today. Time will tell.

Drives--Don't use the saw from behind. The blade will lift the board. Just wire up a switch in series with a grounded plug and outlet. Then plug the saw into your switch. Then you can mount your knee switch in front and have a special kill switch in the back for an extra level of safety.

Madison--That is a clever push pad but having my hand over the blade just gives me the jeebees. :willy_nil I really like my looong stick.
 

PelicanPines

ALLIANCE MEMBER
Joined
Apr 30, 2014
Messages
38,107
Location
New Jersey, USA, Earth, My own reality
I was watching woodworking and they used 2x4 or 2x6 for a push stick but this also allowed the wood to get cut so you hold both the piece and wast down while going through the blade. This will keep your fingers away from the blade and hold your piece down at the same time.

We all got waste 2x4 and 2x6 in the corner of our bins so this should be easy to acheive. Just cut 1/2" off the bottom but leave a lip at the back side so it catches the piece and push it across the blade. Their block looked to be 10" long I think from just seeing it on TV and the lip was 1" long on the back.

This is a quick google but I didn't see a metal handle on their's.

Thanks for the well wishes. I had a PDT to the face where they make your skin photosensitive and then zap you with a blue laser. It is used to remove pre-cancerous lesions. What it does is give you one big sunburn! I am in the dark today enjoying my tomato face. Some people experience lots of pain but not so much for me today. Time will tell.

Drives--Don't use the saw from behind. The blade will lift the board. Just wire up a switch in series with a grounded plug and outlet. Then plug the saw into your switch. Then you can mount your knee switch in front and have a special kill switch in the back for an extra level of safety.

Madison--That is a clever push pad but having my hand over the blade just gives me the jeebees. :willy_nil I really like my looong stick.

I agree with the long stick thing too. I do however have a block similar to the one pictured. When I use it... I assure you... downward pressure is at a minimum with it mostly vectoring towards the fence... If I slip... in my mind... it wont be bad.
 
OP
J

jimreed2160

Well-known member
Joined
Aug 7, 2016
Messages
3,589
Location
Tallahassee FL
Workbench top continued

I managed to slip in a little shop time this morning. We last left the splashback unattached. This board will keep stuff from rolling off the back into oblivion.

DSCN1827.jpg


But it does not fit exactly flush and there is a defect at the end.

DSCN1828.jpg


Here is another shot in the middle.

DSCN1829.jpg


And it is a tad too long.

DSCN1830.jpg


All that took was a trip to the chop saw. And now it is too short!

DSCN1832.jpg


I guess I can fix that later. First I need to put a chamfer on the top edge. It has a few splinters that want to jab me. Time to get the #72 chamfer plane.

DSCN1833.jpg


So I also can run the chamfer on the side splash.

DSCN1834.jpg


WW of yore have used rabbets to cover up mating surfaces. I will use that trick here. A shallow rabbet should make this board fit better and close up that visual gap. First I need to scribe a line.

DSCN1835.jpg


Then I need my Stanley #45 plane with a 1/8 cutter. Skate is not needed for narrow cuts like this. In fact, it interferes and must be removed.

DSCN1837.jpg


I will run a 1/8 groove down the scribe mark to make a shoulder corner for the rabbet. The shavings look cool.

DSCN1838.jpg


Here is the groove.

DSCN1839.jpg


DSCN1840.jpg


I like this two step method of making rabbets because the 1/8 groove is easy and quick to make. It creates a nice corner and marks the depth of the rabbit. Now all I have to do is join the outside with the inside. This way I can avoid using the plane kickers because they never leave very good corners.

Here you can see that I adjusted the #289 skew rabbet plane to end its cut in the middle of the 1/8 groove. That is easy to set up because it does not have to be very precise.

DSCN1841.jpg


Let the gnawing begin.

DSCN1843.jpg


Of course, things go better when I can use my own blades. Trust me, this skew blade is not easy to make. But mine is harder that the original Stanley and slightly thicker. It sure works a lot better.

DSCN1844.jpg


But wait! There are knots in the board. Three, in fact. They are a no-no for handplanes.

DSCN1845.jpg


I got out my Japanese chisels and hammered away at the knots.

DSCN1847.jpg


You don't want to hit this thing with your plane. It will knock the blade out of adjustment and could. nick the blade.

DSCN1848.jpg


With the knot issue taken care of, the #289 makes some beautiful shavings.

DSCN1849.jpg


The construction lumber has pretty whacky grain, especially around the knots. That makes this an opportunity to try out a variety of planes. Here is the LN large shoulder in action.

DSCN1850.jpg


The rabbet is finally done. Here is one of the knots.

DSCN1853.jpg


And here is our stopping place for today. It fits pretty well.

DSCN1854.jpg


I still need to attend to the corner defect. Next session.
 

Shiftless

Well-known member
Joined
Mar 9, 2014
Messages
14,519
Location
East Bay SFO
Drives:
I'd say our saws are identical (yours is way cleaner of course). I run 10 inch blades except when using my dado set.
 

drivesitfar

Well-known member
Joined
Oct 23, 2013
Messages
36,007
Location
Pacific Northwest
Shift: good to know that i might be able to use a 10 inch blade cause i have some big stuff to cut occasionally. i now have a 12 inch Dewalt compound miter saw too, but in the past the skill saw, chop saw, sawsall and maybe chainsaws would cut the big stuff.

JIM: occasionally i'll ask a dumb question i'm almost 100% i know the answer to just so I can see if you or anybody is reading what i post. mostly i ask those so the NEWBIES can see what is right and what is wrong cause we don't want any members of GJ or even the lurkers of GJ getting a DARWIN award.

ALL: also with so many of you afraid of table saw's blades have most of you experienced a little blood like Z just posted or seen worse?

i know my great grand dad who passed either before i was born or when i was very young lived a long life after cutting off one leg at the knee at a cedar mill where he worked. as the story goes he was having lunch prior to the blade being turned off so guessing in the 1910's or 1920's maybe and he dropped something, bent down and slipped and the big saw cut off his leg. the guys at work put him on a skid, maybe horse pulled him to the doctor to save his life and his name became PEG until he passed. his wife and my great grandma was our babysitter when were little, but sorry don't recall the exact details.

i do know those loggers and guys working the factories in the old days would do some dangerous stuff almost daily and live to talk about it. these are the guys passing on the SAFETY TIPS so we should all PAY ATTENTION and LISTEN to them.

cheers
 

ez-duzit

Well-known member
Joined
Jun 24, 2013
Messages
5,095
Location
Marina del Rey
Jim--that rabbet could be done in a matter of seconds on a table saw. Why spend so much time using various hand planes and chisels?

All--the push stick generally does not want to be long; long prevents you from putting controlled downward or sideways pressure on the workpiece. Nor does it want to be tall, with a handle. I make mine from a plywood scrap, maybe 6" long and an inch or so taller than your fence (when supported on the workpiece), a simple rectangle that I then bandsaw the long edge to leave a lip ~3/4" long x ~1/4" deep.

In use, you grip it between your thumb and index finger, leaving your other fingers to wrap around the fence. This prevents your hand from ever being drawn into the blade. And the long, flat edge on the bottom allows you to keep the workpiece tight against the table, so it doesn't try to climb the blade.
 

Shiftless

Well-known member
Joined
Mar 9, 2014
Messages
14,519
Location
East Bay SFO
Drives:
As always, Thanks for the great stories. Safety first. I myself have never been cut with a table saw. I have a very healthy respect for that tool. No beer drinking and table sawing for me. Just like driving... I like drinking and I like driving...just not at the same time.

Here is a pic of the front switch my FIL installed when the saw was his. The cast electrical box is secured with a steel strap which is attached to the underside of the table with a nut and machine screw. He drilled a small hole through the table in the miter slot. Don't neglect to ream out the top of the hole to fit flush with the surface so your miter guide will still slide smoothly.
I can remember him using the saw with the switch in back just like yours prior to the front switch installation. He used it with the motor mounted switch for over 20 years.

EZ:
That's the way I was taught to do it too. :thumbup:
 

Attachments

  • image.jpg
    image.jpg
    129.5 KB · Views: 59
Last edited:

drivesitfar

Well-known member
Joined
Oct 23, 2013
Messages
36,007
Location
Pacific Northwest
EZ: i agree that some of JIM'S work might be easier and maybe even quicker with a table saw if the saw is standing at the ready. that said though he does a helluva job with his planes and if he keeps using them a lot like he does the odds of his bride coming in the shop and seeing the planes in use might be just the excuse he needs to BUY ANOTHER ONE.

SHIFT: thanks for the picture of the switch on your saw. also are you positive you have a 10 inch blade on your saw? HOPEFULLY some of my stories are not repeated over and over or at least too often. thanks for the good words and hope it gave you a good memory or maybe kept you thinking when you turn on your tools to work.

ALL: i should have said this in my last post cause many a worker in the early days of the INDUSTRIAL REVOLUTION didn't survive a work day. so we are getting safety tips from the SURVIVORS who maybe saw first hand what some of the dangerous tools could do if not using them correctly or PAYING ATTENTION.

SAFETY FIRST AND THINK BEFORE YOU TURN ON A POWER TOOL!! also use ear protection and full face shields or at least safety glasses.
 

Ty.

Well-known member
Joined
Dec 21, 2015
Messages
171
Location
Northern Wi
SAFETY FIRST AND THINK BEFORE YOU TURN ON A POWER TOOL!! also use ear protection and full face shields or at least safety glasses.

I will be the first one to admit that I have not always been good with using either, but I have gotten much better over the last two years.

The most helpful thing I have done is gotten several pairs of comfortable and well fitting safety glasses and a few pairs of ear muffs (cant stand the plugs, its a pain to take them out and put them in again) and keep them scattered all over the place. If I keep them in places where I have to look at them before I use a tool, I will use them, but If I have to walk over to the other side of the garage to get them, I wont. I know that sounds lazy, but thats just how I work.

I also keep a pair of each in my truck too, which usually nudges me to use them at work too
 
OP
J

jimreed2160

Well-known member
Joined
Aug 7, 2016
Messages
3,589
Location
Tallahassee FL
EZ--You have a good point--there are certainly many ways to make a long rabbet. The TS would not be my first choice because of the set up time required for dado blade and throat plate. In addition, 55" is a lot of board to manage with my small contractor TS. Another choice is a router or shaper. If I had lots of running feet to cut, then the router would be my first choice. But then again, there is that dreaded set up time and the associated DUST issues. My primitive dust collection system is a shopvac and a broom.

So with these small projects I have a choice between lots of set up time and quick cuts vs. slight set up time with time consuming cuts. The bonus with handplanes is that I also have lots of fun using the planes while making the cuts. I crank up the shop tunes, message my family and do other things while the joint is in progress. It is a relaxing way to spend the morning and helps me maintain my skill level.

It is true that there are many different ways of successfully hunting that wascally wabbet (joint). :lol:
 

ez-duzit

Well-known member
Joined
Jun 24, 2013
Messages
5,095
Location
Marina del Rey
...The TS would not be my first choice because of the set up time required for dado blade and throat plate...

Jim--I'm very surprised to hear such nonsense from an experienced guy like yourself. There is absolutely NO setup time required to make that rabbet on the table saw. And of course a dado is also absolutely unnecessary. It is TWO simple, straight cuts; one shallow cut, to establish the width of the rabbet, and one deep cut to establish the depth. This is basic table saw 101.

As I said, it would take me seconds to do this on my table saw. If your table saw is not up to a simple job like this, then it is not setup properly. Here is a photo of my setup.

shop-1_zpswjliawky.jpg
 

eba3317

Active member
Joined
Dec 17, 2013
Messages
36
While I have not been hurt with the table saw I accidentally put finger too close to trim router with flush trim bit trying to steady the base as I brought it up to the wood and ended up cutting index finger pretty bad. Partially tore a ligament. I was in a splint/bandage for 2 months. Luckily it has healed well. I have my whole finger still and a scar to remind myself not to rush
 
OP
J

jimreed2160

Well-known member
Joined
Aug 7, 2016
Messages
3,589
Location
Tallahassee FL
Workbench top continued

As I continue this march through the swamp using ancient tools and methods. There is a defect on the corner that I want to take care of. I know this is just a workbench top made from construction lumber, but I will use it a lot and want it to look nice. The corner needs a patch.

DSCN1855.jpg


I planed the patch flat and planed the bench corner flat to receive it. Clamping this odd shape seemed troublesome, so I tacked a few nails to hold it until the glue sets.

DSCN1856.jpg


Then I moved on to the backsplash side. I need a dado on the end and a rabbet on the bottom. There are many ways to create these joints. I like the quiet way. For the dado, I fastened a batten and sawed the corner with a Disston D-100 crosscut handsaw.

DSCN1857.jpg


The batten helps the saw run true and square.

DSCN1858.jpg


The best tool for this narrow dado happened to be the LN #140 block plane.

DSCN1860.jpg


The long rabbet was like the previous rabbet, just shorter. It took about 15 minutes.

DSCN1861.jpg


That is the end of today because the glued patch needs to set and cure a bit before it is cut down and sized.

Next step is to attach the backsplash pieces. I will attach them with screws only so they can be removed sometime in the future if the role of the workbench changes.
 

rk5n

Active member
Joined
Jan 11, 2016
Messages
39
I'm making a marking gauge because I'm too cheap to pay for a veritas. Plus I want multiple.

Blackwood fence, stainless steel rod and a 1/4-20 flathead screw as a cutter. I faced it on the lathe so it's pretty sharp. Hopefully it'll hold a decent edge. Next up is a dual marking gauge.
 

Attachments

  • T0gaSVV.jpg
    T0gaSVV.jpg
    135.2 KB · Views: 67

Teenager with old tools

Well-known member
Joined
Jun 3, 2015
Messages
595
Location
riverside california
I can get shavings with my plane to .005 I get thinner but not full width and normally not full strand length. Not as impressive as some of you guys though. Will write up the start of a wood turning thread tonight if anyone is interested. Only project/tutorial so far documented is my ten year old brother making a chisel handle for a chisel with a tang. Didn't take pics of my socket chisel handle project.


Sent from my iPhone using Tapatalk
 
To avoid these ads, REGISTER NOW!
OP
J

jimreed2160

Well-known member
Joined
Aug 7, 2016
Messages
3,589
Location
Tallahassee FL
Benchtop continued

I slipped back into the workshop tonight and finally finished the workbench top. The first order of business was to finish the corner repair.

DSCN1862.jpg


I removed the nails and used the flush cut saw.

DSCN1863.jpg


And then finished up with some sandpaper on a woodblock.

DSCN1864.jpg


My plan was to attach the backsplash temporarily so I could remove it if I reconfigured the bench. So I went with screws only. They needed to be countersunk. That is good because I keep a brace and bit handy with a bit already loaded.

DSCN1865.jpg


A few turns later and the countersink is done.

DSCN1866.jpg


I used 1" drywall screws and attached each piece. Back first with about 5.

DSCN1867.jpg


And the side piece with three. I drilled pilot holes in the splash but used the awl to make a pilot in the benchtop.

DSCN1868.jpg


Here is the before picture of the bench with its tiny slick top.

DSCN1869.jpg


The bench won't move flush to the wall because there is a ledge poured into the garage floor.

DSCN1870.jpg


Here is the top in place. There is an overhang on all sides, with the most generous overhang on the left hand side.

DSCN1871.jpg


It is heavy enough to stay in place by gravity but I added three screws.

DSCN1872.jpg


And then I finished the top with BLO (1/3 boiled linseed oil and 2/3 turpentine). The wood really drank it up. I will give it a few days to dry before piling on the junk.

DSCN1873.jpg


This has been a fun project and I am tickled at how nice the top turned out. Hope this has sparked some ideas with others on how they can upgrade their workbench tops.
 
Last edited:

Shiftless

Well-known member
Joined
Mar 9, 2014
Messages
14,519
Location
East Bay SFO
Drives:
Yes, I am absolutely certain that my saw uses 10 inch blades. I have at least half a dozen different 10 inch blades for different purposes. Mount one in yours to see how it fits. You should be able to crank it all the way down below the surface of the table and then get it up high enough to easily cross cut a 4x4.
I had this table saw way before I owned a chop saw. Now I have 2 chop saws and 2 table saws. It is handy to keep one chop saw with an abrasive cut off wheel dedicated to cutting pipe and steel rod. The other one for wood.
 
OP
J

jimreed2160

Well-known member
Joined
Aug 7, 2016
Messages
3,589
Location
Tallahassee FL
Bench MiniMe

I found this and had to introduce it to its brother.

DSCN1818.jpg


DSCN1819.jpg


It attaches via clips on the bottom.

DSCN1822.jpg


Good for small stuff.

DSCN1826.jpg


Home made dog.

DSCN1825.jpg


I can do better on the dogs. Next project is make a pair and put MiniMe to work.
 

drivesitfar

Well-known member
Joined
Oct 23, 2013
Messages
36,007
Location
Pacific Northwest
TY: if my SAFETY TIPS help even one person i'm happy cause i know i still have to remind myself to put on ear and eye protection. also gloves if the job calls for it. i also put ear muffs (headphone types) on my drill press, grinders and other tools along with my full face shields. i think i might own 4 or 5 of each since i'm working at two locations currently. thanks for the KUDOS and hope you have better hearing than i do at my age cause i've already been saying "WHAT DID YOU SAY" for a few years now. i can't blame it all on ROCK "N" ROLL.

JIM: loving the tutorials and i can't tell you how many new tools and ideas i've learned more about. glueing and mending tear outs or damage instead of starting over, using the RIGHT TOOL FOR THE RIGHT JOB and so many others so thanks again and i know you've still got plenty to share.

TEEN: i love your idea for a new LATHE and WOOD TURNING THREAD and i'm sure you'll add plenty of information and skills as the years pass so getting it started is a big step. plus i know there are a lot of WOODWORKERS on here so keep posting as you do on other threads and put the link for your new thread in your sig line. while you are in your GJ profile adding your sig line you might click on AVATAR and download a favorite picture even if it's only the one with your little brother turning his first piece of wood for now cause you can change later. i've had a few different avatars and the one i've got now reminds me that i need to get my space set up so i can weld cause that Bison is made of scraps and old tools and i've got plenty of those laying around.

Shift: thanks again for letting me know that a 10 inch blade is possible on my little Craftsman 1940's table saw and it's on the list as a summer project.

ALL: i'm still looking for a perfect plan for a mobile bench that has room for my little Craftsman table saw built into it in case any of you want to post a link of a great plan you saw or if you might have built one yourself.

I know i forgot to mention a lot of other good posts, but i'll just thank all of you for contributing to maybe one of my favorite threads here on GJ.

cheers and have a great SATUR day everybody!!
 

drivesitfar

Well-known member
Joined
Oct 23, 2013
Messages
36,007
Location
Pacific Northwest
ALL: so i was looking for my favorite thread WOODWORKING 101 and had to go to page 5 to see it. looks like you all might be busy so i thought i'd give it a bump and maybe help you all find it easier when you do have time to post up anything. also so we might find a few more GJ woodworkers or even a few wood butcherers and want to be wood guys and gals.

so if i wanted to get any wood project looking better i'd using be grabbing my sander or maybe my router and never grabbing one of my planes. with all of Jim's tutorials and all of the rest of you showing us how a plane should be used i think it's time i started using mine too.

i won't have time until my daughter's wedding is over, but i'm heading that direction.

thanks again for showing all the SAFETY TIPS, REPAIR TIPS, all the different tools that are involved that i now need to buy and just good projects in general cause there IS A DIFFERENCE IN A QUALITY finished one and just something to GET R DONE.

cheers and hope you are all enjoying your weekend.
 
OP
J

jimreed2160

Well-known member
Joined
Aug 7, 2016
Messages
3,589
Location
Tallahassee FL
Stanley #144 cornering plane

Stanley tool works introduced a line of three graduated cornering planes in 1925 and continued to sell them until 1943. The sizes were 1/4, 3/8, and 1/2. These were very special purpose tools and did not sell like hotcakes. Accordingly, they are collector's items and the prices reflect that. I found a 3/8 repro in bronze. It was inexpensive because it had no blade. No prob. I make those.

DSCN1876.jpg


DSCN1877.jpg


And here is the sole. You can see the blade peeking out. I need to grind down the lower leg so that only the center protrudes.

DSCN1878.jpg


Even though this blade needs a little adjustment, the plane makes a nice rounded corner.

DSCN1879.jpg


I think I could use a block plane and do the same thing. Even so, this is a pretty cool plane.
 
OP
J

jimreed2160

Well-known member
Joined
Aug 7, 2016
Messages
3,589
Location
Tallahassee FL
Preston Chamfer Shave

Probably the nicest chamfer shave made. It certainly works well. Edward Preston made tools from 1825 until 1932. My guess is that this shave was probably made sometime in the late 19th century.

DSCN1881.jpg


The problem with most chamfer shaves is that the blade is loose and is hard to adjust. Of course, once you get it right it stays that way for awhile. This shave bypasses that problem by using a unique method of blade adjustment.

For most chamfer shaves, the easiest way to adjust the blade is to first remove the wings. That way you have the whole bottom available and can make sure that the blade does not stick down too far on one side. In addition, you can adjust for thickness of shaving. Once it is adjusted just right, you can add the wings and chamfer away.

Here is a shot of the bottom.

DSCN1883.jpg


And here is a good one of the blade adjuster.

DSCN1888.jpg


In use, the shavings start narrow.

DSCN1884.jpg


But get thicker as the chamfer widens up.

DSCN1885.jpg


This tool is easy to use and handy to have in your shop. It certainly leaves a nice edge.

DSCN1887.jpg
 
Last edited:

schor

Well-known member
Joined
Apr 16, 2013
Messages
531
Location
Ajax, Ontario
Drives..
I'm probably going to catch some flack about what I'm going to say, but here goes. I've built hundreds of projects over many years and have never used any hand plane, or any hand tool with maybe the exception of a card scraper, and an occasional chisel for marking.

When I first started out I bought lots of hand tools because everybody told me I had to have them, and almost gave up woodworking frustrated that I couldn't get anything done in a reasonable amount of time with a fit and finish to match my OCD specifications.

Then I saw this guy on the DIY channel many years ago and could tell immediately he had the "skills to pay the bills", and he didn't use any hand tools to do it either. His name is David Marks, and his web site is http://www.djmarks.com/

Take a look around to see some of the things he has made and then buy one of the DVD's of his TV shows. I recommend you buy them all, but a few will get you on the right track. http://www.djmarks.com/product-category/seasons/

All of the episodes are very thorough and he takes you step by step through each project. Pick one you like and follow his instructions to make the project yourself.

One of the tools he uses a lot is the Drum Sander. Many say it's an expensive luxury, but I can't think of many projects that I didn't use it on, probably none. Without question the Drum Sander is the most used piece of equipment that I have.

Even if you don't try to duplicate David's shop, watching his videos will give you invaluable tips and skills not found anywhere else.


Yup, I've done a lot of woodwork and not used many hand tools. Labour of love but it is still labour.
 

ez-duzit

Well-known member
Joined
Jun 24, 2013
Messages
5,095
Location
Marina del Rey
All my woodworking projects involve a combination of both hand and power tools. If I can produce a rabbet with 2 quick cuts on the table saw, I will not choose 15 minutes of hand planing. Likewise, to knock the corner off a sharp edge, I won't take the time to setup a 45* chamfer bit in the router. Instead I'll take a few quick swipes with a block plane or sanding block. Though I very often use a round-over bit.

Time is money. The right tool for the job.
 

kwoswalt99

Well-known member
Joined
Oct 24, 2015
Messages
701
Location
Detroit
Doing ww for a living, and doing ww for a hobby are two different things. I love hand tools, that's why I use them. Yes, it is quicker to use a router than a moulding plane, and time is money, but sometimes money isn't everything.
 
OP
J

jimreed2160

Well-known member
Joined
Aug 7, 2016
Messages
3,589
Location
Tallahassee FL
Aka--I hear you loud and clear. My woodworking tends to be centered around handtools. I like them and I like to show how they were used in days of yore. In some rare cases, handtools are superior to modern machinery. But mostly, handtools and handplanes have been replaced by more efficient equipment.

But in my mind when it comes to having fun in the shop, handtools cannot be replaced. Running a tuned handplane down a walnut board can be magic. Wispy shavings at my feet are much more pleasant than having a screaming lunchbox planer spew dust into my hair.

I hope you and others will join in and post pictures of your work regardless of the machinery involved. David is certainly a great craftsman. There are many out there. But what you do with wood and how you do it is much more important to me than what David can do. Thanks for joining our thread. I look forward to seeing some of your work.
 

superautobacs

Well-known member
Joined
Oct 31, 2008
Messages
3,997
Location
Vancouver, BC
I'm a newcomer to woodworking and I enjoy learning and seeing how woodworking has evolved over time--from the days of only using hand tools to the modern woodworker of today, using a myriad of modern power tools and jigs/fixtures. I guess I consider myself a hybrid woodworker as I've been working with hand tools and a small selection of power/cordless tools that I've slowly accumulated over the past 7 years or so, as need arose. I've spent a lot of time watching countless youtube videos to learn the art of WW from both spectrums. From watching those videos I was able to make many decisions on what I thought were the more essential hand tools and power tools. Reading through this thread is just another resource for me to gain a better understanding on WW methods.

The reason I incorporate more hand tools to my woodworking is due to the fact that unlike the majority here, I don't live in a single dwelling home with either a basement work shop or a garage. I live in a 900 sqft high-rise condo and currently my space for doing woodworking involves making a trip to my mother's townhouse where I use the townhouse complex's common room located in the basement garage on the weekends. Thus, I envy anyone with a dedicated work space all to their own.

Keeping the noise and dust to a minimum is very important, just as much as keeping the common room as tidy and clutter free as possible. Given these limitations I can't store large (often noisy) power tools that create so much fine dust. Currently, my only power tools I use for WW is a circular saw, a jig saw, a Dremel, a cordless drill/driver, and a bench top drill press. Hand tools create little dust, quiet to operate, doesn't take up a lot of space, relatively easy to store, and tend to be safer in use.
 
OP
J

jimreed2160

Well-known member
Joined
Aug 7, 2016
Messages
3,589
Location
Tallahassee FL
Yeah, you're right. ...just thinking of what a chisel could do. :lol:

Chisel safety is one thing I am aware of all the time. My chisels are very sharp and I don't want to get stuck. Early in my ww career I worked out some rules that have been very effective for me.

Chisel Rule #1--Chisel in one hand and mallet in other hand.
Chisel Rule #2--Two hands on paring chisels.

It seems to me that the most common chisel injuries result from slips. This means that the ww needs to keep hands and other body parts as far away from the cutting action as possible. The two rules do that. In order to follow the safety advise one must have necessary fixturing, i.e. vises. I have vises mounted all over my shop and use them. No chisel sticks ever.

My worst ww injury, however, was due to an errant coping saw that hacked a good portion of thumb meat. It is 50 years later and I can still see the scar. :eek:
 

bj383ss

Well-known member
Joined
Sep 29, 2011
Messages
3,166
Location
TX
Jim your workbench came out great. I really like the corner and chamfer planes you have.

I have all of David Marks videos on my computer. I really like him and how he teaches but I am not a big fan of his work. To artsy fartsy for me. But he is great to watch work. His big jointer he has is to die for.

Bret
 
OP
J

jimreed2160

Well-known member
Joined
Aug 7, 2016
Messages
3,589
Location
Tallahassee FL
Aka--Stunningly nice work. I share your love of figured wood. Keep those projects coming.

BJ--Thanks for your kind words. I am waiting for the BLO to dry and cure but all of this waiting is killing me. That big open flat space is calling...
 
OP
J

jimreed2160

Well-known member
Joined
Aug 7, 2016
Messages
3,589
Location
Tallahassee FL
A Coachmakers Shave

As we zip around in our modern wheels, it is hard to believe that just 125 years ago personal transportation required a horse. Coaches and carriages fueled an industrial boom during 19th century America and those tools were made in such large numbers that they are still quite common today. Coachmaker's beaders and quirk routers can be identified at a distance. Most look like spokeshaves. The beaders have identical blades on both sides for working different grain. Here is one that I picked up several decades ago.

DSCN1889.jpg


Here is the bottom.

DSCN1890.jpg


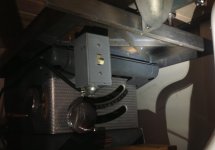
This one has a hickory bottom and looks like it was user made. My guess is that it is late 19th century--I am picking an arbitrary date of 1880. The blades are for beading and are rusty.

DSCN1891.jpg


Odd thing is that the blades are bedded at a very high angle of 80 degrees. That is scraper territory and I am anxious to see how well this tool works.

DSCN1909.jpg


Sharpening a profile blade can be a daunting task. I find the beading blades pretty easy once I find a screwdriver that has the right sized shaft.

DSCN1896.jpg


I pick some sandpaper that has a lightweight backing and wrap the shaft with it.

DSCN1897.jpg


Just pull the paper tightly and shoeshine the bead on the shaft. Just try to ignore why this motion seems so natural.

DSCN1898.jpg


Soon enough your blade will be polished and sharp and the profile will be intact.

DSCN1899.jpg


Now our attention moves to the back of the blade. There is good news and bad news. The good news is that this blade shows wear. That is good because it means the plane was some craftsman's user. Pristine blades in planes is almost never a good finding because it means that someone started and gave up. The bad news about use is that craftsmen of yore were pinched for time and often lazy. Sharpening blades with profiles is a time consuming task. The shortcut is to sharpen only from the flat side by putting a back bevel on the blade. It is an effective but short termed solution. Sooner or later, the cutting angle will be too steep and someone will have to touch up the profile. In the case of this blade, that someone is me.

DSCN1903.jpg


The flat and shiny back shows my sharpening and the dark tips show evidence of backbeveling. I do my best to flatten and then repeat some of the backbeveling.

DSCN1904.jpg


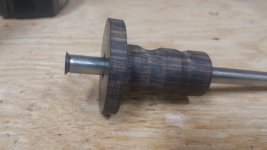
I repeated the same procedure for blade #2. Then I discovered another issue--the wedge was not wedging. Here is a picture.

DSCN1906.jpg


One dead giveaway of this user made plane is the unconventional wedge mortise. Apparently, the owner had narrow steel stock for the blades and made a narrow mortise for the blades to keep them parallel. Then he made a wider wedge to hold said blades in place. BUT he made the blade bed too deep and then split the plane hammering the wedge in place.

It is too bad that he did not consult any Japanese planemakers as they could have told him of a remedy. Japanese blades are hammered into a tight mortise in the dai, or plane body. This tight fitting mortise is hard to get right and the blades sometimes slip. The clever Japanese carpenters use paper behind the blade to shim it up. Who knew that flimsy paper would make a good shim? Why, those clever Japanese carpenters, that's who. So I followed their plan by finding some cardstock and making a shim.

DSCN1907.jpg


So now the shave is ready for action. The blades have been sharpened and shimmed. I tried some walnut. The blade jumped around and chattered a bit.

DSCN1910.jpg


I found that moving the blade back and forth worked better to remove some of the chatter marks. But it still left a nasty looking bead.

DSCN1911.jpg


So then I tried the end grain. Maybe the scraper angle works better there.

DSCN1914.jpg


DSCN1915.jpg


Nope. This plane does not like walnut. Maybe it was made for softer wood. I switched to a piece of pine construction lumber.

DSCN1916.jpg


Yes. That is the ticket. I am sure I could do better with more practice and better wood. Perhaps poplar or fir. Carriages were certainly made from light woods.

So the mystery is solved for this plane. Beaders and quirk routers were important to the carriage makers because water flow was a big issue for them to solve. Look closely at carriages, especially around windows and door frames. You will see an intricate pattern of beads and quirks designed to direct water away and keep it from leaking inside. These guys were clever hydro engineers working away in wood. I admire their work and appreciate using their tools.
 
To avoid these ads, REGISTER NOW!
Top Bottom