To avoid these ads, REGISTER NOW!

Woodworking 101--Tools and Tips

turbowoodworker

Well-known member
Joined
Mar 18, 2012
Messages
3,522
Location
Apex NC
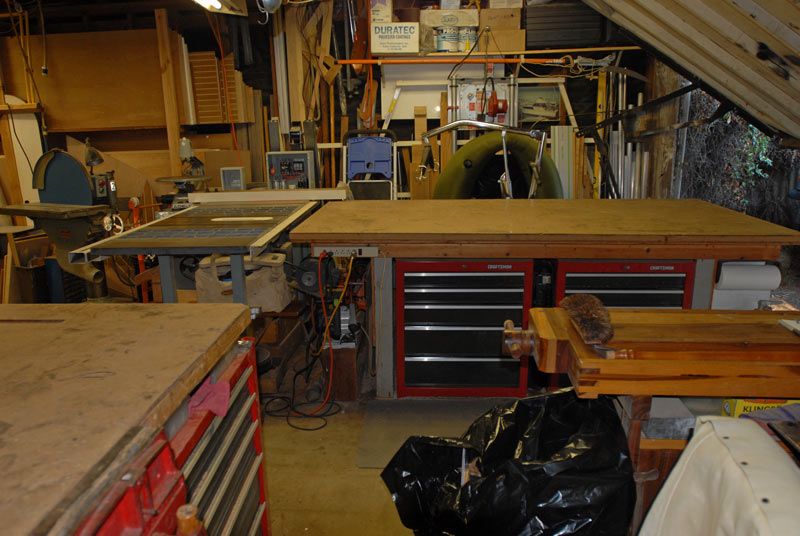
Andy, thanks for your service and sacrifice. Navy Medical/ Fleet Marine Force here. Thanks for sharing your shop with us. Where are you located, may I ask?
 
To avoid these ads, REGISTER NOW!

ADNICK

Well-known member
Joined
Feb 6, 2017
Messages
45
Location
Comfort TX
I'm experimenting with a plow plane as a kerfing plane, cut a #1 blade down to about .070" just a bit wider than my big rip saw.

This worked much better than I expected....plane is kinda rare, Jon Weiss & Sohn, but any old style plow will work.

Sure Jim has several of the real thing, and obviously is better at demonstrating, but hare are a couple of pictures:
 

Attachments

  • IMG_0614.jpg
    IMG_0614.jpg
    142.7 KB · Views: 79
  • IMG_0615.jpg
    IMG_0615.jpg
    142.3 KB · Views: 84
  • IMG_0612.jpg
    IMG_0612.jpg
    148 KB · Views: 88

ADNICK

Well-known member
Joined
Feb 6, 2017
Messages
45
Location
Comfort TX
No, tear out is not a problem, in fact it worked better in hard wood than soft, but that was what I call a tracking issue. Scoring a line with a marking gauge solved that for me. Now on the end grain there was some, but confined mainly to the kerf, not a problem for re-sawing.

Now that blade, although narrow, was still super sharp, and I used it just like a plow plane, very shallow cuts to begin....

Andy-- mos maiorum
 
Last edited:
OP
J

jimreed2160

Well-known member
Joined
Aug 7, 2016
Messages
3,589
Location
Tallahassee FL
Andy--Nice looking plow plane. And you found a good job for it. I keep a 1/8" blade loaded in a Stanley #45 body for making grooves. It is very handy. Almost every project I do has a groove or two somewhere. Tearout is generally not a problem for me either. It depends on the individual stick, but I get clean cuts about 90% of the time.
 
OP
J

jimreed2160

Well-known member
Joined
Aug 7, 2016
Messages
3,589
Location
Tallahassee FL
I would like to send a hearty thanks to all of those who have bravely served and to those who are currently serving. My son is in active service and we are very proud of him. Freedom is not free. Thanks to all. :thumbup:
 
OP
J

jimreed2160

Well-known member
Joined
Aug 7, 2016
Messages
3,589
Location
Tallahassee FL
Sash work continued

Thanks to all of you who endured my foggy posts during the sash blade get acquainted tour. I was able to get some quality sleep time and figure out a few things. It is actually my best ww problem solving strategy. Get in the shop and try a few things. Hit some dead ends. Set up these puzzles that make your brain itch. That is called cognitive dissonance--your brain holds conflicting "truths". But your brain cannot stand conflicting ideas and it itches. Just set up these puzzles and get a good night's sleep. Your brain reboots every evening and solves problems during this cleanup. It always works for me. Answers just magically appear in the morning.

Well this morning was no exception. I realized that the fence was on the wrong side. I also realized that 13/16 lumber was not thick enough for the sash blade. The fence fix was pretty easy. The lumber issue took a little work. I sliced a 2x6.

DSCN2130.jpg


DSCN2131.jpg


The result was 1" stock. My measurements showed that 7/8" was just about right, but I did not want to make it too thin because I could plane that extra 1/8 off pretty easily.

Here is the plane ready for action.

DSCN2132.jpg


Using the sash blade is pretty easy. I start about an inch from the end line--extreme left hand end. And then I back up about an inch or two and plane again. Pretty soon I have backed up all the way to the right and am taking full length shavings.

DSCN2133.jpg


Once I hit the desired depth on the first side, I set the depth gauge on the plane. Now the other side will be just like it.

DSCN2134.jpg


Just flip the board and repeat. Those fluffy shavings pile up rapidly.

DSCN2135.jpg


Here is the finished profile.

DSCN2137.jpg


And here is our test stick.

DSCN2138.jpg


All I have to do is rip down the back side to release the finished muntin. Then I can plane that surface flat and make another. Pretty easy. This test muntin took about 20 minutes. Now I need a sash project. Routers are nice to have but a handplaned sash would look just too cool. :pimpflash
 

ADNICK

Well-known member
Joined
Feb 6, 2017
Messages
45
Location
Comfort TX
Jim:

Great job....now the rails and stiles will have the same profile as the muntin, cut with the same plane/blade?

Looking forward to seeing how they get joined at the mitre intersection....

Great tutorial.....

Andy
 

cheechi

Well-known member
Joined
Feb 29, 2012
Messages
4,384
Location
Triad, NC
Pre-drill it. And cover with tempered Masonite.

My 48" x 96" bench is 3/4" ply, 1' MDF and 1/4" Masonite.

shop-6_zpsm5lv8nfv.jpg
This would have been ideal but I didn't think of it soon enough. We already had half the cart built planning on the 3/4 osb under 3/4 mdf. I do like that bench.

I've always had good success with coarse thread dry wall screws in mdf. No need to pre drill and hold well. I would also recommend topping the mdf with 1/8" tempered Masonite. MDF has a tendency to gouge easily and will soak up anything spilled on it. If you insist on just the MDF, consider sealing it with Poly.
For what I'm planning the only liquid to get near this will be wood glue. Drywall screws might have been perfect for this.


If you don't pr-drill you will create a bulge that ruins the flatness, besides weakening the already poor structural integrity.

Not sure if this is an option for you but countersunk flathead machine screws all the way through all layers may be better. I agree with EZ that the bulge will be difficult and your thickness limits depth of screw.
Hopefully for more than aesthetics, I wanted the top totally smooth as in one piece.

I want to share with you guys the finished product as well as its two 'brothers'. Not intending to make a theme I have decided my flavour of woodworking is apparently repurposing office furniture. This table is built around a map drawer cabinet, next to it is my 'router cabinet' made of a Sharp printer pedestal, and as well the original prototype is a file cabinet drill press stand.

The drill press cabinet is interesting, as the drawers are 'almost deep enough' for everything, but it was wide enough for my forstners set so I decided to put all my 'specialty' drill stuff into it and then eventually the press on top and then eventually frame it intending to put wheels under it. This particular DP has been with me for a decade and been in my way for a decade. When I got my bigger DP I intended to give this one away but everyone I wanted to give it to didn't want one. The cabinet was originally on bigger (4"?) casters but was too tall to do anything, including the DP, as I am 5'3 so I redid it somewhat and put smaller wheels on it. Those 4" wheels were from a really ****** pair of craftsman roll cabs that we put smaller wheels on to fit under a shelf, and when those were sold those wheels sold with it.

So I have these two sets of pretty decent wheels that were never even used, but frequently opened to see if they could be. So I finally stuck them on that file cabinet in lieu of anything else, but it was unusable. So I intended to take that set off the first cabinet and reuse them under the map cabinet, and we wound up having to do things in the opposite order so now both sets have been opened and used. And after the point it got too heavy to change, I got the idea of putting the four swivel casters (all four locking) on the big table. Too late but if I change anything about it those are likely to get on there.

You can see I marked in silver where I put the screws, they are in the outside edge on 3 sides, probably 12 or 16 total. I did pre drill them with 1/8" bit 1" in, so that there would still be some MDF for the #8 screw to grab but not so much that it would bulge. When I put the first screw in it grabbed way tighter than I expected even on the lowest impact setting. I had planned to put about 30 of them in all across the bottom and perimeter, but after the initial two sides it was so secure I didn't put any more than what I had already predrilled.
 

Attachments

  • DSC_0004.jpg
    DSC_0004.jpg
    144.9 KB · Views: 131
  • DSC_0003.jpg
    DSC_0003.jpg
    141.1 KB · Views: 128
  • DSC_0002.jpg
    DSC_0002.jpg
    133.6 KB · Views: 123
  • DSC_0001.jpg
    DSC_0001.jpg
    142.9 KB · Views: 142

rk5n

Active member
Joined
Jan 11, 2016
Messages
39
My first hand cut dovetails.

I'm pretty happy with how they turned out, this is the best joint on a small 6x6 box I made out of poplar. The rest weren't too much worse besides the first one where I mistakenly cut on the wrong side of my knife wall once. I'm gonna keep practicing at least a few times a week. Pretty soon I'll be overflowing in random boxes.
 

Attachments

  • IMG-20170210-WA0001.jpg
    IMG-20170210-WA0001.jpg
    9.9 KB · Views: 128

sawduststeve

Well-known member
Joined
Oct 7, 2016
Messages
2,137
Location
Havering-Atte-Bower,London/Essex boarders, England
My first hand cut dovetails.

I'm pretty happy with how they turned out, this is the best joint on a small 6x6 box I made out of poplar. The rest weren't too much worse besides the first one where I mistakenly cut on the wrong side of my knife wall once. I'm gonna keep practicing at least a few times a week. Pretty soon I'll be overflowing in random boxes.

Good work rk5n, it's been awhile since I've hand cut some dovetails.
I have though, recently made a bathroom cabinet out of Tulip or to give it it's proper name American Poplar.:


It's being used a lot over here now as it's nice to work , stable and takes paint well.

Regards
Steve.
 
OP
J

jimreed2160

Well-known member
Joined
Aug 7, 2016
Messages
3,589
Location
Tallahassee FL
Adnick--It might be awhile before I get back to the sash. But stay tuned.

250--Welcome aboard. Feel free to post pictures of your projects. We love pictures.

Cheechi--Nice repurposing. I love turning trash into treasure and you made some really nice shop furniture.

RK--Nice box. Glad you got into dovetails. We need to cover that someday.

Sawduststeve--You are correct--poplar is nice wood to work. It is easy on the tools and is stable. Sure makes some nice shavings.

I am still looking for a moulding project and hope to crank it up in the next few days. That H&R set needs a workout.
 

72highboy

Well-known member
Joined
May 14, 2016
Messages
269
Location
So Cal
I really need to catch up over here, but, I figured I'd stop by and drop off a picture cause everybody loves pictures! Little spoon carved out of maple for my mother's birthday
a0451e7831a55c28cf37870b96b8c400.jpg
Okay I'll get back to reading, cheers!

Sent from my Nexus 6P using Tapatalk
 

Attachments

  • a0451e7831a55c28cf37870b96b8c400.jpg
    a0451e7831a55c28cf37870b96b8c400.jpg
    114.3 KB · Views: 2
OP
J

jimreed2160

Well-known member
Joined
Aug 7, 2016
Messages
3,589
Location
Tallahassee FL
72--Love the spoon! AND the cutting board in the background. I am sure your mom was delighted.

My mom was my biggest ww fan and her encouragement meant a lot to me in the early days when my projects were pretty crude.
 
To avoid these ads, REGISTER NOW!
OP
J

jimreed2160

Well-known member
Joined
Aug 7, 2016
Messages
3,589
Location
Tallahassee FL
I thought that while I was trying out the Stanley sash blade, I would also try out another sash cutter. Preston made sash spokeshaves in several profiles and in different sizes. I have a few and have always wanted to see how they work. I selected one of the shaves and headed into the shop. First task was to rip the muntin from the test stock and finish off the cut edge. I used my Stanley #4. If your handplane is pulling shavings like this, then it is set up properly.

DSCN2140.jpg


So on to the shave.

DSCN2141.jpg


Here is the profile.

DSCN2142.jpg


The blades were rusted and dull and it took a few minutes to get then into shape. The old sandpaper on screwdriver shaft worked great. Then I ran down the board.

DSCN2143.jpg


Not so hot. I will be the first to tell you that I am not a fan of metallic spokeshaves. Blade adjustment on most vintage shaves just *****. Set up as a traditional spokeshave, they are OK. I set them so the blade just barely sticks out on one side. In use, I move across until I find the sweet cutting spot. It works ok for normal shaving. BUT everything falls apart when you are trying to fashion a profile. The cutter needs to be evenly set across the throat and that is difficult because most do not have an adjuster to hold the blade in place.

This shave was hard to use. Blade setup was tricky and the small sole area was hard to track and keep in place. I am sure I could do better with practice, but I think a plane is easier and produces better results.

So the Preston sash shave was a bust as far as I am concerned. It is just too fiddly for me. I apologize to all faithful readers but sometimes I dig dry holes. This was just a diversion while I continuel looking for a moulding profile and wait for my noggin to feel better.
 

Blue Frog

Well-known member
Joined
Jun 22, 2014
Messages
363
Location
Lynn Haven, FL
I've been down with the flu for several weeks - not able to accomplish much. My last posting on the progress on the crib was post# 1294, way back on page 65.

Did I mention that the oak that I'm using is well seasoned - it was cut with a large circular saw and had been n a dry basement when I purchased it at an estate sale about 12 years ago. This wood is HARD!


I'm now laying out tenons to connect the front pieces to the posts. I mark the board with a marking knife, dragging it along the side of the framing square.


This particular board is 8" wide, 3/4" thick and has two tenons on each end. I rough cut the waste from around the tenos with a bandsaw, staying shy of the scribbed line.


Then comes the hand work. My chisels were ground at 25 degrees and trying to pare the end of hard oak destroyed the edge on the chisel very quickly, so I reground the chisel to 30 degrees - work much better now. The chisel sits very well into the scribbed line made by the marking knife.


I undercut the paring just a small amount to insure a tight joint. Next will be the mortises cut into the posts. I'll use a dedicated mortise machine with 3/8" cutter for this action. Continued tomorrow, hopefully.

Blue Frog
 

ztorres

Well-known member
Joined
Sep 22, 2016
Messages
195
Location
Iowa
Has anyone made a bed set? I'm looking at making one and would like to see if anyone has some tips


Zach
 

ADNICK

Well-known member
Joined
Feb 6, 2017
Messages
45
Location
Comfort TX
Zack:

Have made a few beds, both with metal screw on rails and with wooden rails with through mortises.... the through mortises were done with wedges on the ends, but not sure what you are looking for?

Andy
 

ztorres

Well-known member
Joined
Sep 22, 2016
Messages
195
Location
Iowa
Andy,

Here is what I have thought up so far

I plan on using internal "dominoes" or hidden mortises to keep everything together except the side rails, I will use 3/8" bolts there. Is this concept good, or is there stuff I need to think of that I am missing?
 

Attachments

  • BED FRAME.jpg
    BED FRAME.jpg
    8 KB · Views: 56

ADNICK

Well-known member
Joined
Feb 6, 2017
Messages
45
Location
Comfort TX
Zack, any proven design for the mortises should work fine, the most important joints are the ones connecting the rails with the headboard and footboard of course, and those designs that pull the rails into the post are great, and available commercially.

There can be a lot of stress on those connections.....

Your bed design looks good,
And
 

derosa

Well-known member
Joined
Oct 19, 2010
Messages
1,078
Location
Oceanside, NY
I did stub tenons with bolts that go through the leg and into the rails, you can buy a decorative cover for the bolt heads. Only made a toddler bed so far and its on its third kid so the design works so far.
 

derosa

Well-known member
Joined
Oct 19, 2010
Messages
1,078
Location
Oceanside, NY
How many clamps are needed? Always found it easy to get a tight glue line on edges so for some of the parts a little glue and rubbing the pieces together is all that's needed. On the other one of the two boards slightly twisted after finishing at the planer. Since the glue up will be cut up into 6 pieces and is still 1/4" over thick the pieces can be rejointed and planed after being cut close to size. Just funny how many clamps may or may not be needed.

I've started working on some chairs, 2 for the kids and 8 for the dining room. Kids' chairs are cherry while the dining chairs are quarter sawn sycamore and are based off an arts and craft design.
 

Attachments

  • IMG_20170210_132008.jpg
    IMG_20170210_132008.jpg
    125.4 KB · Views: 79
  • IMG_20170213_141853.jpg
    IMG_20170213_141853.jpg
    144.9 KB · Views: 99
OP
J

jimreed2160

Well-known member
Joined
Aug 7, 2016
Messages
3,589
Location
Tallahassee FL
Blue--That looks like some really hard oak. Good luck with your crib.

Derosa--You are correct. Too many clamps is impossible.

I spent most of Valentine's day in the hospital while my bride underwent outpatient tests. At least I got to see some of my former co-workers. Tests seemed to go OK, but that left little time for ww. I was able to do some cleaning up this afternoon as well as a quick rehab.

The plane in question is a German horn style scrub plane from late 19th century.

DSCN2146.jpg


DSCN2147.jpg


There are no markings on the body, but the blade is marked "Robert Frohn".

DSCN2150.jpg


That is a family company that began making tools in 1689. Robert took over in 1870 and sold the company in 1921. This plane looks like one from the late 19th century.

It was in pretty good shape so I cleaned it with a scotchbrite pad and worked on the blade. I had sharpened it a few years ago but today I took the time to work on the heel. It is about 1/8" thick at the cutting edge but tapers to about 1/16" at the top. Someone had hammered it and curled the steel so I ground it back and filed it smooth. Then I honed the blade.

The body was just dirty so it got wax after the pad. I was careful to avoid getting wax on the sole and on the blade business surfaces. It shined up nicely. Looks like fruitwood of some sort. Pear?

DSCN2151.jpg


DSCN2152.jpg


I love the worn patina look of a well cared for vintage plane like this one. It looks like it could almost tell stories.

DSCN2153.jpg


And then I took it for a test drive in some pine.

DSCN2155.jpg


It did a good job. I was amazed at how lightweight it is. I could scrub with this plane for a long time. It might not stand up to tough maple, but for smaller projects would be just the right tool.

So I was able to use my workshop to turn around a day that did not start too well. It does not take hours of slaving away in the shop to have a good time. Some days all it takes is a nice tool and a quick project.

DSCN2154.jpg
 
Last edited:

ADNICK

Well-known member
Joined
Feb 6, 2017
Messages
45
Location
Comfort TX
Jim:

What a great tool, those wood planes transmits some sort of soothing voodoo covering the nearly the whole spectrum of our senses.

With he right type of odiferous wood it can cover the whole spectrum ;-)

Andy -- mos maiorum
 

Craptain

Well-known member
Joined
Apr 18, 2013
Messages
4,027
Location
Tampa Bay FL
So I was able to use my workshop to turn around a day that did not start too well. It does not take hours of slaving away in the shop to have a good time. Some days all it takes is a nice tool and a quick project.
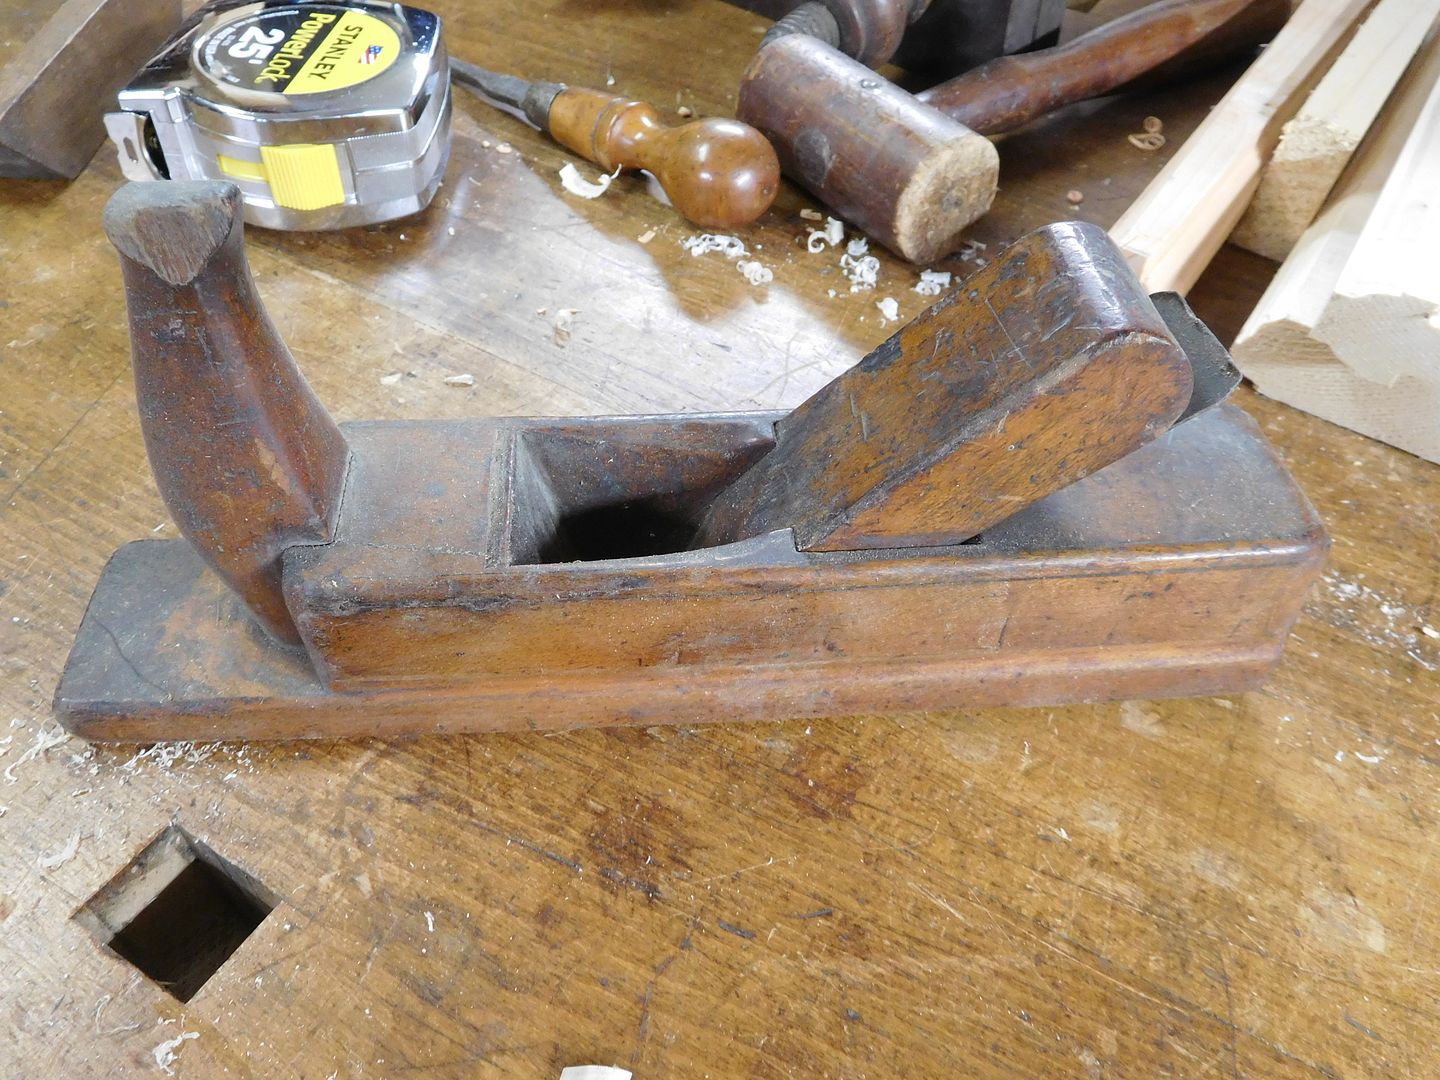
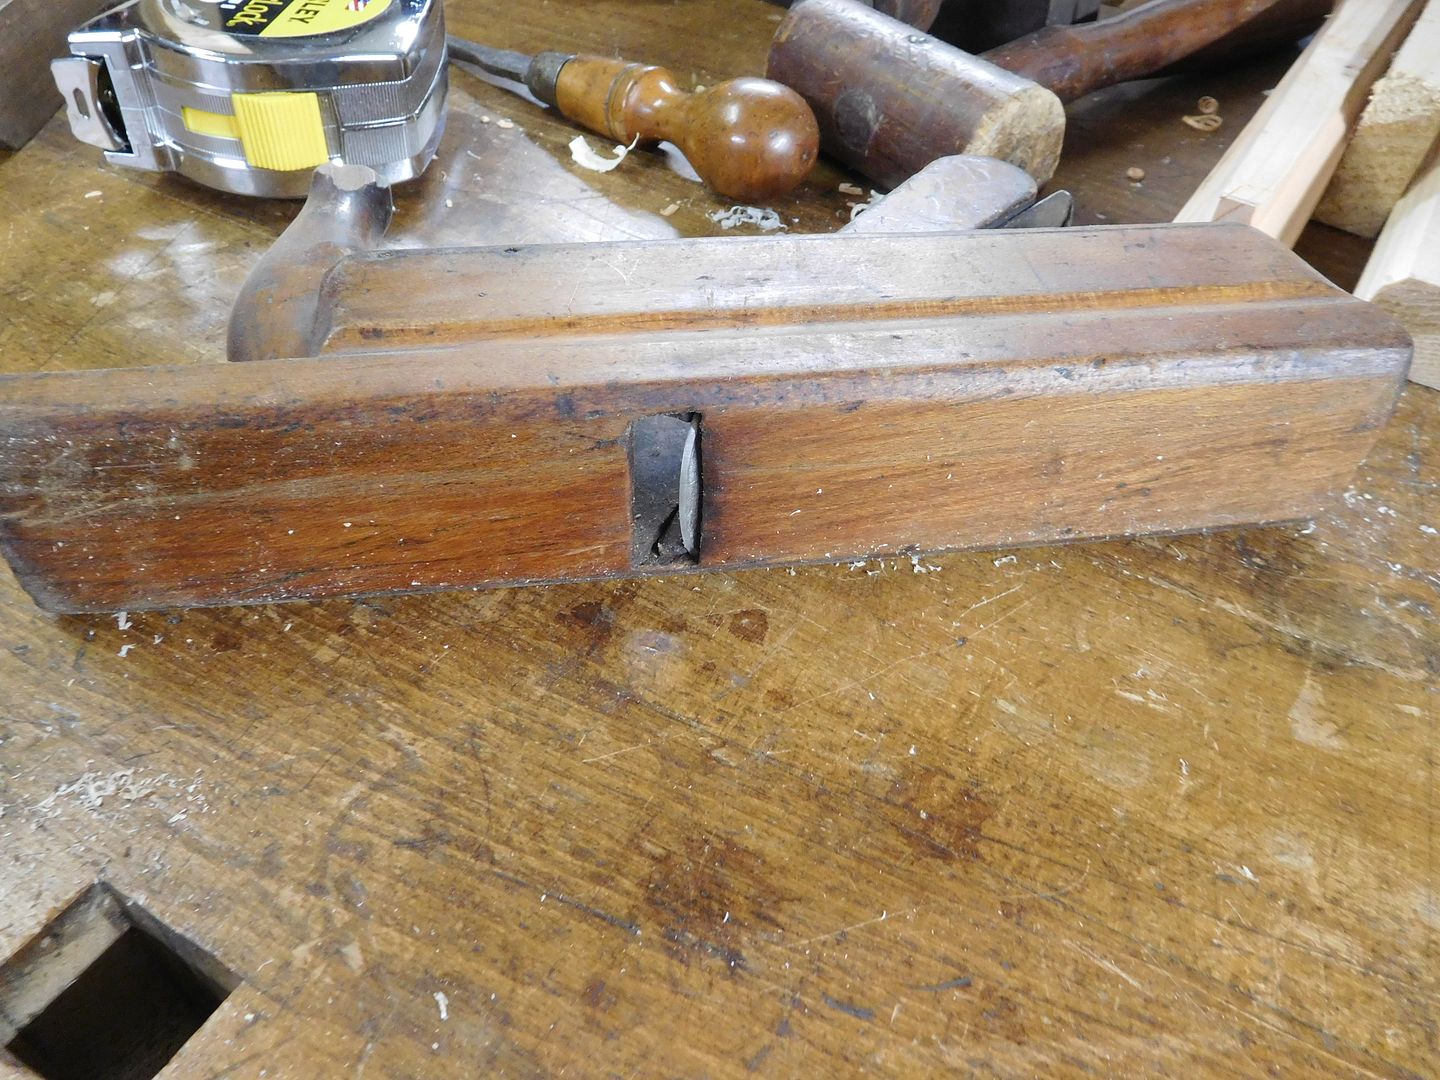
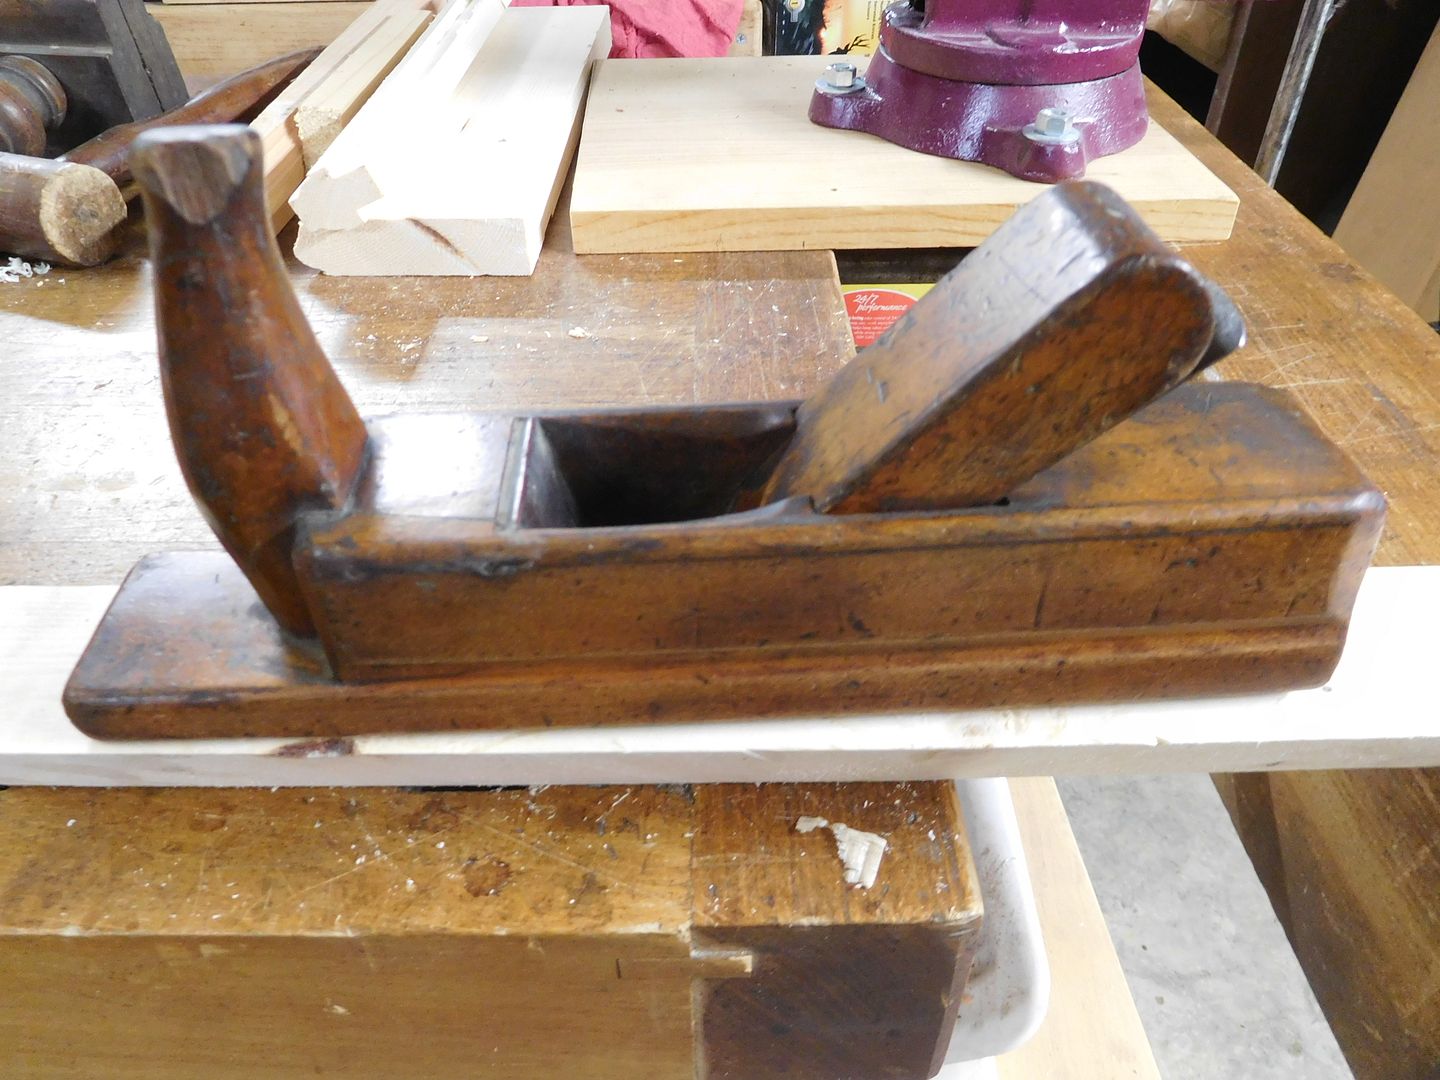
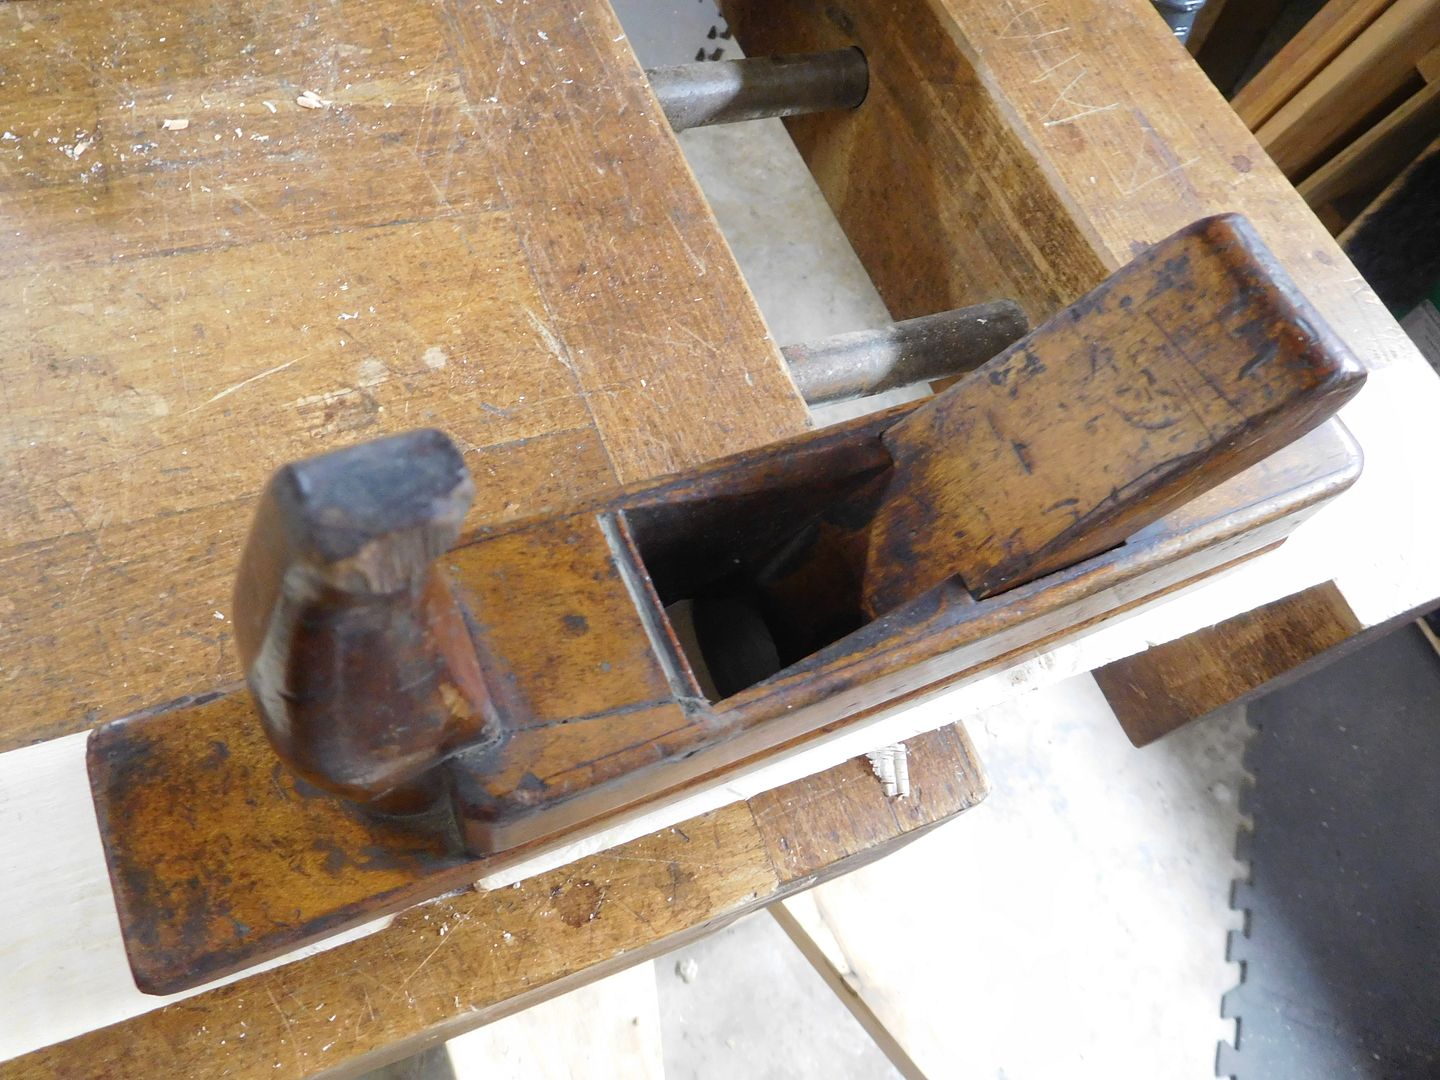
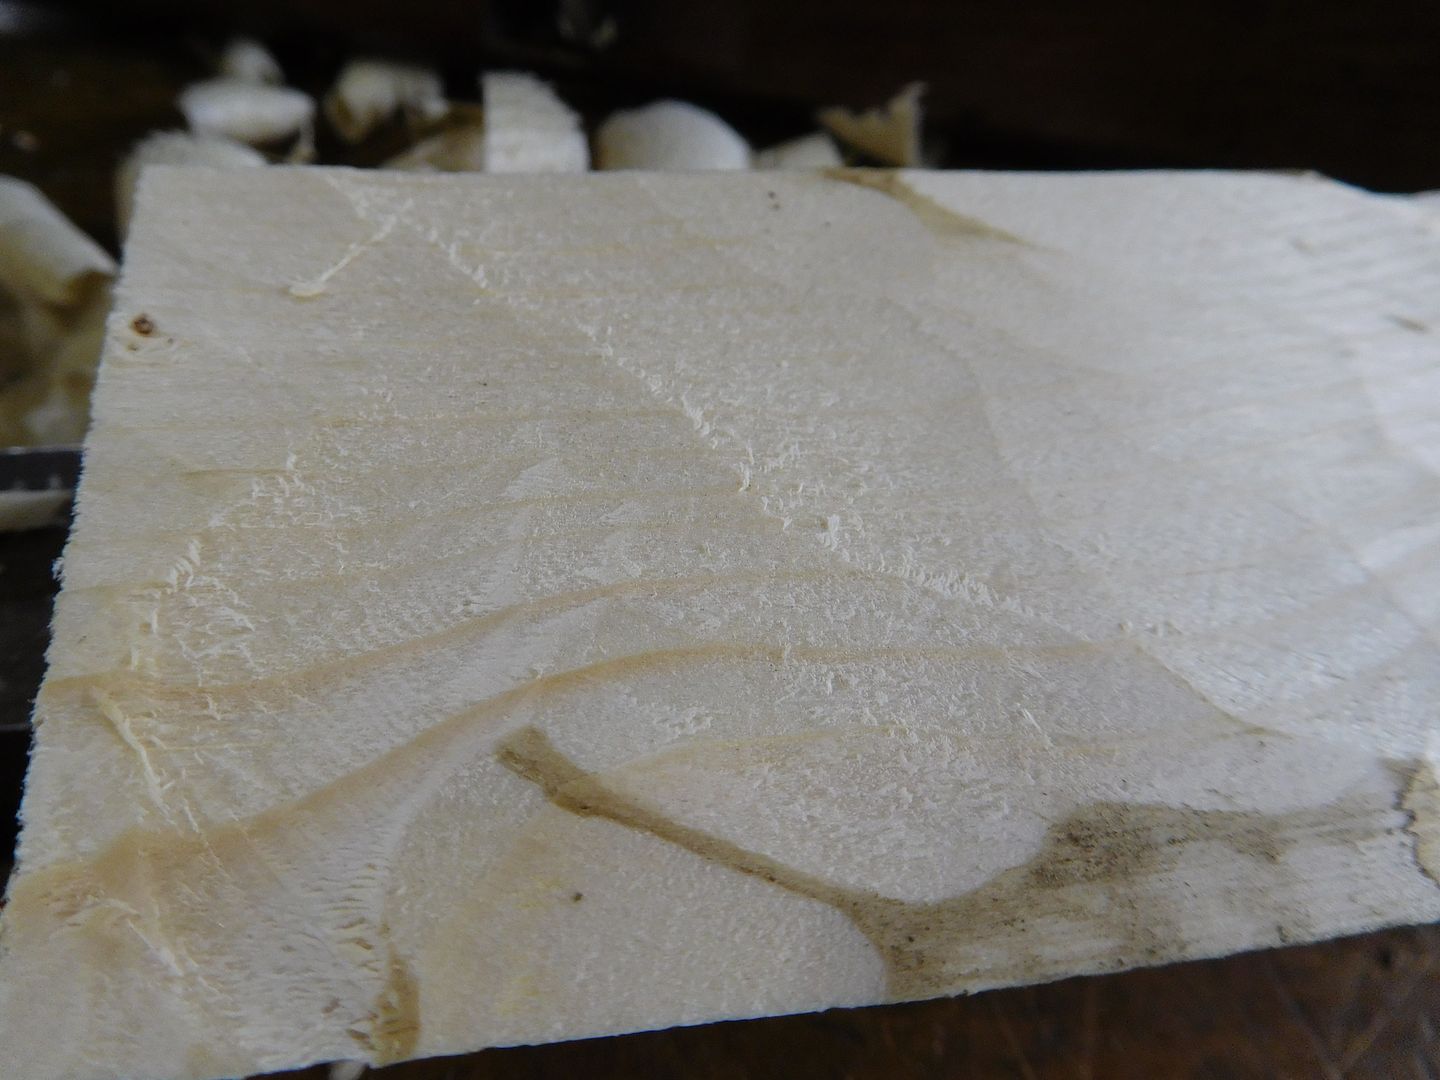
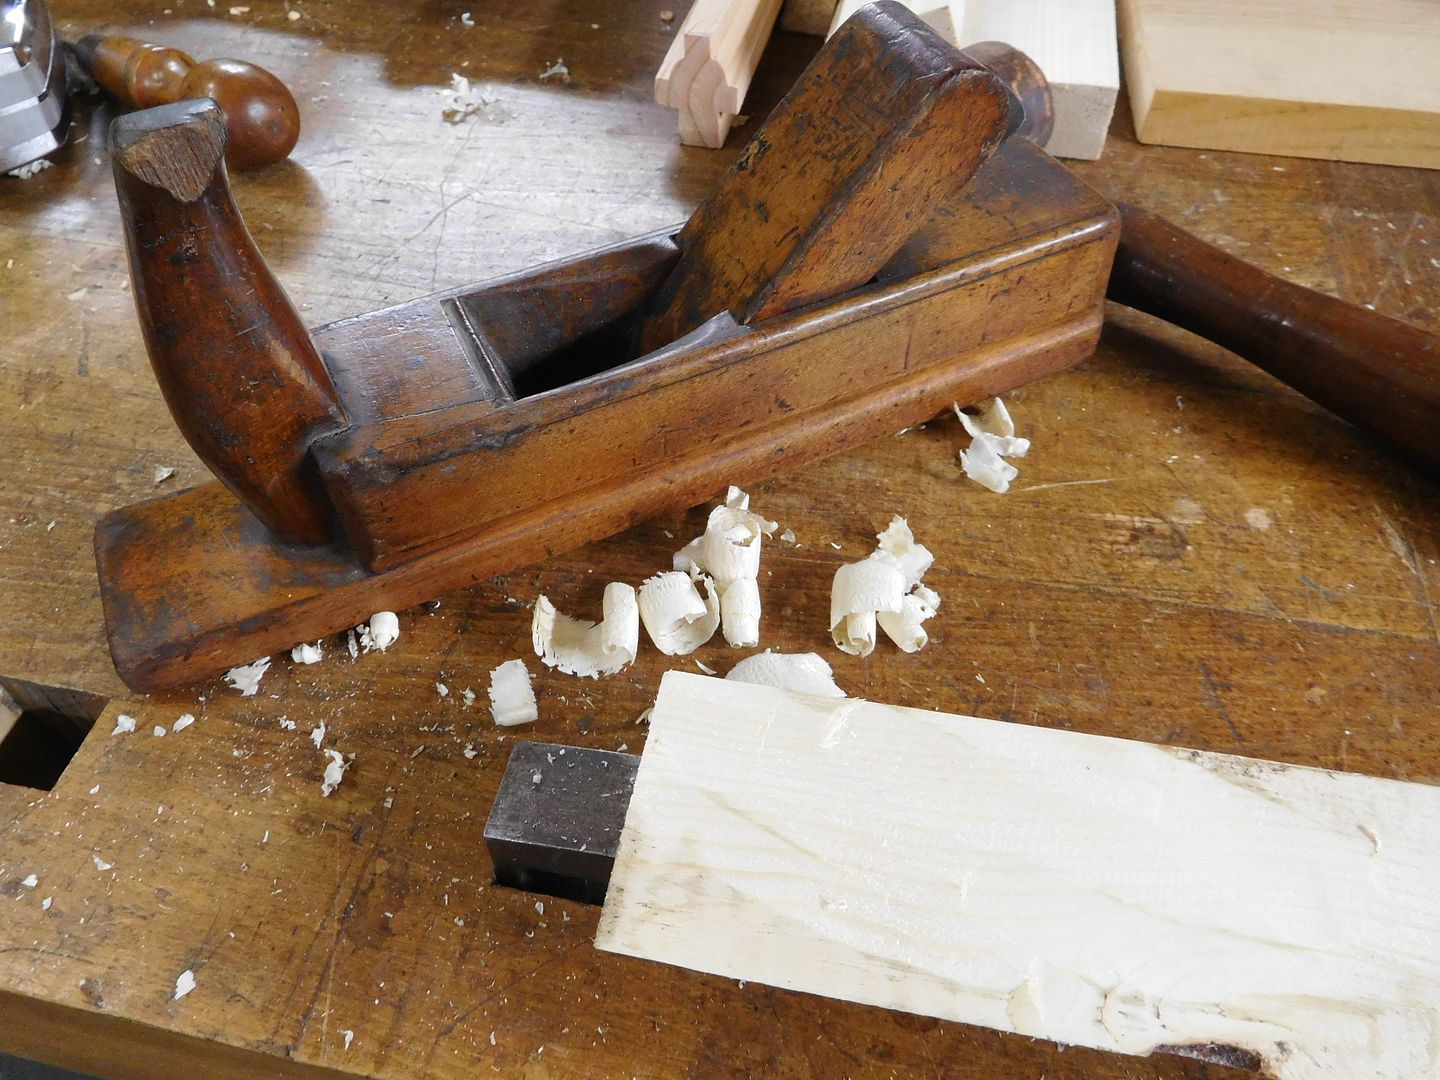
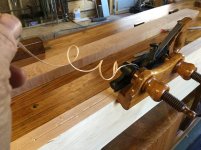
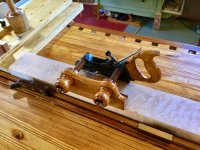
That's right Jim. Short time can still be productive time. Yesterday I pulled out a few of my garage sale finds and started cleaning and sharpening. Here are a few pics.
8c4e84931e14dcba3782a1bba8cb68a1.jpg

860585fd112e7599c375c5fc2b8d7926.jpg

430636507de2e801ff64bc0eb363409a.jpg

Oh dear. This guy has been subject to some harsh grinding and now the back needs some help. A couple of taps from my hammer on the makeshift anvil and I can re-sharpen it. 756e299d1d74b918bc79fa371bb03b23.jpg
6f587e0260b2ce77c250eb58b86e7478.jpg

Well I have more work to do here but it is cutting nicely now. I have often wished I had an offset chisel and now I have 2.

Dang. Looks as if I lost a picture of the "repaired" blade. But anyway it is much improved.

Sent from my SM-G900T using Tapatalk
 

Attachments

  • 6f587e0260b2ce77c250eb58b86e7478.jpg
    6f587e0260b2ce77c250eb58b86e7478.jpg
    48.3 KB · Views: 0
  • 8c4e84931e14dcba3782a1bba8cb68a1.jpg
    8c4e84931e14dcba3782a1bba8cb68a1.jpg
    46.7 KB · Views: 0
  • 860585fd112e7599c375c5fc2b8d7926.jpg
    860585fd112e7599c375c5fc2b8d7926.jpg
    32.4 KB · Views: 0
  • 430636507de2e801ff64bc0eb363409a.jpg
    430636507de2e801ff64bc0eb363409a.jpg
    48.3 KB · Views: 0
  • 756e299d1d74b918bc79fa371bb03b23.jpg
    756e299d1d74b918bc79fa371bb03b23.jpg
    39 KB · Views: 2
Last edited:
OP
J

jimreed2160

Well-known member
Joined
Aug 7, 2016
Messages
3,589
Location
Tallahassee FL
Craptain--Good job on the offset chisel. I have toyed with the idea of making a few because they seem to be real handy. You can get the same cut just by flipping the chisel over and using it bevel side down. But you lose the flat bottom as a reference. I am guessing that the offset chisel is an excellent paring tool and offers more control than a chisel plane. In fact, it probably has more in common with a chisel plane or an OWT router than it does with a regular chisel. Nice transition tool.
 

turbowoodworker

Well-known member
Joined
Mar 18, 2012
Messages
3,522
Location
Apex NC
Ryan just posted a video with Nick Offerman which is a tour of his

shop.http://www.garagejournal.com/2017/02/nick-offermans-wood-shop/

As I mentioned on a host on Ryan's thread I think that there is a lot to be learned in that interview that would be very valuable to new woodworkers when it comes to getting started, purchasing tools, and enjoying woodworking.

Nice video, I wish there had been more of his shop but still there is some true words in the interview.
 
OP
J

jimreed2160

Well-known member
Joined
Aug 7, 2016
Messages
3,589
Location
Tallahassee FL
Working on the todo list

I have not had much time this week for sustained woodworking. Yesterday, at one week post-op, my head finally quit hurting. That was a milestone as far as attitude goes. The queen is still in the middle of her appointments, but the last of those are tomorrow. Then things can settle down. Good news is that I think I have found a suitable moulding for the H&R project.

As this week winds down, I am pulling from the projects list. Today's effort comes to us courtesy of the WayBack machine. Long ago, I saved up my coins and purchased a rolling tool cabinet from JC Penney. It was just a little cabinet but was a big purchase for me at the time. It had two fixed casters and two flimsy metal brackets. Remember those. Soon after the purchase I moved from Petersburg, Virginia to Vandalia, Ohio. The cabinet foot brackets were a little fragile and the movers managed to crush one of them. It crushed me to see my cabinet hurt when I did not have the talent or time to fix it. I removed both brackets and replaced them with a piece of firewood. And thus it traveled back to the southeast and finally to Florida. The repair is one of my longest standing projects.

DSCN2159.jpg


DSCN2160.jpg


So the time has come for a fix. At one time, this little chest held every tool I had. It is older than my children and survived a divorce and a dozen moves. We have a special bond.

I went to HF and picked up some 3" casters. I found the original price tag during the repair.

DSCN2161.jpg


Wow! That was a lot of money in 1972 or thereabouts.

So the existing casters are fixed and the two new casters swivel. I was able to line up on an existing hole on both sides so only six new holes were needed.

DSCN2162.jpg


And here is the money shot of my repaired cabinet. The HF 3" wheels are an exact match and the now rolling cabinet is wonderful.

DSCN2164.jpg


The trusty ole piece of Virginia red oak will now be retired. It is covered with grinding swarf but is not checked.

DSCN2163.jpg


Maybe it can be a new project. One project down--one project added. I may never run out of things to do in the shop. :willy_nil
 
Last edited:
To avoid these ads, REGISTER NOW!
Top Bottom