ScottsGT
Well-known member
Those pens are stunningly beautiful!

Those pens are stunningly beautiful!
CSRPenFab, those pens are gorgeous! Well done!


is it a matter of you knowing wood in general, you knowing your stock, or something else that makes you either sure/unsure what species of wood you find when you go through your stock? This has always been interesting to me as some go by grain, smell, some rely on labeling everything. Never met two guys whose system is exactly the same.luan or something like it
lucky I'm not done yet, I do intend to cut off at least 1/2" of the end I've got done so far since it is uneven. The gaps are interstitial though so I may try that with the dust/glue mix. generally is it about 1:1 mix? or should I experiment?
I have one of the rockler silicon brushes that has like a scraper type flat end on the other side. I will use that like a putty knife and get in there.


Thanks. I feel like it is slow progress.rrich1--Good progress on your workbench.

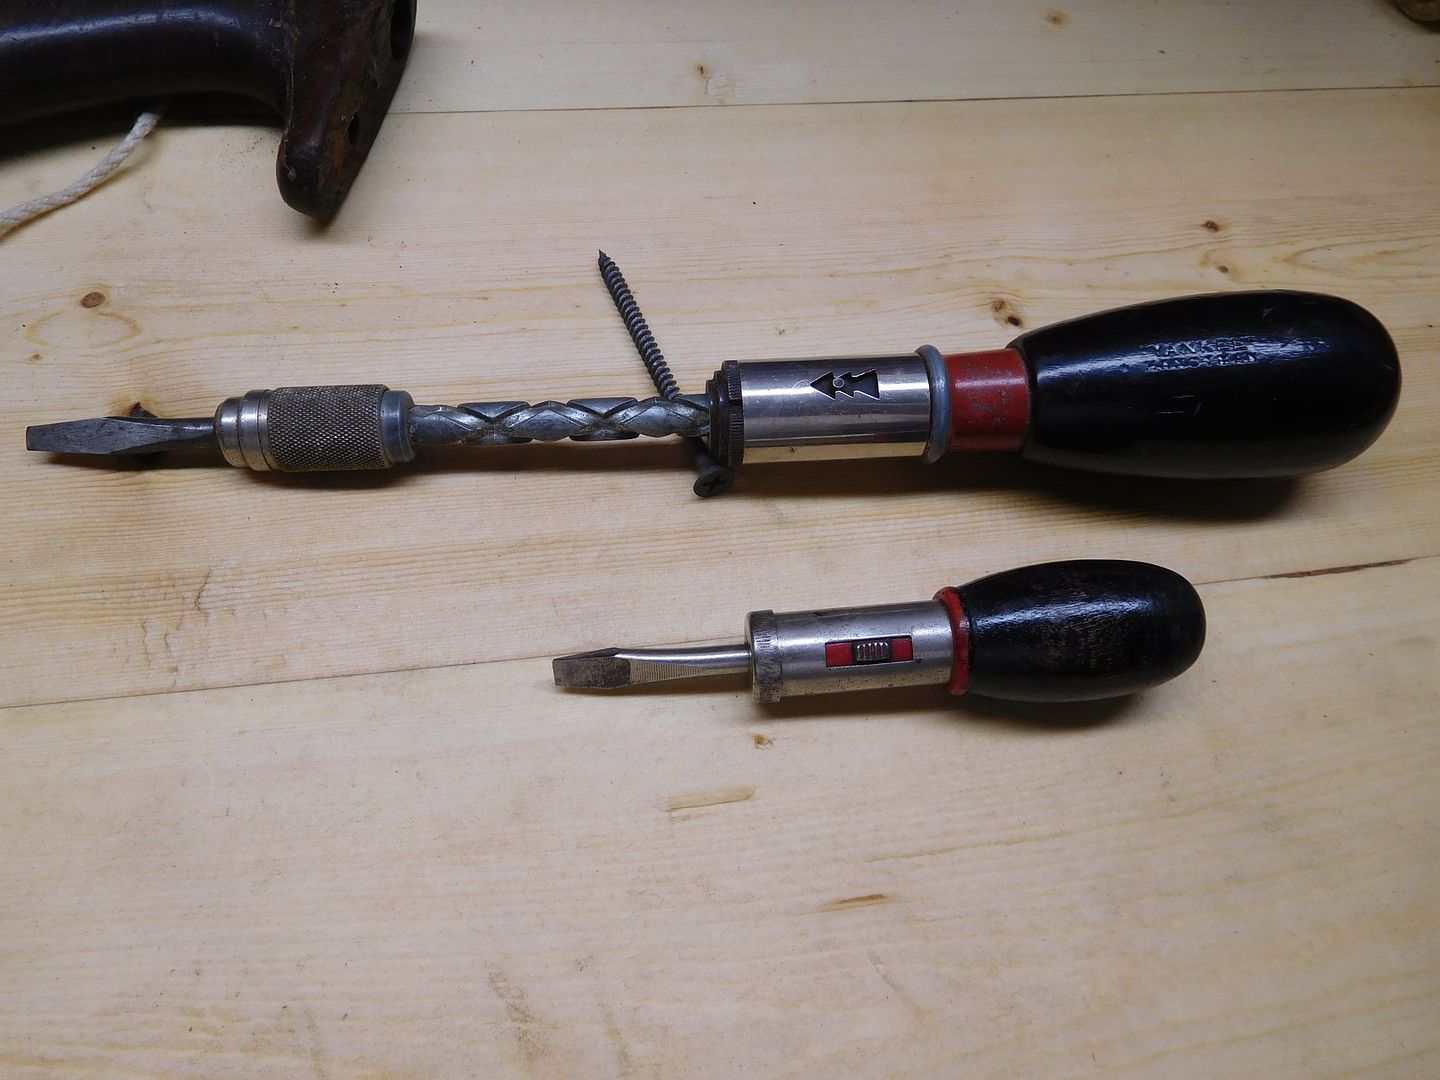
Jim: i like your Yankee MINI ME!! just curious if you'd maybe have cut the original piece of ebony in half before putting on the lathe do you think it still would have split? and wouldn't that have been enough wood to do a little pawn?
Well I should have picked a piece without a visible split. I was hoping to work around it. Or should have dribbled some superglue into the crack. Or could have planed it down. Shoulda, coulda, woulda...


Dang Jim, sorry for the bad luck on the turning. I'm surprised. What turning tool were you using when they broke? Spindle roughing gouge?
Jim: this might sound stupid, but why are your pieces of wood so long that you are using to make your pawn on your lathe? is there a minimum size requirement? i think i recall being able to make a bowl with the block of wood just attached to the bit on the left side or was/am i mistaken?
even though you are making a challenge out of this pawn i (we) are learning from your mistakes.
good luck
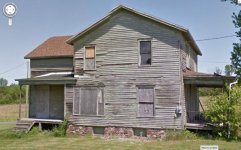
Sadly, unless I find a church job with a parsonage the house goes up for sale next month.Derosa--Wow. Lotsa trim work. That is really a project of love. Of course, at the end there should be lots of time to admire your work. Good stuff. And we all enjoy the pictures.
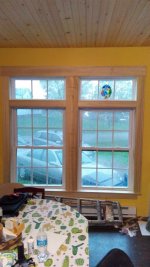
That really is my house. What's sad is that people around here can live in such squaller that I actually had people glad I had "moved in" since it was such a nice house. I was actually living 75 miles away and camping in an RVto begin with.Derosa: if that's really your house you are restoring do you have any current pictures of the outside? nice work on the window trim and what kind of wood is that? PINE or ??