To avoid these ads, REGISTER NOW!

Woodworking 101--Tools and Tips

bdelmar2

Well-known member
Joined
Apr 5, 2013
Messages
276
Well, you folks have all been pretty busy since I last stopped by.

I guess I've been kinda busy myself, but nothing woodworking/shop related sadly.

Between a tooth infection and my truck breaking down, work, and the basic everyday home stuff, just haven't had any time.

I will say if you happen to own a Ford 4.9 straight 6, be careful if you try to replace the distributor. Mine just sheared the pump gear roll pin, but I thought I'd go ahead and get a new distributor while they are still available.'

However all the new ones you can actually get seem to have a steel gear instead of the correct cast iron gear. Glad I caught that, otherwise it would chew up the gear cast into the cam in a few months.

So after chasing that around for a week I just put a new roll pin in my old one.


Jimreed, hickory is some hard stuff. Once in a great while at the cabinet shop we would do a house in it.

Mostly we used oak, and with that the blades in the majority of the tools would last a week and a half or so - generally we did a good sized house's cabinets in a day. Kitchen, master and guest bath, and a large entertainment center was the most common run.

We used plywood for the finished sides, but made our own face frames, drawers, and doors - raised panel (made our own panels) with arch option, also made our own crown moulding in two optional sizes. So 5 large shapers, 3 with power feeds, planer, jointer, moulder, etc....

We also did a fair amount of popular for the houses with painted cabinets, if there were a couple of those jobs we could usually stretch the bits and blades for two weeks without issue.

But with a hickory job we had to change everything out before we started and they needed swapped out again at the end. So, one day instead of 10, and that's just for a kitchen.

If it was a bigger job, (they went hickory for the whole house) we most likely would have to swap them out in order to finish, which is more of a hassle because you have to match the setups exactly.

Maple, Cherry and Mahogany all had similar blade life as Oak, though I can only recall one Mahogany job in my time there. 4 or 5 Hickory jobs, all from the same smaller homebuilder - he did about a house a year.

Maple was probably a little harder on blades, but we only did the occasional Maple run - maybe once every couple months or so.

Couple of Birch and a Pine or two also, but I don't recall blade life on those so probably not out of the ordinary, but Hickory definitely stands out.

rrich, congrats on the dust collector - I would say you qualify for a 'you ****' on that one.

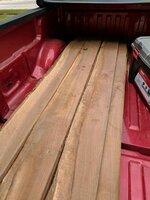
wrenchguy, nice slab, and love the old planer - 15"?

I still have yet to try the crappy old Ryobi 10" I got fairly cheaply and close by. It sounds fine. Have a little issue with the setup though. Apparently these came with a jig to set the blades separate from the machine and then you just drop them in. I don't have the jig and it doesn't seem to be available anymore.

I imagine I can make one if the blades currently in it are set up correctly.
 
Last edited:
To avoid these ads, REGISTER NOW!

Ainsley

Well-known member
Joined
Jun 12, 2014
Messages
557
Location
Ontario, Canada
Getting closer to being complete, just need to finish all the smaller top pieces that sit along the arch.

95B98A54-F22A-426B-9B5B-D51EBA9CA4DA_zps3jakgg9b.jpg
 
OP
J

jimreed2160

Well-known member
Joined
Aug 7, 2016
Messages
3,589
Location
Tallahassee FL
rrich--Looks like you are getting in some great shop time. Nice to see your new shop assistant sucking up.

BD--Sometimes life gets in the way of woodworking. Thanks for sharing the info on cabinet builds. The Queen specified hickory for our kitchen upgrade back in 2012. I bought a bundle of hickory from Steve Wall lumber so I could make the windowsill trim to match the cabinets. The original was stained doug fir. So I had a ww project in the mix. Turns out that I had a painting project also because the painter got sick. Pictures to follow.

A--Love your arbor. I have always thought about having one in my back yard. Did you use a plan?
 

drivesitfar

Well-known member
Joined
Oct 23, 2013
Messages
36,006
Location
Pacific Northwest
Rich: nice work on finding and setting up your sawdust collection unit. was it hard to set up? looks like it's working pretty well.

Ainsley: your arbor or pergola looks AMAZING. WELL DONE!

are you worried about it rotting in the soil cause i just cut off the bottoms of mine that were sitting on the ground in steel supports. ants and rot were starting to happen after 4 years and hopefully it won't now. i hope yours last for many years and I bet your wife is smiling as i'm sure you are.

Jim: so the big square piece of wood is your handle hold? looks like your moss removal tool worked so on to the next project.

BD: great post and i bet a lot of us don't change or sharpen our blades often enough hence some of being more of a wood butcher than a woodworker. any pictures of those nice kitchens and entertainment centers to post please do if any stand out or maybe a few pictures of your shop and all it's tools would be nice to see. thanks

EZ: those are some pretty nice planes you added to your collection.
 

Attachments

  • WP_20161004_002.jpg
    WP_20161004_002.jpg
    155.9 KB · Views: 50
  • WP_20161004_001.jpg
    WP_20161004_001.jpg
    157.5 KB · Views: 47
  • WP_20161018_007.jpg
    WP_20161018_007.jpg
    148.5 KB · Views: 49
  • WP_20160924_006.jpg
    WP_20160924_006.jpg
    154.3 KB · Views: 45
  • WP_20160414_022.jpg
    WP_20160414_022.jpg
    152.9 KB · Views: 45
Last edited:

ztorres

Well-known member
Joined
Sep 22, 2016
Messages
195
Location
Iowa
Ainsley: That's an awesome hops trellis. Have you ever seen a full size hops yard?

I had the privilege to build an one-acre hops yard about two years ago. One hundred 25' tall timbers of Osage Orange wood. Pretty complicated and was new to me because I had never seen a good yard prior to this. Sadly I only have one picture left from when I was there.
570c9f4fb5571333cf9954e1eb113f03.jpg
 

Attachments

  • 570c9f4fb5571333cf9954e1eb113f03.jpg
    570c9f4fb5571333cf9954e1eb113f03.jpg
    219.2 KB · Views: 0
Last edited:

Bigmichaelkim

Active member
Joined
May 5, 2017
Messages
38
67259b200b38785d26eac8c672385e55.jpgf9db6986cf5d8d4bcbba09a1756472bb.jpg

Hello, while repairing a hand saw I got at an estate sale, I noticed the handle was broken on the bottom. It only cost me 2 dollars but I think besides the crack the handle is in pretty good shape and worth restoring. Would wood glue like titebond type 2 work well in repairing the crack? And would I need to fill in some of the chips with wood putty? I have never used wood glue or wood putty ever and was wondering if those two things and a clamp will help my saw handle become usable once again. I plan on using the handle on a basis. Thanks in advance for all your help.


Sent from my iPhone using Tapatalk
 

Attachments

  • 67259b200b38785d26eac8c672385e55.jpg
    67259b200b38785d26eac8c672385e55.jpg
    923.8 KB · Views: 1
  • f9db6986cf5d8d4bcbba09a1756472bb.jpg
    f9db6986cf5d8d4bcbba09a1756472bb.jpg
    946.7 KB · Views: 1
OP
J

jimreed2160

Well-known member
Joined
Aug 7, 2016
Messages
3,589
Location
Tallahassee FL
Bigmike--EZ likes epoxy and I like Titebond. The problem is getting clean surfaces to join as no adhesive likes dirt. I would open that crack as much as possible and clean with brushes. Then I would dribble Titebond in until both sides of the crack are saturated. A pocketknife blade might help it get started. Once the glue has soaked in the wood for a few minutes, clamp it and wipe down the squeeze out. Drill out the nut hole again to keep from putting undue pressure on it. And apply finish once the glue is good and dry.

Good luck.
 

rrich1

Well-known member
Joined
Oct 7, 2015
Messages
793
Got my hands on some free walnut this week! Not sure on the footage. Need to wait til next year for it to dry. Also a few boards of an unknown wood. Anyone have an idea what it might be? I Ran of stickers so I'll need to make some more. c9cdc52f00dc9df04d3c488b9e457970.jpgdbf37e46ee75ec5cb83ed82bf153bad9.jpg6b52cb52aa37fe0960af42d7200e501d.jpg1b644640a7ae1c020d7bc6f8dd06a74f.jpg

Sent from my Pixel XL using Tapatalk
 

Attachments

  • 1b644640a7ae1c020d7bc6f8dd06a74f.jpg
    1b644640a7ae1c020d7bc6f8dd06a74f.jpg
    172.8 KB · Views: 0
  • dbf37e46ee75ec5cb83ed82bf153bad9.jpg
    dbf37e46ee75ec5cb83ed82bf153bad9.jpg
    123.3 KB · Views: 0
  • c9cdc52f00dc9df04d3c488b9e457970.jpg
    c9cdc52f00dc9df04d3c488b9e457970.jpg
    88.2 KB · Views: 0
  • 6b52cb52aa37fe0960af42d7200e501d.jpg
    6b52cb52aa37fe0960af42d7200e501d.jpg
    114.6 KB · Views: 1

drivesitfar

Well-known member
Joined
Oct 23, 2013
Messages
36,006
Location
Pacific Northwest
RR: great score on the walnut and looks like a LEIN TOO or SHED BUILD is on your TO DO LIST. I'd say the wood with the bark on it is Douglas fir or could be Pine, but it's only a guess.

ALL: speaking of wood i'm going to start a WOOD 101 thread so we can maybe learn more about the different types of wood and keep this thread for how to work with it.

i tore down a rickety old workbench yesterday that had some awesome old growth boards that i'll use for some projects in the future. i used a few of them to support my WWII ship hatch i used as a workbench top for some of my vintage tools.

cheers
 

Attachments

  • WP_20170702_003[36937].jpg
    WP_20170702_003[36937].jpg
    115.2 KB · Views: 47
  • WP_20170702_006[36940].jpg
    WP_20170702_006[36940].jpg
    146.9 KB · Views: 46
  • WP_20170702_004[36938].jpg
    WP_20170702_004[36938].jpg
    142.5 KB · Views: 48

wrenchguy

Well-known member
Joined
Sep 22, 2011
Messages
4,697
Location
NW Indiana
Got my hands on some free walnut this week! Not sure on the footage. Need to wait til next year for it to dry. Also a few boards of an unknown wood. Anyone have an idea what it might be? I Ran of stickers so I'll need to make some more. 1b644640a7ae1c020d7bc6f8dd06a74f.jpg
Sent from my Pixel XL using Tapatalk

"out" ur sticks should b closer and thicker, right? make them all the same both dimensions so as not 2 have to make sure u got it turned right. u should have 3/4" airspace between and make dam sure bottom board it placed on straight edge straight flat surface and it stays flat for a year. good luck with ur project. looks maybe oak 2me.
 

lilredex

Well-known member
Joined
Apr 29, 2006
Messages
5,956
Location
Toronto
RR...your unknown wood kind of has a Maple look to it, would be interesting to see the leaves that were on that tree.

Photos show how I stickered some pine that was made up into channel siding.
 

Attachments

  • Channel Siding 1A.jpg
    Channel Siding 1A.jpg
    144.4 KB · Views: 97
  • Channel Siding 1B.jpg
    Channel Siding 1B.jpg
    139.7 KB · Views: 72

rrich1

Well-known member
Joined
Oct 7, 2015
Messages
793
@wrenchguy and @lilredex thanks. I'll look into making bigger ones. The wood is on the north side of the house that barely sees any rain. Should dry out just fine there.

Sent from my Pixel XL using Tapatalk
 

wrenchguy

Well-known member
Joined
Sep 22, 2011
Messages
4,697
Location
NW Indiana
@wrenchguy and @lilredex thanks. I'll look into making bigger ones. The wood is on the north side of the house that barely sees any rain. Should dry out just fine there.

Sent from my Pixel XL using Tapatalk

2b honest it should be open all around 4 proper even drying. sometimes u gotta make due. good luck with ur project
 

rrich1

Well-known member
Joined
Oct 7, 2015
Messages
793
Got the vise back together. I am waiting to hear back on a t section for the handle. Very happy with how it turned out. Now she matches the rest of the restored projects! Still need to restore the jointer at some point. 8dfbd4cccfa9c0dfdc6dbdd818289983.jpg7c4efea6309940e1d2e1e0804ad9c1b0.jpg42b747a094800269ae18b55848030950.jpga876db4614f1d88f9a71214fe5ad983f.jpg

Sent from my Pixel XL using Tapatalk
 

Attachments

  • 7c4efea6309940e1d2e1e0804ad9c1b0.jpg
    7c4efea6309940e1d2e1e0804ad9c1b0.jpg
    95.6 KB · Views: 0
  • 42b747a094800269ae18b55848030950.jpg
    42b747a094800269ae18b55848030950.jpg
    86.1 KB · Views: 0
  • a876db4614f1d88f9a71214fe5ad983f.jpg
    a876db4614f1d88f9a71214fe5ad983f.jpg
    93.6 KB · Views: 0
  • 8dfbd4cccfa9c0dfdc6dbdd818289983.jpg
    8dfbd4cccfa9c0dfdc6dbdd818289983.jpg
    116.3 KB · Views: 1

bdelmar2

Well-known member
Joined
Apr 5, 2013
Messages
276
rrich looks like Oak to me also, possibly Ash. Hard to tell apart in a photo of rough sawn though.

Oak will have ray flecks, Ash doesn't.

You asked earlier about photos of my shop and the machines. I don't really have a shop or any machines to speak of now, and old grizzly table saw, an old 10" Ryobi planer, and a new 12" dual bevel compound Dewalt on a Bosch gravity stand are about it, plus a bunch of hand tools spread in a thin layer in pretty much every room I own, lol.

Well, plus the mechanic tools that is, most of those are at work though thankfully.

Now the cabinet shop I used to work at was pretty good sized, it was/is an old bus garage - about 50' x 100' or a little larger.

Lots of tools there, most notable was the 36" thickness sander probably. Though the open head shaper with a floating clamp used for making door arches sticks out in my memory pretty good.

I forget if it was 7hp or 10 off hand, and the cutter head was about 5" in diameter or so with carbide blade inserts. It sat in the back of the shop in the door department, and if the front doors were open you could hear it fire up 2 blocks away. Not real loud that far away, sort of a high pitched whine, but the closer you got, the louder it got anywhere in the shop itself and it was a screaming monster. A scary screaming monster.

Shop employed around 12 people, not including installers. Generally no more than 3 people at any given time were willing to run that machine.

I remember one time a couple of the guys needed more money, so they came in a cleaned the shop one weekend.

At one time or another I worked in every position and that particular Monday the door dept. was behind so I went back to help.

There was a stack of arched door panels already cut and waiting to go, so I started there.

The way it works is the panels are lettered based on width, each letter corresponds to a plexiglass template.

The shaper has a large table with just the head sticking up. On top of the head is a bearing, like the ones you see on router bits, but a lot bigger - maybe 2 or 2 1/2" in diameter or so.

At the back of the shaper table was a sort of sheet metal arrangement that funneled chips into a blast gate for collection.

Sitting on the table is a floating head, which is a pretty cool deal really. On the front side facing the cutter head is where the plexiglass template goes. It screws on with thumb screws and rides on the head bearing to give the correct arch.

You look at the stack of panel blanks and see which letter is on the first one, grab that template and put it on the floater. The panel slides in under the template and lines up to a mark. Then you hit a switch air locks the panel in place and also blows out underneath making the arrangement float.

Here is one I found that Grizzly sells for reference: http://www.grizzly.com/products/24-...464?utm_campaign=zPage&utm_source=grizzly.com


Then you fire up the shaper, wait for it to come up to speed and then push the floater ahead until the template contacts the bearing and then run it across from left to right and it cuts the arch. (well, the basic arch shape has already been cut with a bandsaw by this point, the shaper does the 'raised' part you see when the door is assembled.)


Not a terribly complicated process, just have to pay attention and be careful, standard workshop stuff.

Anyway, this particular morning I had the panel clamped and the shaper running and was just getting ready to cut the first panel when I noticed I forgot to open the blast gate in the back.

Not the first time I'd done that, same with everybody who ran it, and generally no biggy, just keep one hand on the floater and reach over and back and open the gate.

Well, there was one of those coiled yellow air hoses providing air to the head. It came down from overhead and was positioned so it pulled the floater away from the head slightly.

Or at least it did before they moved it when cleaning, now it pulled the floater into the head.

About the time I opened the blast gate the floater carriage hit the shaper head and the carbide blades exploded instantly.

There are 3 blades, about 1/2" thick, maybe 1 1/2" tall and about 3" long and are held in with 2 3/8" set screws each - big pieces of metal.

After they blew up I was only able to find enough metal to make about a bottle cap sized piece and one other chunk about that size.

I really have no idea how all that pretty much missed me. I got one small cut line on the outside of my hand, maybe an inch long and just enough to bleed.

Directly to the right of the shaper sat a rack we built to store the sandpaper for the 36" thickness sander I mentioned earlier. The larger piece I found went through two brand new unused 60 grit belts hung over a rod, so 4 thicknesses, it punched through 2 faces, then two backs and lodged in the 3/4" plywood back. Might have gone though that as well but it was up against a block wall.

There were probably more pieces to be found, but 'clean' is a relative term in the door dept. of a small production custom cabinet shop.

I moved the air line back where it was.

Scary how such a small thing can have such dangerous consequences when dealing with high speed machines.

Oddly, the only damage to the floating head was a tiny nick on one side in the aluminum body.

I guess my takeaway from the situation was that anytime something out of the exact sequence of events occurs - no matter how small or common - shut the machine down and wait for it to stop before doing anything else.


Edit: worth noting that at the time this happened I had been running arches through that machine for about 2 years or better.
 
Last edited:
OP
J

jimreed2160

Well-known member
Joined
Aug 7, 2016
Messages
3,589
Location
Tallahassee FL
rrich--Nice score on your wood. I agree with wrench--make that stack as orderly and level as you can. A uniform stack means uniform dry wood. Make sure it has air circulation and keep the critters away. The extra wood looks like ash or oak to me. Your vise turned out great.

Drives--I have been meaning to cover wood but never got around to it. Good luck with the thread.

I have been out of the shop due to holiday. My daughter had to work a holiday shift (with holiday pay) so she and my granddaughter drove up for the day yesterday. We hung out and ate pizza before they left. Of course, the kitties freeked out but they are OK now. My granddaughter is anxious to get the secretary desk so I really need to get moving on that project. It is just hard to get started on the last mile.
 

wrenchguy

Well-known member
Joined
Sep 22, 2011
Messages
4,697
Location
NW Indiana
RR:

ALL: speaking of wood i'm going to start a WOOD 101 thread so we can maybe learn more about the different types of wood and keep this thread for how to work with it.
cheers

u must got a lot time for this 1? i wouldn't without requiring leave and bark shots. most time hard to tell with it sitting in front of u, more less from photos. there are plenty wood id sites.
 
OP
J

jimreed2160

Well-known member
Joined
Aug 7, 2016
Messages
3,589
Location
Tallahassee FL
BD--So the score was BD-1 and shaper -0. It was your lucky day. I have had a few shapers but never really liked them because they scare me a bit. Your story just reinforces my feelings.
 
To avoid these ads, REGISTER NOW!

drivesitfar

Well-known member
Joined
Oct 23, 2013
Messages
36,006
Location
Pacific Northwest
WRENCH: yep there might be other sites and ways to learn about different wood and types of grain, ways to store it and use it, but there are also a ton of woodworking sites and videos and look at this thread here on GJ.

i don't have a ton of time in fact just the opposite, but if i do get on the computer GJ is about the only website i visit so putting more great stuff here might draw even more members from other websites to post here especially with old pros like you and others sharing knowledge here as you have time to.

RR: so far i've heard about 8 different possibilities for the light colored wood you have. i'd love to hear what it actually is.

Jim: so the cats don't like kids? best of luck with the desk.
 
OP
J

jimreed2160

Well-known member
Joined
Aug 7, 2016
Messages
3,589
Location
Tallahassee FL
Older projects

The backstory is that when we purchased this house in 2005, it was little changed from its original 1978 construction. The kitchen needed an update and that happened in 2012 with a gut job. We lived in the house during the furious one week project. I ended up being the painter when the original sub backed out. And we stayed on schedule because I painted all night long.

The Queen did the decorating from a shard of granite. She decided that natural hickory cabinets worked the best and specified that they vary the grain as much as possible to give it some interest. The semi-custom cabinet guys did a great job and the installer was an artist. Only problem was that the window sill was like all other house trim--dark stained doug fir. That would just not work in the middle of things, and cheapskate me was unwilling to hire the job out to a millwork shop. I bought some hickory and made the sill myself. Of course it was not a hard job.

DSCN3432.jpg


DSCN3433.jpg


DSCN3434.jpg


I copied the original mostly. But the best part of doing it yourself is getting what you want. The original was too narrow so I made the new sill wider so I could stack junk on it. Like a clock and an inside/outside thermometer.

And here is yet another older project. This is the base of a postmasters desk I made. It is walnut and the top is MIA. BUT the cool part is the drawer. I made a false back with a storage compartment behind. This piece is scheduled for shipment to my daughter.

DSCN3435.jpg


In the meantime, the kitty crew has it on their daily patrol.
 
OP
J

jimreed2160

Well-known member
Joined
Aug 7, 2016
Messages
3,589
Location
Tallahassee FL
Secretary Desk

My granddaughter flashed those eyes at me and in just one glance filled me with motivation to finish this project for her. It is hard to know where to start with a project that has stalled for over 13 years, so I guess I will just jump in. Today I put brasses on the smaller drawers. Here is the before.

DSCN3436.jpg


First I used a trammel to measure the distance from post to post.

DSCN3437.jpg


I thought they would look best centered so I did a trial fit.

DSCN3438.jpg


Looked good so I used a tape measure to center the trammel. It made faint marks that I enlarged with an awl. I measured again and found that drawer #2 was off a bit. How does this stuff happen? Oh well, I can awl another set of holes in the proper space.

DSCN3439.jpg


I drilled 1/8 pilots for the screws. In addition, I drilled an inset for the screw head and another inset for the handle post screws. These drawer fronts are really thick and the screws do not quite make it through.

DSCN3440.jpg


Success!

DSCN3441.jpg


Make that two down and four to go. Progress begins again!
 

Cope

Well-known member
Joined
Mar 8, 2013
Messages
2,067
Location
Houston, TX
I have a question for any of you regarding dadoes. My saw is a Ridgid R4510 portable contractor style, in the instruction book it says use a 6" stack not an 8". The motor is a 15 amp and I intend to cut soft woods most of the time, should I take the instructions as gospel or as a guideline? I know an 8" will fit on my saw just don't know how I could stress the motor enough that it matters which size I use.

No cut I've ever made with it has bogged down the motor or caused any kickback, I work with it safely and within its parameters in every other capacity.

I'm a day late and a dollar short. If you haven't purchased a set, go with the 6". I would not want to run an 8" set on that motor.
 
OP
J

jimreed2160

Well-known member
Joined
Aug 7, 2016
Messages
3,589
Location
Tallahassee FL
Wrench--Great score on the plane. It looks industrial like a trade piece but not for cabinetmaking. Carriagemaking? Printing? It is a very interesting find.
 

Craptain

Well-known member
Joined
Apr 18, 2013
Messages
4,028
Location
Tampa Bay FL
Thanks. Dado set is still on the shopping list but it will be a 6".
I agree that 6" is a good size. After all it is a dado, and dado's are relatively shallow so why have the ability to do something that is rarely if ever done.
I have personally never done a dado deeper than 3/4" and that was deeper than actually needed.

Sent from my SM-G900T using Tapatalk
 

ADNICK

Well-known member
Joined
Feb 6, 2017
Messages
45
Location
Comfort TX
Rich1:

Nice score on the wood....

In my experience the wood will check (crack) on the ends to the first sticker, so I space my end stickers about 2" in.

Takes more stickers but it's worth it, also recommend cutting about a foot off of one board and lay it on the stack, when the moisture content stabilizes between the cut off and the other wood it has reached it's driest point for the area.

Andy
 
OP
J

jimreed2160

Well-known member
Joined
Aug 7, 2016
Messages
3,589
Location
Tallahassee FL
Desk

I think the next thing to work on will be the front slides. These two slides are contained inside the desk and slide out to support the fall front.

DSCN3446.jpg


DSCN3447.jpg


The right one needs to be planed down a bit as it sticks. Both of them need trim on the end along with a brass knob. In addition, I need to add trim around them.

Here is a picture of the slide stored.

DSCN3448.jpg


The dowel slides along in a slot and prevents the slide from falling out of the case. I did not glue them into place and that helps when I need to make adjustments like these.

Once I get all of the trim in place, I can attach the front panel and the floor of the compartment. At some point, the panel was bumped hard enough to knock out the back cover.

DSCN3450.jpg


When I clear up the interior issues, then I can reattach the back cover panel.

After that is done, I plan to attach the base.

DSCN3449.jpg


When I designed this secretary desk, I made sure it was modular so that it could be easily moved by one person. Most of it is held in place by gravity. All I need for the base is some dowel pins to keep it from shifting.

The bookcase top is held in place by dovetail cleats that are doweled to the case. These cleats are easily removed so that the desk can convert into a standalone piece of furniture.

DSCN3443.jpg


DSCN3444.jpg


DSCN3445.jpg


Time to get busy. More progress shots soon (I hope).
 

R_einan

Well-known member
Joined
Aug 29, 2016
Messages
461
Location
Eastern WA
Picked up some black walnut to make an chairside table. One piece was a touch over 5" wide at its narrowest and the other was about 2 1/4" at its narrowest. I liked the sapwood in the thinner piece so I took used it in the center to add some interesting character. I've got the top glued up, sanded, and put an oil coat on it. Legs are also going to be 2 1/4 wide pieces glued together so I can cut a taper in 2 sides. I'm saving the narrow piece with the sapwood for the aprons.
 

Attachments

  • IMG_2257.jpg
    IMG_2257.jpg
    134 KB · Views: 83

ztorres

Well-known member
Joined
Sep 22, 2016
Messages
195
Location
Iowa
Well got some awesome news yesterday. The wife and I are buying our first house, which is a god send for us, no more money going down the drain in rent. The new house has a split level garage which is a little small, but the wife gave me some great news about that. She said it was okay if I turned the basement into my woodshop. Which will be wonderful because it's already semi-finished, climate controlled, and has a three-quarter bathroom. Once I get some measurements I will start planning a layout, and will probably be asking for some input and advice.
 

Bigmichaelkim

Active member
Joined
May 5, 2017
Messages
38
Hello, I am in the process of restoring an old Stanley no 4 type 11 handplane and noticed that the handle is slightly loose, wiggles slightly left and right, and the wooden knob spins. I have never used a hand plane before, just getting into woodworking, and was wondering if this was normal.

I am guessing it is not normal, so I am planning on using a hack saw to cut ever so slightly the screws that hold both the handle and the tote to fix this. I saw Mr. Paul Sellers do this on YouTube to fix a wobbly handle. Would this be the right thing to do for the handle and the knob as well? Any advice would be appreciated. Thanks in advance.


Sent from my iPhone using Tapatalk
 

rrich1

Well-known member
Joined
Oct 7, 2015
Messages
793
Hello, I am in the process of restoring an old Stanley no 4 type 11 handplane and noticed that the handle is slightly loose, wiggles slightly left and right, and the wooden knob spins. I have never used a hand plane before, just getting into woodworking, and was wondering if this was normal.

I am guessing it is not normal, so I am planning on using a hack saw to cut ever so slightly the screws that hold both the handle and the tote to fix this. I saw Mr. Paul Sellers do this on YouTube to fix a wobbly handle. Would this be the right thing to do for the handle and the knob as well? Any advice would be appreciated. Thanks in advance.


Sent from my iPhone using Tapatalk
I wouldn't. Are we talking the front knob or the handle (tote). Either way I would first try putting a washer under the brass nut and try to re tighten it.

Sent from my Pixel XL using Tapatalk
 

Bigmichaelkim

Active member
Joined
May 5, 2017
Messages
38
I wouldn't. Are we talking the front knob or the handle (tote). Either way I would first try putting a washer under the brass nut and try to re tighten it.

Sent from my Pixel XL using Tapatalk


The tote is wobbly the knob spins if I spin it with my hand.


Sent from my iPhone using Tapatalk
 

Autonomous

Well-known member
Joined
Dec 26, 2015
Messages
66
"wouldn't. Are we talking the front knob or the handle (tote). Either way I would first try putting a washer under the brass nut and try to re tighten it. "

First take it apart and clean the threads as well as the inside of the "screw" and where it threads into the "base". Could be some rust keeping it from seating properly.

If that doesn't work, try the washer/spacer trick.

You can trim the threaded piece if nothing else works, but just remember it is a lot harder to put the threads back on than to cut them off.

Sent from my Pixel XL using Tapatalk
 
OP
J

jimreed2160

Well-known member
Joined
Aug 7, 2016
Messages
3,589
Location
Tallahassee FL
Zach--Great news on the house. I have had a few basement shops and they all were outstanding. It is really nice to paddle down the stairs on a rainy evening and make shavings.

BigMike--Loose handles are often found on Stanley Bailey bench planes. I have seen many fixes and many of them are hack jobs. Here is how I do it.

Take the plane apart and clean all of the threads. Both the tote (back handle) and the front knob have threaded posts. One end of the post screws into a large brass nut and the other end screws into a boss cast into the sole. Once you get everything clean you can tighten from both ends.

Don't tighten so hard that you booger the brass screw heads. Remove the rod and carefully remove about 1/8 from one end on a grinder. Put a slight chamfer on the edge.

You may have to remove material from each end, but that is rarely necessary. Both the knob and tote need to be tight for use.

Good luck. Type 11s are nice planes.
 
To avoid these ads, REGISTER NOW!
Top Bottom