To avoid these ads, REGISTER NOW!

Woodworking 101--Tools and Tips

CRSINMICH

Well-known member
Joined
Aug 15, 2015
Messages
2,397
Location
Southeastern Michigan
TOOTHING PLANE​
I bought this plane on a recent Saturday excursion. I knew what toothing planes were but this was the first one I have ever seen in the real world. It was made in Germany by the Gebruder Busch (Busch Brothers). The Busch family have been making tools since 1780. This particular plane was made between 1895 and 1899.

jim: With your stash of vintage tools you must already have one or more toothing planes. Have you ever used one? All I know about them is that they were used in veneering and for working highly figured wood.
 

Attachments

  • Toothing plane after (4).jpg
    Toothing plane after (4).jpg
    145.8 KB · Views: 28
  • Toothing plane after (1).jpg
    Toothing plane after (1).jpg
    145.2 KB · Views: 28
  • Toothing plane after (10).jpg
    Toothing plane after (10).jpg
    155.8 KB · Views: 27
Last edited:
To avoid these ads, REGISTER NOW!
OP
J

jimreed2160

Well-known member
Joined
Aug 7, 2016
Messages
3,589
Location
Tallahassee FL
Andy--Sorry but no hide glue parts here. Never went down that rabbit hole. I like the mini crock pot idea. Good luck in your search.

CRS--Yes I have run across a few toothing planes and blades. I even played with one once and found it very hard to use. I think the idea is to set the blade LIGHTLY and make FINE scratches. The scored area provides a better surface for gluing veneer. If working fine wood, the scoring is a good way to soften up defect areas so they can be finish planed with less tearout. Why not sharpen the blade and give us a user report?
 

CRSINMICH

Well-known member
Joined
Aug 15, 2015
Messages
2,397
Location
Southeastern Michigan
jim: I did sharpen it which required required some fine needle files to restore missing teeth. I also made the bevel closer to 30 degrees hoping that would make the teeth stronger. It had been ground fairly recently at about 25 degrees. I tried it out on some figured walnut scraps and it worked okay. It produced fine shavings when I used it on fairly smooth wood. When I used it on a rough and uneven surface it produced fine chips. I could see how it could be used as sort of a fine scrub plane. The high angle of the iron (80 degrees) makes it work like a scraper which is why it didn't seem to matter if I went with the grain or across. I think if I spent more time fiddling with adjusting the iron that the plane would work well. Here are pix of the top and bottom of the business end of the iron. Notice that the teeth are cut like saw teeth. BTW toothing plane irons are still being produced, most notably by Lie-Nielsen and Lee Valley.
 

Attachments

  • Toothing plane after (8).jpg
    Toothing plane after (8).jpg
    138.4 KB · Views: 45
  • Toothing plane after (9).jpg
    Toothing plane after (9).jpg
    152.5 KB · Views: 43
Last edited:

ADNICK

Well-known member
Joined
Feb 6, 2017
Messages
45
Location
Comfort TX
Jim:
Thanks

CRS: That is a great find, don't come across them in the "wild" very often.....been looking for one myself.

Looks to be in decent shape, glad you are putting it to work, but it's also a great display item.

Andy
 
OP
J

jimreed2160

Well-known member
Joined
Aug 7, 2016
Messages
3,589
Location
Tallahassee FL
CRS--Thanks for your test drive results. Maybe you will encourage others to remember how handy a toothing plane can be when you are lost in figured and tortured grain.

As for me, I am still making slooow progress on the desk. Today was stain day for one side of trim. I like to use Minwax Cherry stain on cherry. I think it improves the raw wood and sets it up just fine for more darkening.

DSCN3470.jpg


I apply the stain lightly with a paper towel applicator and leave it on for only a minute or two. As you can see, the effect is a slight darkening and a reddish tint.

DSCN3471.jpg


Here they are together.

DSCN3472.jpg


Poly is next. But the Minwax needs a day to dry. Stay tuned for more fun as this project continues its snail's pace.
 

CRSINMICH

Well-known member
Joined
Aug 15, 2015
Messages
2,397
Location
Southeastern Michigan
Andy: Thanks! I haven't exactly been looking for one but at some point I had made a mental BOLO for a toothing plane. I always look over wooden planes when I see them and it was a pleasant surprise to find one. My theory as to why they are rare is that they wouldn't have been used on a job site very often so they were mostly used in cabinet shops. There were a lot more carpenters than cabinet makers. It was a good thing I went there on 10% off day or I would have had to pay the full $10.

jim: I'm jealous that you can stain now. The humidity here hasn't been below 80% for over a week and at that level applied finishes just turn gummy.
 
Last edited:

R_einan

Well-known member
Joined
Aug 29, 2016
Messages
461
Location
Eastern WA
Finished cutting the legs and ripped the pieces for the aprons. Now to finish cutting the aprons to length and assemble the legs and aprons.
 

Attachments

  • IMG_2265.jpg
    IMG_2265.jpg
    142 KB · Views: 39

R_einan

Well-known member
Joined
Aug 29, 2016
Messages
461
Location
Eastern WA
Thanks Jim, got them marked for attaching the aprons and wiped down with oil, the grain really popped. It's really coming together.
 

Attachments

  • IMG_2267.jpg
    IMG_2267.jpg
    141.2 KB · Views: 52
  • IMG_2266.jpg
    IMG_2266.jpg
    139.8 KB · Views: 65

rrich1

Well-known member
Joined
Oct 7, 2015
Messages
793
Trying to make my first cutting board and can't decide on a pattern. Here is what I'm between. Any thoughts? b07330d7d4c302b9fe8434d31ef580a6.jpg36069d4d24a7ff305a14e661959db058.jpg1302c0abf5a80ce20139646eabaf1f4b.jpg

Sent from my Pixel XL using Tapatalk
 

Attachments

  • b07330d7d4c302b9fe8434d31ef580a6.jpg
    b07330d7d4c302b9fe8434d31ef580a6.jpg
    85.5 KB · Views: 0
  • 1302c0abf5a80ce20139646eabaf1f4b.jpg
    1302c0abf5a80ce20139646eabaf1f4b.jpg
    70.5 KB · Views: 0
  • 36069d4d24a7ff305a14e661959db058.jpg
    36069d4d24a7ff305a14e661959db058.jpg
    89.8 KB · Views: 0
OP
J

jimreed2160

Well-known member
Joined
Aug 7, 2016
Messages
3,589
Location
Tallahassee FL
rrich--Good project. Maybe these will give you some ideas. They were both gifts. As you can see, the maple/walnut one is holding up well but the multi-wood one is beginning to separate at the seams.

DSCN3473.jpg


But if you are looking for a low bar, how about a 40+ year old piece of red oak?

DSCN3474.jpg


I had a 3/8" thick piece and made a cutting board. After a dozen years or so, it split and then I had two. The other piece is still around and in use. Not only is this a cutting board, but also serves as a mallet when I need to send a knife through frozen chicken. I know you can do better than this one. Keep us in the loop.
 

ztorres

Well-known member
Joined
Sep 22, 2016
Messages
195
Location
Iowa
Rrich1 here's is a cutting board I made from Padauk, Maple, and if you look closely you can see a small piece of black walnut. I like your off-centered option, either pic 1 or 2. But that's my 2 cents.
7180ded2434a24032e3aee0f19d6f063.jpg


Sent from my iPhone using Tapatalk
 

Attachments

  • 7180ded2434a24032e3aee0f19d6f063.jpg
    7180ded2434a24032e3aee0f19d6f063.jpg
    90.1 KB · Views: 0

rrich1

Well-known member
Joined
Oct 7, 2015
Messages
793
Shorty, Jim, Ztorres: Thanks. those boards look good. I'm leaning towards the off center design but that might change by tonight. Not like I can't make more than one of these.
 

rrich1

Well-known member
Joined
Oct 7, 2015
Messages
793
Ended up doing the design below.

I also got a Record A151 spoke shave yesterday. Let the parts soak while I worked and did a quick clean up on it. Now I need to figure out how to sharpen it.

I also started on a much needed table saw sled. I picked up the plans from Nick ferry over Black Friday and just hadn't gotten to it. I got some miter tracks and miter slots so no excuses now. Front and back fences glued up and in clamps. 6a2216dd4396d23cd5a19b3db14c0538.jpg779279f6b340b59c4e6c29edac48d808.jpg9880aaa8bf7583ed173c18389b9de0f8.jpgba7d185aed07f3d832858ddebc1145b0.jpg93b2337bcd2d774b56c8264410114f9b.jpge91fd82750e7f5a290a2ae56a949c847.jpg

Sent from my Pixel XL using Tapatalk
 

Attachments

  • ba7d185aed07f3d832858ddebc1145b0.jpg
    ba7d185aed07f3d832858ddebc1145b0.jpg
    113.6 KB · Views: 0
  • 93b2337bcd2d774b56c8264410114f9b.jpg
    93b2337bcd2d774b56c8264410114f9b.jpg
    108.5 KB · Views: 0
  • e91fd82750e7f5a290a2ae56a949c847.jpg
    e91fd82750e7f5a290a2ae56a949c847.jpg
    103 KB · Views: 0
  • 9880aaa8bf7583ed173c18389b9de0f8.jpg
    9880aaa8bf7583ed173c18389b9de0f8.jpg
    250.4 KB · Views: 0
  • 779279f6b340b59c4e6c29edac48d808.jpg
    779279f6b340b59c4e6c29edac48d808.jpg
    169.8 KB · Views: 0
  • 6a2216dd4396d23cd5a19b3db14c0538.jpg
    6a2216dd4396d23cd5a19b3db14c0538.jpg
    80.9 KB · Views: 1
Last edited:
OP
J

jimreed2160

Well-known member
Joined
Aug 7, 2016
Messages
3,589
Location
Tallahassee FL
250--Clamp spacing is a great subject for discussion. I like to make the wood do the work--that is, I like to make sure that the wood is even and tight without glue. Then I let the glue soak in for a few minutes before I clamp. When the clamps are finally in place, they just hold the wood together tightly. Too little pressure and the wood does not touch; too much pressure and the glue is all forced out of the joint.

This means that for long glue ups, I have a clamp about every foot or so. I like to have one a few inches in from the end and enough in the middle to keep everything in alignment.

Wood that does not fit together well makes a poor glue joint that will probably fail over time. This is especially true with **** joints like those in butcher blocks and cutting boards.
 
To avoid these ads, REGISTER NOW!
OP
J

jimreed2160

Well-known member
Joined
Aug 7, 2016
Messages
3,589
Location
Tallahassee FL
rrich--Good score on the spokeshave. It still has its decals. Of the modern ones, this one is the most desirable because it has dual adjusters for the blade. Get it sharp and start pulling some shavings.
 

CRSINMICH

Well-known member
Joined
Aug 15, 2015
Messages
2,397
Location
Southeastern Michigan
rrich: Nice score on the Record 151. I have an English Stanley 151 and a U.S. Stanley 151. They are great tools, but since the irons are so short they can be hard to sharpen. Paul Sellers has a video about making a sharpening jig out of wood. I made one and it works but it didn't fit into any of the sharpening guides I have. My solution was to make one out of metal. It fits nicely in a Tormek guide and I'm sure it would work in many others. By the way, Paul does his irons by hand. He just grabs the iron and drags it across his sharpening stones.
 

Attachments

  • Spokeshave sharpening jig (4).jpg
    Spokeshave sharpening jig (4).jpg
    140.6 KB · Views: 29
  • Spokeshave sharpening jig (3).jpg
    Spokeshave sharpening jig (3).jpg
    152.1 KB · Views: 29
  • Spokeshave sharpening jig (2).jpg
    Spokeshave sharpening jig (2).jpg
    146.7 KB · Views: 29
Last edited:

rrich1

Well-known member
Joined
Oct 7, 2015
Messages
793
Jimreed: thanks.

Scottsgt: yes...yes it should. I out it together quickly last night and snapped a pic. Oversight on my part.

Crisinmich: I remember seeing a video but forgot who did it with a made wooden jig. Of course it had to be Paul sellers. Lol. Such a wealth of information from him. Nice jig! O should have you make me one.

Got the cutting board all but done today. Put a first coat of oil on. I eased over the edges with sandpaper. I went back and forth using a round over or chamfer bit but liked the eased edge better. Terrible lighting where I put the oil on. I'll get a better pic later. 4a0f4688fdd938400280623772d2fcd0.jpg4f9e8e0ff8bb1953886dddc4576fd8e1.jpg

Sent from my Pixel XL using Tapatalk
 

Attachments

  • 4a0f4688fdd938400280623772d2fcd0.jpg
    4a0f4688fdd938400280623772d2fcd0.jpg
    73.1 KB · Views: 0
  • 4f9e8e0ff8bb1953886dddc4576fd8e1.jpg
    4f9e8e0ff8bb1953886dddc4576fd8e1.jpg
    72.7 KB · Views: 0

ztorres

Well-known member
Joined
Sep 22, 2016
Messages
195
Location
Iowa
ScottsGT: I've used Titebond Original on all boards and had no issues.
Vintage: I've never used a biscuit jointer to hold cutting board pieces together. But no that you mention it, it would be interesting to use a solid dowel as a positional runner all the way through


Sent from my iPhone using Tapatalk
 

rrich1

Well-known member
Joined
Oct 7, 2015
Messages
793
Scott's: I used titebond 2

Vintage: no biscuits. Glue only. If you are worried about misalignment, glue less pieces together at a time. When I did my workbench I had no more than 2 glue joints at a time and it came out extremely flat.

Sent from my Pixel XL using Tapatalk
 
Last edited:
OP
J

jimreed2160

Well-known member
Joined
Aug 7, 2016
Messages
3,589
Location
Tallahassee FL
rrich--The cutting board looks great.

I am still working on the desk. The trim pieces are out of the finishing department. Here is a trial fit.

DSCN3476.jpg


I think the color match is right on. The trim is lighter than the desk but will darken up in the sunlight over time.

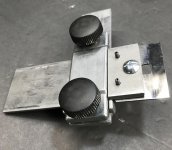
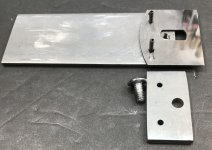
Before I attach it, I need to turn the carcass upside down for dowels. I plan to insert rounded dowels in the base that will fit into holes in the bottom of the desk. That should keep the desk from sliding off the base.

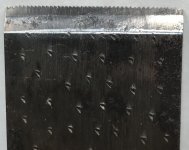
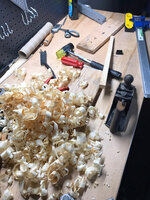
That calls for custom dowels. Not a problem around here. I found a scrap of maple and cut a blank for the dowel machine. These dowels will be 1/2".

DSCN3478.jpg


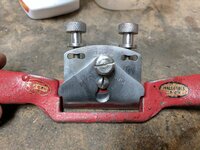
But it cut and stopped.

DSCN3479.jpg


Those astute dowel makers in the group here already know the problem--cutter needs advancing. When the cutter is not aggressive enough, it will cut the end but will not reduce the diameter sufficiently for it to exit the die. The solution is simple--just loosen the screw and bump the cutter forward.

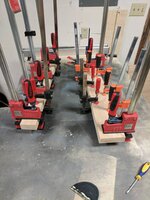
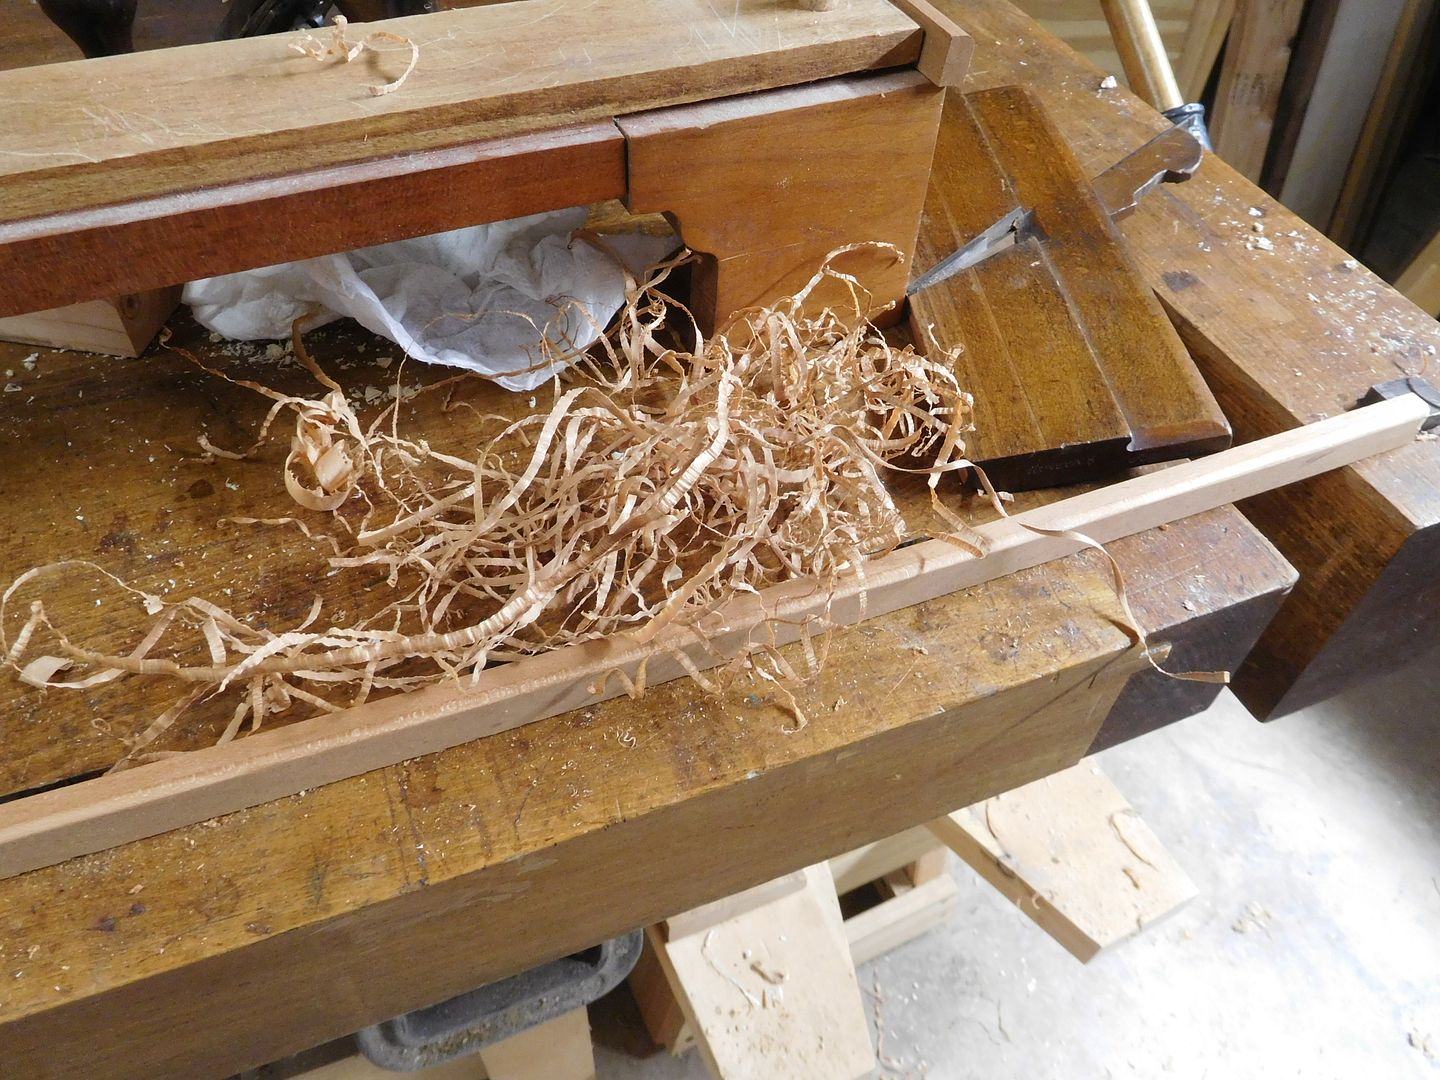
And then I was on my merry way, cranking and sweating in the 90 degree heat. Lucky for me I cranked out the necessary length in about two minutes.

DSCN3481.jpg


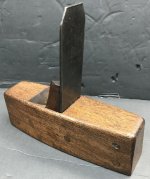
Next I needed some finish nails.

DSCN3482.jpg


And a tack hammer.

DSCN3483.jpg


After insertion I filed the heads a bit. The scrap wood kept me from scarring the project.

DSCN3484.jpg


I tacked a nail in each of four corners just where I wanted the dowels to go. Next I will turn the desk upside down, put the base in place, and pound each corner with my new basa wood faced hammer. That will transfer the dowel mark to the carcass. Then I can remove the nails and drill all eight holes. They should be in perfect alignment. I know I could use a dowel finder but that will take too long as I have to do one hole at a time. This finish nail technique is quicker.

I am getting excited about my progress. This project is in high gear now and I have a good chance of making my September deadline. More later. Stay tuned.
 

cheechi

Well-known member
Joined
Feb 29, 2012
Messages
4,384
Location
Triad, NC
250--Clamp spacing is a great subject for discussion. I like to make the wood do the work--that is, I like to make sure that the wood is even and tight without glue. Then I let the glue soak in for a few minutes before I clamp. When the clamps are finally in place, they just hold the wood together tightly. Too little pressure and the wood does not touch; too much pressure and the glue is all forced out of the joint.

This means that for long glue ups, I have a clamp about every foot or so. I like to have one a few inches in from the end and enough in the middle to keep everything in alignment.

Wood that does not fit together well makes a poor glue joint that will probably fail over time. This is especially true with **** joints like those in butcher blocks and cutting boards.
I like this answer but I think it applies more to hardwoods where you can get the wood to behave better. Generally I have found for a given side of 3/4 or 2/4 the harder woods tend to 'find their groove' better than pine or poplar do.
 

Bigmichaelkim

Active member
Joined
May 5, 2017
Messages
38
Thanks to all of you who helped a new woodworker with some earnest questions. Due to your help and some trial and error now I have my hand plane taking shavings off for the first time in a century. I am happy to put a tool that was so well made back then back into use. Thanks you guys and I will post pics of my saw bench build with just hand tools which will be my first task. a5f46c02f0b4faadd9b91006b4470b96.jpg


Sent from my iPhone using Tapatalk
 

Attachments

  • a5f46c02f0b4faadd9b91006b4470b96.jpg
    a5f46c02f0b4faadd9b91006b4470b96.jpg
    967.7 KB · Views: 2

ADNICK

Well-known member
Joined
Feb 6, 2017
Messages
45
Location
Comfort TX
Putting an old tool back into the workforce--Yea that's a great feeling.....


Jim: my money is on you beating the deadline, as long as you stay focused

:3gears:
 

250

Well-known member
Joined
Oct 16, 2014
Messages
537
Location
West of the Sierras
Thanks to all of you who helped a new woodworker with some earnest questions. Due to your help and some trial and error now I have my hand plane taking shavings off for the first time in a century. I am happy to put a tool that was so well made back then back into use. Thanks you guys and I will post pics of my saw bench build with just hand tools which will be my first task.

Cool :thumbup:
 
OP
J

jimreed2160

Well-known member
Joined
Aug 7, 2016
Messages
3,589
Location
Tallahassee FL
Desk continued

I am on a roll and have to keep up the momentum. Today I need to fix and fit the bottom so the desk needs to go upside down. I removed the drawers and then was reminded that I need to fasten up the pigeonholes.

DSCN3485.jpg


Now we are upside down and the work can begin.

DSCN3486.jpg


I did not spend a lot of time cleaning up the areas that did not show.

DSCN3487.jpg


But I think the Leigh jig made some nice dovetails.

DSCN3488.jpg


Here is the bottom in place.

DSCN3489.jpg


The Garland hammer did its job. Only four blows. The holes were hard to see so I drew arrows. It would not be good to drill a hole on a dustspeck.

DSCN3490.jpg


I made some test holes. Forstner #1 was not sharp and wallowed out the hole. Forstner #2 did a much better job.

DSCN3491.jpg


I drilled the first hole.

DSCN3492.jpg


Then I inserted the dowel and made a gauge.

DSCN3493.jpg


DSCN3494.jpg


Then I used my dowel jig to cut four dowels.

DSCN3495.jpg


I pointed them on the oscillating spindle sander.

DSCN3497.jpg


And then glued them in place.

DSCN3499.jpg


Then I realized that I really do need some trim on the base transition. Here is a mock up.

DSCN3500.jpg


Moving on pretty good today.
 
OP
J

jimreed2160

Well-known member
Joined
Aug 7, 2016
Messages
3,589
Location
Tallahassee FL
Desk base continued

So I decided to cut up some of the 3/8 cherry for base trim. Here is a mock up.

DSCN3501.jpg


I think a simple roundover will be just fine. I could get out that screaming router or I could go another way with the H&R planes. The #4 hollow looks just about right.

DSCN3502.jpg


A few passes are all that is needed to take down the corner.

DSCN3503.jpg


And now they are all done. It is blazingly hot in the shop so I am going to quit here. At least I have a large pile of shavings.

DSCN3504.jpg


Slow, but steady, progress will get me to the end.
 

pault28

Well-known member
Joined
Jan 24, 2011
Messages
475
Location
Westchester, IL
Man, there are some really talented woodworkers among us on this forum! I've attached some pics of my amateur project...some American Girl clothes dressers for each of my two daughters and their best friend. The cabinet carcass is built out of 3/4" oak veneer plywood. The legs are 1-5/8" square solid oak, rabbetted to sit flush against the cabinet carcass on sach corner. The drawers are Baltic birch kreg'd together with solid oak slab drawer fronts. The top was 5/4" oak laminated together. I'm pretty much done with assembly. I have a ton of sanding and prep work ahead of me. I would like the end result to be smooth as glass. I understand that one step that would help achieve this would be to use grain filler, is this correct? I'm not familiar with it and have never used it. I'm looking for advice. After everything is filled and prepped, I plan to spray via the purple hvlp some general finishes water based dye stain and some General finishes high performance top coat. I'm looking for advice for the whole grain filling process though. Let's hear it! Thanks in advance.


R_einan

Well-known member
Joined
Aug 29, 2016
Messages
461
Location
Eastern WA
Nice work Paul! I'm pretty amateur myself, but my experience with filling grain involved many layers of finish and a progressive sanding that leveled the top coat so I could build up the finish. Very time consuming, especially considering you have 3 units to finish. Maybe someone else can chime in with a quicker solution.
 

cheechi

Well-known member
Joined
Feb 29, 2012
Messages
4,384
Location
Triad, NC
you mentioned the Leigh dovetail jig and now that I have some big projects out of the way i'm going to get my dovetail jig back out and see if i can get something that fits out of it.

does anyone else have the Woodstock and/or harbor freight jig? they are the same. i'd like to compare notes.
 
To avoid these ads, REGISTER NOW!
Top Bottom