OP
jimreed2160
Well-known member
Desk
I grabbed a few shop minutes before the heat of the day. Today's task was to glue on the bookcase standoffs. I am not sure what the skids on the bottom are made of. It was something from the scrap pile--maybe poplar. Anyway, I cut the end grain standoffs from a block of beech. Here is the bookcase ready to go.

And here is one of the skids.

Glue up #1 went well. I used a block to spread the pressure evenly.

And here they are all glued up.

You may notice an extra clamp on the top that is used for a counterweight. The hinges are proud and I had to put the bookcase on a scrap of wood to keep from scratching the workbench. Once I started applying clamps to it, the bookcase became wobbly.
I think I will stand it on its head on the floor when time comes to trim the blocks. That would put it at a nice working height.
Next task is to fashion a piece of trim for the front of the bottom to fill the void under the doors. I deviated a little from the plans and am paying for it now. Small things that go unnoticed can really bite you at the end. Can I work myself out of this hole? Find out in the next episode. Drink yer Ovaltine and stay tuned for more fun.
I grabbed a few shop minutes before the heat of the day. Today's task was to glue on the bookcase standoffs. I am not sure what the skids on the bottom are made of. It was something from the scrap pile--maybe poplar. Anyway, I cut the end grain standoffs from a block of beech. Here is the bookcase ready to go.
And here is one of the skids.
Glue up #1 went well. I used a block to spread the pressure evenly.
And here they are all glued up.
You may notice an extra clamp on the top that is used for a counterweight. The hinges are proud and I had to put the bookcase on a scrap of wood to keep from scratching the workbench. Once I started applying clamps to it, the bookcase became wobbly.
I think I will stand it on its head on the floor when time comes to trim the blocks. That would put it at a nice working height.
Next task is to fashion a piece of trim for the front of the bottom to fill the void under the doors. I deviated a little from the plans and am paying for it now. Small things that go unnoticed can really bite you at the end. Can I work myself out of this hole? Find out in the next episode. Drink yer Ovaltine and stay tuned for more fun.


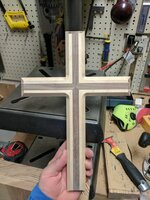
 . All sacrilege aside- very nice work, sir.