Blue Frog
Well-known member
Has anyone heard from Jim Reed? The last post from him that I've been able to find was on 5/25.

I have been wondering the same thing.Has anyone heard from Jim Reed? The last post from him that I've been able to find was on 5/25.


I asked Shortykorte to check up on him. They live close by. Here's the reply.Has anyone heard from Jim Reed? The last post from him that I've been able to find was on 5/25.
What is your take away on this?
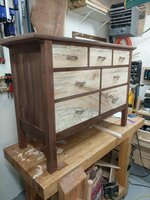
The pocket screw jig is singularly responsible for ruining more potential woodworkers than any other tool.
What’s the problem? With one of those, you too can churn out IKEA quality furniture.
I'm trying to get into woodworking and looking into buying a pocket hole jig. I found these two:
https://www.homedepot.com/p/Kreg-Jig-Pocket-Hole-System-R3/202269070


The pocket screw jig is singularly responsible for ruining more potential woodworkers than any other tool.
The pocket screw jig is singularly responsible for ruining more potential woodworkers than any other tool.
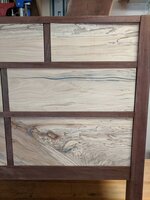
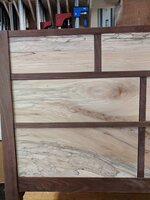
...Case in point. My bathroom vanity is assembled with pocket hole joints. But the facing is built using conventional joinery. There you go. Melding of the new and the old.

But does it still carry the warranty? [emoji16]
That's the strongest IKEA furniture I've ever seen!
Love it!
[emoji106]
But does it still carry the warranty? [emoji16]
Sent from my SM-G930T using Tapatalk


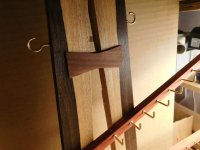
If I was better at doing anything symmetrical I would have gone that route. But unfortunately that isn't in my bag of tricks. [emoji38]. This gave me a hard reference surface to flush trim a curve from instead of rough cutting and then doing it by hand. This turned out really well and didn't take long at all.1--a very fair curve can be created by bending a thin batten of straight-grained wood across 3 points (I use lead weights for those points). The curve is first drawn onto a piece of door skin and then transferred to the workpiece after refining with a plane or sanding block. Often 1/2 the curve on the door skin is more nearly perfect than the other, so I use that 1/2 (flipped over) to transfer the curve to the workpiece.


This is basically the method I used to build my bathroom vanity. I used pins to locate the batten as I did this before adding the formica so no witness marks.1--a very fair curve can be created by bending a thin batten of straight-grained wood across 3 points (I use lead weights for those points). The curve is first drawn onto a piece of door skin and then transferred to the workpiece after refining with a plane or sanding block. Often 1/2 the curve on the door skin is more nearly perfect than the other, so I use that 1/2 (flipped over) to transfer the curve to the workpiece.
ALL: it's been way too long since I visited this great thread, but i have a question that maybe has been discussed or needs to be updated.
i'm getting ready to start a huge cedar fence project and then a cedar deck project and I'm heading down the rabbit hole of Circular and Miter saw blades.
anybody agree the Diablo or Freud blades are the best or do tell what is the best for cutting mostly cedar and lumber?
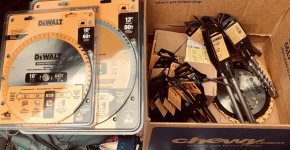
I needed a few basic blades for other projects so found a seller on craigs that had some new old Dewalt blades to sell along with a few rotohammer bits that I can use.
the Dewalt blade on my 12 inch compound sliding miter saw I think is 40 tooth and it cuts cedar nicely so not sure what i'll use the 80 tooth for, but i'm sure i'll find something to cut down the road.
THOUGHTS ON SAW BLADES? brands and type?

TC: thanks for the tip on the high end saw blades, but spending $300 for a saw blade isn't in my league at the moment.


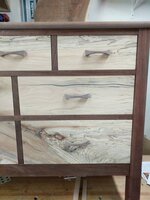

Thanks ez1--very attractive.