kbkna
Well-known member
What would be the best way to protect either MDf or 1 1/2 press board if I were to use it as a top? Which would you use and why? I have both about 1 1/2 inches thick.


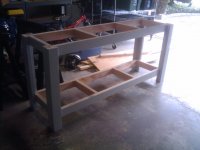
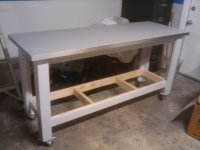
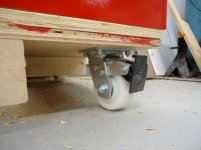
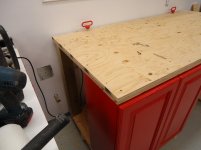
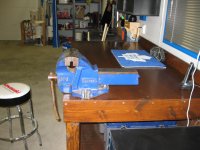
After looking through almost every bench on this thread and others, I decided for a simple but functional bench. It's 5 1/2' long, 30" deep and 42" high. The top piece is oak plywood and I want to give it a clear coat to protect from spills. I also added a drawer that I bought at Lowes for $5 and the peg board was purchased at Lowes on clearance.
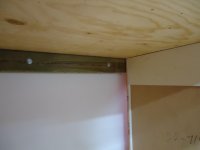
Now I need to figure out how to mount my vise since I have the 2x4 on the front edge and I'm not sure that drilling a bolt down through a small 2x4 is a good idea.

What would be the best way to protect either MDf or 1 1/2 press board if I were to use it as a top? Which would you use and why? I have both about 1 1/2 inches thick.
What would be the best way to protect either MDf or 1 1/2 press board if I were to use it as a top? Which would you use and why? I have both about 1 1/2 inches thick.
Also, any thoughts on how to best line up the two benches to make one surface when things call for it that way?
thanks!
So many ideas and examples, this is great stuff! I hope to design and build a bench for my new garage this spring or early summer using some of your ideas. How important is it for the bench top to overhang the legs/frame so you can clamp things down? Suggested overhang depths? If you don't have an overhang on your current bench, do you wish you had one?

I've got a bench that looks a LOT like yours and had the vice connected through the top into the 2X4 stringers for 20 years with lag bolts. The third bolt just went through the 3/4" top.
Lately I have upgraded to use receiver hitches. See post 32 on this post http://www.garagejournal.com/forum/showthread.php?t=86067&page=2.
It's really your call. If you ever need to clamp something down and you don't have a deep clamp, you'll probably ask yourself "wonder how much time it'll take to redo this bench so I can clamp something?"
I did put a small 1.5" overhang on mine (i'm definitely not a serious woodworker or tool-head) but I just know there'll come a time where I'm using the jigsaw and need to clamp something down. If I ever decide I don't like the overhang I can always cut it off or better yet, nail a furring strip under there for support.
Then again, they do make deep clamps for use on benches without overhangs.
Just finished building my work bench this weekend. Still need to build a shelf at each end, skin the sides and back with 1/4" plywood, then top with 1/4" hard board. Bench is 32" deep by 10' long. There wil be a vice at the far end as soon as I find one. All the joints and screw holes are already filled with wood filler. Next step will be prime, then paint.
<a href="http://s17.photobucket.com/albums/b58/jayinkali/?action=view¤t=Bench1.jpg" target="_blank"><img src="http://i17.photobucket.com/albums/b58/jayinkali/Bench1.jpg" border="0" alt="Photobucket"></a>
How do you like that makita drill? Im about to pull the trigger on a Makita but im torn between the compact white drill you have or full size green drill.
Thinking about my future workbench, I'm not sure whether it should be fastened to the wall or not. When built it will be roughly 5-6' wide and 20" deep, that's about all the room I can spare. It will not be on casters as I don't want to deal with the wobbles. But if I fasten it to the wall, I can never shuffle it around if I need space for large projects. Do you guys build your benches onto the wall, do you just attach it to a few studs with some lag bolts, or do you leave it floating should you need to move it later?

Here's mine...
<a href="http://www.flickr.com/photos/59565689@N06/5452888304/" "><img src="http://farm6.static.flickr.com/5293/5452888304_c037a0935c.jpg" width="413" height="500" alt="" /></a>
It's about 10 feet long, two layers of 3/4" MDF with a top later of 1/4" Masonite, banded with clear pine. Same for the roll around carts which are the same height as my tablesaw and serve double duty as infeed/outfeed tables.


 Thanks for sharing I spent way too much time looking through this thread last night!
To all the guys who are using hardboard layered on top of 3/4" plywood or OSB, how are you securing the layers? I'm planing on doing 3/4" OSB (maybe double thick), topped with 1/4" hardboard, but i'm torn on how to secure the layers.
Build the top separately, then Kreg / pocket screw it to the frame? Add it to the bench in layers, securing down into the cross pieces as you go? Anybody recommend edging the whole bench using 1x pine (i've seen a few people do this, curious what the hoard thinks)? How about overhang, I'm thinking 6" overhang on the front and sides, flush with the back?
I'm leaning towards screwing the 3/4" down from the top, then layering on the hardboard using glue and possibly some smaller-d sinker nails or something. I worry that if i go with glue it'll make replacing the hardboard later a painful affair, but relying on only nails might make a mess of things too. Anybody got different approaches? I've noticed a few different methods, but i don't recall it being actively discussed.
View media item 7860In the design, I borrowed Jack Olsen's soffit idea for the sliding doors, and ripped tracks into the 2x4's for the Masonite doors. I also benefited from his advice and made the top tracks deeper so I could lift the doors into the top first and then drop the bottom edges into place.
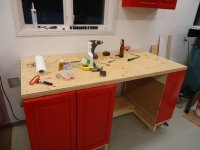
I built the top in layers. I didn't want to make the bench too high (it's 40.5" high), yet the open area had to be high enough to clear the table saw. So I only used one layer of 3/4" plywood. So the base has extra 2x4" cross members for added support.
For the hardboard, I chose not to glue it down so I could easily replace it later with a fresh piece. So I screwed it down with countersunk holes and flat-top screws.
A nice feature to using hardboard is it can be a cheap 'sacrificial' top. If you dont glue it then you can easily remove and replace when its time to spruce it up again.To all the guys who are using hardboard layered on top of 3/4" plywood or OSB, how are you securing the layers? I'm planing on doing 3/4" OSB (maybe double thick), topped with 1/4" hardboard, but i'm torn on how to secure the layers.
To all the guys who are using hardboard layered on top of 3/4" plywood or OSB, how are you securing the layers? I'm planing on doing 3/4" OSB (maybe double thick), topped with 1/4" hardboard, but i'm torn on how to secure the layers.
I'm leaning towards screwing the 3/4" down from the top, then layering on the hardboard using glue and possibly some smaller-d sinker nails or something. I worry that if i go with glue it'll make replacing the hardboard later a painful affair, but relying on only nails might make a mess of things too. Anybody got different approaches? I've noticed a few different methods, but i don't recall it being actively discussed.
Does Hardboard = Malamine or Masonite?
Has anyone used concrete board or tile backer board for a fire proof top section?
I suppose firebrick is the safest option for that.
Hardboard = Masonite
Melamine is the typically the white covered partical board shelving.
The only disavantage to concrete tops are that they are brittle and can't take a beating.
A nice feature to using hardboard is it can be a cheap 'sacrificial' top. If you dont glue it then you can easily remove and replace when its time to spruce it up again.
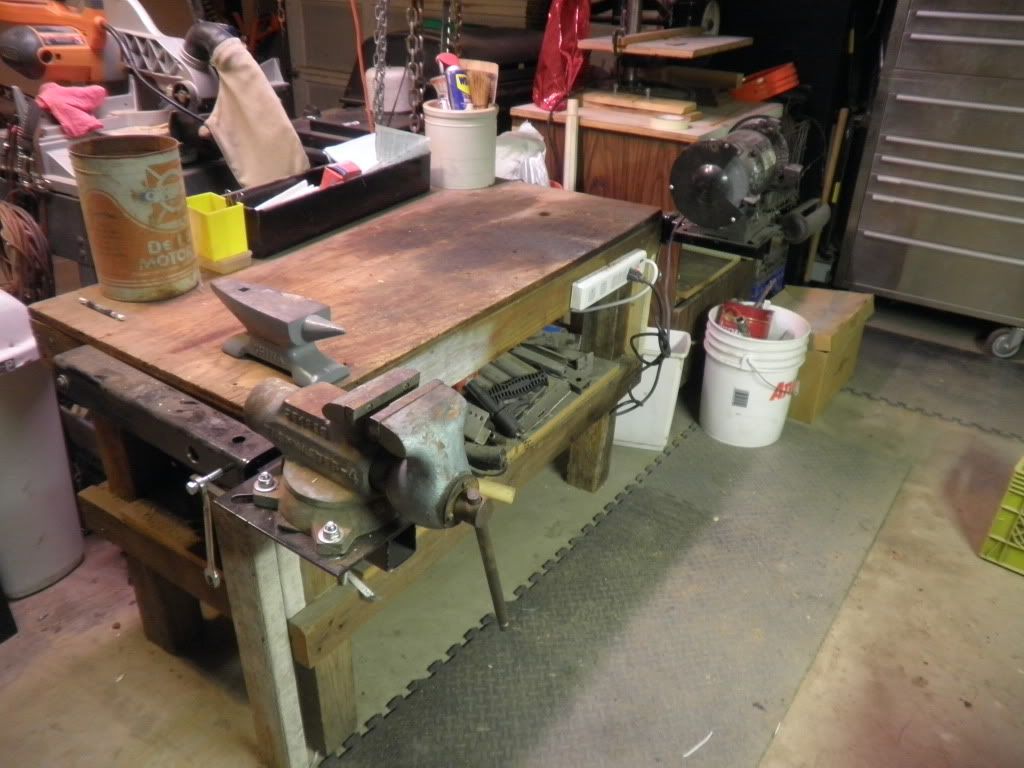
I attached mine by simply laying it on top of the bench then using 1/8" painted iron bar across each seam and 1 1/2" angle iron covering the front edges.
Can post a closer pic later...