To avoid these ads, REGISTER NOW!

ZMotorsports Shop Projects 2.0

OP
Z

zmotorsports

ALLIANCE MEMBER
Joined
Oct 20, 2009
Messages
21,437
Location
Northern Utah
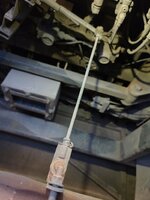
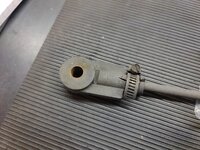
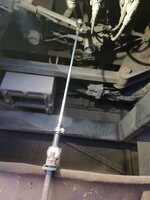
Dang! I would have thought .032” wire would have held the struts.

I would have thought so as well Jim. In fact, that was the one I thought I used last time when I grabbed it from the toolbox. I was surprised when I released the hydraulic pressure from the press and it continued to extend as the wire snapped.

Grabbed the .041" and it worked like a charm.


I normally just loop a 1" ratchet strap around the whole thing and ratchet it down to the desired length. 1" tends to be wide enough that it doesn't slip off while handling it. - Your method does seem a bit more secure.

I've used that method many a time myself, other than access on this one was less than ideal and the strap acted like it wanted to slip. Wasn't worth the risk at that point and went to my safety wire method.


Doesn't the hood extend slightly more than the struts allow for? You should be able to open it a little more, mount the bottom strut, mount the top strut, and then close like normal.

No. This isn't like a traditional "hood" or even like more traditional compartment doors. My coach has a pantographic style of rear hatch. The framework is built in such a manner that the door extends up to a certain point is all, otherwise it will contact the paint if it keeps going in an arc. The strut has to fit inside of this framework and then the fiberglass hatch is fastened to the steel framework. The strut must be compressed shorter than the distance between the ball mounts, then the hatch can be closed slightly until they align perfectly and snapped into place.
 
To avoid these ads, REGISTER NOW!

macgyver

Well-known member
Joined
Feb 13, 2008
Messages
45
Location
Big Bear Lake
Hey Mike, I have also been very happy with my Toyo M144's. I just got back from a 5,300 mile trip with terrible roads and the Toyo's excelled. I have run the Bridgstone R250's and the Falken RI 151's. And these are definitely the happiest for us. I mounted the Falken tires on the rims myself and said never again! These Toyo's I had done by a mobile truck guy who does tires. I wont mount them again, too much for the back.
 
Last edited:
OP
Z

zmotorsports

ALLIANCE MEMBER
Joined
Oct 20, 2009
Messages
21,437
Location
Northern Utah
Hey Mike, I have also been very happy with my Toyo M144's. I just got back from a 5,300 mile trip with terrible roads and the Toyo's excelled. I have run the Bridgstone R250's and the Falken RI 151's. And these are definitely the happiest for us.

Thanks Quinn. I appreciate the feedback on the Toyo's.

I can actually say in the 32+ years of RV'ing and more than a quarter million miles on 3 different coaches I have only been very unhappy with the Goodyears. I wouldn't have Goodyears again on anything I own if someone paid me to run them.

That being said, I really have nothing but good things to say about the Michelin's. They have been a GREAT tire and the pictures below should prove how well they've lasted. They have worn well and not developed any weird or adverse handling characteristics nor wear patterns. My ONLY complaint about them is the price discrepancy between them and anything else. Anyone who knows me can testify that I don't mind paying for quality, when that quality is justified. But also I can say that I don't throw money away either and try to be frugal with my spending. At work our Michelins have been equally impressive. Even after several recaps for our trailers, the casings still look good up to the 10-year mark where we have to take them out of over the road service. We still have some in the 12+ year range on yard trailers that are just barely beginning to show signs of weather or UV cracking and those are sitting without any exercising.

Now, I may get flamed about this, but hey it seems to be a common theme here lately with people beating up on me, but the tires I am running on my coach's drive and tag axles are ten years old. They have a code date of mid-2014 and show absolutely no signs of weather cracking, checking or any adverse tread or especially sidewall deterioration.

Quinn, you've been around RV's long enough to know as well as I do that in the RV world there is a LOT of misinformation. One of those commonly spread lines is that tires should be replaced every 5 years. Some will even argue that the manufacturers state that and anyone running anything older than 5 years of age on tires is just asking for problems happily murdering innocent puppies. Some even tout that THEY are the only responsible people on the road because they replace their tires like clockwork every 5 years. My feelings are is they have that kind of money, then great, go for it. But basically, many are just ignorant to the facts and keep repeating this misinformation over and over again thinking that if they repeat it enough it will become true.

Most manufacturers, Michelin in particular, do state very consistently and boldly that at the five year mark, they begin thorough inspections and looking for cracking, weathering, rivering, and any abnormal wear that can result in a failure. In the Michelin training that I've been through at work, they even have a specification for the depth of the crack at which they should be replaced which means they expect and accept cracking to "some" degree. Personally, I look to replace when I see any initial signs of cracking and don't run any and feel I'm probably overly **** about it. Now I won't run tires past 10 years but when I mention I have routinely ran 7+ year old Bridgestone R250's on my last coach and now 9+ year old Michelin's I get chastised before anyone has even looked at my tires. Now the Goodyears were junk well before the 5-year mark as I bought the coach at 4 years of age and they were absolute garbage by that time.
tires1.jpg

No evidence of checking or a single weather crack. The insides look as good if not slightly better than the outside of the tire.
tires6.jpg

And these are coming up on 10-years old.
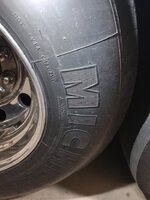
tires5.jpg

The drive and tag axles look every bit as good as my steer tires pictured here.
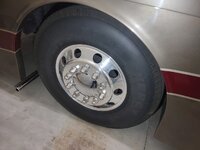
tires2.jpg

Which are now 5 years old.
tires3.jpg

If someone didn't look at the code dates, I don't think they'd be able to tell the difference between the 5-year-old steers and 10-year-old drives or tags.

Bottom line, keeping the tires clean is the best thing for them and second best is to run them down the road and keep them exercised. Tires sitting for extended periods of time is the worst thing for them. Even the few months in the winter of inactivity of our coach bothers me to let them sit for that long. Driving during a weeklong trip once a month or so in the 8+ months of our RV'ing season has worked to keep the tires exercised and then a good wash before parking upon arriving home. I don't use any treatments or chemicals on my tires, just a thorough washing with a mild bristles brush upon arriving home.

I am quite proud of how long I've been able to make my tires last with no signs of checking or weather cracking. The water spots on my wheels, not so proud of. Very much in need of a polish job as I missed my annual polish last year. :mad:
 
Last edited:

Bodj Built

Well-known member
Joined
Feb 3, 2016
Messages
1,167
Location
Moorpark, CA
No. This isn't like a traditional "hood" or even like more traditional compartment doors. My coach has a pantographic style of rear hatch. The framework is built in such a manner that the door extends up to a certain point is all, otherwise it will contact the paint if it keeps going in an arc. The strut has to fit inside of this framework and then the fiberglass hatch is fastened to the steel framework. The strut must be compressed shorter than the distance between the ball mounts, then the hatch can be closed slightly until they align perfectly and snapped into place.
Ahh I see. What a pain in the ****
 

Seagoon

Well-known member
Joined
Jan 23, 2014
Messages
859
Location
Scunthorpe. UK.
Thanks Quinn. I appreciate the feedback on the Toyo's.

I can actually say in the 32+ years of RV'ing and more than a quarter million miles on 3 different coaches I have only been very unhappy with the Goodyears. I wouldn't have Goodyears again on anything I own if someone paid me to run them.

That being said, I really have nothing but good things to say about the Michelin's. They have been a GREAT tire and the pictures below should prove how well they've lasted. They have worn well and not developed any weird or adverse handling characteristics nor wear patterns. My ONLY complaint about them is the price discrepancy between them and anything else. Anyone who knows me can testify that I don't mind paying for quality, when that quality is justified. But also I can say that I don't throw money away either and try to be frugal with my spending. At work our Michelins have been equally impressive. Even after several recaps for our trailers, the casings still look good up to the 10-year mark where we have to take them out of over the road service. We still have some in the 12+ year range on yard trailers that are just barely beginning to show signs of weather or UV cracking and those are sitting without any exercising.

Now, I may get flamed about this, but hey it seems to be a common theme here lately with people beating up on me, but the tires I am running on my coach's drive and tag axles are ten years old. They have a code date of mid-2014 and show absolutely no signs of weather cracking, checking or any adverse tread or especially sidewall deterioration.

Quinn, you've been around RV's long enough to know as well as I do that in the RV world there is a LOT of misinformation. One of those commonly spread lines is that tires should be replaced every 5 years. Some will even argue that the manufacturers state that and anyone running anything older than 5 years of age on tires is just asking for problems happily murdering innocent puppies. Some even tout that THEY are the only responsible people on the road because they replace their tires like clockwork every 5 years. My feelings are is they have that kind of money, then great, go for it. But basically, many are just ignorant to the facts and keep repeating this misinformation over and over again thinking that if they repeat it enough it will become true.

Most manufacturers, Michelin in particular, do state very consistently and boldly that at the five year mark, they begin thorough inspections and looking for cracking, weathering, rivering, and any abnormal wear that can result in a failure. In the Michelin training that I've been through at work, they even have a specification for the depth of the crack at which they should be replaced which means they expect and accept cracking to "some" degree. Personally, I look to replace when I see any initial signs of cracking and don't run any and feel I'm probably overly **** about it. Now I won't run tires past 10 years as that is what DOT deems end of life for a tire but when I mention I have routinely ran 7+ year old Bridgestone R250's on my last coach and now 9+ year old Michelin's I get chastised before anyone has even looked at my tires. Now the Goodyears were junk well before the 5-year mark as I bought the coach at 4 years of age and they were absolute garbage by that time.
tires1.jpg

No evidence of checking or a single weather crack. The insides look as good if not slightly better than the outside of the tire.
tires6.jpg

And these are coming up on 10-years old.
tires5.jpg

The drive and tag axles look every bit as good as my steer tires pictured here.
tires2.jpg

Which are now 5 years old.
tires3.jpg

If someone didn't look at the code dates, I don't think they'd be able to tell the difference between the 5-year-old steers and 10-year-old drives or tags.

Bottom line, keeping the tires clean is the best thing for them and second best is to run them down the road and keep them exercised. Tires sitting for extended periods of time is the worst thing for them. Even the few months in the winter of inactivity of our coach bothers me to let them sit for that long. Driving during a weeklong trip once a month or so in the 8+ months of our RV'ing season has worked to keep the tires exercised and then a good wash before parking upon arriving home. I don't use any treatments or chemicals on my tires, just a thorough washing with a mild bristles brush upon arriving home.

I am quite proud of how long I've been able to make my tires last with no signs of checking or weather cracking. The water spots on my wheels, not so proud of. Very much in need of a polish job as I missed my annual polish last year. :mad:
If it weren't for the liability issues I would happily run those for another couple of years.
We have the same issues on this side of the pond with bike tyres. If you run them for more than five years all the kittens in the country are going to die. I have got personal experience of running nine year old tyres down to the wear limit on my VFR with absolutely no effects on grip or handling.. I'm all for safety but throwing away perfectly good tyres because of an old wives tale seems crazy to me.
 

mmsheb

Well-known member
Joined
Mar 30, 2008
Messages
365
Location
Wisconsin
Mike,
I'm curious why you don't use any treatments or chemicals on your tires, but just do a thorough wash with a mild bristles brush. Does that apply to your coach tires only, or tires on any and all of your vehicles?
Thanks,
Mike in WI
 
OP
Z

zmotorsports

ALLIANCE MEMBER
Joined
Oct 20, 2009
Messages
21,437
Location
Northern Utah
Mike,
I'm curious why you don't use any treatments or chemicals on your tires, but just do a thorough wash with a mild bristles brush. Does that apply to your coach tires only, or tires on any and all of your vehicles?
Thanks,
Mike in WI

Mike, years ago I used various chemicals to enhance the appearance of my tires, especially on my street rods/show vehicles, but then about 20 years or so ago I attended some training offered by Michelin at work. During that training seminar they were very adamant that they in no way endorsed any use of chemicals on their tires.

The research they shared with us actually had the opposite affect and sped up the aging process of the rubber and the degradation of the black carbon in the tires makeup. That pretty much turned me off of using chemicals on tires for good.

Mike, sorry if this is a repeat question for you but do you put your coach on jack stands to take the load off the tires? And avoiding flat spots?

:beer:

Dan, I do not raise the coach off the ground for the few months of not being used.
 

mmsheb

Well-known member
Joined
Mar 30, 2008
Messages
365
Location
Wisconsin
Mike,
Thanks for the information on the use of chemicals. I'll rethink what I will do since I'm getting new tires soon on my classic car. Appreciate your explanation.
Mike in WI
 

Fixr

Well-known member
Joined
Dec 23, 2012
Messages
9,708
Location
SW VA
I would have thought so as well Jim. In fact, that was the one I thought I used last time when I grabbed it from the toolbox. I was surprised when I released the hydraulic pressure from the press and it continued to extend as the wire snapped.

Grabbed the .041" and it worked like a charm.


I've used that method many a time myself, other than access on this one was less than ideal and the strap acted like it wanted to slip. Wasn't worth the risk at that point and went to my safety wire method.


No. This isn't like a traditional "hood" or even like more traditional compartment doors. My coach has a pantographic style of rear hatch. The framework is built in such a manner that the door extends up to a certain point is all, otherwise it will contact the paint if it keeps going in an arc. The strut has to fit inside of this framework and then the fiberglass hatch is fastened to the steel framework. The strut must be compressed shorter than the distance between the ball mounts, then the hatch can be closed slightly until they align perfectly and snapped into place.
This confuses me. In all of my decades of working on vehicles, gas struts have always run out of stroke just a little before the hatch, door, hood or whatever ran completely out of normal travel. Letting the gas strut try to push the door or linkage past the hard stops seems like a really bad idea unless the linkage is overbuilt or made with additional clearance to compensate. And requiring that a mechanic kludge a way to keep a commodity gas strut from extending fully while installing it seems like a recipe for losing a personal injury lawsuit. In other words, bad design.

But what do I know?

Now somebody will show conclusively that I missed something and it's actually a really good idea.
 
OP
Z

zmotorsports

ALLIANCE MEMBER
Joined
Oct 20, 2009
Messages
21,437
Location
Northern Utah
This confuses me. In all of my decades of working on vehicles, gas struts have always run out of stroke just a little before the hatch, door, hood or whatever ran completely out of normal travel. Letting the gas strut try to push the door or linkage past the hard stops seems like a really bad idea unless the linkage is overbuilt or made with additional clearance to compensate. And requiring that a mechanic kludge a way to keep a commodity gas strut from extending fully while installing it seems like a recipe for losing a personal injury lawsuit. In other words, bad design.

But what do I know?

Now somebody will show conclusively that I missed something and it's actually a really good idea.

I have not seen that personally. In the RV world I have not seen any gas strut act as you described. They are under full pressure all the way to the end of the their stroke.
 

Fixr

Well-known member
Joined
Dec 23, 2012
Messages
9,708
Location
SW VA
I have not seen that personally. In the RV world I have not seen any gas strut act as you described. They are under full pressure all the way to the end of the their stroke.
I've always been able to install one at full stroke by just flexing the door or hatch a bit. Having to tie one down short of full stroke with whatever is at hand has never been a requirement. Pressure is almost completely unrelated to stroke. I've never installed a gas cylinder that ran out of pressure at full stroke.
 
OP
Z

zmotorsports

ALLIANCE MEMBER
Joined
Oct 20, 2009
Messages
21,437
Location
Northern Utah
I've always been able to install one at full stroke by just flexing the door or hatch a bit. Having to tie one down short of full stroke with whatever is at hand has never been a requirement. Pressure is almost completely unrelated to stroke. I've never installed a gas cylinder that ran out of pressure at full stroke.

Well I don't know what to tell ya other than consider yourself lucky. These compartment doors do not flex. A few of my compartment doors open upward where they can be over traveled slightly just enough to engage the ball studs. However, with the pantograph bus style compartment doors and engine hatch on my coach with 150 lb. rated gas struts, that just is not possible.
 

Fixr

Well-known member
Joined
Dec 23, 2012
Messages
9,708
Location
SW VA
Well I don't know what to tell ya other than consider yourself lucky. These compartment doors do not flex. A few of my compartment doors open upward where they can be over traveled slightly just enough to engage the ball studs. However, with the pantograph bus style compartment doors and engine hatch on my coach with 150 lb. rated gas struts, that just is not possible.
I'll just say that it seems like bad engineering. Gas struts are available in an incredible myriad of lengths and strengths. Specifying ones that don't snap into place is just ****** design. I'm sorry that you had to improvise a way to install them.
 

Bob Heine

ALLIANCE MEMBER
Joined
Oct 24, 2009
Messages
10,707
Location
Boca Raton, Florida
I'll just say that it seems like bad engineering. Gas struts are available in an incredible myriad of lengths and strengths. Specifying ones that don't snap into place is just ****** design. I'm sorry that you had to improvise a way to install them.
@Fixr, the engine door on Mike's Monaco isn't like a hatchback. It doesn't swing up from hinges at the roofline. It moves out and up, parallel to the back of the coach. I've installed a few struts but never a single 150 lb strut, let alone two. The first page of this thread shows the engine cover opened up with a complicated set of arms and the lift mechanism isn't something you prop up with a stick and snap in a couple of struts.
I had to pull the coach out of the storage bay tonight so they could program the RV bay door remote so I figured while the coach was out I would pressure wash the engine bay and undercarriage to get all of the paint and sanding dust off from the paint shop. I also vacuumed the storage bays, watered batteries and wiped down the utility bays so it is ready for its next trip.

Engine bay all cleaned up.
d024b703dfd2e51d2fe81d93939a0519.jpg

A couple pictures of the coach while backed up to the shop.
90b3c32595e16539c18216cef0914428.jpg

d1e049db6ddc81ddcac47b0fefcd3165.jpg

After parking the coach back in her bay I trammed the head on my mill and squared the vise on the table in preparation for use.

Thanks for looking.

Mike


Sent from my iPhone using Tapatalk
 

Fixr

Well-known member
Joined
Dec 23, 2012
Messages
9,708
Location
SW VA
@Fixr, the engine door on Mike's Monaco isn't like a hatchback. It doesn't swing up from hinges at the roofline. It moves out and up, parallel to the back of the coach. I've installed a few struts but never a single 150 lb strut, let alone two. The first page of this thread shows the engine cover opened up with a complicated set of arms and the lift mechanism isn't something you prop up with a stick and snap in a couple of struts.
Bob, I get that. I've worked on some of those kind of hatches on high-end motorcoaches. The extended length of the strut is part of the design of that whole linkage. 150 lbs for a strut is trivial. Replacement should literally call for no more than supporting the hatch with a 2x4, and that should be called out in the service manual. If more is needed, the instructions should call out the exact special tools and equipment required so the technician can perform the job properly. Having to guess which gauge of safety wire to use is just ludicrous.
 
OP
Z

zmotorsports

ALLIANCE MEMBER
Joined
Oct 20, 2009
Messages
21,437
Location
Northern Utah
Bob, I get that. I've worked on some of those kind of hatches on high-end motorcoaches. The extended length of the strut is part of the design of that whole linkage. 150 lbs for a strut is trivial. Replacement should literally call for no more than supporting the hatch with a 2x4, and that should be called out in the service manual. If more is needed, the instructions should call out the exact special tools and equipment required so the technician can perform the job properly. Having to guess which gauge of safety wire to use is just ludicrous.

Well, I guess therein lies my problem. I didn't have a 2x4 designated to hold the hatch up nor am I a trained technician. I guess I'm just fucked all the way around.
 
OP
Z

zmotorsports

ALLIANCE MEMBER
Joined
Oct 20, 2009
Messages
21,437
Location
Northern Utah
Mike, can you explain “rivering”? I’ve never heard that term before pertaining to tire wear or habits. I know I could just look it up, but I’d rather hear your explanation. Thanks!

Sterling, there are several explanations I have heard and read about over the years.

One is the lengthwise (parallel to tire travel) erosion of the outer tread blocks/ribs in several areas around the circumference of the tire. The rib doesn't wear evenly and actually looks like a river as the rib gets narrow and then wide but all on the same rib. The other is the wavey uneven wear pattern that can go across the tread pattern developed in several areas (more than one) around the circumference of the tire. Almost looks like the brakes were locked up randomly but at the same point to where the areas are worn down much faster than the surrounding tread. Can also somewhat take on a characteristic of maybe a lightly loaded and overinflated tire hopping down the road. So it looks like a river going up and down if you run your hand around the outer circumference. There is nothing really to be done or corrections to the chassis that will help this as it is usually a result of something in the manufacturing process of the tire. Recommendations in the manuals that I have seen just say to continue running until wear get to the replacement point. Hope that makes sense.

For some reason Goodyear in particular had a nasty habit of this on their G670, G149 and G159 tires which were found most prevalently on RV's around the early to mid-2000's.
 
To avoid these ads, REGISTER NOW!
OP
Z

zmotorsports

ALLIANCE MEMBER
Joined
Oct 20, 2009
Messages
21,437
Location
Northern Utah
Mike, I bet it really gives you the warm and fuzzies to know that someone else knows so much more about your coach than you do;)

Oh I'm not saying I know everything, trust me I don't. But I'm not a complete ***** or idiot either.

My hell, I seem to be a magnet for criticism from the peanut gallery lately for some reason. Try to help and just get criticized for it.

I think I need a break from people.
 

Fixr

Well-known member
Joined
Dec 23, 2012
Messages
9,708
Location
SW VA
Oh I'm not saying I know everything, trust me I don't. But I'm not a complete ***** or idiot either.

My hell, I seem to be a magnet for criticism from the peanut gallery lately for some reason. Try to help and just get criticized for it.

I think I need a break from people.
Sorry man, I didn't intend any criticism of you, and I'm certainly no motorcoach guru. I was just ranting about the apparent design stupidity that requires compressing a gas strut in order to install it.
 

gearhead1960

ALLIANCE MEMBER
Joined
Mar 21, 2019
Messages
1,862
Location
Manassas, VA, a small blot in history
Mike,

I believe (as I think you do, as well) that tires are part of the maintenance of the vehicle. They are going to last well into their expected service life or even beyond normal expectancy if you do the maintenance. Key things that I think you do are:
-maintain correct pressures at all times.
-rotate them periodically
-constant awareness of condition
Other factors also come into play that I think might be missed or misunderstood are: When not in use, you are able to store your RV in a climate controlled space. Constant temperature change, exposure to sun (UV), ozone, and weather are also a major factor in the aging of the tire/rubber. The fact that you limit this exposure and temperature change helps to extend the life and condition (both structurally and cosmetically) of the tires and even your RV. Just my thoughts....:)
 

ScepterToad

Well-known member
Joined
Nov 9, 2023
Messages
338
Mike, those tires look REALLY good, even if they are Michelins :ROFLMAO:

On a serious note, I do like Michelin tires in general and would give them a serious look on the coach if they weren't so darn expensive. I ran a set of their M/S 2s on my Excursion for right around 100K and they are still in decent shape. They are cracked, but the treadwear is still above the bars.

As to the rivering, here's what my steers are exhibiting. There's quite a bit of meat left, but I just don't like the way they look. Based on my front axle weight of 13,500 and their condition, I run them pretty close to their maximum capacity air pressure wise, so I've got a bit of "room" on them weight wise. I have zero pulling/steering issues and she floats down the road quite nicely. The old rears had this as well when I had them changed out.

I do carry a spare, which is the G670 I purchased new 2 years ago now. However, when I go to get new steers, I may sell that one and get a Toyo spare. You know how that goes, as long as I have a spare, I'll never need it.
 

Attachments

  • IMG_1457.jpg
    IMG_1457.jpg
    505.8 KB · Views: 48
  • IMG_1454.jpg
    IMG_1454.jpg
    493.3 KB · Views: 49

SilverJimmy

Well-known member
Joined
Apr 14, 2012
Messages
1,643
Location
Prescott/Flagstaff, AZ
Thanks Mike for the explanation. On my 98 International 4600 I had that same wear pattern on my tires, just didn’t know it had a name. I was a starving tool slinger, so I had to run my tires till the air started to show! In the almost a million miles I drove over my career I only experienced one tire failure, a right front blow out on I-40 just east of Winslow, Az. That was a very exciting event. The tire was probably at about 50% life left and I believe it was a road debris caused failure. I did all my own tire work, dismount and mount, even would rotate my tires a couple times to try to stretch their life. Balance was a constant struggle. I had a Snap-On Semi tire balancer that I used to balance the steers, but that was a futile exercise because my tires would slowly rotate on my Alcoa aluminum rims in the same direction they were turning. I decided that they were doing that because of braking forces causing them to slowly slip. Very glad I don’t need to worry about that anymore! As a side note, I’m more than willing to donate to your shop my Ken-Tool tire irons if you’d like to do one more thing yourself!
 

Dodge

Well-known member
Joined
Feb 8, 2008
Messages
557
Location
Illinois
On a different subject: I always enjoy your pictures of your Wheelin trips. So I have gotten hooked on YouTube videos of "Matt's Off Road Recovery" and couple of others out there in Utah. He recovers some people, as a result of doing some really Stupid stuff! I am sure you have seen it all! Is most of that country, mountains, canyons, etc. owned by the Govt? You live in an area of this country that is absolutely beautiful!! Also, various degrees of weather! Please keep your vacation pics coming. Thanks
 
OP
Z

zmotorsports

ALLIANCE MEMBER
Joined
Oct 20, 2009
Messages
21,437
Location
Northern Utah
On a different subject: I always enjoy your pictures of your Wheelin trips. So I have gotten hooked on YouTube videos of "Matt's Off Road Recovery" and couple of others out there in Utah. He recovers some people, as a result of doing some really Stupid stuff! I am sure you have seen it all! Is most of that country, mountains, canyons, etc. owned by the Govt? You live in an area of this country that is absolutely beautiful!! Also, various degrees of weather! Please keep your vacation pics coming. Thanks

It varies, some of the property is BLM land/National Forest Service and other is private that we wheel on.
 

macgyver

Well-known member
Joined
Feb 13, 2008
Messages
45
Location
Big Bear Lake
Thanks Quinn. I appreciate the feedback on the Toyo's.

I can actually say in the 32+ years of RV'ing and more than a quarter million miles on 3 different coaches I have only been very unhappy with the Goodyears. I wouldn't have Goodyears again on anything I own if someone paid me to run them.

That being said, I really have nothing but good things to say about the Michelin's. They have been a GREAT tire and the pictures below should prove how well they've lasted. They have worn well and not developed any weird or adverse handling characteristics nor wear patterns. My ONLY complaint about them is the price discrepancy between them and anything else. Anyone who knows me can testify that I don't mind paying for quality, when that quality is justified. But also I can say that I don't throw money away either and try to be frugal with my spending. At work our Michelins have been equally impressive. Even after several recaps for our trailers, the casings still look good up to the 10-year mark where we have to take them out of over the road service. We still have some in the 12+ year range on yard trailers that are just barely beginning to show signs of weather or UV cracking and those are sitting without any exercising.

Now, I may get flamed about this, but hey it seems to be a common theme here lately with people beating up on me, but the tires I am running on my coach's drive and tag axles are ten years old. They have a code date of mid-2014 and show absolutely no signs of weather cracking, checking or any adverse tread or especially sidewall deterioration.

Quinn, you've been around RV's long enough to know as well as I do that in the RV world there is a LOT of misinformation. One of those commonly spread lines is that tires should be replaced every 5 years. Some will even argue that the manufacturers state that and anyone running anything older than 5 years of age on tires is just asking for problems happily murdering innocent puppies. Some even tout that THEY are the only responsible people on the road because they replace their tires like clockwork every 5 years. My feelings are is they have that kind of money, then great, go for it. But basically, many are just ignorant to the facts and keep repeating this misinformation over and over again thinking that if they repeat it enough it will become true.

Most manufacturers, Michelin in particular, do state very consistently and boldly that at the five year mark, they begin thorough inspections and looking for cracking, weathering, rivering, and any abnormal wear that can result in a failure. In the Michelin training that I've been through at work, they even have a specification for the depth of the crack at which they should be replaced which means they expect and accept cracking to "some" degree. Personally, I look to replace when I see any initial signs of cracking and don't run any and feel I'm probably overly **** about it. Now I won't run tires past 10 years but when I mention I have routinely ran 7+ year old Bridgestone R250's on my last coach and now 9+ year old Michelin's I get chastised before anyone has even looked at my tires. Now the Goodyears were junk well before the 5-year mark as I bought the coach at 4 years of age and they were absolute garbage by that time.
tires1.jpg

No evidence of checking or a single weather crack. The insides look as good if not slightly better than the outside of the tire.
tires6.jpg

And these are coming up on 10-years old.
tires5.jpg

The drive and tag axles look every bit as good as my steer tires pictured here.
tires2.jpg

Which are now 5 years old.
tires3.jpg

If someone didn't look at the code dates, I don't think they'd be able to tell the difference between the 5-year-old steers and 10-year-old drives or tags.

Bottom line, keeping the tires clean is the best thing for them and second best is to run them down the road and keep them exercised. Tires sitting for extended periods of time is the worst thing for them. Even the few months in the winter of inactivity of our coach bothers me to let them sit for that long. Driving during a weeklong trip once a month or so in the 8+ months of our RV'ing season has worked to keep the tires exercised and then a good wash before parking upon arriving home. I don't use any treatments or chemicals on my tires, just a thorough washing with a mild bristles brush upon arriving home.

I am quite proud of how long I've been able to make my tires last with no signs of checking or weather cracking. The water spots on my wheels, not so proud of. Very much in need of a polish job as I missed my annual polish last year. :mad:
Mike, I agree with you about the 5 years being not necessarily the rule. My Falkens I just took off were 7 years old and looked pretty good still. I decided to replace them at 7 years because they were starting to show their wear. Also my coach sits outdoors 24/7 and the sun where we live is brutal on tires. (I don't cover them due to wind) Someday when I get a garage for the Monaco, my tires may last longer. I have seen Michelin's here with cracks at 3 years. My Falkens had no cracks at 7 years, but I did have a few chunks in the edges of the tread from dirt roads and driving off road.
 

Mr. Roboto

Well-known member
Joined
Dec 11, 2012
Messages
2,160
Location
New Hampshire
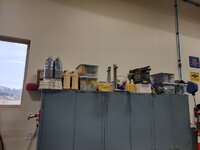
I have been frustrated with how I have let the area above my cabinets get cluttered over the past few years so yesterday I stopped by my local big box store and picked up a few plastic storage totes for a few items.


bins1.jpg

I have a bank of cabinets at the rear of my shop with a similar mess up top that has been bothering me. I need to do the same. I've been thinking about building a one tier shelf that sits on top of them that runs the entire span, to better keep things organized and also to keep me from stacking stuff on top of each other.

tires3.jpg

If someone didn't look at the code dates, I don't think they'd be able to tell the difference between the 5-year-old steers and 10-year-old drives or tags.

Bottom line, keeping the tires clean is the best thing for them and second best is to run them down the road and keep them exercised. Tires sitting for extended periods of time is the worst thing for them. Even the few months in the winter of inactivity of our coach bothers me to let them sit for that long. Driving during a weeklong trip once a month or so in the 8+ months of our RV'ing season has worked to keep the tires exercised and then a good wash before parking upon arriving home. I don't use any treatments or chemicals on my tires, just a thorough washing with a mild bristles brush upon arriving home.

I am quite proud of how long I've been able to make my tires last with no signs of checking or weather cracking. The water spots on my wheels, not so proud of. Very much in need of a polish job as I missed my annual polish last year. :mad:

Funny to hear you talk about your tires. I've been thinking more and more about my car trailer tires. With the amount of miles I put on it, they will likely need replacing due to age long before they do because of tire wear. I don't have the luxury of keeping that indoors, though. It sits outside in the elements, parked on gravel. I've been debating getting a set of something like this to at least keep the sun from beating on them, but I'm not sure if they'd end up doing more harm than good? Since they could potentially just trap moisture up against them pretty regularly.

Cover.PNG

Nice work on the bellhousing. Good catch on the surfaces not being parallel to one another. I agree with your logic. When you bolt up 2 non parallel surfaces to fixed objects, something has to give! Glad the customer OKd the machining repair to fix that... otherwise if it cracked again he'd be back falsely blaming your beautifully executed welds!
 
OP
Z

zmotorsports

ALLIANCE MEMBER
Joined
Oct 20, 2009
Messages
21,437
Location
Northern Utah
I have a bank of cabinets at the rear of my shop with a similar mess up top that has been bothering me. I need to do the same. I've been thinking about building a one tier shelf that sits on top of them that runs the entire span, to better keep things organized and also to keep me from stacking stuff on top of each other.


Funny to hear you talk about your tires. I've been thinking more and more about my car trailer tires. With the amount of miles I put on it, they will likely need replacing due to age long before they do because of tire wear. I don't have the luxury of keeping that indoors, though. It sits outside in the elements, parked on gravel. I've been debating getting a set of something like this to at least keep the sun from beating on them, but I'm not sure if they'd end up doing more harm than good? Since they could potentially just trap moisture up against them pretty regularly.

Cover.PNG

Nice work on the bellhousing. Good catch on the surfaces not being parallel to one another. I agree with your logic. When you bolt up 2 non parallel surfaces to fixed objects, something has to give! Glad the customer OKd the machining repair to fix that... otherwise if it cracked again he'd be back falsely blaming your beautifully executed welds!
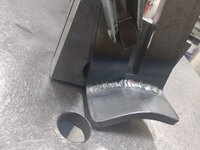
Thank you.

I also cover my trailer tires to protect them from UV damage. I also covered our coach tires at our last home as it sat outside 24/7/365 so a little extra protection paid huge dividends in the long run.
 
OP
Z

zmotorsports

ALLIANCE MEMBER
Joined
Oct 20, 2009
Messages
21,437
Location
Northern Utah
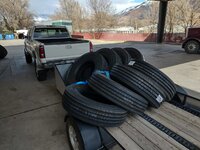
Picked up my new tires a couple of weeks ago that were delivered to my cousin's shop, then took them to a local tire shop for dismounting/mounting.

tires26.jpg

Dropping off at local tire shop.
tires27.jpg

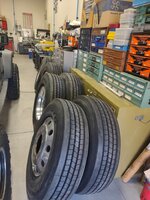
New tires mounted and brought back home.
tires29.jpg

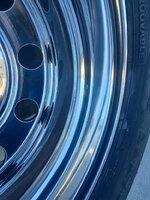
Awaiting polish. They didn't look terrible but last year we got caught in a campground where their sprinklers were on and the wind blew water all over the side of the coach and wheels so I have some hard water spots that need to be removed. I also run around them by hand with some Busch's polish once a year and time got away from me last year so I didn't do them. Figured I'd polish them before mounting them back on the coach.
tires31.jpg

I sold my two steers to a guy that is going to run them on his truck and he agreed to take my 10-year old Michelin's when he saw them to run on his yard trailers. I was happy to deliver them as it saved me $17/each for disposal fees.
tires35.jpg

Then the polishing began. Although it was a lot of work, I found it rewarding to sit and polish the wheels to a nice shine. I don't think these Accuride's polish up quite as nicely as my old Alcoa's did on my last coach, but they shine up well enough. Left half of wheel hasn't been polished yet and the right side has.
tires36.jpg

Close up view.
tires39.jpg

tires40.jpg

Rolled back into the shop and awaiting a wash job to get the lint fibers off and splatter from the polish. I used my little Milwaukee 12 volt 3" polisher with fine pad and Busch's Aluminum Polish this go-round.
tires41.jpg

tires42.jpg


The original owners must have curb checked these on more than one occasion. They were really beat up and neglected when we bought the coach 17 years ago but I've been able to bring them "mostly" back. Still have some pretty nice sized dings and nicks in them though. Just can't bring myself to buy new ones at this point as they are not cheap.
 
OP
Z

zmotorsports

ALLIANCE MEMBER
Joined
Oct 20, 2009
Messages
21,437
Location
Northern Utah
While tires/wheels were removed I performed some other preventive maintenance tasks on the coach's chassis.

The Balance Masters were showing signs of wear, fronts much more than the rears. However, that could be due to the rears being a bit newer. The rears just required a cleaning then a scuff before applying some semi-gloss black chassis paint but the fronts needed a bit more attention. I ran the DA around them before painting.

balance1.jpg

balance2.jpg

All done and ready for installation. I also purchased some new Crossfire's in the background. I had one that the center ball was acting weird and the other side had a hose that was getting frayed. These have been on the coach for 17-years so I contacted the manufacturer to see about sending them in for repairs. They said it would be less expensive to replace than repair and then made me what I thought was a decent offer on replacement costs so I bought a couple new ones which showed up a couple of weeks ago and will go back on the coach when the drive tires/wheels are mounted.
balance4.jpg

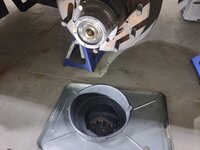
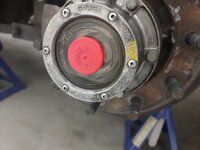
I drained all of the gear oil from my wet hubs at the steer and tag axles. Oil looked great so nothing else had to be done other than drain and refill.
hubs1.jpg

hubs2.jpg

hubs3.jpg


Last fall when I was doing a routine chassis inspection after a trip I noted that a couple of the rubber ends of the ride height linkages were looking a bit cracked and brittle so I had purchased some new Haldex links a few months ago knowing I'd have good access to them with the tires/wheels removed. I removed the linkages from the axle and ride height valves. There is one at the front center and two on the rear end at the outer corners of the drive axle.
rideheight1.jpg

Matched the length.
rideheight2.jpg

Here you can see a small tear or crack in the rubber end.
rideheight4.jpg

And new front one installed.
rideheight5.jpg

I also replaced the two on the drive axle but didn't snap any pictures of them, they are the same style and connect in the same manner. The OEM's held up well for a 22-year old coach but I thought I'd replace them now vs. on the side of the road somewhere when one decided to fail.
 
OP
Z

zmotorsports

ALLIANCE MEMBER
Joined
Oct 20, 2009
Messages
21,437
Location
Northern Utah
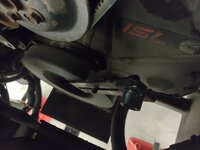
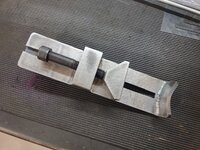
A couple of weeks ago I also fabbed up a tool that I have wanted to make for a while now. I should have fabricated this before running the overhead on our Cummins ISL in our coach but time got away from me and I just dropped the starter motor and barred the engine over that way.

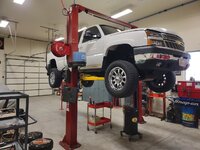
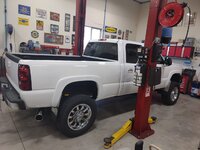
On these rear engine diesel pusher coaches access to things like starter motors and such are a bit more cumbersome than in an OTR truck so I wanted to fabricate a tool that would grab ahold of the harmonic balancer and allow me to bar the engine over from the front of the engine (rear of the coach). We have some friends with these engines and I see myself doing this in the near future more and more so I thought I'd make the tool a couple of weekends ago while I was also performing a service on our 2006 Silverado 2500HD. Just cranked up the radio and got in the zone for a few hours in the shop.

Started with a plan and then started machining parts.
tool1.jpg

tool2.jpg

This will be adjustable to fit a variety of harmonic balancers. I'm not much of a fan of just using the crank bolt for barring these over although I know many who do. I don't like to exert that much force on the crank bolt and would rather grab the balancer if possible, especially where it is easier than dropping the starter motor and in some applications even the lift pump.
tool3.jpg

I cut the socket head bolt to the exact length so when tight into the threaded hole in the block is barely allowed movement in the slot.
tool4.jpg

After drilling and tapping a block I broke out the TIG welder.
tool5.jpg

tool6.jpg

tool7.jpg

tool8.jpg

The cut down an old socket and welded it onto the end of the tool. This will allow a 1/2" ratchet to attach as space is tight.
tool9.jpg

Fully assembled for a test run.
tool10.jpg


More pictures to follow....
 
OP
Z

zmotorsports

ALLIANCE MEMBER
Joined
Oct 20, 2009
Messages
21,437
Location
Northern Utah
Continuing on with the barring tool.

Test fit on harmonic balancer. Works great.
tool11.jpg

Then I merely ran a DA over the surface to clean up the heat traces.
tool12.jpg

tool13.jpg

And ready to go into the toolbox for when needed.
tool14.jpg

Moved on to the LOF service of our truck. Oil filter and oil was changed @ 5k miles, tires were rotated and fuel filters were replaced @ 10k miles or every other oil service/tire rotation.
dmax1.jpg

Gave the ole' girl a bath before pulling in the shop.
dmax4.jpg

Then ran a little polish over the exhaust tip and wheels.
dmax3.jpg

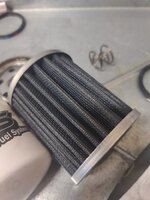
Lastly cut the fuel filters apart to inspect for debris. These have been on since I installed the FASS fuel system last year as I barely put 10k miles on the truck in all that time.
dmaxfilters1.jpg

Filters looked pristine and no signs of any foreign debris.
dmaxfilters2.jpg

dmaxfilters3.jpg

Thanks for looking.
 
To avoid these ads, REGISTER NOW!
Top Bottom