To avoid these ads, REGISTER NOW!

ZMotorsports Shop Projects 2.0

OP
Z

zmotorsports

ALLIANCE MEMBER
Joined
Oct 20, 2009
Messages
21,621
Location
Northern Utah
You know Mike, as a kind of a side-bet, I’ll ask myself as I read along: “I wonder if he’ll take the easy way out this time.”

Happy to see that’s not the case and you’ll be doing the fall kill as well as the spring verification. It’s always satisfying to see the thoroughness and consistency in what you do. This thread frequently comes to mind as I’m engaged in my own pursuits and is a reminder to stick to a standard while my sons watch and help.

By the way, what kind of grass DO you have for your lawn?


-John


Thank you John. The lawn is just normal Kentucky Bluegrass that we purchased from a nearby sod grower in southern Idaho. When I was putting our yard in during summer 2017, the two neighbors approached me to see if I was interested in going in on a "group by" to get a better price on the sod as they were putting their yards in at the same time.

I talked to them about a week ago inquiring if they had experienced any issues with Bermuda grass and was told they were not. Which leads me to believe it was not in the sod and must have been something I placed the sod over and had possibly already been in the yard like one guy suggested.

I appreciate your kind words and for following along. I don't necessarily think about sticking to a standard or least don't consciously think I do. However, maybe it was all those years of looking up to others whom I tried to surround myself with, watching my mentors with how they went about their lives in everything they did, and I wanted to follow suit. Now maybe it has just become part of me without thinking. :unsure:

I stumbled across a saying years ago that stated "Success doesn't come from what you do occasionally, it comes from what you do consistently." Everyone can define success to be whatever they feel it to mean in their own lives. It doesn't have to be defined as work, it can be anything you enjoy such as sports or other activities. I looked up to and loved my father very much growing up, and maybe even more so now that he's been gone for 20+ years, but how he went about things was not always the most precise or detailed. He was an exceptionally hard worker and did an amazing job providing for his family. However, looking back, much of the equipment and tools we had on the farm were just that, tools to do a job and his philosophy seemed to be as long as the job got done, it didn't matter the process.

However, as I got out into the "real world" and away from my parents and started in my career path, I was fortunate to have a couple of men that I looked up to and admired as I was beginning my journey through life. These men seemed to have success in EVERYTHING they did or touched, from their work, their marriages, their homes, vehicles and everything else. They just seemed to have their **** together and I quickly realized it had nothing to do with their particular trade, even though they were mechanics like myself, it had to do with their mindset and how they applied themselves to each and every task.

I think in my early years and trying to find my way through life I watched these men to see what I could do to deliver similar results, and I realized it was in fact their attitude. I tried to duplicate that mindset that I admired so much and seek similar results no matter how difficult it was at first. I looked at certain jobs or tasks and asked what they would do or how they would approach this. I then set out to formulate a plan based on what I thought they would do. Now thinking about it based on your comments, it's kind of funny in a sense that as we think back, many times maybe there are key points in our lives that we see a direct path that we took that has led us to where we are now. :unsure: We don't recognize these turns along the journey at the time, however, if we reflect back when we're older we sure can see them looking back 20 or 30 plus years and say "yep, that is where I made that decision." All those years ago what started as a conscious turn that led us down a path that has much later in life become an unconscious mindset. Thinking about it, maybe I have finally become more like my mentors than I realized.

I don't know, I guess I'm just rambling and thinking out loud based on your comment. I do appreciate what you said as it makes me feel more closely connected to those mentors of mine and whose behaviors I tried to emulate.
 
To avoid these ads, REGISTER NOW!
OP
Z

zmotorsports

ALLIANCE MEMBER
Joined
Oct 20, 2009
Messages
21,621
Location
Northern Utah
I know that lift table wasn't cheap Mike, but I'd say you got a little bit of your money back on dropping that transmission and transfer case all in one. Pretty darn cool.

Thanks Keith. I was hoping once I used it that the buyer's remorse I have been feeling would diminish, and it did. I quickly became pleased with the purchase afterwards.
 

Jarhead0408

Well-known member
Joined
Apr 1, 2012
Messages
5,814
Location
Who knows?
Thank you John. The lawn is just normal Kentucky Bluegrass that we purchased from a nearby sod grower in southern Idaho. When I was putting our yard in during summer 2017, the two neighbors approached me to see if I was interested in going in on a "group by" to get a better price on the sod as they were putting their yards in at the same time.

I talked to them about a week ago inquiring if they had experienced any issues with Bermuda grass and was told they were not. Which leads me to believe it was not in the sod and must have been something I placed the sod over and had possibly already been in the yard like one guy suggested.

I appreciate your kind words and for following along. I don't necessarily think about sticking to a standard or least don't consciously think I do. However, maybe it was all those years of looking up to others whom I tried to surround myself with, watching my mentors with how they went about their lives in everything they did, and I wanted to follow suit. Now maybe it has just become part of me without thinking. :unsure:

I stumbled across a saying years ago that stated "Success doesn't come from what you do occasionally, it comes from what you do consistently." Everyone can define success to be whatever they feel it to mean in their own lives. It doesn't have to be defined as work, it can be anything you enjoy such as sports or other activities. I looked up to and loved my father very much growing up, and maybe even more so now that he's been gone for 20+ years, but how he went about things was not always the most precise or detailed. He was an exceptionally hard worker and did an amazing job providing for his family. However, looking back, much of the equipment and tools we had on the farm were just that, tools to do a job and his philosophy seemed to be as long as the job got done, it didn't matter the process.

However, as I got out into the "real world" and away from my parents and started in my career path, I was fortunate to have a couple of men that I looked up to and admired as I was beginning my journey through life. These men seemed to have success in EVERYTHING they did or touched, from their work, their marriages, their homes, vehicles and everything else. They just seemed to have their **** together and I quickly realized it had nothing to do with their particular trade, even though they were mechanics like myself, it had to do with their mindset and how they applied themselves to each and every task.

I think in my early years and trying to find my way through life I watched these men to see what I could do to deliver similar results, and I realized it was in fact their attitude. I tried to duplicate that mindset that I admired so much and seek similar results no matter how difficult it was at first. I looked at certain jobs or tasks and asked what they would do or how they would approach this. I then set out to formulate a plan based on what I thought they would do. Now thinking about it based on your comments, it's kind of funny in a sense that as we think back, many times maybe there are key points in our lives that we see a direct path that we took that has led us to where we are now. :unsure: We don't recognize these turns along the journey at the time, however, if we reflect back when we're older we sure can see them looking back 20 or 30 plus years and say "yep, that is where I made that decision." All those years ago what started as a conscious turn that led us down a path that has much later in life become an unconscious mindset. Thinking about it, maybe I have finally become more like my mentors than I realized.

I don't know, I guess I'm just rambling and thinking out loud based on your comment. I do appreciate what you said as it makes me feel more closely connected to those mentors of mine and whose behaviors I tried to emulate.
You’re welcome Mike.

This post of yours really hits home with me. I was once a young Marine, fresh out of the service, newly married, with a newborn daughter…and absolutely no idea what I was doing. I had an excellent work ethic thanks to my father, but I lacked any sort of knowledge on how to navigate life. Consequently, I did most things wrong unwittingly. I didn’t know how to plan or how to set goals so failure was a constant companion. I had always trusted in my ability to land on my feet, but I overlooked the wasted effort and the opportunity costs that came alone with it.

When things had hit rock bottom I finally started waking up. Our marriage was in shambles, my earnings were poor, our future was absolutely hopeless. Only after all of this did I start to evaluate where I had gone wrong. I realized the problem was not my wife, my boss, or my coworkers…it was me. I made my own chains, but I could break them too. I decided to pursue wisdom.

I forced myself to treat my wife better and trusted in the hope of incremental changes. I made a concrete decision that no matter how long it took, I would work to restore our marriage until it was successful with no end date in mind and no point in which I would give up. At the same time I came to a similar decision regarding our finances and future.

I stopped listening to the radio and watching T.V. and instead started following financial and life advice from Dave Ramsey as well as finding mentors of my own. Someone told me I needed to find “dead friends” (to put it bluntly). Men who had lived successfully and had left a record of it behind. Earl Nightingale, Jim Rohn, Gary V, Grant Cardone, Tony Robbins, Marcus Aurelius, Plato, Aristotle, Socrates, other philosophers of course, Sun Tzu. Biographies of Henry Ford, John D. Rockefeller, Andrew Carnegie, Cornelius Vanderbilt, Truett Cathy etc. . Warren Buffet and Charles Munger were big helps as well. When I reflected on all I was learning I asked myself whether the things I was learning would make my father proud…since they were, I did them. I’ve also learned a lot about mindset here on the GJ. I study people here. How they act, react, and respond. I try to determine their philosophy in life and I can learn something from anyone whether it be good or bad.

I too, took examples from men I admired and tried to pattern myself after them. What was different about them versus most men you meet on a daily basis? Why did their lives work out so well and others did not? I learned to approach things like they did by asking how they got there…and then realizing that to discover the answer I had to work backwards in order to intuit how they got there. My Uncle Grady was my primary model for this. He started off as a young boy that had to provide for his mother and several sisters after their father died. This is difficult under any circumstance, but Grady had a club right hand. Nevertheless, no one starved. He became a welders helper and then a welder for the Navy at the Norfolk Naval Shipyards
cutting panels out of Subs and Aircraft carriers and then welding them back together again. After a time he realized he could be comfortable there, or he could aim higher. He moved on to work as an FAA Flight Controller, then onto computer coding, and then finally retired after working at NASA on various space programs. He died a multi-millionaire and was humble as the day is long. He taught me to buckle down to a process and not allow yourself to be but so comfortable.

Anyways, it took 7-8 years to heal the marriage, but we did it. In that time we also became debt free and payed off our house last year. I also learned how to pursue a career properly and after paying my dues, raised my income by 100k in one year. So we did what we came to do and I am grateful to God that I finally woke up.

Now that I’ve done what I have to do in order to not just survive, but to thrive, now it’s time to set further goals to refine what I want to do in life, pursue them, and achieve them. It’ll mean another career change, but the difference is now we know the mechanisms of success.

So to wrap this up, THAT is why I enjoy your thread so much. I’ve read what you’ve written about your methodology, and the mentors you’ve had along the way, and I recognize a similar pattern playing out in the lives of my family though we are a few decades behind. I recognize the pattern and the resonance it brings with it. Figuring life out like that and reflecting back on how you figured it out is a reward unto itself. We are very blessed to be here, we are very blessed to have come from good people, and we are very blessed to be able to pass that goodness on to our children, our families at large, our communities, and ultimately our nation.

So cheers to a life well lived friend! 🍻
 
Last edited:

Jarhead0408

Well-known member
Joined
Apr 1, 2012
Messages
5,814
Location
Who knows?
Very well said John, and my hat is off to you for recognizing that within yourself and deciding early on what you wanted your life to look like. That speaks volumes to your character and appears to have served you well.
Thank you Mike.

Hope I didn’t hijack your thread too much, just kind of saying thanks to you and the universe in general in my own way.
 

SilverJimmy

Well-known member
Joined
Apr 14, 2012
Messages
1,772
Location
Prescott/Flagstaff, AZ
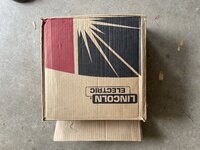
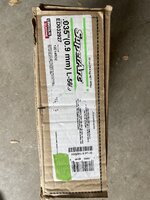
Went to a yard sale today. Thanks to Mike I had to buy some things….B47C32B2-4413-426D-B719-22C01B013C0F.jpeg
EF0277BD-F21A-492D-9312-8210649B2BFC.jpeg
Not really what I use a lot of being as it’s .035, but, $20.00 is $20.00!

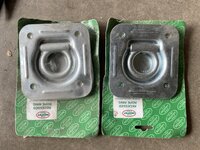
My trailer could use a couple more tie down spots so I got these two for $5.00 ea…
759881E2-D058-445C-835A-7A4B8B68482D.jpeg
And being as this is The Garage Journal, I had to also get these!
365164B9-1F33-43D8-AC14-D668A9088EEA.jpeg
I might already have these in my tool box at home, but I’m not sure! I need to not go with the wife on Saturday mornings.
 
OP
Z

zmotorsports

ALLIANCE MEMBER
Joined
Oct 20, 2009
Messages
21,621
Location
Northern Utah
My son and I finished up his rear main on his WJ Saturday.

After polishing the sealing surface and prepping the seal and area, I applied a little dab of GM ES sealant at the sealing joint between the bed plate and the block. I generally install this style of seal dry on the exterior but with me being able to slightly feel the parting line I figured a little extra insurance was in order.
seal11.jpg

We were trying to look around to find something that was approx. 4.5" in diameter to match the seal's OD as this seal is a bit larger diameter than some of the past ones that I've done. My son recommended an axle socket and sure enough, the largest one in the toolbox fit perfectly to use as a seal driver. I also had packed the back side with some grease around the garter spring, but the seal went in relatively easy so that may not have been necessary.
seal12.jpg

Seal installed and after wiping off the residual grease and Sil-Glyde it was ready to accept the flexplate.
seal13.jpg

Flex plate being installed.
seal14.jpg

Ready to accept the transmission and transfer case assembly. All of the wiring and hoses were tucked up high and tight.
seal15.jpg

We measured the angle in which the engine was tilting back and matched the transmission assembly to that angle to aid in mating. Then the lift table was rolled under the Jeep and centered into position.
seal16.jpg

It practically fell right into position. Bolted up to the engine, then a pole jack was placed under the transfer case output shaft so we could complete hooking everything up and installing the crossmember.
seal17.jpg

With a pole jack holding the tailshaft up, the lift table was lowered and moved out of the way. Its job was complete.
seal18.jpg


The crossmember was installed, driveshaft, torque converter bolted up, exhaust head pipe w/catalytic converters installed, starter motor and all electrical connections made before calling that job done.

That completes the rear main seal replacement.

Thanks for looking.
 
OP
Z

zmotorsports

ALLIANCE MEMBER
Joined
Oct 20, 2009
Messages
21,621
Location
Northern Utah
As we were starting to install the transmission and transfer case assembly, I reached for the anti-seize in which to use on some of the fasteners. I remembered seeing a shop hack/trick a few weeks ago so I thought I'd give it a go.

For anyone who gets tired of the messy brush in the lid of the anti-seize this little trick may help. I saw this a few weeks ago and it seemed logical.

I'm not gonna lie, I was a bit anxious when I first clamped the bottle in the lathe chuck. My son even thought he should get his camera ready to record the anti-seize going everywhere in the shop. I told him to relax, I had seen this done online so it must work. :bounce:

I wanted to clamp it tight enough to hold the bottle firmly, but not too tight to damage the bottle. As soon as I spun up the lathe the bottle shifted slightly and I nearly **** myself. My son who was laughing hysterically by that time at the look on my face when the bottle shifted said he definitely should have been recording it. I didn't quite see the humor in it that he did. :oops:


The theory is to sling the anti-seize to the outermost of the bottle and thus creating a void right down the middle where the brush resides.
anti1.jpg

It worked, but not without giving me a good scare. The anti-seize is now all around the outer circumference of the bottle leaving a void right down through the middle of the bottle.
anti2.jpg

I then trimmed the brush down ever so slightly to avoid having such long bristles and cleaned the brush and cap before reinstalling.
anti3.jpg

At that point the brush can be installed and removed easily without creating a mess on the applicator or the lip of the bottle. When more is needed on the brush simply swipe it along the side and grab some more anti-seize on the brush and apply as normal. Works like a charm.
anti4.jpg


So, if anyone is trying to avoid getting anti-seize on anything they don't wish to, or is tired of having to wipe the applicator off after each dab into the bottle, this little shop hack works great.


...............................Then as you are putting things away, and looking around the shop, you may notice that there is silver anti-seize on pretty much everything that was out during the process.


On second thought, maybe this wasn't such a good idea to contain the mess.......:ROFLMAO:


About the time I "thought" I was done and ready to start using my freshly cleaned bottle of anti-seize, I hear my son laughing his *** off as he looked over at my phone sitting on the bench.......
anti5.jpg


Needless to say, we both had a pretty good laugh at the last 10-minutes of antics trying to contain the mess from the anti-seize bottle.:rolleyes:
 
OP
Z

zmotorsports

ALLIANCE MEMBER
Joined
Oct 20, 2009
Messages
21,621
Location
Northern Utah
As we finished up the WJ for the day, my son headed home to spend time with his family, and I thought I would tackle a small job on our Jeep that I've been meaning to get to for a few weeks now.

Let me preface on this task and give it some context. Sorry, this will be long.


About 4 years ago and 50k plus miles ago we were at our annual Jeep gathering with our friends in South Dakota. As we were coming off the trail one afternoon and heading back towards camp the Jeep got a dead pedal and went into limp mode. I had a DTC so we pulled off and I checked the code. Came up as a P2138 which is a throttle pedal voltage variation code. At the time that one didn't stand out to me as I had not had much experience with that particular code but it cleared and was fine, so we continued back to camp.

Upon getting back to camp and having internet I did some research to discover this was a common problem with mid-2000 GM vehicles and usually pointed to either an accelerator pedal or throttle control. Seeing as how I only had about 12k-15k or so miles on the GM powertrain in the Jeep at that time I had a difficult time thinking it could be either and although I had installed a GM pedal into the Jeep, I purchased a new OEM pedal and not an aftermarket.

I crawled under the dash and unplugged the Weatherpack connector at the throttle pedal, gave it a visual inspection, including all of the wiring to the plug and upon not seeing anything out of the ordinary, I reconnected it and went about the remainder of the trip without incident.

I figured one of two things, either it must have been a nuisance code, maybe I slipped on the pedal and it flipped back suddenly giving a false error OR maybe there was a connection issue with the pedal connector. Either way it didn't seem to give me any further issues the remainder of the trip nor the several weeks later as I daily drove it.

Although, once I returned home I did more research about the code and what it took to set the code. I found out that GM used two switches/potentiometers in their pedal assemblies. One registering a low to high (0V-5V) and one high to low (5V-0V) and they must agree with one another or it will give a voltage variation code. I thought it could have been either one of the wires feeding either of the switch circuits back to the ECM or it could have been a floating ground in that circuit giving an error. But either way I figured it had to be something in the pedal assembly or connector.

The next month we were with our same group of friends in Moab in October and the first couple of days the Jeep ran without missing a beat, like normal. On the third day we had just aired down and hit the first several hundred yards of the trail when it did it again. I thought to myself we were bouncing around on the washboard section and it must have caused the issue. I pulled off, checked the code using the Aeroforce gauge on the dash and it was the same P2138 code. I cleared it and it ran fine for the remainder of the trail. That is until we aired up and hit the pavement back to camp. It did it several more times as we were heading back to camp. It actually got to the point as we were driving through Moab that as soon as I cleared the code it would return and the pedal would go dead.

I was not sure what to do here as I didn't have a spare pedal nor was my gut thinking that was the issue. I had talked to Robbie @ Motech on several occasions when I was planning my LS swap back in 2018 and he had been very helpful in answering my questions about parts selection when I was preparing for my engine swap and I had actually purchased some parts from him along the way so I thought I'd give him a call and pick his brain if he was willing to talk with me. I think I have a pretty good rapport with Robbie as he has used my videos to link to other LS swap videos for Jeeps and we have communicated multiple times over the phone. I had assisted him and his wife several years ago when they were looking for a second home in Utah so I hoped we would be willing to assist me or at least let me bounce some things off of him. It was mid-week and early enough in the afternoon I thought maybe he'd still be at his shop in Las Vegas. I called him and when he didn't answer I left a message. He was AWESOME. He called me back within about 10 minutes and asked how he could help.

I explained my issue and he immediately asked me if I was using the OEM GM bail connector where it went from the engine bay and connected to the interior wiring harness. I said yes, I was using the OEM connector but had minimized the wire count to only use the circuits that were necessary. He informed me that GM had a TSB out several years earlier referencing an issue with that particular code as well as a couple of others and had changed that connector to a different style.

He said in their shop build, they cut that bail connector out of the circuit and merely hardwire the wiring together around the connector. I knew right where that connector was in my Jeep, but it was slightly buried down under the master cylinder and brake booster, so not the easiest to access in a hurry. I thanked him for his help and went about getting the Jeep back to camp. We nursed the Jeep back to camp and after happy hour and the Jeep cooling down, I went out to dig into the area where the connector was located.

I didn't like the idea of cutting the plug out of the circuit and bypassing it by soldering or joining the wires together solidly around the connector because I liked the idea of having a connector there for the time when/if I need to raise the body off the chassis for major work. I thought long and hard about correcting this issue permanently by joining the wires but then rejected the idea because I wanted to keep the serviceability factor in play. I thought maybe I'd hardwire the wires then if/when I had to lift the body, I'd deal with it then, but also rejected that idea.

While the wife was in the coach fixing dinner that night, I went out to work on the Jeep so it was ready for the next day's trail. I moved the components out of the way and dug that connector out enough that I could disconnect it and inspect it. Upon disconnecting the bail connector I did see the pins that were visible and grabbed a small pick to insert into the male pins and spread them ever so slightly. I also used the pick to go down alongside the socket side of the connectors and squeeze them a bit tighter with the thinking of just making a tighter connection between each pin and socket in the connector housing.

The Jeep ran perfectly for the remainder of the week and has not skipped a beat in the 4 years since and over 50k miles. That is until a couple of weeks ago when the wife and I were in Ouray, CO for our annual trip. We had wheeled six days straight covering several hundred miles of pavement driving and a couple hundred miles of off-road driving and didn't have a single issue until heading back to camp on the last day of the trip. On the last day (Friday) of our trip we ran a 38-mile trail between Owl Creek, Silver Jack Reservoir and into Montrose via Hwy. 50 which was a trail that we had not run before. We aired up and hit the pavement driving west into Montrose passing the Black Canyon of the Gunnison and heading back to camp.

We turned south onto Hwy 550 heading to Ouray from Montrose as it began to rain and we were just enjoying the relaxing drive. Just past a section of one-lane road where there was construction, the Jeep bobbled, the CEL illuminated and I got a dead pedal. The wife looked at me in panic and I said, it feels like that code P2138 has returned. She didn't quite remember the issue, but I sure did.

We found a wide spot along the highway so I could pull off and clear the code. I figured it was the last day of the trip and I'd deal with it when we got home. I cleared the code and we drove about a quarter of a mile and it returned. We pulled off again, cleared it and this time it returned immediately upon depressing the accelerator pedal. I let the Jeep roll a little further off the road and this time and I dug out the tools to get down to that bail connector. I disconnected and reconnected the bail connector and it ran perfectly the rest of the way back to camp and has done since.

However, not wanting to deal with this issue again, I thought I would cut that OEM connector out and take it out of the equation, but I wanted to keep the ability to disconnect the interior harness from the main engine harness. I also know that the interior harness is where I tied my CAN bus module into the system. I made the connection to the interior wiring under the dash. The CAN bus module I am using is what creates the handshake between the Chrysler BCM and the GM ECM so it is system critical.

I know in the off-road industry as well as race industry Deutsch connectors seem to be the go-to connections for most everything, especially those system critical circuits. I have used the Deutsch DT connectors in the past and really like them, but I have been using the Size 16 which is more suited for 14-18 gauge wiring. The wires coming through the interior harness are 20-gauge wires and much smaller amperage rating than what the Size 16 is suited to carry. I thought I could just strip the wires back a bit further and double them over to create a thicker cross section in the solid barrel connectors but I knew that wasn't the "right" way to do it.

A few weeks ago I ordered the smaller DTM connectors which use a Size 20 pin and socket. These carry a smaller approx. 7-amp rating compared to the 13-amp rating of the DT series, but even being rated at 7-amps, they will be overkill for this application of carrying reference voltage and grounds to the interior harness and CAN bus module. But as you know my saying that "Overkill is Underrated", I figured I would order and use the Deutsch DTM series and create a better connection between the engine harness and the interior harness compared to what the GM bail connector was providing.


Sorry for the long drawn-out preface to this repair.

Now for the repair as I had some time Saturday afternoon to finally address this issue once and for all.


I removed the bracketry holding the E38 ECM and the fuse panel for the swap and moved them over and out of the way so I could gain some access to the wiring under the brake booster and master cylinder.

This is the GM OEM bail connector that has been causing my issue. I only used 10-wires to connect my interior needs to the GM engine harness.
connector1.jpg

Before cutting any wires, I went through wire by wire and identified the color on either side of the connector and assigned them a number in which they would reside to in the 12-pin Deutsch DTM housing.
connector1a.jpg

First cut and crimp. I figured I'd use the receptacle on the interior side which accepts the pin connector. One crimped and ready to install into the receptacle.
connector2.jpg

Inserting the other side which is the socket into the plug side of the connector.
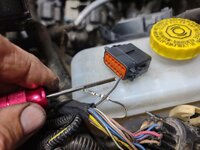
connector3.jpg

I moved through wire by wire until all ten wires were cut, stripped, crimped and installed in their respective locations in the Deutsch housings and then cut the remaining several wires from the engine side that were not in use, thus removing this bail connector from the Jeep.
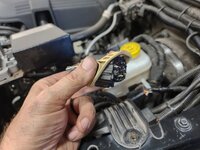
connector4.jpg

Plug and receptacles have their pin and socket retainers installed as well as taped back up using the cloth tape and electrical tape to mimic the OEM harness.
connector5.jpg

Connection made.
connector6.jpg

Tucked back down into place and zip-tied to prevent unnecessary bouncing around and vibrations.
connector7.jpg

Bracket holding the GM E38 ECM and fuse panel reinstalled into place and this job completed and ready for a test drive.
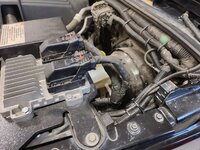
connector8.jpg


Yesterday the wife and I went for a nice long drive after breakfast and gave the Jeep a thorough test putting some miles on her. That repair should provide a reliable and vibration proof connection able to withstand the rather harsh environment in which it resides.

Thanks for looking and sorry about the long story leading up to the repair. For nearly 65k miles now the Jeep has performed flawlessly either on road or off, but this issue was intermittent enough to cause worry and stress at times. Knowing what was causing the issue lessened the stress about being in the back country alone and having it go into limp mode, but what really bothered me was when we were with a group and had it happen. That was embarrassing and something I wanted to address and eliminate from the possibility of happening again.
 

Jgaz

Well-known member
Joined
Dec 16, 2016
Messages
1,759
Location
AZ
As we were starting to install the transmission and transfer case assembly, I reached for the anti-seize in which to use on some of the fasteners. I remembered seeing a shop hack/trick a few weeks ago so I thought I'd give it a go.

For anyone who gets tired of the messy brush in the lid of the anti-seize this little trick may help. I saw this a few weeks ago and it seemed logical.

I'm not gonna lie, I was a bit anxious when I first clamped the bottle in the lathe chuck. My son even thought he should get his camera ready to record the anti-seize going everywhere in the shop. I told him to relax, I had seen this done online so it must work. :bounce:

I wanted to clamp it tight enough to hold the bottle firmly, but not too tight to damage the bottle. As soon as I spun up the lathe the bottle shifted slightly and I nearly **** myself. My son who was laughing hysterically by that time at the look on my face when the bottle shifted said he definitely should have been recording it. I didn't quite see the humor in it that he did. :oops:


The theory is to sling the anti-seize to the outermost of the bottle and thus creating a void right down the middle where the brush resides.
anti1.jpg

It worked, but not without giving me a good scare. The anti-seize is now all around the outer circumference of the bottle leaving a void right down through the middle of the bottle.
anti2.jpg

I then trimmed the brush down ever so slightly to avoid having such long bristles and cleaned the brush and cap before reinstalling.
anti3.jpg

At that point the brush can be installed and removed easily without creating a mess on the applicator or the lip of the bottle. When more is needed on the brush simply swipe it along the side and grab some more anti-seize on the brush and apply as normal. Works like a charm.
anti4.jpg


So, if anyone is trying to avoid getting anti-seize on anything they don't wish to, or is tired of having to wipe the applicator off after each dab into the bottle, this little shop hack works great.


...............................Then as you are putting things away, and looking around the shop, you may notice that there is silver anti-seize on pretty much everything that was out during the process.


On second thought, maybe this wasn't such a good idea to contain the mess.......:ROFLMAO:


About the time I "thought" I was done and ready to start using my freshly cleaned bottle of anti-seize, I hear my son laughing his *** off as he looked over at my phone sitting on the bench.......
anti5.jpg


Needless to say, we both had a pretty good laugh at the last 10-minutes of antics trying to contain the mess from the anti-seize bottle.:rolleyes:
You are brave. I would have been willing to bet that when your experiment was done you’d have had anti seize on your back deck!
 
OP
Z

zmotorsports

ALLIANCE MEMBER
Joined
Oct 20, 2009
Messages
21,621
Location
Northern Utah
You are brave. I would have been willing to bet that when your experiment was done you’d have had anti seize on your back deck!

I'm not gonna lie, when I saw the pictures online I was skeptical. However, the more thought I gave it, I figured as thick as the anti-seize was it would just want to naturally sling to the outermost circumference of the bottle so it "should" work. Should being the question mark here. :ROFLMAO: When I told my son about it and started putting it in the chuck, he immediately asked why I'm not putting the brush application and lid on? I told him, "because I just cleaned it". :unsure:

He said he thought for sure there would be a silver stripe up to the ceiling and out the door, but it worked perfectly. :thumbup:

I'm not sure how long it will be until it self-levels and moves back to center but time will tell. It was sure nice not having that mess all over the brush applicator for a change.
 

Mr.zippy

Well-known member
Joined
Apr 27, 2020
Messages
2,228
Location
Wyoming
Dang Mike, if you wouldn't have told the second part of that anti size story, everyone with a lathe would have been chucking up a bottle and spinning away. You could have had a much better story to tell!
 

moab11

Well-known member
Joined
Nov 22, 2015
Messages
593
Location
Thunder Bay, Ontario
Dang Mike, if you wouldn't have told the second part of that anti size story, everyone with a lathe would have been chucking up a bottle and spinning away. You could have had a much better story to tell!
I think most anyone other than Mike would have 3/4 of the jar spread all across the shop as it went into low earth orbit exiting the lathe jaws. After that, might as well just paint the whole shop silver as you know it will never be fully cleaned up.
 
To avoid these ads, REGISTER NOW!

Scuderia-F1

Well-known member
Joined
Feb 9, 2011
Messages
1,198
Location
Stockholm, Sweden
As we finished up the WJ for the day, my son headed home to spend time with his family, and I thought I would tackle a small job on our Jeep that I've been meaning to get to for a few weeks now.

Let me preface on this task and give it some context. Sorry, this will be long.


About 4 years ago and 50k plus miles ago we were at our annual Jeep gathering with our friends in South Dakota. As we were coming off the trail one afternoon and heading back towards camp the Jeep got a dead pedal and went into limp mode. I had a DTC so we pulled off and I checked the code. Came up as a P2138 which is a throttle pedal voltage variation code. At the time that one didn't stand out to me as I had not had much experience with that particular code but it cleared and was fine, so we continued back to camp.

Upon getting back to camp and having internet I did some research to discover this was a common problem with mid-2000 GM vehicles and usually pointed to either an accelerator pedal or throttle control. Seeing as how I only had about 12k-15k or so miles on the GM powertrain in the Jeep at that time I had a difficult time thinking it could be either and although I had installed a GM pedal into the Jeep, I purchased a new OEM pedal and not an aftermarket.

I crawled under the dash and unplugged the Weatherpack connector at the throttle pedal, gave it a visual inspection, including all of the wiring to the plug and upon not seeing anything out of the ordinary, I reconnected it and went about the remainder of the trip without incident.

I figured one of two things, either it must have been a nuisance code, maybe I slipped on the pedal and it flipped back suddenly giving a false error OR maybe there was a connection issue with the pedal connector. Either way it didn't seem to give me any further issues the remainder of the trip nor the several weeks later as I daily drove it.

Although, once I returned home I did more research about the code and what it took to set the code. I found out that GM used two switches/potentiometers in their pedal assemblies. One registering a low to high (0V-5V) and one high to low (5V-0V) and they must agree with one another or it will give a voltage variation code. I thought it could have been either one of the wires feeding either of the switch circuits back to the ECM or it could have been a floating ground in that circuit giving an error. But either way I figured it had to be something in the pedal assembly or connector.

The next month we were with our same group of friends in Moab in October and the first couple of days the Jeep ran without missing a beat, like normal. On the third day we had just aired down and hit the first several hundred yards of the trail when it did it again. I thought to myself we were bouncing around on the washboard section and it must have caused the issue. I pulled off, checked the code using the Aeroforce gauge on the dash and it was the same P2138 code. I cleared it and it ran fine for the remainder of the trail. That is until we aired up and hit the pavement back to camp. It did it several more times as we were heading back to camp. It actually got to the point as we were driving through Moab that as soon as I cleared the code it would return and the pedal would go dead.

I was not sure what to do here as I didn't have a spare pedal nor was my gut thinking that was the issue. I had talked to Robbie @ Motech on several occasions when I was planning my LS swap back in 2018 and he had been very helpful in answering my questions about parts selection when I was preparing for my engine swap and I had actually purchased some parts from him along the way so I thought I'd give him a call and pick his brain if he was willing to talk with me. I think I have a pretty good rapport with Robbie as he has used my videos to link to other LS swap videos for Jeeps and we have communicated multiple times over the phone. I had assisted him and his wife several years ago when they were looking for a second home in Utah so I hoped we would be willing to assist me or at least let me bounce some things off of him. It was mid-week and early enough in the afternoon I thought maybe he'd still be at his shop in Las Vegas. I called him and when he didn't answer I left a message. He was AWESOME. He called me back within about 10 minutes and asked how he could help.

I explained my issue and he immediately asked me if I was using the OEM GM bail connector where it went from the engine bay and connected to the interior wiring harness. I said yes, I was using the OEM connector but had minimized the wire count to only use the circuits that were necessary. He informed me that GM had a TSB out several years earlier referencing an issue with that particular code as well as a couple of others and had changed that connector to a different style.

He said in their shop build, they cut that bail connector out of the circuit and merely hardwire the wiring together around the connector. I knew right where that connector was in my Jeep, but it was slightly buried down under the master cylinder and brake booster, so not the easiest to access in a hurry. I thanked him for his help and went about getting the Jeep back to camp. We nursed the Jeep back to camp and after happy hour and the Jeep cooling down, I went out to dig into the area where the connector was located.

I didn't like the idea of cutting the plug out of the circuit and bypassing it by soldering or joining the wires together solidly around the connector because I liked the idea of having a connector there for the time when/if I need to raise the body off the chassis for major work. I thought long and hard about correcting this issue permanently by joining the wires but then rejected the idea because I wanted to keep the serviceability factor in play. I thought maybe I'd hardwire the wires then if/when I had to lift the body, I'd deal with it then, but also rejected that idea.

While the wife was in the coach fixing dinner that night, I went out to work on the Jeep so it was ready for the next day's trail. I moved the components out of the way and dug that connector out enough that I could disconnect it and inspect it. Upon disconnecting the bail connector I did see the pins that were visible and grabbed a small pick to insert into the male pins and spread them ever so slightly. I also used the pick to go down alongside the socket side of the connectors and squeeze them a bit tighter with the thinking of just making a tighter connection between each pin and socket in the connector housing.

The Jeep ran perfectly for the remainder of the week and has not skipped a beat in the 4 years since and over 50k miles. That is until a couple of weeks ago when the wife and I were in Ouray, CO for our annual trip. We had wheeled six days straight covering several hundred miles of pavement driving and a couple hundred miles of off-road driving and didn't have a single issue until heading back to camp on the last day of the trip. On the last day (Friday) of our trip we ran a 38-mile trail between Owl Creek, Silver Jack Reservoir and into Montrose via Hwy. 50 which was a trail that we had not run before. We aired up and hit the pavement driving west into Montrose passing the Black Canyon of the Gunnison and heading back to camp.

We turned south onto Hwy 550 heading to Ouray from Montrose as it began to rain and we were just enjoying the relaxing drive. Just past a section of one-lane road where there was construction, the Jeep bobbled, the CEL illuminated and I got a dead pedal. The wife looked at me in panic and I said, it feels like that code P2138 has returned. She didn't quite remember the issue, but I sure did.

We found a wide spot along the highway so I could pull off and clear the code. I figured it was the last day of the trip and I'd deal with it when we got home. I cleared the code and we drove about a quarter of a mile and it returned. We pulled off again, cleared it and this time it returned immediately upon depressing the accelerator pedal. I let the Jeep roll a little further off the road and this time and I dug out the tools to get down to that bail connector. I disconnected and reconnected the bail connector and it ran perfectly the rest of the way back to camp and has done since.

However, not wanting to deal with this issue again, I thought I would cut that OEM connector out and take it out of the equation, but I wanted to keep the ability to disconnect the interior harness from the main engine harness. I also know that the interior harness is where I tied my CAN bus module into the system. I made the connection to the interior wiring under the dash. The CAN bus module I am using is what creates the handshake between the Chrysler BCM and the GM ECM so it is system critical.

I know in the off-road industry as well as race industry Deutsch connectors seem to be the go-to connections for most everything, especially those system critical circuits. I have used the Deutsch DT connectors in the past and really like them, but I have been using the Size 16 which is more suited for 14-18 gauge wiring. The wires coming through the interior harness are 20-gauge wires and much smaller amperage rating than what the Size 16 is suited to carry. I thought I could just strip the wires back a bit further and double them over to create a thicker cross section in the solid barrel connectors but I knew that wasn't the "right" way to do it.

A few weeks ago I ordered the smaller DTM connectors which use a Size 20 pin and socket. These carry a smaller approx. 7-amp rating compared to the 13-amp rating of the DT series, but even being rated at 7-amps, they will be overkill for this application of carrying reference voltage and grounds to the interior harness and CAN bus module. But as you know my saying that "Overkill is Underrated", I figured I would order and use the Deutsch DTM series and create a better connection between the engine harness and the interior harness compared to what the GM bail connector was providing.


Sorry for the long drawn-out preface to this repair.

Now for the repair as I had some time Saturday afternoon to finally address this issue once and for all.


I removed the bracketry holding the E38 ECM and the fuse panel for the swap and moved them over and out of the way so I could gain some access to the wiring under the brake booster and master cylinder.

This is the GM OEM bail connector that has been causing my issue. I only used 10-wires to connect my interior needs to the GM engine harness.
connector1.jpg

Before cutting any wires, I went through wire by wire and identified the color on either side of the connector and assigned them a number in which they would reside to in the 12-pin Deutsch DTM housing.
connector1a.jpg

First cut and crimp. I figured I'd use the receptacle on the interior side which accepts the pin connector. One crimped and ready to install into the receptacle.
connector2.jpg

Inserting the other side which is the socket into the plug side of the connector.
connector3.jpg

I moved through wire by wire until all ten wires were cut, stripped, crimped and installed in their respective locations in the Deutsch housings and then cut the remaining several wires from the engine side that were not in use, thus removing this bail connector from the Jeep.
connector4.jpg

Plug and receptacles have their pin and socket retainers installed as well as taped back up using the cloth tape and electrical tape to mimic the OEM harness.
connector5.jpg

Connection made.
connector6.jpg

Tucked back down into place and zip-tied to prevent unnecessary bouncing around and vibrations.
connector7.jpg

Bracket holding the GM E38 ECM and fuse panel reinstalled into place and this job completed and ready for a test drive.
connector8.jpg


Yesterday the wife and I went for a nice long drive after breakfast and gave the Jeep a thorough test putting some miles on her. That repair should provide a reliable and vibration proof connection able to withstand the rather harsh environment in which it resides.

Thanks for looking and sorry about the long story leading up to the repair. For nearly 65k miles now the Jeep has performed flawlessly either on road or off, but this issue was intermittent enough to cause worry and stress at times. Knowing what was causing the issue lessened the stress about being in the back country alone and having it go into limp mode, but what really bothered me was when we were with a group and had it happen. That was embarrassing and something I wanted to address and eliminate from the possibility of happening again.
What a great post, just as the videos, the longer and more contentmaterial the better. I'm a big fan of DT/DTM myself.
 
OP
Z

zmotorsports

ALLIANCE MEMBER
Joined
Oct 20, 2009
Messages
21,621
Location
Northern Utah
I definitely would have spun that jar with the brush/cap on. NO WAY would I do it otherwise. I know Murphy is lurking somewhere in my shop.

:beer:

Oh come on Dan, just wing it, more or less. Where's your sense of adventure? :ROFLMAO:

What a great post, just as the videos, the longer and more contentmaterial the better. I'm a big fan of DT/DTM myself.


Thank you Anders. Figured I had to set the stage, sort of speak, for why I was cutting the OEM connector out, thus the long explanation. I guess I could have just said "I cut the OEM connector out and replaced it with a Deutsch connector" and left people wondering why. :bounce:

As for the Deutsch DT and DTM, I too am a huge fan of the Deutsch connectors. However, this was my first usage of the DTM version. My personal experience with the Deutsch line of connectors came mainly from working on Harley's, but also used them on our race cars and sandrails over the years. I had to replenish a few of the Size 16 pins in my assortment and when I started looking for ones that could accommodate the smaller 20-gauge wiring, it kept leaning me towards the DTM series with Size 20 pins and sockets. I could have just bought the 12-count DTM connector and pins to go along with it, but I ended up buying an assortment to keep that size on hand.
 

Finallygotit

ALLIANCE MEMBER
Joined
Jul 6, 2013
Messages
4,119
Location
Tucson, AZ
Oh come on Dan, just wing it, more or less. Where's your sense of adventure? :ROFLMAO:
Oh Mike.................... you have no idea the depth of stupid things I have done. I'm trying to use those past experiences to NOT do stupid things in my golden years. But guess what? I still do stupid things; just not as frequently as I used to.

:beer:
 

ScepterToad

Well-known member
Joined
Nov 9, 2023
Messages
357
Mike, you are a braver man than me. No way I'd chuck anti seize in a lathe and spin it like that, internet truth or not. Certainly not without a lid!! Sheesh!

Great fix in the connector! I'll keep that in the back of the old brain for use at a later date. Having done the engine swap in the Excursion and contemplating (dreaming) of LS swapping my Jeep, that seems like a very logical path to take for items such as that connector. Well done!
 
OP
Z

zmotorsports

ALLIANCE MEMBER
Joined
Oct 20, 2009
Messages
21,621
Location
Northern Utah
Mike, you are a braver man than me. No way I'd chuck anti seize in a lathe and spin it like that, internet truth or not. Certainly not without a lid!! Sheesh!

Great fix in the connector! I'll keep that in the back of the old brain for use at a later date. Having done the engine swap in the Excursion and contemplating (dreaming) of LS swapping my Jeep, that seems like a very logical path to take for items such as that connector. Well done!

Thanks Keith. To be honest, this is really the first OEM style of bail connector that has given me any issues. Had I not talked with Robbie and he not told me about the TSB, I think I'd still be questioning everything except the OEM connector. I think with the Deutsch connector I corrected it once and for though. Those Deutsch connectors are worth their weight in gold and seem to stand up well to harsh environments very well.
 

SilverJimmy

Well-known member
Joined
Apr 14, 2012
Messages
1,772
Location
Prescott/Flagstaff, AZ
The first time I even heard of Deutsch was at my Peterbilt and Freightliner dealerships as that was the wire system being implemented by the OEM. When the guys that wanted their own tool set I looked for price and availability. Only one guy bought a set because they were very expensive back then. He didn’t want to be doing something and have to deal with the issues that come from a shop tool set that gets used by multiple techs.
 

ntsqd

Well-known member
Joined
Jan 22, 2005
Messages
1,033
Location
Lower left coast
What will you put on that bare metal for a preservative to keep rust from forming during the high humidity of our western monsoon weather? An amazing thing I learned while working as a steam plant mechanic was the sealer we used on the turbine. The turbine at Navajo Generating Station was a GE Super Critical Turbine, meaning that it operated at 1000 PSI and 1000 degrees! (If my memory is correct, that was over 35 years ago!) The only thing sealing the cast steel turbine shell was a brushed on coating of Boiled Linseed Oil. The GE engineers told us the the BOL allowed the steel shell to move as needed while the halves were being bolted together and also kept them from developing any surface rust. And when I say bolted, picture 3-1/2- x 4’ studs everywhere you could fit them! Those studs had 10 threads per inch and they all had to be stretched the the exact length the engineer specified!
I’m sure you have a plan for this, just thought you’d find this interesting!
I was told that Ormond Beach, CA is also a Super-Critical pair of turbines; 1200 psi and 1200°F There's at least 10,000 ways to die in a steam turbine generating plant, Super-Criticals just compound that.

One job that I had was to make the body of a blown and injected 426 Hemi T-Bucket easily removed to work on the mechanicals. It sat really low and was hard to get any sort of jack under it to even start lifting it. We also converted to EFI from an Enderle constant flow system in the process. All of the wiring needed to pass thru a single bulkhead connector, but what? One of the guys who frequently came by that shop during social hour worked on scissor lifts and similar equipment. He provided a Deutsch bulkhead connector used on those machines that worked perfectly.
 
OP
Z

zmotorsports

ALLIANCE MEMBER
Joined
Oct 20, 2009
Messages
21,621
Location
Northern Utah
The first time I even heard of Deutsch was at my Peterbilt and Freightliner dealerships as that was the wire system being implemented by the OEM. When the guys that wanted their own tool set I looked for price and availability. Only one guy bought a set because they were very expensive back then. He didn’t want to be doing something and have to deal with the issues that come from a shop tool set that gets used by multiple techs.

Sterling, several of the OTR engine manufacturers use Deutsch connectors for their means of connection for various harnesses. CAT in particular even offered their own version of a "field repair kit" which was an assortment of Deutsch pins and sockets along with plugs and receptacles. I believe they are still available from the Caterpillar dealerships. I figure if Deutsch connectors can survive the harsh environments of not only the OTR industry but also the off-highway and mining environments in which that equipment must perform it, then they must be good. ;)

I know they are well sought after in the race industries and people feel if a race is lost due to a simple connection problem, then the money is well spent on quality components. However, race cars are often taken into the shops and totally disassembled, inspected, worked on and any deficiencies addressed so they are in essence, not comparing apples to apples. Yes, a race can be lost by a faulty component or connection, but in mining or other off-highway equipment use, a failure can result in tens of thousands, if not hundreds of thousands, of dollars' worth of down time. That is more or less what drove my decision to invest in another Deutsch connector kit to compliment the DT series kit that I already had. Are they cheap? Hell no, but what quality component is, and I still think they probably the cheapest component I've bought in a long time. :ROFLMAO:

Also, to add to @ntsqd comment above, I like the fact that they are easy to depin or disassemble and pass through firewalls or other components which allows the ability to keep the holes smaller than if having to pass a plug or receptacle through. They just have a lot of versatility, functionality and reliability in terms of a connector or connection point.
 

SilverJimmy

Well-known member
Joined
Apr 14, 2012
Messages
1,772
Location
Prescott/Flagstaff, AZ
I’ve recently started hanging out with a group of Land Speed Racers. They race at both Bonneville and El Mirage. The guy who does all the wiring on the cars is a retired Lockheed Avionics Tech. He used to do wiring on stuff like the F-117, F-22, and the SR71, so everything he does is with non color coded wire, just white Teflon sheathing. Next level stuff there!
C26887E4-D4DC-49AF-87CE-0DDFAD77DB29.jpeg
All those white wires have 5 or 6 more inside them running to all the sensors in the MoTeC system. I was told the first thing he does when wiring your car was to remove every existing wire!
 

Scuderia-F1

Well-known member
Joined
Feb 9, 2011
Messages
1,198
Location
Stockholm, Sweden
Oh come on Dan, just wing it, more or less. Where's your sense of adventure? :ROFLMAO:


Thank you Anders. Figured I had to set the stage, sort of speak, for why I was cutting the OEM connector out, thus the long explanation. I guess I could have just said "I cut the OEM connector out and replaced it with a Deutsch connector" and left people wondering why. :bounce:

As for the Deutsch DT and DTM, I too am a huge fan of the Deutsch connectors. However, this was my first usage of the DTM version. My personal experience with the Deutsch line of connectors came mainly from working on Harley's, but also used them on our race cars and sandrails over the years. I had to replenish a few of the Size 16 pins in my assortment and when I started looking for ones that could accommodate the smaller 20-gauge wiring, it kept leaning me towards the DTM series with Size 20 pins and sockets. I could have just bought the 12-count DTM connector and pins to go along with it, but I ended up buying an assortment to keep that size on hand.
But of course Mike, we want the FULL kit....
Now you're set for most needs, if you feel like stepping it up, you can always add some of them much coveted Deutsch AS (motorsport connectors) as well.
 

Scuderia-F1

Well-known member
Joined
Feb 9, 2011
Messages
1,198
Location
Stockholm, Sweden
I’ve recently started hanging out with a group of Land Speed Racers. They race at both Bonneville and El Mirage. The guy who does all the wiring on the cars is a retired Lockheed Avionics Tech. He used to do wiring on stuff like the F-117, F-22, and the SR71, so everything he does is with non color coded wire, just white Teflon sheathing. Next level stuff there!
C26887E4-D4DC-49AF-87CE-0DDFAD77DB29.jpeg
All those white wires have 5 or 6 more inside them running to all the sensors in the MoTeC system. I was told the first thing he does when wiring your car was to remove every existing wire!
We do need to see more of this guy's work, just saying....
 

ntsqd

Well-known member
Joined
Jan 22, 2005
Messages
1,033
Location
Lower left coast
Is that teflon or tefzel insulation? MIL-W-22759, which I'll bet is what he's working from, covers both. Either way, that's some very good wire.
 
OP
Z

zmotorsports

ALLIANCE MEMBER
Joined
Oct 20, 2009
Messages
21,621
Location
Northern Utah
But of course Mike, we want the FULL kit....
Now you're set for most needs, if you feel like stepping it up, you can always add some of them much coveted Deutsch AS (motorsport connectors) as well.

I waffled on the AS series Anders, but I had already convinced the wife these are what I needed to correct the issue, and it was an unexpected purchase, so I kept it within reason. :ROFLMAO: Had I needed more wire count connectors I may have gone that direction. Who knows, the next project may require the AS series connectors though. ;)
 

TimeWarpF100

Well-known member
Joined
Aug 21, 2010
Messages
6,784
Location
not here
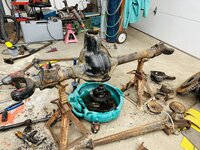
Mike, few questions. Doing a Dana 44 front on my 1966 F100 4x4. Do not recall ever messing with one.

Any pointers and best place to find parts? Appears it has never been apart. During rebuild adding a Dana Detroit Locker (what previous owner purchased) bit confusing in literature if it’s really Detroit Locker or…

Dana 913A591 keeping stock 3.54 gearing.

My question mostly on parts for this type with no actual ball joints but bearings, shims.

Also swapping to 14” discs hoping to make them full ABS

Managed to get it apart, did order a case spreader and seal install tool.
IMG_0300.jpegIMG_0301.jpegIMG_0285.jpegIMG_0274.jpeg
 
OP
Z

zmotorsports

ALLIANCE MEMBER
Joined
Oct 20, 2009
Messages
21,621
Location
Northern Utah
Yeah Randy, that's one of the old original style Dana 44's. Those are hard to beat and damn near bulletproof as far as axles go. The newer Jeep Dana 44's are a variation of that axle but nowhere near the same.

As for parts, I gears and axle parts I generally purchase my axle components from either Randy's Ring & Pinion or Northridge 4X4. For bearings I just purchase them from my local NAPA parts store as they are nothing out of the ordinary.

Glad to see you going to use a case spreader. In my opinion that is the only "real" way to do these axles in order to get the proper carrier bearing preload.

As for the tapered bearings at the axle ends, there's nothing special about them other than just ensuring you have the bearings packed with a good quality grease and everything is cleaned thoroughly before going back together. Those should have a double nut style of bearing retention. The inner bearing is greased, then the axle seal installed. Next the outer bearing is greased and installed then the inner nut. There is the possibility of a large flat machined washer between the outer bearing and the inner nut, I have seen them both ways, with and without this washer.

Once the inner nut is installed, tighten it while spinning the hub to ensure the bearings are seated and smooth. I generally torque to around 45-50 ft/lbs. Then back off about 1/4 turn until a slight clearance is detected, very slight. Then the locking ring installed on the pin and lastly the outer nut installed and torqued in place. The outer nut torque is about 200 ft/lbs.

Then you can assemble the locking hub and you're done.

As for the knuckle bearings, think of these similar to a king pin style of axle. I like to clean everything, then assemble the bearings onto the housing. Place the knuckle in position and lift it up until it is tight against the top. Then I use either some shims from the assortment, or feeler gauges to determine the shim stack required. It should be snug but not too tight and no clearance.

As for the Detroit Locker, I'm generally leery of using these in front axles. The clutches can get quite "grabby" when turning and create some unique handling characteristics. I much prefer either a selectable locker or limited slip, (Truetrac) in the front axles. If you go back with the Detroit Locker, be sure to use a lube with the proper additive for the clutches.

Not sure if that answers your questions or not but hope it's helpful Randy.
 
To avoid these ads, REGISTER NOW!
Top Bottom