To avoid these ads, REGISTER NOW!

ZMotorsports Shop Projects 2.0

ScepterToad

Well-known member
Joined
Nov 9, 2023
Messages
357
Nice project Mike! Looking forward to seeing how it all comes together (as I'm not familiar with what it is you're actually building).

EDIT: Duh. Should have went and seen the remaining responses before responding.
 
To avoid these ads, REGISTER NOW!
OP
Z

zmotorsports

ALLIANCE MEMBER
Joined
Oct 20, 2009
Messages
21,627
Location
Northern Utah
The shop that I worked in the first summer out of high school had one of those. They usually had something like a 9" diff in it when in use. Only ever saw a VW engine in it once, when one of the mechanics was building himself a new engine after hours.
It did wobble and I recall the mechanic complaining about it.
If you haven't already thought of it I would want something that won't allow the shaft to slip forwards out of the clamp unless I want it to do that. A single bolt on the back end of the shaft with a hole-saw "washer" of sufficient OD would do it.
Perhaps a ring from the same tubing tacked on the shaft to prevent it from going too far in as well?

It will be fine. If I pull it forward more than 6 inches to let the stem fall out, then I deserve to have it fall. In all the years I've been building transmission and 2-stroke engines using my old design, which is actually smaller and shorter, I've never even had one come forward more than a half inch or so during rotation. Besides, I want it to easily remove as I will be making and/or modifying additional attachments to fit in it for quick interchanging of attachments.
 
OP
Z

zmotorsports

ALLIANCE MEMBER
Joined
Oct 20, 2009
Messages
21,627
Location
Northern Utah

Mike, I saw this and thought you might be interested. Seems this guy knows a thing or two about RVs :ROFLMAO:

Thanks. Yeah, I follow Mark Martin and his Newell coach. Followed his posts on IG when he was having it built and when he was having his engine custom built then tuned. That thing is a hot rod for sure.

You should see his engine bay, a work of art.
 
OP
Z

zmotorsports

ALLIANCE MEMBER
Joined
Oct 20, 2009
Messages
21,627
Location
Northern Utah
Had my buddy who’s still a dealer In Minnesota look it up. Discontinued in 2001 and last price was $127.50 which is probably about $400.00 today. I still want one!

Thanks Sterling. That is actually much less expensive than I remember it being but it was more of a want than a need back then so I couldn't justify it regardless.

Even now, I don't know exactly how much I'll use it, so it probably was a waste of time, but I have it when I do need it.

Thanks again.
 
OP
Z

zmotorsports

ALLIANCE MEMBER
Joined
Oct 20, 2009
Messages
21,627
Location
Northern Utah
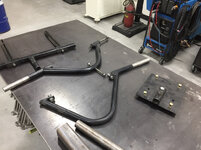
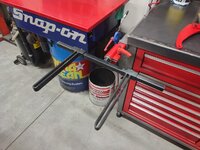
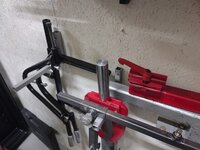
I finished up my imitation Snap-on fixture assembly last night.


To start with, I think the .250" wall thickness of the tubing was a bit too much. After cutting the slit in the side for the clamp placement prior, I put it in the vise to see just how much force it would require to pinch the stem hard enough to hold it rigid and it seemed like it took more than I felt it should and maybe more than a quick half turn of the handle would be able to provide. So to remedy that, I removed .150" from the diameter reducing the wall thickness approx. 33% which seemed to require much less pressure to clamp.
fix31.jpg

Then I cleaned up the ID by removing about .015".
fix32.jpg

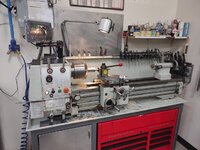
I haven't had the opportunity to use the lathe much since building my new stand with storage. I kind of like it and it moved the spindle center up about 1.5" which seems about perfect.
fix33.jpg

Test fitment of the stem into the sleeve.
fix34.jpg

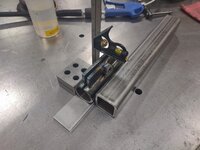
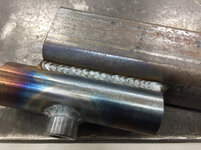
Next, I cleaned the zinc coating off the nut and TIG welded it onto the backside of one of the strips which will be used for the clamping system.
fix35.jpg

I used a piece of .500" thick drop plus a .032" shim to space the pivot plates apart enough that the arms will move freely when the shoulder bolts are tightened yet not so freely that they are sloppy. Then the stem was centered on the pivot plates and tacked in place, then checked for alignment before final welding.
fix36.jpg

Stem finish welded onto the pivot plates and allowed to cool.
fix37.jpg

While the stem was cooling, I moved on to weld the clamp assembly.
fix38.jpg

And it was allowed to cool.
fix39.jpg

Test fitment of the arms into the pivot plate/stem assembly before painting the stem.
fix40.jpg


Stay tuned for more pictures.....
 
OP
Z

zmotorsports

ALLIANCE MEMBER
Joined
Oct 20, 2009
Messages
21,627
Location
Northern Utah
Continuing on.

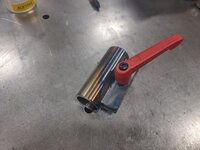
With the clamp assembly cool, it was time to install the handle and test.
fix41.jpg

I slid a length of hitch tube into the receiver and determined a length that would get it out past the workbench enough to allow easy access around whatever I was working on, yet not too far out to be a nuisance.
fix42.jpg

Hitch tube cut to length, wiped down and sanded with a DA in preparation for welding the clamp mechanism onto it.
fix43.jpg

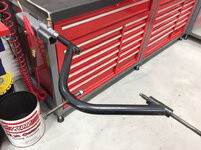
Fabrication complete and test fitting as a complete assembly.
fix44.jpg

Works great and holds the fixture firmly no matter the position. I think this will work much better than merely a pin stuck through a series of holes to secure the location.
fix45.jpg

Everything painted and completed.
fix46.jpg

fix47.jpg

Then the shop was cleaned and ready for the next job coming into the shop.
fix48.jpg


Thanks for looking.
 

WoodsTruck

Well-known member
Joined
Jan 12, 2013
Messages
1,037
Quick question:
Would there be an advantage to tapering the leading edge of the stem so the fixture can be bolted to the transmission, then picked up and slid into the holder easier?
I picture this being an easier and safer method than trying to hold the transmission up while bolting the holding arms to it.
 
OP
Z

zmotorsports

ALLIANCE MEMBER
Joined
Oct 20, 2009
Messages
21,627
Location
Northern Utah
Quick question:
Would there be an advantage to tapering the leading edge of the stem so the fixture can be bolted to the transmission, then picked up and slid into the holder easier?
I picture this being an easier and safer method than trying to hold the transmission up while bolting the holding arms to it.

I put a nice chamfer on the end of the stem as well as the inside of the clamp tube so it should be easy to slide into place. With my other transmission mounting fixture I usually do exactly how you mentioned and mount to the transmission to the fixture first, then slide the fixture already holding the component into the tube and it works great. Much easier than trying to mount the component to the fixture while it is attached to the workbench.

I also think I need to run an emery roll through the tube clamp a bit as it is still just a bit more "snug" than I would like. It requires a bit more effort to slide all the way into the clamp. It goes in about 2 inches relatively nice, but the last couple of inches it drags a bit, and I have to walk it in the rest of the way.
 
OP
Z

zmotorsports

ALLIANCE MEMBER
Joined
Oct 20, 2009
Messages
21,627
Location
Northern Utah
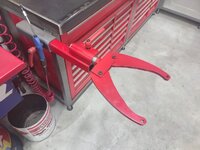
@WoodsTruck , I'm not sure if you've followed my thread from the beginning but I thought I'd repost some pictures of my old transmission and small engine mounting fixtures. I fabricated these about 25 years ago at my old shop for doing transmission rebuilds as well as when we were heavily involved in building snowmobile and ATV engines. The square plate with round tube to the right was mounted on my workbench and the various attachments slid into it depending on what I was working on.

trans1.jpg


I modified my mounting system nearly 8 years ago when I moved into the new shop as I didn't want the mount permanently mounted to the workbench like it was in my last shop. When I built my new workbenches back in 2017, I added receiver tubes to either end and then fabricated a receiver tube for using with my old transmission fixtures.
trans2.jpg

This one works well but only using a single bolt to hold, I think the clamp style works much better and will hold the work more firmly.
trans3.jpg


The stems on the old attachments are all 1" but I am thinking about changing them to 1.5" so I can use them in the new clamp mount instead. Rather than completely rebuilding the attachments, I think I will find some 1.5" OD x 1" ID tubing and weld it onto each attachment. Quick and simple but will allow me to use the clamp mounting fixture rather than this one.
 

WoodsTruck

Well-known member
Joined
Jan 12, 2013
Messages
1,037
I have been following along for quite a while. I figured you would have chamfered the ends but I didn't see that commented about.
I would also agree that the clamping style you now have would be preferred over the bolt tension method so the stub doesn't get marred up which tends to cause clearance issues with use.
 
OP
Z

zmotorsports

ALLIANCE MEMBER
Joined
Oct 20, 2009
Messages
21,627
Location
Northern Utah
That is a great kit for your projects. Love how low profile everything is. I wish I could get away with a setup like that, But my engines are usually 4-600lbs so I have to mount them straight to the floor.

The jealousy is real!

Thank you. My engine stand gets used for most engines, it's not solid mounted as yours, but it is on wheels and has a nice geared head for easy rotation. For lighter and smaller projects such as transmissions these adapters work great. I don't do much with powersports or sandrails any longer so I don't have the need to hold snowmobiles or ATV's engines or VW engines or transaxles like I did in the past but the adapter(s) can be used for other things, pretty much anything I can bolt to it and have access to rotate it. I'm sure it won't get used as much as in my last shop which is why I didn't mount it permanently to my workbench in the new shop and made receiver style attachments into my workbench.


Mike,
You always impress me with the quality of your work. Thanks for sharing it!

Thank you. I appreciate that and thank you for following along.
 
To avoid these ads, REGISTER NOW!
OP
Z

zmotorsports

ALLIANCE MEMBER
Joined
Oct 20, 2009
Messages
21,627
Location
Northern Utah
I arrived home last night to the first snow of the season down in the valley. It was snowing pretty hard and barely started sticking to the grass and rooftops, but soon afterwards the sun poked through. We really haven't had much of a fall this year, we went from mid-70 degrees a couple of weeks ago down to 30's and completely skipped right past the 60's and 50's we generally have this time of year. I haven't acclimated yet. :(

snow.jpg


I also got a text when I arrived home from the owner of the truck I had coming in stating he was going to be a couple of hours later than expected. So rather than sit around twiddling my thumbs I figured I would modify my transmission and small engine adapters to fit in the new fixture mount.

fix51.jpg

Without wanting to spend money on materials, I dug through my supply of drops and found some tubing that would work and just needed about .050" larger ID and some cleanup before welding them onto the various attachments.
fix52.jpg

Test fit before welding.
fix53.jpg

One welded and two more to go.
fix54.jpg

After they all cooled down and I cleaned up my mess I gave them a test fit. I used this adapter mainly for snowmobile engines and some ATV engines many years ago. Also used it for a few VW transaxles but I always wanted one of the Snap-on style like I just fabricated. Now that I have the adapter I've always wanted I'll probably never do another one. :rolleyes:
fix55.jpg

I built this adapter to hold GM transmissions (TH350/TH400/TH700R4 (4L60) and 4L80's) as well as many older Ford C4's and C6's.
fix56.jpg

This adapter I fabricated to support the Dodge 47RH, 47RE and 48RE's that I used to build. Haven't built many newer ones lately.
fix57.jpg

All of the various adapters now securely fit into the new clamp.
fix58.jpg

I hung them back up in the RV/storage bay so they are readily accessible when needed yet out of the way in the shop.fix59.jpg

Thanks for looking.
 
OP
Z

zmotorsports

ALLIANCE MEMBER
Joined
Oct 20, 2009
Messages
21,627
Location
Northern Utah
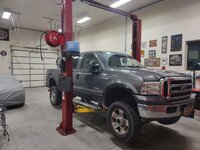
As I was finishing up the adapter modifications, the side job pulled in. It is a 2007 F350 Powerstroke that needs a lot of work to get it zero'd out after the owner recently purchased it.

We went for a test drive then I pulled it into the shop so work can begin.
sd1.jpg

sd2.jpg


Something didn't feel right in the steering and he said the guy that fixed a flat tire for him mentioned he thought it may need a ball joint on the passenger side. I raised it while the owner was still there and determined it did in fact need ball joints on the passenger side. I asked what about the driver's side as I like to replace them together rather than only one side. He mentioned the guy didn't say anything about the driver's side so I walked around and stuck my prybar under the driver's tire and about **** myself. I have never seen ball joints that bad before, at least not ones that were still in one piece. I could get more than 2 inches of movement from the top of the tire in/out with a prybar under the tire. I was glad the owner was still there to witness that as I don't think I could have expressed my shock through a picture or text to him. :oops:
 

Jgaz

Well-known member
Joined
Dec 16, 2016
Messages
1,762
Location
AZ
Mike,
I know you are safe with the vehicles you put on your lift, but I don’t think I’ll ever get used to the amount of rear overhang.

You can tell I’m stuck in the past, but I’m glad I spent most of my career using the old school, two post, in ground, hydraulic hoists
I know all their problems and I used your type hoist for many years and hundreds of lifts with no problems. Others I worked with, maybe not so much.

I just wanted to impress upon other people using their above ground two posts to be careful with the lift pad placements and to use support stands.
 
OP
Z

zmotorsports

ALLIANCE MEMBER
Joined
Oct 20, 2009
Messages
21,627
Location
Northern Utah
Mike,
I know you are safe with the vehicles you put on your lift, but I don’t think I’ll ever get used to the amount of rear overhang.

You can tell I’m stuck in the past, but I’m glad I spent most of my career using the old school, two post, in ground, hydraulic hoists
I know all their problems and I used your type hoist for many years and hundreds of lifts with no problems. Others I worked with, maybe not so much.

I just wanted to impress upon other people using their above ground two posts to be careful with the lift pad placements and to use support stands.

Yes, I am very cognitive of the arm placement and balance. The appearance of the overhang is kind of misleading these days because of the weight of the powertrains that offset the longer overhang to the rear. I ALWAYS place the arms on these large trucks as far back on the frames as possible and then find that balancing point with the front arms to where I can grab the chassis or suspension mount with the least amount of arm extension. Once the vehicle is off the ground by about a foot I go to the rear and apply a lot of downward force to try and throw it off balance or see how it responds before going higher. Another point I want to stress, is to make sure to have secondary support on hand and use them. By this I mean the use of pole jacks to aid in supporting the weight when you are under the vehicle. I generally place a pole jack both front and rear, but at least the rear if work is going on in the front and I will also lower the vehicle whenever possible before closing up the shop for the night as I don't like leaving them high up on the lifts overnight.

The other odd things on most trucks built in the last couple of decades is the rear frame kickup. This prevents the ability to grab the chassis as far rearward as I would like so I grab them at the point just before the frame kicks upward going rearward. Hope that makes sense.
 
OP
Z

zmotorsports

ALLIANCE MEMBER
Joined
Oct 20, 2009
Messages
21,627
Location
Northern Utah
Have to stop looking at the physical shape of the vehicle and start looking for the actual Center of Gravity (CG). The center of the shape is rarely anywhere close to the CG, but the center of the shape is easily seen and the CG is very much not visually obvious.

Agreed. What I've found on the shortbed 4-doors and extended cabs is the CG is around the leading edge of the seat back of the front seat, which is slightly forward biased to the actual shape of the truck.

On long bed trucks it is back about an extra 6 to 8 inches so right at the seatback. I also set the height of my arm's pads to slightly pick up the fronts first as that is where the majority of the weight is located.
 

Jgaz

Well-known member
Joined
Dec 16, 2016
Messages
1,762
Location
AZ
Trust me guys I understand.

Mike I also always did the bounce test.
In no way was I ever thinking you were unsafe and apologize if that’s how it came across.
I hope others will read and heed your methods.

I used this type of hoist extensively, daily, on all types and sizes of vehicles for most of my last 10 years as a professional mechanic.
My post was just my thoughts and mostly aimed at the users with less experience.

Your post that spoke of the rear frame kick up is very much in line with my experience
 

LXCam

ALLIANCE MEMBER
Joined
Apr 23, 2013
Messages
19,373
Location
AZ
Wow Mike that might be a hell of a project zero'n out that furd, I'm surprised you took this on. Past that I'm a little taken back about what you stated the owner said. When he commented that the other shop didn't say anything about the other ball joints, was he doubting your recommendation or was it nothing more then a comment and you have free rein to do whatever it takes to make it right?.
 
OP
Z

zmotorsports

ALLIANCE MEMBER
Joined
Oct 20, 2009
Messages
21,627
Location
Northern Utah
Trust me guys I understand.

Mike I also always did the bounce test.
In no way was I ever thinking you were unsafe and apologize if that’s how it came across.
I hope others will read and heed your methods.

I used this type of hoist extensively, daily, on all types and sizes of vehicles for most of my last 10 years as a professional mechanic.
My post was just my thoughts and mostly aimed at the users with less experience.

Your post that spoke of the rear frame kick up is very much in line with my experience

No worries. To be honest, I wasn't quite sure how to take it but now understand. I have only been working off a 2-post lift for the past 14+ years now so I'm sure nowhere near your experience but thought I'd share my thoughts of arm placement as well as additional support in case anyone else had questions.


Wow Mike that might be a hell of a project zero'n out that furd, I'm surprised you took this on. Past that I'm a little taken back about what you stated the owner said. When he commented that the other shop didn't say anything about the other ball joints, was he doubting your recommendation or was it nothing more then a comment and you have free rein to do whatever it takes to make it right?.


Yeah, I know it's a Ford Cam, but I'm up for the challenge to try to make it a decent ride. :bounce:

I don't think he was doubting me as much as just waiting for his ride to arrive to pick him up after the test drive.

He had mentioned he had a weird shimmy in his steering wheel and suspected brakes originally. When he arrived I said I wanted to go on a test drive with him to confirm what he was experiencing as I don't like to just throw parts at something based on no evidence. During the test drive I mentioned that I had no indications of warped brakes or pulsing in the pedal like he had mentioned a few months ago. I mentioned that if the pulsing is accompanied by a shaking of the steering wheel, then it usually is indicative of front rotors either warped or some disk thickness variation going on and if it is felt in the floorboards or in your ****, then it will cause for more suspicion of the rear brakes. I explained the difference while driving but said I didn't feel either.

That is when he told me that it seems to come and go and isn't consistent. :headscrat Okay, that sheds a different light on things and explained why I then really didn't suspect brakes because a warped rotor or a thickness variation isn't going to come and go intermittently. Those conditions either exist or they don't.

That is when he said it seems to be worse on rough roads and after having a flat repaired the guy at the tire shop told him he had a bad passenger's side ball joint. Okay, well that seems a little more logical as to how it can appear to come and go depending on the road surface during braking.

Once back to the shop and while he was waiting for his ride to show up is when I thought I'd rack it and check the passenger's side ball joint while he was standing there. Yes, it was bad and had a considerable amount of slop, but when I walked to the driver's side with the pry bar and gave it a test, THAT is when I about **** myself when I saw how much play there was. Even the look on the owner's face was evidence he had no idea how bad it was. I told him it was good we got it in when we did because I didn't know how much longer it would remain intact, it was that bad.

Other than the ball joints, it looks like all fluids will be replaced and he wants me to give it a good once over while I'm under it. I noticed the tires are wearing very uneven and suggested a more frequent tire rotation than 10k miles as once the irregular wear begins it is nearly impossible to correct, and with large lug all-terrain or mud style tires it becomes even more critical to ward off irregular wear.
 
OP
Z

zmotorsports

ALLIANCE MEMBER
Joined
Oct 20, 2009
Messages
21,627
Location
Northern Utah
So you now are “Ford Quality is Job 1” certified? I really do need to bring my fleet up to you and get the Z Spa treatment! Or I’ll just sit here and watch over your shoulder and see how I should really be doing my maintenance!

Thanks for the kind words Sterling, although I really don't think I am doing anything more than what most shops should be doing. Unfortunately, I hear all too often from past clients and other people I talk to that they don't get anywhere near the number of items checked and/or serviced when they bring their vehicles into a shop.

I am kind of shocked to be honest as I thought more would be doing similar work or at least suggesting these items be done. :unsure:
 

LXCam

ALLIANCE MEMBER
Joined
Apr 23, 2013
Messages
19,373
Location
AZ
Thanks for the kind words Sterling, although I really don't think I am doing anything more than what most shops should be doing. Unfortunately, I hear all too often from past clients and other people I talk to that they don't get anywhere near the number of items checked and/or serviced when they bring their vehicles into a shop.

I am kind of shocked to be honest as I thought more would be doing similar work or at least suggesting these items be done. :unsure:
This might surprise you Mike. A couple months back I took my work truck in for a 100k service. I not only gave them free pass on doing anything they found needed to be done but told them I wanted X done. They did about 70% of the work I wanted done to begin with and stopped there. Wtf is that all about
 
OP
Z

zmotorsports

ALLIANCE MEMBER
Joined
Oct 20, 2009
Messages
21,627
Location
Northern Utah
This might surprise you Mike. A couple months back I took my work truck in for a 100k service. I not only gave them free pass on doing anything they found needed to be done but told them I wanted X done. They did about 70% of the work I wanted done to begin with and stopped there. Wtf is that all about


You're right Cam, that does surprise me. Not sure what the thinking is behind that though. :dunno:

I would think the benefits would be twofold to do the job thoroughly from the start. First, and the most obvious, is because of the revenue that it would bring into the shop and therefore into the mechanic's pocket by doing more work. Hell, the vehicle is already on the lift or in the bay so why not? :headscrat

Secondly, by taking proper care of the vehicle, and therefore the owner, wouldn't it make more sense to take care of both and develop a symbiotic relationship where you both want the same thing, which is proper care for the vehicle to ensure a longer and more reliable life?

Maybe someone else can explain something I'm missing.

Now on one hand, I could have easily just thrown brakes on the guy's truck and called it a day, after all that's what he asked me to do. However, I would not feel good about him calling me afterwards stating it wasn't fixed even though I installed $600+ dollars' worth of parts on it as well as several hundred dollars' worth of labor, but his issue was not addressed. I did what he requested after all.


For me, it is just as much about saving money as it is making money. Maybe that's kind of backwards thinking but I want to be able to lower my head onto the pillow each night and now feel like I took advantage of someone.
 
OP
Z

zmotorsports

ALLIANCE MEMBER
Joined
Oct 20, 2009
Messages
21,627
Location
Northern Utah
I can't believe the unit bearings weren't shot also. Personally, if I'm doing ball joints, everything going back together is going to be brand new. On that truck if he had you do the joints, bearings, hub seals and brakes, it will last another 100k or until the 6.0L pops......

Funny you mentioned the unit bearings Ryan. He told me that the owner informed him they were just replaced before he bought the truck. :oops:

I tried forewarning him about the 6.0's reputation before he purchased the truck, but he said the previous owner had just had the complete top end rebuilt along with new turbo, head studs and some other items. :dunno:

Either way, I did pick up some new seals that go behind the unit bearings as I have not had the best luck in reusing those large seals and if they don't seal the vacuum hubs don't function. I purchased the large seal driver years ago so this way I get to use it again and make me feel like it was a worthwhile tool purchase. :ROFLMAO:
 

olsenmotorsports

Well-known member
Joined
Apr 13, 2013
Messages
764
Location
Chicago, IL
Thank you. My engine stand gets used for most engines, it's not solid mounted as yours, but it is on wheels and has a nice geared head for easy rotation. For lighter and smaller projects such as transmissions these adapters work great. I don't do much with powersports or sandrails any longer so I don't have the need to hold snowmobiles or ATV's engines or VW engines or transaxles like I did in the past but the adapter(s) can be used for other things, pretty much anything I can bolt to it and have access to rotate it. I'm sure it won't get used as much as in my last shop which is why I didn't mount it permanently to my workbench in the new shop and made receiver style attachments into my workbench.

Yes I envy you on the stand on wheels. Ive got 6 stands at our store but they are all bolted down. We have interchangeable heads for everything but I made our’s out of 1/2 plate for the base, welded to 10” pipe. They are bulletproof and rock solid, just hard to place them for workflow as they are not moveable. In hindsight I wish they were on wheels to store them when they are not in service (which is super rare)
 

SilverJimmy

Well-known member
Joined
Apr 14, 2012
Messages
1,777
Location
Prescott/Flagstaff, AZ
Mike, in 30 years of going into almost every single automotive repair shop in northern Arizona I can count on my two hand how many “techs” I would ever let put a wrench to my stuff! Most of them are just parts changers and not very good at that either. I have a Toyota FJ80 LandCruiser that was having a problem with mildly overheating in the warmer months in Flagstaff. I asked a former customer that had done some other work on it to diagnose it for me. He basically told me that it needed a radiator because it was so old and that they just go bad and that was what they did at the dealership. It was frustrating because in the cooler months it was fine.
I tried flushing the radiator and I even got a OEM rebuild kit for the fan clutch (didn’t even know that was an option but kinda cool to do!) and those things seemed to make it good. Then last spring it started getting worse, just driving over 45 mph it would get hot. Lucky for me a friend who has owned a import auto repair shop happened to stop by and we got to talking about my LandCruiser and it’s overheat issues. He quickly diagnosed what he suspected was wrong, recommended that I replace the fan clutch with a OEM unit and that while I have it apart I should also change out the thermostat. Changed the fan clutch and then pulled the thermostat…..BC552F07-C26E-4429-95FA-5A2B2EB5168B.jpeg
He nailed it, thermostat was actually broken, stuck 1/2 closed, which explained the mild overheat condition! New thermostat and now at 296k miles it runs like new! The point of my rant is that the other guy would have gladly billed me for a new radiator, and then as a side note would have done me a favor and installed a new thermostat “while he was at it”!!! All those years of selling tools I saw this done many times, it almost was my turn! I now try to do as much of my own repairs that I can and for the stuff I‘m not sure about I‘m lucky to have three or four guys that I respect and trust to do great work.
 

ntsqd

Well-known member
Joined
Jan 22, 2005
Messages
1,035
Location
Lower left coast
I used to use up a radiator cap on my '84 Xcab yota about every 18 months to 2 years. I'd notice it starting to run warmer than normal and I'd replace the cap. It always went right back to running properly after that. Of course the first time that I went thru it I did the whole 'refurb the radiator' dance because the cap wasn't all that old......
 

Wiz02

Well-known member
Joined
Jul 13, 2007
Messages
2,399
Location
Southeastern PA
Not a pro mechanic story but a DIY one. Had a 67 Valiant with a slant six that9 had the opposite problem, it never made heat, Dad had me change thermostats and radiator cap every fall for years and no heat. Finally flushed the system and found that the heater core was plugged. Plenty of heat post flush.
 
OP
Z

zmotorsports

ALLIANCE MEMBER
Joined
Oct 20, 2009
Messages
21,627
Location
Northern Utah
Sterling, when I worked at a couple of auto parts stores back in the 80's we used to see thermostats that people would bring in quite a lot that had the stem offset and stuck like the one you showed. Then many manufacturers staring using some form of sliding pin to the spring and plate couldn't kick out and get stuck like that. That pretty much solved many of the issues for a lot of years.

However, I have seen a decline in quality over the past several years and I feel we are right back to where we were in the 80's, or even worse in some areas with parts quality. Radiator caps have been horrendous over the past several years and I am to the point on my personal vehicles I just replace the radiator caps every couple/few years because they will most likely fail anyways, and I'd rather not have one fail while I'm away from home.

Glad you have a couple of guys whom you can trust. Trust and loyalty go a long ways in the auto repair business. Unfortunately, some shops either haven't learned that or just think they'll stick it to them and see how it goes. That doesn't help our industry or the people in it one bit, in fact, makes it harder to be taken serious at times. :mad: On the other hand it also makes those who are even average really shine compared to the hacks.
 
To avoid these ads, REGISTER NOW!
Top Bottom