To avoid these ads, REGISTER NOW!

ZMotorsports Shop Projects 2.0

To avoid these ads, REGISTER NOW!
OP
Z

zmotorsports

ALLIANCE MEMBER
Joined
Oct 20, 2009
Messages
21,477
Location
Northern Utah
I'm surprise that you would even paint as much as you hate it. :ROFLMAO:

Cody, when I had a place to actually paint, I really quite enjoyed it and I think I was quite decent at it. My street rods and project cars, bikes, sleds and quads won several best of paint awards and quite a few overall awards in various car shows, plus it was nice even having daily drivers that I had painted and added some custom touches to. When I built my home shop in the early 90's I refused to paint inside my shop much like my current shop. However, my old shop on my parent's dairy farm where I started wrenching back in the 80's is where I did all of my painting. I had converted it into a fairly decent paint shop and had filter setup to pull overspray out and was able to turn out some nice paint jobs from that little 2-bay shop. I would do all of the metal work and metal finishing at my home shop, then load projects onto my flatbed trailer and haul them about 8 miles to my parent's farm where I would perform all of the prep and painting, then haul them back to my home shop to cut & buff and assemble. I did this for about 16 years when I built my home shop up until my mom sold the family farm in 2008, eight years after my father passed. I felt like it was the perfect setup to be able to do all of the mechanical, fabrication and metal work at home, then transport the vehicle to my "paint shop" where the messy work was done, then back home for final assembly.

Even our first two motorhomes, I painted at either home (outside) or at my parent's farm just outside the paint shop. To take our current coach to a painter in Indiana was a hard thing for me to do. I think I like to do my own work to be able to control the details and the process and painting is something that many, many corners can be cut. When possible I still like to do my own painting but I have to do it outside. Such as when we did the paint work on my son's Jeep and Duramax. I actually have quite a bit more room at this place than my last so it is somewhat easier, I just have to have the weather cooperate. ;)

When I bought my 2006 Duramax in 2009 the previous owner had thrown a lot of items over the sides of the bed and therefore it had a few dents and dings down the bedrails. It also had the typical flaking GM paint on the roof and tailgate. I did all of the prep work, fixing the dents/dings and sanding the roof down at my home shop, outside of course. It was late fall and weather was changing so I was losing my window to paint outside and therefore took it to a local shop that I had heard did good work for the actual paint process. When I discussed with them their process and explained how I used epoxy primer and 2X primer surfacer as well as which paint and clearcoat I preferred, they told me that was not the usual process they did seeing as how they did more high volume work, but they would perform the work to the degree that I asked although it was a bit higher price.

I had also arranged with them that all I wanted them to do was the actual painting and that I would cut and buff the clear and all I needed them to do was seal (with epoxy primer), paint and 3 coats of PPG 2021 clearcoat. They agreed. They actually knocked it out relatively quick and I had the truck back in less than 2-weeks and I was overall pleased with the job. The new smooth flares were painted and the trim pieces but the cutting and buffing I did when I got it back to my shop.

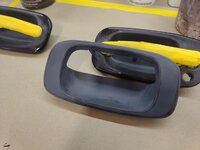
Of all the work they did, the only thing that bugged me was the tailgate handle bezel and the texture coming through the paint and clear.


The flaking gold on the bow tie emblems has irritated me for years. Come on GM, you've had years to fix that! After all, it's only your trademark.....

Agreed. You'd think they would do something after all these years of the same failing finish. :rolleyes:
 

mike528

Well-known member
Joined
Dec 20, 2014
Messages
503
Location
Shelby county Ohio
on the subject of cable ties, I finally had time to get caught up on this page and wanted to through these into the mix in case anyone has ever wandered what kind of cable ties they are missing out on, here are some rated for 1,000 lbs at mcmaster...
 

ntsqd

Well-known member
Joined
Jan 22, 2005
Messages
997
Location
Lower left coast
Mike528 reminds me, I don't recall where I found them, but I found some very large "zip-ties" made from stainless steel. I carry a bundle in the FSB for use in fixing a desert racer should something like that be the best/fastest way to them back in the race.
 
OP
Z

zmotorsports

ALLIANCE MEMBER
Joined
Oct 20, 2009
Messages
21,477
Location
Northern Utah
Hope everyone had a nice weekend.

The last week was busy as hell with family stuff going on. It was nice to just be alone with my thoughts in the shop on Saturday and knock out some painting, then put the shop back together as I don't like the fact of having boxes of paint supplies out and paint supplies all over the workbench.

Over the course of a couple of nights last week I was able to get the small items sanded and prepped for paint work, but time just didn't allow me to get them painted until Saturday.

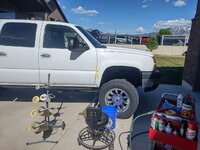
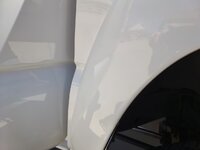
In addition to the door handles, tailgate handle bezel and grille bowtie, I also had a small area just behind the right front fender flare that needed attention. I am not one to enjoy open blends, but for such a small area I couldn't just let it go any longer nor could I justify sanding and clearing the entire fender. Open blends with clear can be tricky so care must be taken to avoid having them look worse than not doing anything at all, but I couldn't stand looking at this spot any longer.
paint15.jpg

I hit the area with some 400-grit wet sandpaper and went through in one area as the OEM primer was quite thin.
paint16.jpg

Paint shaker to the rescue shaking up my can of UPOL #5.
paint17.jpg

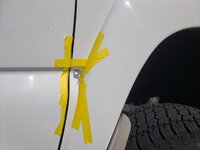
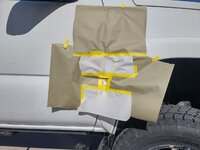
Area masked off and tape folded back to create a soft edge for the primer.
paint18.jpg

Masking paper removed and truck pulled back into the shop for a few nights until I had time to continue.
paint20.jpg

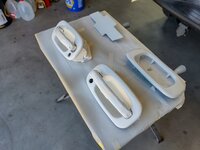
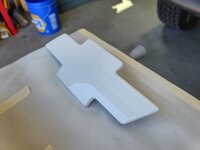
While I had a bucket of water and sandpaper out, I hit the tailgate bezel, bowtie and door handles.
paint21.jpg

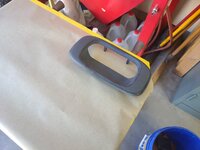
Bezel ready for epoxy sealer, then paint and clear.
paint22.jpg

Door handles wet sanded, dried and ready for epoxy primer (sealer), paint and clear.
paint23.jpg

That is where I left off last Thursday night.
 
OP
Z

zmotorsports

ALLIANCE MEMBER
Joined
Oct 20, 2009
Messages
21,477
Location
Northern Utah
Saturday morning after a few cups of coffee on the deck, I figured they weren't going to paint themselves so I headed out to the shop.

I wiped all of the plastic parts down with wax & grease remover as well as isopropyl alcohol. I've found that the isopropyl alcohol on plastic parts not only does a fine job of a final wipe, but also neutralizes the static charge so less chance of attracting floaties.

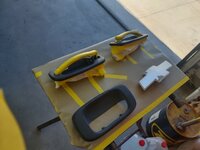
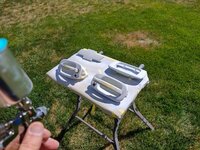
I then added some backfolded tape to the bezel to stick to the paper and help hold the parts to the table which would have less chance of blowing away during painting.
paint24.jpg

Stuck to the paper which is stuck to the folding table.
paint25.jpg

Bowtie and door handles also stuck to the paper with masking tape.
paint26.jpg

paint27.jpg

Prepping the area on the front fender.
paint28.jpg

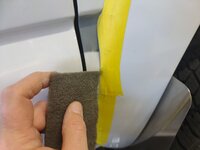
Scotchbrite pad (grey) to prep the primer and area just below for paint and clear blend.
paint29.jpg

Then further down and above the body line I hit it with white Scotchbrite to create the blending area.
paint30.jpg

I mixed up some SPI epoxy primer and reduced a bit to use as a sealer. It was then allowed to induce for about an hour while I went back to masking things up and moving the truck outside.
paint32.jpg

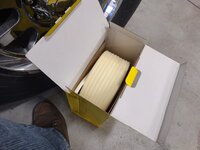
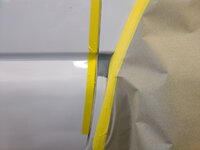
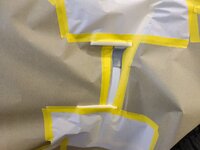
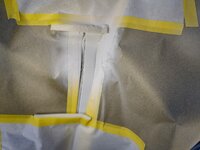
I despise overspray in doorjambs so care was taken to backmask the doorjamb and surrounding areas. This foam rolled tape is awesome. I only started using it a short time ago even though it has been out for many years now. In the past I would backmask using standard masking tape to create the soft edge in doorjambs and blend area, this is so much faster.
paint33.jpg

Doorjamb masked as well as adjacent panel (door).
paint34.jpg

Stay tuned for more...
 
OP
Z

zmotorsports

ALLIANCE MEMBER
Joined
Oct 20, 2009
Messages
21,477
Location
Northern Utah
Continuing on with the paint work.

Fender backmasked and ready for color. Foam tape used to create soft edges above and below the blend areas.
paint35.jpg

Truck ready to back outside.
paint36.jpg

Sealer has induced for about an hour and is ready to spray.
paint37.jpg

Two light coats of epoxy sealer applied to the small parts.
paint38.jpg

Then the gun was broken down and cleaned. When spraying a similar color a complete gun teardown isn't necessarily needed, but old habits are hard to break.
paint39.jpg

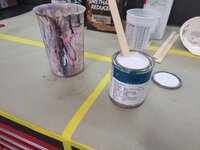
After a couple hours the paint was mixed up.
paint40.jpg

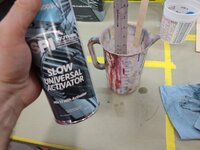
I added a small amount of activator to the base color. This is quite controversial and most don't feel it is necessary, but I'm in the camp of activating my base. Had a bad experience with paint creep years ago and just don't gamble any longer. Especially with the cost of paint supplies these days. HOLY **** talk about sticker shock as it's been a couple of years since I bought a pint of paint.
paint41.jpg

First very light coat of color on the fender. You are not going to full coverage, slow buildup yields the best results. In a small blend area such as this the gun adjustments must be fine tuned to get the fan width as well as volume needed to build depth and create the blend. If you just turn the fan down, you'll have way too much volume and end up piling the color on and it will end up running onto the ground.
paint42.jpg

A couple of coats later I am pleased with the progress of the blend.
paint47.jpg

I grabbed the sun gun and verified it looks like a nice blend once the solvent flashed off.
paint45.jpg

Still more to come.
 
Last edited:
OP
Z

zmotorsports

ALLIANCE MEMBER
Joined
Oct 20, 2009
Messages
21,477
Location
Northern Utah
Continuing on.

Three coats of paint applied on the small parts with flash times between as well.
paint44.jpg

paint46.jpg

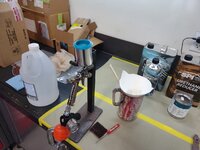
With the paint work progressing, supplies can be boxed back as each step is completed.
paint48.jpg


Pile of supplies is shrinking on the workbench.
paint49.jpg

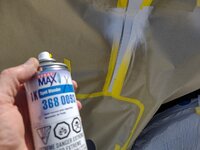
Clear mixed up and applied. After the second coat of clear was applied to the fender, the upper and lower paper was removed with the soft edge so the blending agent could be applied and melt in the blend.
paint50.jpg

Blend area turned out pretty nice.
paint51.jpg

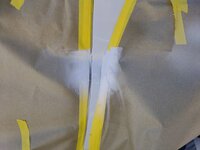
After unmasking the blend area is undetectable.
paint52.jpg

paint53.jpg

Even using the sun gun, the color match and blend are undetectable.
paint54.jpg

A few more pictures to follow....
 
OP
Z

zmotorsports

ALLIANCE MEMBER
Joined
Oct 20, 2009
Messages
21,477
Location
Northern Utah
Continuing on with the last few pictures from the weekend's paint work on our 2006 Duramax.

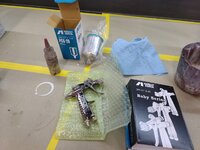
With the last of the clear applied, the gun can be broken down, cleaned, lubed and bagged up for next use. I sure like this small Iwata detail gun for small projects such as this. Big performance in such a small package. The atomization and control of this small gun are second to none.
paint56.jpg

The truck was pulled back into the shop after unmasking as well as the small table with the parts were brought inside.
paint57.jpg

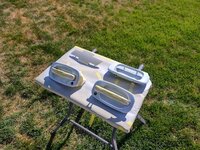
Overall I am pretty pleased with how they turned out.
paint58.jpg

paint59.jpg

Then all of the paint supplies were boxed up and stored giving me back my clean shop. The color sanding and buffing supplies at the ready to give the blend area a small buffing as a final touch.
paint60.jpg

Workbench nice and clean again.
paint61.jpg

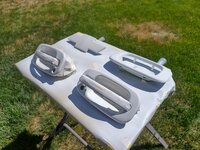
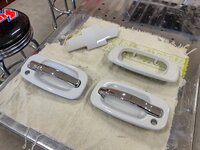
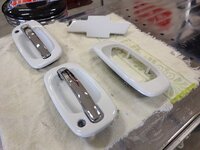
Sunday morning I went out and unmasked all of the parts and set them on the lift table on a towel and allowed to completely cure.
paint62.jpg

These turned out very nice.
paint63.jpg


I also gave the blend area a light breathing over yesterday morning before the kids came over for Mother's Day brunch.

I don't know if I'll have time to install these on the truck this week or not, but they are ready when I have the time.

Thank you for checking out my work.
 
OP
Z

zmotorsports

ALLIANCE MEMBER
Joined
Oct 20, 2009
Messages
21,477
Location
Northern Utah
I need to look into that blending agent, Mike. Job looks great!

I find myself doing more spot repairs than full panel repaints in the last few years.

Thanks Marc, I really don't like doing open blends but sometimes they just make more sense than prepping and clearing full panels, especially on a daily driver.

I actually don't really enjoy painting these days, but I just can't bring myself to trust anyone else to do them properly.
 

signcrafter

Well-known member
Joined
May 9, 2012
Messages
12,531
Looks great Mike and glad to see a morning post from you! I get withdraw symptoms and have to actually go do my own work when I don't see a post from you. Just kidding and hope all is well with the family.
 
OP
Z

zmotorsports

ALLIANCE MEMBER
Joined
Oct 20, 2009
Messages
21,477
Location
Northern Utah
Looks great Mike and glad to see a morning post from you! I get withdraw symptoms and have to actually go do my own work when I don't see a post from you. Just kidding and hope all is well with the family.

Thanks Scott. We're doing well, just had a lot of extended family time last week with my wife's family. I was ready to be back in the shop doing something productive, so Saturday was a good day to be alone with my thoughts.

Wasn't quite sure if I was going to post the painting process as it isn't that cool of a project, but opted to post the pictures anyways.


I say the paint job looks great!

My next question is, how you storing your paint supplies? Seems like you got quite a bit of supply stashed in your garage!

Thank you. I keep my paint supplies stored in our unfinished basement so they don't freeze.
 

signcrafter

Well-known member
Joined
May 9, 2012
Messages
12,531
Thanks Scott. We're doing well, just had a lot of extended family time last week with my wife's family. I was ready to be back in the shop doing something productive, so Saturday was a good day to be alone with my thoughts.

Wasn't quite sure if I was going to post the painting process as it isn't that cool of a project, but opted to post the pictures anyways.


Thank you. I keep my paint supplies stored in our unfinished basement so they don't freeze.


I appreciate you taking the time to post stuff like this, even if it "isn't that cool". I and I'm sure others learn a lot from stuff like this because you post all the little details. I don't do much painting at all, only done a few replacement quarter panels and a few other odds and ends. But I still pick up a lot from reading your stuff and try and store it away for if I ever need it.
 
OP
Z

zmotorsports

ALLIANCE MEMBER
Joined
Oct 20, 2009
Messages
21,477
Location
Northern Utah
I appreciate you taking the time to post stuff like this, even if it "isn't that cool". I and I'm sure others learn a lot from stuff like this because you post all the little details. I don't do much painting at all, only done a few replacement quarter panels and a few other odds and ends. But I still pick up a lot from reading your stuff and try and store it away for if I ever need it.

Thank you Scott. I appreciate the feedback. Sometimes I don't know what is valuable and what isn't, so I don't want to waste my time nor other people's time trying to wade through it. If it's helpful then it's worth posting.
 

signcrafter

Well-known member
Joined
May 9, 2012
Messages
12,531
Thank you Scott. I appreciate the feedback. Sometimes I don't know what is valuable and what isn't, so I don't want to waste my time nor other people's time trying to wade through it. If it's helpful then it's worth posting.
I think you could post about anything and it would be interesting, and think I am speaking for most on here. I've picked up a lot just by the little details that you do and post about.
 
To avoid these ads, REGISTER NOW!

aka Larry

Well-known member
Joined
May 2, 2012
Messages
8,099
Location
Eastern, NC
Looks great as always Mike!

I did a small paint project myself over a few nights last week (took my time and didn't rush it for once), but next to yours it's hard to post about it. ;) I remembered the starting pic, but forgot the all important "in process ones". :( The paint portion is now complete, but I will try to get pics of the installation at least.
 

Scuderia-F1

Well-known member
Joined
Feb 9, 2011
Messages
1,198
Location
Stockholm, Sweden
Continuing on with the paint work.

Fender backmasked and ready for color. Foam tape used to create soft edges above and below the blend areas.
paint35.jpg

Truck ready to back outside.
paint36.jpg

Sealer has induced for about an hour and is ready to spray.
paint37.jpg

Two light coats of epoxy sealer applied to the small parts.
paint38.jpg

Then the gun was broken down and cleaned. When spraying a similar color a complete gun teardown isn't necessarily needed, but old habits are hard to break.
paint39.jpg

After a couple hours the paint was mixed up.
paint40.jpg

I added a small amount of activator to the base color. This is quite controversial and most don't feel it is necessary, but I'm in the camp of activating my base. Had a bad experience with paint creep years ago and just don't gamble any longer. Especially with the cost of paint supplies these days. HOLY **** talk about sticker shock as it's been a couple of years since I bought a pint of paint.
paint41.jpg

First very light coat of color on the fender. You are not going to full coverage, slow buildup yields the best results. In a small blend area such as this the gun adjustments must be fine tuned to get the fan width as well as volume needed to build depth and create the blend. If you just turn the fan down, you'll have way too much volume and end up piling the color on and it will end up running onto the ground.
paint42.jpg

A couple of coats later I am pleased with the progress of the blend.
paint47.jpg

I grabbed the sun gun and verified it looks like a nice blend once the solvent flashed off.
paint45.jpg

Still more to come.
This is something I really would like to learn. Notes will be taken from watching these posts.

Thanks for stellar content Mike!
 

bigdave_185

Well-known member
Joined
Feb 14, 2021
Messages
443
Location
Utah
Thank you Scott. I appreciate the feedback. Sometimes I don't know what is valuable and what isn't, so I don't want to waste my time nor other people's time trying to wade through it. If it's helpful then it's worth posting.
Like about anything, you seem to take the project big or small, provide enough detail to give a guy some confidence that he could follow your step and like these door handles give it a try. Fifteen years ago I would have come across this and been all over it! I’d be out in the garage taking all kids I’d stuff off the truck to paint match them. Especially where these generations of trucks gm put that nasty black plastic everywhere!

It’s much appreciated Mike.

Super glad you didn’t do black like I was thinking
 
OP
Z

zmotorsports

ALLIANCE MEMBER
Joined
Oct 20, 2009
Messages
21,477
Location
Northern Utah
This is something I really would like to learn. Notes will be taken from watching these posts.

Thanks for stellar content Mike!

Thanks for your continued support Anders. Painting is not necessarily something I enjoy these days, but there are too many corners to be cut by those looking to turn a quick buck so it forces me to continue on my own fleet to ensure that it is done properly. My son mentioned a spot on the hood of his truck that we need to touch up at some point as well. Fortunately, I still have a little left over Torch Red from when we did his roof and tops of doors so it should be a relatively easy blend and then re-clear the entire hood.

I really enjoy your updates Mike. Staying busy is better than watching tv.

Thank you Aaron. I appreciate you continuing to follow along and I completely agree. It's nice to stay productive and busy.

Mike, really appreciate the details, and as others have mentioned, I may never do the same but seeing the details, really brings to life the time quality work requires.
PS as an aside, the body guy informed me the gallon of paint for the baja was only $2200. o_O

Thanks Joel. Yeah, paint has gone through the roof lately. I remember back when I was doing a lot of painting I would get upset when PPG would have an annual 7% increase year over year. The last paint I purchased was for my son's WJ and his 2002 2500HD Duramax a couple of years ago and I got sticker shock then.

My local supplier whom I worked for back in 1985-1988 has over the years scaled down from selling auto parts to now solely paint and body supplies. They were also recently sold to a national corporation. When I called them, gave them my account # and paint code I mentioned I would like a cost of a PINT of that mixed up in DBC from PPG. I was shot a price of $179 for a freakin' pint..... I knew they carried Omni which is PPG's economy line but I haven't heard that it covers the greatest so I inquired about their Omni Plus, which is their mid-level and what most paint and body shops around are using. It was much more reasonable, but still quite expensive for a pint @ $74.00 so that is what I went with. It laid now nice enough and covered well, but if I were doing a hot rod or even a higher end project vehicle I would bite the bullet and use the higher end PPG DBC basecoat and then cover it with the SPI Universal Clear which I have really fallen in love with. It is like the old PPG Concept clear from the 80's and 90's, a high quality, high solids clear that lays down beautifully, cuts & buffs beautifully and have a deep high gloss when cured. The PPG clears solids have really dropped over the past couple of decades and not what they used to be, I was pleased to start using SPI's clear, epoxies and 2K primer.
 
OP
Z

zmotorsports

ALLIANCE MEMBER
Joined
Oct 20, 2009
Messages
21,477
Location
Northern Utah
Like about anything, you seem to take the project big or small, provide enough detail to give a guy some confidence that he could follow your step and like these door handles give it a try. Fifteen years ago I would have come across this and been all over it! I’d be out in the garage taking all kids I’d stuff off the truck to paint match them. Especially where these generations of trucks gm put that nasty black plastic everywhere!

It’s much appreciated Mike.

Super glad you didn’t do black like I was thinking

Thank you Dave, I appreciate that. I hope the ramblings I provide give enough detail to the process and others can benefit.
 
OP
Z

zmotorsports

ALLIANCE MEMBER
Joined
Oct 20, 2009
Messages
21,477
Location
Northern Utah
Shifting gears from paint work to Jeep maintenance, sorry guys, I'm all over the place lately in what I'm working on.

My son reached out to me yesterday stating he needs to get his truck in the shop and do a fluid replacement on his truck's axles so before he ties up the lift, I figured I'd rack my Jeep and give it a once over seeing as how we are entering our Jeeping and RV'ing season.

After giving it a once over and checking bolt torque on the suspension fasteners, I looked through my notes and determined my axles were also due for a service. The rear has right @ 25k since I replaced the gears due the pinion gear issue back in April of 2022 so it was time to drain and fill and the front end has a bit more mileage on them so it was definitely due.

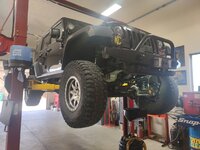
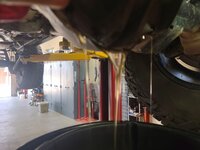
Jeep racked and ready to drain front differential fluid after inspecting the chassis components.
jeep1.jpg

Bolts removed from the diff. cover as well as the oil level and fill plugs removed. It is easier to remove them while still bolted to the axle vs. wrestling with the cover on the workbench.
jeep2.jpg

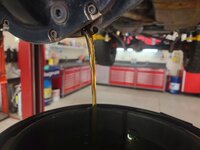
The oil still looks pretty good, even if I did go slightly over on my service intervals. In the FSM it states 40k mile service intervals for the fluid, but on my Jeep I shoot for around 25k-30k due to the abuse I put it through. The front 4.56:1 gears have about 70k on them now and about 36k since last fluid change and the oil is still relatively light in color.
jeep3.jpg

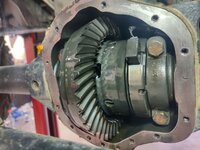
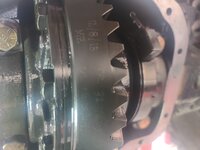
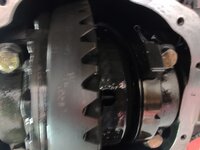
With the cover off, the gears are in pristine condition with a beautiful wear pattern.
jeep4.jpg

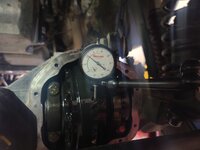
Backlash still measures at a fat .008".
jeep5.jpg

Notes from when I installed the 4.56 gears just before I dropped in the 6.2 liter LS engine.
jeep6.jpg

It's hard to see due to the picture being blurry, but at time of setup the backlash was right @ .008".
jeep7.jpg

I also grabbed a torque wrench and double checked the bearing cap fasteners.
jeep8.jpg

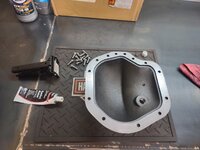
With everything inside the front axle looking good, I turned to cleaning the differential cover and fasteners, prepping for some sealant. The gear oil in the background is not for this project as I have been running the Valvoline 75W-140 synthetic in my Jeep axles.
jeep9.jpg

Housing cleaned and ready to accept the cover.
jeep10.jpg


Stay tuned for a few more pictures.....
 
OP
Z

zmotorsports

ALLIANCE MEMBER
Joined
Oct 20, 2009
Messages
21,477
Location
Northern Utah
Continuing on.

Cover torqued back in place. I like to let them set overnight and the RTV cure before filling with fluid when at all possible. I also like to take a razor blade and trim back the small ribbon of sealant that gets squeezed out from between the housing and cover once cured. If you noticed the deep grooves in the Dynatrac cover above, these are to retain some sealant rather than a perfectly smooth surface, so it is a good idea when cleaning these covers not to use powered gasket removal methods as they can removed these sealant retaining grooves which can result in having a difficult time sealing.
jeep11.jpg

Now moving on to the rear axle. The fluid actually still looks fantastic coming out of the rear end.
jeep12.jpg

Very, very little sludge or buildup on the magnet.
jeep13.jpg

Basically just normal wear.
jeep14.jpg

By this time the wife arrived home from work so I lowered the Jeep so the tires are just in contact with the ground and on a lower lock and called it a night.
jeep15.jpg


Thanks for looking.
 
OP
Z

zmotorsports

ALLIANCE MEMBER
Joined
Oct 20, 2009
Messages
21,477
Location
Northern Utah
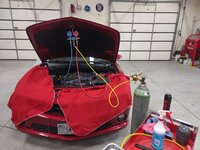
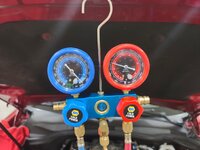
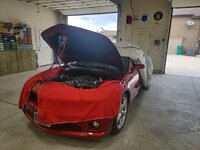
A couple weeks ago the wife and I took the Camaro for a drive and noted the A/C wasn't working. I had an issue last year as well and found a seal at the condenser that I repaired but during the vacuum process prior to charging it held fine. I recharged the system last May/June timeframe and it was great all summer and into the fall. However, sometime over the winter I guess it lost enough that the system wouldn't engage. I had a few minutes last night so I threw the gauges on it and sure enough, only had about 10PSI of pressure. 🤬
ac1.jpg

I grabbed the bottle of nitrogen and pressurized the system to check for leaks.
ac2.jpg

Approx. 150 PSI usually is enough to find leaks.
ac3.jpg

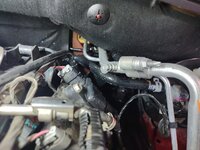
I sprayed every connection point and each hose crimp down with soapy water and found no bubbles, NONE. After being a bit frustrated and going over each connection point multiple more times and not finding anything it hit me, I wonder if I have a Schrader valve leaking and with the gauges attached, the Schrader is technically removed from the equation. I closed off the high side port first and sprayed around it as I have heard on these Fifth Gen Camaros that it is a common leak point and nothing at all. I then turned my attention to the low side port and BINGO!
ac4.jpg

Bubbles galore coming out of the low side port.
ac5.jpg

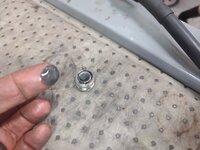
I bled the pressure, removed the Schrader valve to see if it looked like one that I may have on hand.
ac6.jpg

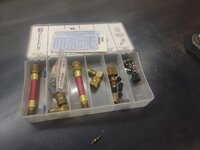
Sure enough, I grabbed my old A/C adapter set and I had a few new Schrader valves available.
ac7.jpg

I installed a new one, repressurized the system with nitrogen to 150 PSI again and retested. No leaks this time.
ac8.jpg

I figured I would let it sit overnight and check it after 24-hours before recharging the system.
ac9.jpg


As I was preparing to close up the shop, the wife pulled in and said her left turn signal was flashing very rapidly. Sure enough a turn signal bulb was out. I also noted the left side marker light was not illuminating. I had to nearly pull half the front of the car apart to get to both bulbs and of course, I had neither on hand. With my local NAPA closed for the evening, I was forced to run to the new Autozone a couple of miles away. It was actually quite a nice clean store. It is only a couple of years old but this was the first time I had stepped foot into it.

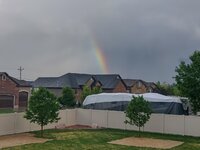
I grabbed the bulbs, then got hit with sticker shock at the counter and upon arriving home put the wife's car back together. Just as I was finishing it up, the kids stopped by so I was able to visit and play with my grandson for little bit. We no sooner went into the house when the skies opened up again and we had this beautiful rainbow just to our south.
ac10.jpg


Thanks for looking.
 
OP
Z

zmotorsports

ALLIANCE MEMBER
Joined
Oct 20, 2009
Messages
21,477
Location
Northern Utah
Kind of sad when fixing the A/C is easier than changing a bulb.

Agreed. I hadn't thought of it like that. Now I'm even more frustrated with the time spent replacing the bulbs. :unsure: That being said, my wife really likes her Acura so I am glad she told me as soon as she noticed something. It is about ready to turn over 200k miles here shortly and still has a lot of life left in it. Our plan it to make it last a few more years while she's commuting and then upgrade at or close to retirement.
 

Wiz02

Well-known member
Joined
Jul 13, 2007
Messages
2,399
Location
Southeastern PA
A couple weeks ago the wife and I took the Camaro for a drive and noted the A/C wasn't working. I had an issue last year as well and found a seal at the condenser that I repaired but during the vacuum process prior to charging it held fine. I recharged the system last May/June timeframe and it was great all summer and into the fall. However, sometime over the winter I guess it lost enough that the system wouldn't engage. I had a few minutes last night so I threw the gauges on it and sure enough, only had about 10PSI of pressure. 🤬
ac1.jpg

I grabbed the bottle of nitrogen and pressurized the system to check for leaks.
ac2.jpg

Approx. 150 PSI usually is enough to find leaks.
ac3.jpg

I sprayed every connection point and each hose crimp down with soapy water and found no bubbles, NONE. After being a bit frustrated and going over each connection point multiple more times and not finding anything it hit me, I wonder if I have a Schrader valve leaking and with the gauges attached, the Schrader is technically removed from the equation. I closed off the high side port first and sprayed around it as I have heard on these Fifth Gen Camaros that it is a common leak point and nothing at all. I then turned my attention to the low side port and BINGO!
ac4.jpg

Bubbles galore coming out of the low side port.
ac5.jpg

I bled the pressure, removed the Schrader valve to see if it looked like one that I may have on hand.
ac6.jpg

Sure enough, I grabbed my old A/C adapter set and I had a few new Schrader valves available.
ac7.jpg

I installed a new one, repressurized the system with nitrogen to 150 PSI again and retested. No leaks this time.
ac8.jpg

I figured I would let it sit overnight and check it after 24-hours before recharging the system.
ac9.jpg


As I was preparing to close up the shop, the wife pulled in and said her left turn signal was flashing very rapidly. Sure enough a turn signal bulb was out. I also noted the left side marker light was not illuminating. I had to nearly pull half the front of the car apart to get to both bulbs and of course, I had neither on hand. With my local NAPA closed for the evening, I was forced to run to the new Autozone a couple of miles away. It was actually quite a nice clean store. It is only a couple of years old but this was the first time I had stepped foot into it.

I grabbed the bulbs, then got hit with sticker shock at the counter and upon arriving home put the wife's car back together. Just as I was finishing it up, the kids stopped by so I was able to visit and play with my grandson for little bit. We no sooner went into the house when the skies opened up again and we had this beautiful rainbow just to our south.
ac10.jpg


Thanks for looking.
Mike, I appreciate the write up on your 5th Gen Camaro's ac. I have a 5th Gen Camaro too.

I used the Camar's ac for the first time in a long while a few days ago and it seemed to take too long to cool down the interior.

I wrote off the issue as it was sunny but only in the mid to high 80's. Now that I know that the charging ports are a known leak area, I will keep an eye on it.

Thanks for the information.
 

gorilla

Well-known member
Joined
Dec 13, 2007
Messages
1,656
What's your opinion about adding some die when you top up your ac system? I've found more than one Leakey schrader valve that way. Do you feel OK topping up a 134A system by pressure?
 

rd65

Well-known member
Joined
Sep 29, 2017
Messages
2,845
Location
Granite Falls, WA
I'm sure this info is in here somewhere but I will cheat and just ask. What do you use for you oil filter needs on your gasoline vehicles, brand wise. It seems some of my go-to filter companies have been acquired and gone the wrong way quality wise. I have been running the Kirkland synthetic oil in our three more modern rigs but havent settled on an oil for my old push rod flat tappet Ford in my F350. It is still in a holding pattern, waiting for me to get back to engine/trans installation. Lots of good content on here. I surely dont have your drive and attention to detail.
 

signcrafter

Well-known member
Joined
May 9, 2012
Messages
12,531
Think my malibu calls for 3 hours of labor to change a bulb, have to pull front clip off. We also just got an autozone a few months ago and it's a pretty nice store. It's nice to have options since each parts store chain seems to carry different or unique things. My napa carries bulbs behind the counter for shops. They come in packs of 10 or so and the packaging is plain, why they keep them on the back shelf instead of out front with the other individual packs of bulbs. But they are significantly less then the ones that come in colorful packaging. I think they will sell them individually but I always just buy the whole pack and keep them on hand. The napa store manager was nice enough to give me a wall cabinet for bulbs a few years back. I also order 10 packs(or whatever size pack a particular bulb comes in) from rockauto when I place an order and need a bulb.
 
OP
Z

zmotorsports

ALLIANCE MEMBER
Joined
Oct 20, 2009
Messages
21,477
Location
Northern Utah
Bleeding brakes was my least enjoyable aspect of the hobby, but now A/C system leaks.

Amen Justin, you're preaching to the choir my friend. I don't particularly care for A/C work in general, but can't bring myself to take it anywhere. I've been eyeing recovery machines but after the lift table I purchased last year it's a hard pill to swallow. Especially when I have a friend who will let me use his recovery machine, then I can either use his machine to recharge or I will recharge in my shop.


What's your opinion about adding some die when you top up your ac system? I've found more than one Leakey schrader valve that way. Do you feel OK topping up a 134A system by pressure?

Personally, I'm not a fan of die in an A/C system. I've added a little hear and there but prefer not to in order to keep the systems as clean and pure as possible, but that's just my opinion.

This was the first Schrader valve I have personally seen leak. I've heard of them, but this was a first for me. Maybe I've just been lucky.

As for topping off by pressures, yes, I am comfortable going off of pressures. I much prefer to evacuate a system and weigh the exact amount going in, but in those instances where it just needs a little "topping off", I feel comfortable going off of pressures.


I'm sure this info is in here somewhere but I will cheat and just ask. What do you use for you oil filter needs on your gasoline vehicles, brand wise. It seems some of my go-to filter companies have been acquired and gone the wrong way quality wise. I have been running the Kirkland synthetic oil in our three more modern rigs but havent settled on an oil for my old push rod flat tappet Ford in my F350. It is still in a holding pattern, waiting for me to get back to engine/trans installation. Lots of good content on here. I surely dont have your drive and attention to detail.

Thank you for the kind words.

As for filtration needs, I have been a longtime Wix fanboy personally. When Mann-Hummel was making the Wix filters marketed under the NAPA Gold line that was mostly what I have been running for the past probably couple decades now. I really got a good deal on them from my local NAPA, especially when they held their annual filter sales where I would stock up for about a year's needs. Now that the NAPA Gold filters are no longer made by Mann-Hummel I will probably still stick with the Wix name brand filters, I will just have to source them elsewhere. I still have quite a few remaining as I stocked up when I heard that the Wix filters made by Mann-Hummel were no longer going to be supplying the NAPA Gold filters.

I also have had good luck with AC Delco, Motorcraft, Donaldson and Baldwin, but the last two can be a bit more problematic to find on short notice. I have also seen and read some articles about how much testing Amsoil does on their filters, but I have had no personal experience with them. For diesel applications I have used Parker, Fleetguard, Baldwin, Cummins and CAT filters all with excellent results and confidence.

Now that being said, there is also an argument to be made for the ones made offshore. I can't believe I just said that. :rolleyes: I should be shot. Those who know me personally, know how I feel about products made in the good 'ole U.S of A, so rather than getting banned for being political, I'll just leave that there. ;) Now I am not suggesting that we should run out and buy from overseas manufacturers, quite the opposite in fact, however, the manufacturing facilities overseas are given specifications to meet by the mother ship and "can" build quality when directed to. Many items even though they don't match up to some of the high quality that many of us here expect and demand, they do in fact meet the OEM's specifications on things like flow rates and micron size. I'll just leave that there and say that even the overseas ones "can" protect as designed in most cases. Whether we choose to use them is completely a personal choice.
 
OP
Z

zmotorsports

ALLIANCE MEMBER
Joined
Oct 20, 2009
Messages
21,477
Location
Northern Utah
Think my malibu calls for 3 hours of labor to change a bulb, have to pull front clip off. We also just got an autozone a few months ago and it's a pretty nice store. It's nice to have options since each parts store chain seems to carry different or unique things. My napa carries bulbs behind the counter for shops. They come in packs of 10 or so and the packaging is plain, why they keep them on the back shelf instead of out front with the other individual packs of bulbs. But they are significantly less then the ones that come in colorful packaging. I think they will sell them individually but I always just buy the whole pack and keep them on hand. The napa store manager was nice enough to give me a wall cabinet for bulbs a few years back. I also order 10 packs(or whatever size pack a particular bulb comes in) from rockauto when I place an order and need a bulb.

I agree Scott, and had my local NAPA still been open at 7pm last night that is where I would have gone. Unfortunately, the NAPA store closes at 6pm here and my wife usually doesn't get home until after that so by the time I racked her car, found out what I needed it was far too late to hit the NAPA store. I was just a bit sticker shocked to see a 2-pack of 168 bulbs be $10.00 at Autozone where most of the bulbs I've been buying are a couple bucks each from NAPA.

WOW! I think I just sounded like my dad right there. :bounce:
 
To avoid these ads, REGISTER NOW!
Top Bottom