To avoid these ads, REGISTER NOW!

Between 265 & 485 SQ/FT Nick's Two-Car Detached Vdub Garage

Workspaces sized between 265 and 485 squarefeet.
OP
N

nicholam77

Well-known member
Joined
Dec 18, 2016
Messages
2,671
Location
Minneapolis, MN
Can you use a 360° laser level to create a consistent height on the molding throughout the room, and then scribe to the floor somehow?

Possibly? I'd have to pick an area to "start". I wanted to do this back wall first so I can get my office desk back in place. But I don't know if it's the 'best' starting point.

I don't have a laser level, but my FIL does. Not sure if it's 360° or not.

I am also thinking... if that's the worst dip in the room, I might just **** it up and have that section a bit out of level. Half of it will be covered by my desk anyways. I might scribe in a way that still leaves a bit of a gap in that corner (like 1/4") so it's not as extreme of a tilt. I think I can live with one bad corner, I just hope the rest of the room is not that wonky.
 
To avoid these ads, REGISTER NOW!

cccoltsicehockey

Well-known member
Joined
Apr 3, 2014
Messages
1,414
Location
Charlotte, NC
Was thinking belt sander since it's MDF


That would be an option if the gaps were fairly minimal. Unfortunately they are not. In that long board above, some of the gaps are 1/4" or more which IMO is too much for caulk. And then below I'm about to show a much worse example. 🤣


Thanks Jar. Planning on it, or possibly adding the back bevel when I rough remove the material from the scribe. Depends on how much I need to take off but it's looking like it's going to be a lot.


So, yeah... it's not going great so far. 🤣

I borrowed my dad's old miter saw, but then decided I didn't want the dust mess inside, and didn't want to be carrying the long pieces in and out. So I'm going to use the track saw like a maniac!!!

IMG-5380.jpg

With these super long pieces it's almost easier to do it on the floor anyways.

IMG-5383.jpg

It's been a long time since I've used these tools.

IMG-5382.jpg
IMG-5385.jpg

And the first board cut to length:

IMG-5386.jpg

Notice any problems???

IMG-5388.jpg

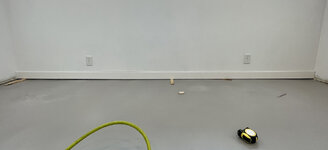
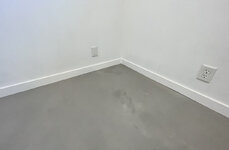
WTF I am supposed to do here?!? It's just over 3/4" dip, pretty much just in that right corner. I don't even know if shoe would cover it.

With my plan of setting each end to 4" off the floor, and then taking an 1" off with the scribe... this would result in a run that's 3/4" out-of-level. Making the end not perpendicular. Maybe that's better than continuing a scribe around the room? I can't visualize how obvious it would be if it's 3/4" off over 12'.

Also I don't understand why there's such a big dip in the corner when we did like 5 layers of self leveler :rolleyes:

Is that the only spot that large? Could you buy two taller pieces maybe for the two walls that meet in that corner so that you don't have to make the base so small to account for that corner?

That is crazy with the amount of times they used leveler to have anything that off. Wavy is one thing but that is nuts. Sorry you are having to deal with that.
 

sawduststeve

Well-known member
Joined
Oct 7, 2016
Messages
2,139
Location
Havering-Atte-Bower,London/Essex boarders, England
Nick,
1712083041338.jpeg
It’s a long and a lot to scribe in, I would be inclined to cut a wedge shaped piece and glue it to the bottom. You then have to start the next piece at the same height.
Now you’re into sanding joints and hoping they don’t show.
Or, one screw fixing far left and the kids and wife standing on the skirting far right, and get a fix in it quick.

Sorry to see your issues.
Steve 🍻
 
OP
N

nicholam77

Well-known member
Joined
Dec 18, 2016
Messages
2,671
Location
Minneapolis, MN
Is that the only spot that large? Could you buy two taller pieces maybe for the two walls that meet in that corner so that you don't have to make the base so small to account for that corner?

I don't know why the self-leveler didn't take care of it, but I do know that corner was originally sloped like that. That's where I had the water issues before.

I am going to do some checking around the room and see if there are any other major issues.

Good thought on getting a taller piece. Yes I could... it just would mean another trip to Home Depot as well as borrowing my dad's truck and he is out of town at the moment. It's a good idea, though, I'll think about it.

That is crazy with the amount of times they used leveler to have anything that off. Wavy is one thing but that is nuts. Sorry you are having to deal with that.

Right?! My thoughts exactly.

It’s a long and a lot to scribe in, I would be inclined to cut a wedge shaped piece and glue it to the bottom. You then have to start the next piece at the same height.
Now you’re into sanding joints and hoping they don’t show.

Oooh, I like the wedge idea. I could still scribe but just not take off as much material, and fill in whatever's left in that corner with a piece glued on the bottom. I think I want to keep all the ends of the boards at 3" height so I'm not following the 'height' around the whole room, but cheating this one corner seems like a good idea.

I know I might have to do some sanding / custom fitting of my joints with this approach, but at least it's just MDF, and paint grade. I think sanding, caulk, and paint will be able to hide any lousy joinery better than the waviness of the floor if I don't scribe it. I just know it's would bug me.

Or, one screw fixing far left and the kids and wife standing on the skirting far right, and get a fix in it quick.

Ha, I like the way you think 🤣
 
OP
N

nicholam77

Well-known member
Joined
Dec 18, 2016
Messages
2,671
Location
Minneapolis, MN
Well I pretty much executed my scribing plan. After shimming that board against the back wall, I decided it was best to have the hump in the middle and equal gaps on the ends so the right side wasn't so severe.

IMG-5389.jpg
IMG-5393.jpg

Then I tacked it in place at a height 4" off the floor at each end, and drew a scribe line.

IMG-5392.jpg
IMG-5398.jpg

You can see at the end, the 4" height minus the ~1" scribe block leaves ~3" of baseboard left at a neutral position.

IMG-5395.jpg

I 'hogged' out the waste with my circular saw set to a 45° bevel. To do this I made use of my MFT and new clamps:

IMG-5400.jpg
IMG-5401.jpg

This gives a nice overhang.

IMG-5403.jpg

About halfway through my skilsaw started smoking (or the MDF did?) and the blade started wobbling). This freaked me out so I stopped and did the rest with the orbital sander. Took awhile but the 45° helped.

IMG-5410.jpg

A *few* less than perfect spots, but all-in-all it fit well!

IMG-5406.jpg

The adjacent board I also had to scribe, but was much less severe, so I was able to remove the waste on a 45° with the table saw.

IMG-5408.jpg

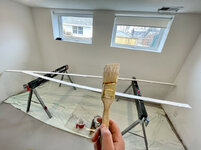
Painting.

IMG-5419.jpg

And some new tools:

ProFinder5000+

IMG-5412.jpg

This appears to be a Franklin Sensors rebrand from Menards. It even calls it Franklin in the description. Only $30 vs. $60 or so for the Franklin version on Amazon.

It works awesome! Can't believe I waited so long to get a stud finder like this!

Ope... found one!

IMG-5417.jpg

Sorry, as a dad, I had to.

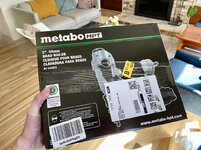
Metabo HPT 18 gauge brad nailer

IMG-5420.jpg

To replace my old Husky gun that exploded on me.

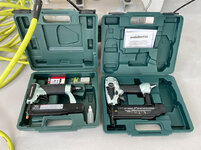
I've been so happy with my Metabo HPT 23 gauge pin nailer I got for a steal that I wanted to stick with the brand. They come in some pretty decent blow-moulded cases, are lightweight, and perform well.

IMG-5429.jpg

After marking the studs on the floor with blue tape, I pinned the boards in. In the past I've used 16 gauge for baseboard, but I just don't think it's needed. 2" 18 gauge is what I used. Hopefully it will hold. Smaller holes, less air, quieter work.

And touch up paint, and all of a sudden I've spent like 2 days on 2 boards lol.

IMG-5436.jpg
IMG-5437.jpg

Yeah the back one gets a little skinny in the middle and my scribes aren't perfection, but it's close enough!

The main thing is I was able to set up my desk, and get the card table out of our bedroom that I've been using for weeks in the interim!

IMG-5440.jpg

The pink smart bulb is a TP-Link Kasa RGB bulb I got for $7. It serves as a silent notification light. It turns pink for 10sec when a person is detected by our front doorbell, and blue for 10sec if the doorbell is rang. Still coming up with other use cases. I plan on making a 3D printed diffusion cover for it.

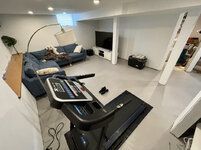
Other than that I've moved the treadmill and some other things to the TV side.

IMG-5435.jpg

A long ways to go with the trim, doors, and cabinets, but at least a few things are functional again.

Hope everyone has a great weekend!

🍻
 

jonshonda

Well-known member
Joined
Jul 17, 2017
Messages
4,747
Location
Wisconsin
Nice work Nick! Metabo acquired Hitachi fairly recently so if you are looking for more info in the future you can search up Hitachi.

When I saw you had the track saw out and insulation on the floor I was curious how long you would be able to endure such torture. Good too see you moved up to a comfortable working height setup eventually. haha

I was working on building a new king sized bed frame out of 2x10's this weekend and forgot what a challenge working with big material like that can be. Dimensional lumber isn't finished to a furniture quality level, and wood of that size moves a lot and requires lots of sanding as I don't have (or really NEED) a planar. Also too wide for my 10" miter saw so out comes the worm drive circ saw. Once all the wood filler was applied and sanded smooth and tacked clean, I painted everything.

When I selected the 2x10's from Menards they were as straight as one might expect from wood that size. Well they didn't stay straight for too long. I've been asked a few times from friends why I have so many various clamps, and I wish I would have taken a time lapse of all the clamping that was required to get the mitered corners to bolt up straight. Long story short working by myself off saw horses I was able to get it finished. Now I just need to take it all apart again and get it upstairs.
 

kaymccampbell

Well-known member
Joined
Feb 27, 2015
Messages
29,583
Location
Upstate New York
Nice work Nick! Metabo acquired Hitachi fairly recently so if you are looking for more info in the future you can search up Hitachi.

When I saw you had the track saw out and insulation on the floor I was curious how long you would be able to endure such torture. Good too see you moved up to a comfortable working height setup eventually. haha

I was working on building a new king sized bed frame out of 2x10's this weekend and forgot what a challenge working with big material like that can be. Dimensional lumber isn't finished to a furniture quality level, and wood of that size moves a lot and requires lots of sanding as I don't have (or really NEED) a planar. Also too wide for my 10" miter saw so out comes the worm drive circ saw. Once all the wood filler was applied and sanded smooth and tacked clean, I painted everything.

When I selected the 2x10's from Menards they were as straight as one might expect from wood that size. Well they didn't stay straight for too long. I've been asked a few times from friends why I have so many various clamps, and I wish I would have taken a time lapse of all the clamping that was required to get the mitered corners to bolt up straight. Long story short working by myself off saw horses I was able to get it finished. Now I just need to take it all apart again and get it upstairs.
Remember to label the corners.
 

cccoltsicehockey

Well-known member
Joined
Apr 3, 2014
Messages
1,414
Location
Charlotte, NC
Those baseboards came out great. Nice work. I have also had similar issues with MDF smoking over the years. That stuff seems to be really particular in how it is cut. I used to build a ton of sub woofer boxes in high school for friends.

I think I am going to steal your idea with that light. I have been looking to build a notification for our backyard gates if they have been left open so the dogs don't get out. That might be the ticket.
 
OP
N

nicholam77

Well-known member
Joined
Dec 18, 2016
Messages
2,671
Location
Minneapolis, MN
Nice update Nick, kudos.
Great update Nick.
Nice work Nick!

Thanks, all!

When I saw you had the track saw out and insulation on the floor I was curious how long you would be able to endure such torture. Good too see you moved up to a comfortable working height setup eventually. haha

Ha, I'm still working on the floor. It's just too much to be finagling a 16' piece up the stairs, out the back door and screen door, out to the garage, open the garage door, and back again just to make a cut. And sometimes I like to sneak up on cuts. So I still have the track saw and vac and foam insulation on the floor inside. And table saw + sander outside for the scribes once the board is fitted.

I've even been using the track saw for the miters. o_O

IMG-5431.jpg

I feel your pain on the 2x10's and dimensional lumber. Even hardwood I've almost always struggling with twist, cupping, and general movement. That's one of the reasons I like to build with nice plywood so much, veneered the night stands etc... it's just less headache for me without a climate controlled shop or milling machines. Sounds like you got it done, though!

Those baseboards came out great. Nice work. I have also had similar issues with MDF smoking over the years. That stuff seems to be really particular in how it is cut. I used to build a ton of sub woofer boxes in high school for friends.

I think I am going to steal your idea with that light. I have been looking to build a notification for our backyard gates if they have been left open so the dogs don't get out. That might be the ticket.

Thanks!

That's a great idea for a 'status light'. Could also use for garage, shop door left open, laundry finished, trash day... pretty anything that has a 'status'. Obviously you need to be in the room where the light is, but it's pretty neat. The TP-link bulb is actually great and works well with Home Assistant. I believe there's a way to set it up locally (for now) but for some reason I think mine is using the cloud for the integration. Oh well, it's not critical.

I've been trying to come up with a way to do a light notification if my Garage Journal thread has an unread status 🤣

If you want something smaller, I know LIFX and Hue make RGB E12 / Candelabra base bulbs. And there's also this motion sensor with an independent RGB light if you have a ZigBee controller:


Not sure how good the motion sensor is, but it's AC powered so it would be perfect for a kitchen or similar and do double-duty motion + notification light and not need batteries.
 
OP
N

nicholam77

Well-known member
Joined
Dec 18, 2016
Messages
2,671
Location
Minneapolis, MN
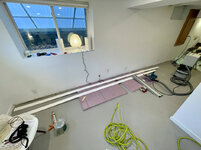
Progress has continued, albeit somewhat slowly. I've been scribing everything. Got this little run done (no caulk or paint yet).

IMG-5457.jpg

I managed to cut one of my already-scribed boards short on the miter and had to re-do. And also managed to shoot a brad out the side of this one:

IMG-5456.jpg

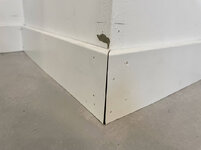
This little wall indent was not square at all. Even with the scribing and back-beveling, I'm struggling to get things to fit nice. Good thing it's paint grade.

IMG-5455.jpg

Some wood filler and sanding and and caulk and paint should hide it, but this is just not my game. If I wasn't worried it would cost me $5k for a :poop: job, I'd have definitely left it to the pros.

On the up side... the scribes have been coming out halfway decent. 🤣

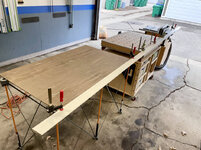
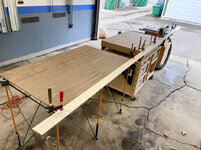
It is a process, though, especially on the long boards. Here I am clamping onto my table saw because I ran out of work surfaces to support.

IMG-5459.jpg

Table saw has been great to rip out the waste of the scribe, but I can only rip to the skinniest part of the scribe since I'm using the fence. So on one occasion I cut away some additional waste with the track saw on the ends. Less sanding that way.

IMG-5467.jpg

This stud finder is the bees knees.

IMG-5460.jpg

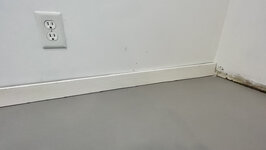
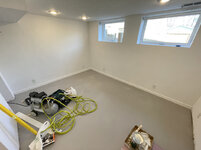
The white has brightened up the room so much.

IMG-5458.jpg
IMG-5462.jpg

I need to start getting some doors and closets ordered.

🍻
 

cccoltsicehockey

Well-known member
Joined
Apr 3, 2014
Messages
1,414
Location
Charlotte, NC
Thanks!

That's a great idea for a 'status light'. Could also use for garage, shop door left open, laundry finished, trash day... pretty anything that has a 'status'. Obviously you need to be in the room where the light is, but it's pretty neat. The TP-link bulb is actually great and works well with Home Assistant. I believe there's a way to set it up locally (for now) but for some reason I think mine is using the cloud for the integration. Oh well, it's not critical.

I've been trying to come up with a way to do a light notification if my Garage Journal thread has an unread status 🤣

If you want something smaller, I know LIFX and Hue make RGB E12 / Candelabra base bulbs. And there's also this motion sensor with an independent RGB light if you have a ZigBee controller:


Not sure how good the motion sensor is, but it's AC powered so it would be perfect for a kitchen or similar and do double-duty motion + notification light and not need batteries.
Those lights are really cool. I have so far stayed ZWave for everything but might have to order one of those. I have a SmartThings hub still so it does both I believe. Still haven't figured out my hardware path to moving to HomeAssistant full time. There is an outlet right next to our backdoor and that would be perfect place to have the notification light. Appreciate the link.
 
OP
N

nicholam77

Well-known member
Joined
Dec 18, 2016
Messages
2,671
Location
Minneapolis, MN
I have so far stayed ZWave for everything but might have to order one of those. I have a SmartThings hub still so it does both I believe. Still haven't figured out my hardware path to moving to HomeAssistant full time. There is an outlet right next to our backdoor and that would be perfect place to have the notification light. Appreciate the link.

ZWave is my preferred protocol as well. It just works. But it's usually expensive and not as many options for hardware. I try to stick to Zwave or ZigBee, but will occasionally get a WiFi or even cloud-based device if it's compatible and cheap depending on the usage. Especially if it's for something like a notification light. No way I'm spending $50 on a single Hue RGB bulb for that.

All my hardwired light switches are Zwave, and all my battery powered sensors are ZigBee from a known / reliable brand.

SmartThings hub does have a ZigBee radio, and it works well. I'm assuming there is a SmartThings driver for that Third Reality motion sensor plug light, but you might want to look it up if you're actually going to get it because pretty sure it will need a custom driver.

The easiest way to move to Home Assistant full on would be to set up the SmartThings integration and use your SmartThings hub purely as a device bridge for your Zwave and ZigBee devices. Then connect any WiFi or LAN api devices direct to Home Assistant.

I too have a desire to get everything under one roof in Home Assistant because right now I have devices and automation code on both HA and Hubitat, and also components in HomeKit. I've been reluctant to change anything because it's all been working pretty solid, but it's kind of a cluster in terms of keeping track of stuff and troubleshooting on the occasion something malfunctions. And then there's the matter of rebuilding the 60+ WebCoRE pistons I have in the native HA automation... one day...
 

cccoltsicehockey

Well-known member
Joined
Apr 3, 2014
Messages
1,414
Location
Charlotte, NC
ZWave is my preferred protocol as well. It just works. But it's usually expensive and not as many options for hardware. I try to stick to Zwave or ZigBee, but will occasionally get a WiFi or even cloud-based device if it's compatible and cheap depending on the usage. Especially if it's for something like a notification light. No way I'm spending $50 on a single Hue RGB bulb for that.

All my hardwired light switches are Zwave, and all my battery powered sensors are ZigBee from a known / reliable brand.

SmartThings hub does have a ZigBee radio, and it works well. I'm assuming there is a SmartThings driver for that Third Reality motion sensor plug light, but you might want to look it up if you're actually going to get it because pretty sure it will need a custom driver.

The easiest way to move to Home Assistant full on would be to set up the SmartThings integration and use your SmartThings hub purely as a device bridge for your Zwave and ZigBee devices. Then connect any WiFi or LAN api devices direct to Home Assistant.

I too have a desire to get everything under one roof in Home Assistant because right now I have devices and automation code on both HA and Hubitat, and also components in HomeKit. I've been reluctant to change anything because it's all been working pretty solid, but it's kind of a cluster in terms of keeping track of stuff and troubleshooting on the occasion something malfunctions. And then there's the matter of rebuilding the 60+ WebCoRE pistons I have in the native HA automation... one day...
Good call to make sure it has a driver before ordering.

I currently have the SmartThings integration setup. Also, have NabuCasa setup for cloud integration of using my GoogleHome as doorbell speakers for my Ubiquiti Doorbell cam. That has created a bit of annoyance though for voice control. The Google Home now sees the devices in HomeAssistant and SmartThings so when you ask it to turn off a light it says turn off two lights since everything is doubled. Hopefully, I can just break the SmartThings to GoogleHome association but I am scared that I might break something else I setup that I forget about.

It seems weird a bit but also not weird. I read an article the other day you basically need to build a disaster recovery document for you HomeAutomation setup setup like you would an actual business data center system once you get past a few devices. To be honest it is really true as some of the stuff I use on a regular basis I configured 5 or 6 or more years ago.

To your last point that is part of why I haven't moved things directly as well is its just working. My HomeAssistant is currently running as a container on my Synology NAS but I think I want to go to a full install with either a VM on the NAS or actually getting a RasPi to install it on. Either option requires me to commit though to a Zwave Dongle and I have yet to find one that I feel there are no negative reviews on. Mainly been looking at the ones from ZooZ. There is a pretty cool in-depth procedure as well where you can migrate everything from one hub to another and not actually have to do a re-learn of all the devices I have figured out.
 

jonshonda

Well-known member
Joined
Jul 17, 2017
Messages
4,747
Location
Wisconsin
Yeah you need to bring your miter saw downstairs!! haha

Also for brad nailing near outside corners you likely hit the metal corner bead buried under the plaster. Might want to either switch to a 16ga nail or pin nail the two pieces together BEFORE installing them. The one huge advantage you have working with white trim is it hides rookie mistakes very easily.
 
OP
N

nicholam77

Well-known member
Joined
Dec 18, 2016
Messages
2,671
Location
Minneapolis, MN
It seems weird a bit but also not weird. I read an article the other day you basically need to build a disaster recovery document for you HomeAutomation setup setup like you would an actual business data center system once you get past a few devices. To be honest it is really true as some of the stuff I use on a regular basis I configured 5 or 6 or more years ago.

I probably should have one of those documents but I have so much set up I don't even know how I'd write it all down. 🤣 Some of it is complex and it would be literal pages, haha.

So far I haven't exposed my HA to the internet, but I've been meaning to, because I've set up a nice little mobile dashboard I use a lot around the house. Would be nice to have that same access when out and about.

To your last point that is part of why I haven't moved things directly as well is its just working. My HomeAssistant is currently running as a container on my Synology NAS but I think I want to go to a full install with either a VM on the NAS or actually getting a RasPi to install it on. Either option requires me to commit though to a Zwave Dongle and I have yet to find one that I feel there are no negative reviews on. Mainly been looking at the ones from ZooZ. There is a pretty cool in-depth procedure as well where you can migrate everything from one hub to another and not actually have to do a re-learn of all the devices I have figured out.

That's fair. I first tried Home Assistant in a VM and I guess I'm just not that familiar with VM's but I didn't like it. I know a very popular solution is to run it in something like Proxmox on a more powerful computer. Personally I didn't have a bunch of other services to run, and was scared of the RasPi route (SD card corruption, lack of power, availability, etc), so I just got a cheap Lenovo mini PC on ebay for $50 and it's worked great so far. Sure, it's probably overkill, but I like knowing that it's overkill.

I can't recommend a stick because Hubitat handles my Zwave and Zigbee devices. The Zooz hardware I do have works well, and they are a good known company. I think the Sonoff dongles are popular, too.

Also for brad nailing near outside corners you likely hit the metal corner bead buried under the plaster. Might want to either switch to a 16ga nail or pin nail the two pieces together BEFORE installing them. The one huge advantage you have working with white trim is it hides rookie mistakes very easily.

Ooooh I bet you're right. I do have a 16ga nailer, but I'll probably just try to be more careful. I did attempt to glue these with CA glue before attaching but they didn't adhere very well for some reason, plus I cut straight 45° miters and the walls in that indent were way off. Probably should have been 47° or more. So it was never gonna happen haha. So yeah I could have done better, but the paint grade is a life saver for me.


Not much has happened on the basement. Next step is to get the doors and closets ordered I think, I took some measurements today.

I had a very busy weekend with my wife working, two afternoon kid birthdays, her dad's birthday one evening, swim lessons, and the first car show of the season!

IMG-5493.jpg

I did get one little punch-list item ticked off, which was a rocker switch blocker for the garbage disposal switched outlet under our kitchen sink.

IMG-5520.jpg

I've always hated how inconvenient it is to reach under the sink to run the disposal. And the recycling bin is usually in the way.

Naturally I solved for this by adding a smart plug to the disposal, and a Tradfri IKEA Zigbee remote on the wall next to the sink. This has worked great... but if the rocker switch accidentally gets turned off, which the recycling bin seems to bump it a lot... then the smart plug goes offline.

This nifty little 3d printed part prevents the switch from turning off, but can be easily rotated out of the way if manual operation is needed. Nice design.

IMG-5521.jpg

Now hopefully my wife will stop blaming my stupid smart home stuff instead of the recycling bin when it's not working! 🤣
 
To avoid these ads, REGISTER NOW!
OP
N

nicholam77

Well-known member
Joined
Dec 18, 2016
Messages
2,671
Location
Minneapolis, MN
Another (commercially available) solution is Wall Switch Guards. An example: https://www.amazon.com/dp/B07RBSGXZZ?tag=atomicindus08-20

Ah yes, those look good. I didn't really care what it looks like under the kitchen sink, but I'd maybe look for a commercial solution in main areas. I have 95% Decora paddle-style switches, but not that many of them are controlling smart bulbs.

Nick, great work with the skirting.

I would have been tempted to cut this in half with a 45deg cut, two shorter lengths being more manageable. Once glued, pinned and sanded the joint wouldn’t show.
The basement is coming together nicely.

Steve 🍻

Thank you, Steve. Cutting it in half would have definitely made it easier to carry in and out of the house, that's for sure. I have some more longer runs so maybe I'll try that next time.
 

Odinson

New member
Joined
Jan 30, 2018
Messages
2
Location
St. Louis Park, MN
I probably should have one of those documents but I have so much set up I don't even know how I'd write it all down. 🤣 Some of it is complex and it would be literal pages, haha.

So far I haven't exposed my HA to the internet, but I've been meaning to, because I've set up a nice little mobile dashboard I use a lot around the house. Would be nice to have that same access when out and about.


That's fair. I first tried Home Assistant in a VM and I guess I'm just not that familiar with VM's but I didn't like it. I know a very popular solution is to run it in something like Proxmox on a more powerful computer. Personally I didn't have a bunch of other services to run, and was scared of the RasPi route (SD card corruption, lack of power, availability, etc), so I just got a cheap Lenovo mini PC on ebay for $50 and it's worked great so far. Sure, it's probably overkill, but I like knowing that it's overkill.

I can't recommend a stick because Hubitat handles my Zwave and Zigbee devices. The Zooz hardware I do have works well, and they are a good known company. I think the Sonoff dongles are popular, too.


Ooooh I bet you're right. I do have a 16ga nailer, but I'll probably just try to be more careful. I did attempt to glue these with CA glue before attaching but they didn't adhere very well for some reason, plus I cut straight 45° miters and the walls in that indent were way off. Probably should have been 47° or more. So it was never gonna happen haha. So yeah I could have done better, but the paint grade is a life saver for me.


Not much has happened on the basement. Next step is to get the doors and closets ordered I think, I took some measurements today.

I had a very busy weekend with my wife working, two afternoon kid birthdays, her dad's birthday one evening, swim lessons, and the first car show of the season!

IMG-5493.jpg

I did get one little punch-list item ticked off, which was a rocker switch blocker for the garbage disposal switched outlet under our kitchen sink.

IMG-5520.jpg

I've always hated how inconvenient it is to reach under the sink to run the disposal. And the recycling bin is usually in the way.

Naturally I solved for this by adding a smart plug to the disposal, and a Tradfri IKEA Zigbee remote on the wall next to the sink. This has worked great... but if the rocker switch accidentally gets turned off, which the recycling bin seems to bump it a lot... then the smart plug goes offline.

This nifty little 3d printed part prevents the switch from turning off, but can be easily rotated out of the way if manual operation is needed. Nice design.

IMG-5521.jpg

Now hopefully my wife will stop blaming my stupid smart home stuff instead of the recycling bin when it's not working! 🤣
Can you share the file, or location of that switch blocker? That is a genius design
 

cccoltsicehockey

Well-known member
Joined
Apr 3, 2014
Messages
1,414
Location
Charlotte, NC
I probably should have one of those documents but I have so much set up I don't even know how I'd write it all down. 🤣 Some of it is complex and it would be literal pages, haha.

So far I haven't exposed my HA to the internet, but I've been meaning to, because I've set up a nice little mobile dashboard I use a lot around the house. Would be nice to have that same access when out and about.


That's fair. I first tried Home Assistant in a VM and I guess I'm just not that familiar with VM's but I didn't like it. I know a very popular solution is to run it in something like Proxmox on a more powerful computer. Personally I didn't have a bunch of other services to run, and was scared of the RasPi route (SD card corruption, lack of power, availability, etc), so I just got a cheap Lenovo mini PC on ebay for $50 and it's worked great so far. Sure, it's probably overkill, but I like knowing that it's overkill.

I can't recommend a stick because Hubitat handles my Zwave and Zigbee devices. The Zooz hardware I do have works well, and they are a good known company. I think the Sonoff dongles are popular, too.
Need to start doing some testing here shortly as I want to have a decision made when I start installing switches in the garage as to which system I am adding them too. A standalone mini PC is not a bad idea either. If my NAS is capable though likely go that route since it isn't really running anything else. I had not heard of Sonoff so will compare that one to the Zooz one. I definitely have had good luck with other Zooz devices so far.
 

wyndscreen

Member
Joined
Apr 9, 2024
Messages
16
I probably should have one of those documents but I have so much set up I don't even know how I'd write it all down. 🤣 Some of it is complex and it would be literal pages, haha.

So far I haven't exposed my HA to the internet, but I've been meaning to, because I've set up a nice little mobile dashboard I use a lot around the house. Would be nice to have that same access when out and about.


That's fair. I first tried Home Assistant in a VM and I guess I'm just not that familiar with VM's but I didn't like it. I know a very popular solution is to run it in something like Proxmox on a more powerful computer. Personally I didn't have a bunch of other services to run, and was scared of the RasPi route (SD card corruption, lack of power, availability, etc), so I just got a cheap Lenovo mini PC on ebay for $50 and it's worked great so far. Sure, it's probably overkill, but I like knowing that it's overkill.

I can't recommend a stick because Hubitat handles my Zwave and Zigbee devices. The Zooz hardware I do have works well, and they are a good known company. I think the Sonoff dongles are popular, too.


Ooooh I bet you're right. I do have a 16ga nailer, but I'll probably just try to be more careful. I did attempt to glue these with CA glue before attaching but they didn't adhere very well for some reason, plus I cut straight 45° miters and the walls in that indent were way off. Probably should have been 47° or more. So it was never gonna happen haha. So yeah I could have done better, but the paint grade is a life saver for me.


Not much has happened on the basement. Next step is to get the doors and closets ordered I think, I took some measurements today.

I had a very busy weekend with my wife working, two afternoon kid birthdays, her dad's birthday one evening, swim lessons, and the first car show of the season!

IMG-5493.jpg

I did get one little punch-list item ticked off, which was a rocker switch blocker for the garbage disposal switched outlet under our kitchen sink.

IMG-5520.jpg

I've always hated how inconvenient it is to reach under the sink to run the disposal. And the recycling bin is usually in the way.

Naturally I solved for this by adding a smart plug to the disposal, and a Tradfri IKEA Zigbee remote on the wall next to the sink. This has worked great... but if the rocker switch accidentally gets turned off, which the recycling bin seems to bump it a lot... then the smart plug goes offline.

This nifty little 3d printed part prevents the switch from turning off, but can be easily rotated out of the way if manual operation is needed. Nice design.

IMG-5521.jpg

Now hopefully my wife will stop blaming my stupid smart home stuff instead of the recycling bin when it's not working! 🤣

Really like this solution.....and all the recent updates!
 
OP
N

nicholam77

Well-known member
Joined
Dec 18, 2016
Messages
2,671
Location
Minneapolis, MN
Need to start doing some testing here shortly as I want to have a decision made when I start installing switches in the garage as to which system I am adding them too. A standalone mini PC is not a bad idea either. If my NAS is capable though likely go that route since it isn't really running anything else. I had not heard of Sonoff so will compare that one to the Zooz one. I definitely have had good luck with other Zooz devices so far.

Ah, my bad, Sonoff is actually Zigbee. Yeah, for Zwave (just like devices), there are less options. These are the 'supported' Zwave controllers according to Home Assistant themselves. I would get a newer 700 series controller so that pretty much leaves you with Aeotec or Zooz, and if you have other Zooz hardware and like them... might as well do that.

Unless you really want to get rid of your SmartThings hub altogether, you *could* simply use it as a Zwave controller through the ST integration you already have set up. The downside would be pairing and managing firmwares / custom device handlers through ST instead of Home Assistant. Even if I move all my and logic and automations to Home Assistant some day, I'll probably keep Hubitat for my radios because I'm too lazy to reset and re-pair all my devices again to new dongles. If you do get the Zooz stick, please report back! I'm curious to see how it works for you since I haven't ventured into that territory with HA yet.

Really like this solution.....and all the recent updates!

Thank you!!
 

cccoltsicehockey

Well-known member
Joined
Apr 3, 2014
Messages
1,414
Location
Charlotte, NC
Ah, my bad, Sonoff is actually Zigbee. Yeah, for Zwave (just like devices), there are less options. These are the 'supported' Zwave controllers according to Home Assistant themselves. I would get a newer 700 series controller so that pretty much leaves you with Aeotec or Zooz, and if you have other Zooz hardware and like them... might as well do that.

Unless you really want to get rid of your SmartThings hub altogether, you *could* simply use it as a Zwave controller through the ST integration you already have set up. The downside would be pairing and managing firmwares / custom device handlers through ST instead of Home Assistant. Even if I move all my and logic and automations to Home Assistant some day, I'll probably keep Hubitat for my radios because I'm too lazy to reset and re-pair all my devices again to new dongles. If you do get the Zooz stick, please report back! I'm curious to see how it works for you since I haven't ventured into that territory with HA yet.
Part of my initial motivation was to get as many things as possible out of the cloud. Certain pieces, like using Google Homes for voice control I am just stuck with having a cloud integration. My Spectrum internet used to drop out a good bit before so that was one of my main reasons initially. Since I switched to ATT&T fiber though that has never happened.

Since I don't have a Zwave dongle yet for HA I am not really sure of the pairing process. The one in SmartThings is pretty painless though most of the time.

If you ever get the itch. At least with your Zwave devices you don't have to reset and repair anymore. You can just replace the controller.

You are likely correct though time is better spent right now working on advanced automation vs migrating things to another controller.
 
OP
N

nicholam77

Well-known member
Joined
Dec 18, 2016
Messages
2,671
Location
Minneapolis, MN
Weekend Update — Doors

My wife planned to go to her dad's cabin this weekend, but feeling the pressure of the basement project and a bunch of other stuff I decided to stay home. Very rare to have a weekend by myself, and by very rare I mean never. It was a bit lonely without the family around, but I set my mind on getting some stuff accomplished.

Last week I had ordered some passage doors and they came in Friday. Looks like I know what I'm doing this weekend!

IMG-5545.jpg

They are hollow core birch with maple-veneered jambs. $320 a piece!! That's like over 1/3 more expensive than last time I ordered 4 yrs ago. They are quite nice, though. My first time with these ball-bearing hinges:
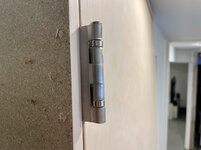
IMG-5553.jpg

There is one for the laundry room, and one for the passage to the office.
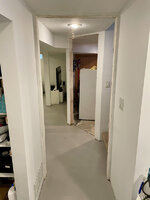
IMG-5546.jpg

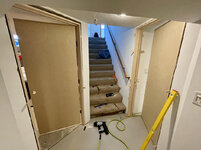
Being a basement with a drop ceiling for mechanicals, the standard 82" door height was a very tight fit. In fact the office one didn't fit... I had to trim down the jamb a 1/2" or so. Track saw made it nice and easy.

IMG-5552.jpg

A bit awkward with no wiggle room.

IMG-5555.jpg

Anyways, once I confirmed it would fit, I started with my door install method. Well, it's not mine, but it's what I like to do. I know there's a million ways to do it.

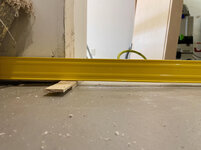
Check the floor for level. Of course it's nowhere near level. Why would it be? It's not like they applied 4 coats of self-leveling concrete or anything. :rolleyes:

Seriously, the waviness of this floor is not that perceptible looking at it or walking on it... but man it is a thorn in my side doing the baseboard, etc. Even my desk cabinets had to be shimmed.

IMG-5556.jpg
IMG-5557.jpg

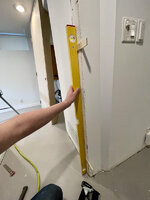
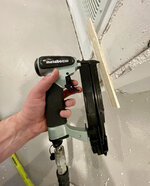
Then I calculate the wiggle room I have for shims on the sides, in this case 1/2", and shoot for about half that or 1/4" of shims on the hinge side. Get those tacked in the hinge side only and make sure they are plumb.
IMG-5559.jpg
IMG-5560.jpg
IMG-5561.jpg

I find this much nicer than trying to install shims with the jamb in place, by yourself.

Then I slide the door in place and tack it at the top on the hinge side, with a 16 gauge 2 1/2" brad. And then go down the hinge side, making sure it's in line with the drywall.

IMG-5562.jpg

And then work around the top and handle side, eyeballing a 1/8" gap and checking to make sure it closes ok as I go along.

Sometimes I tack a piece of wood top and bottom on one side to help stabilize the door while working alone.
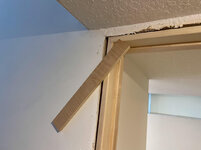
IMG-5563.jpg

This office side door was a really tight fit, and while it's not dragging, it's very close to the floor when open. Damn wavy floors.

IMG-5577.jpg

When I go to finish it I might hand plane that bottom corner a bit, as well as the top corner.

It is plumb and level, though, and opens real nice.

IMG-5567.jpg
IMG-5569.jpg

One done, one to go! The laundry had more room and went much easier.

IMG-5575.jpg
IMG-5573.jpg

I'm planning on finishing them with General Finishes High Performance Satin.

I really like the way the birch looks with the white and the cool gray of the concrete finish.

I don't often get to use Systainers as they're intended, but they really shine working inside the house. Keeps my tools nice and compact.
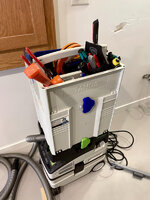
IMG-5548.jpg

I need to do some toolbox organization... perhaps a future 3D printing project.

It felt good to get the doors in, but it made me realize how much I have left to do.

🍻
 

loganb

ALLIANCE MEMBER
Joined
Dec 29, 2011
Messages
5,577
Location
Omaha, NE
Looks good sir!

And I hear you on the rarity of home alone! Starting to get mine trained to at least help sweep and clean up in the garage....soon will hopefully introduce tool gopher duty to the 5 year old....after a year or two of that hopefully it'll start being faster with her around then without...but it can be fun. I'll quickly admit the fun times are hard to think about in the moment when I'm frustrated I've been trying to make the same cut for the last 5 minutes but keep getting bombarded with questions, requests for more food, complaints about something and then needing to go change a diaper
 
OP
N

nicholam77

Well-known member
Joined
Dec 18, 2016
Messages
2,671
Location
Minneapolis, MN
So back to the sink garbage disposal... it died this week!

It was old (came with the house), so I *think* it just wore out. I am hoping that my smart plug zigbee setup had nothing to do with it. I know that motors can be tough on smart plugs, I just hope it there's no reason a smart plug would harm a motor like that. But I'm no expert on electrical motors so I don't really know.

Anyways, I ordered a new, beefier one on Amazon, and got around to installing it yesterday.

IMG-5607.jpg


Both the new and old are Insinkerator brand. I went with a bigger 3/4 HP model that's extra quiet for the replacement.

I previewed my mess of a toolbox with the door installation post, which is where I keep all my indoor tools. A subset of that is this little pouch, which I've had forever:

IMG-5606.jpg

It's super easy to grab, has a belt clip, and contains 90% of what I need for most stuff around the house. Of course I can swap things in and out but I have it loaded with:

— pencils
— sharpies
— non-contact voltage tester
— stanley utility knife
— nail set
— small reversible blade screwdriver
— Wera magnetic 1/4" bit driver
— Klein 15-in-1 screwdriver
— Klein 4-in-1 electronics screwdriver
— Knipex needle nose
— Knipex Cobra 180
— Knipex TwinGrip

I also have a Knipex linemans plier that I swap out for the cobra if I'm doing electrical work.

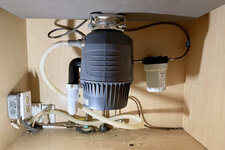
I was able to reuse the sink flange, and the drain plumbing, so it was a pretty easy install.

IMG-5608.jpg

It didn't come with a power cord!

So I had to same-day order one from Amazon, and installed it after the disposal was in place. It has this 'EZ connect' system that uses a screw from the bottom, and there wasn't really room with the disposal installed, but fortunately this little mini ratchet and bit holder from my Tool Check Plus did the job!

IMG-5614.jpg

All done.

IMG-5612.jpg

Yes, I vacuumed the cabinet out after taking the photo!

I'm leaving it 'dumb' for now. Still deciding if the smart plug is safe to employ.

Baseboard progress has been very slow / non-existent, so the only other important news I have to share is I got my 25th anniversary re-release tickets for The Phantom Menace 🤣

IMG-34-F58418-E330-1.jpg

Hope everyone had a good weekend.

🍻
 
Last edited:

zanyad

ALLIANCE MEMBER
Joined
Apr 26, 2018
Messages
2,804
Location
NE Ohio
I've used one of these before, with good results: Garbage Disposal Air Switch Kit Sink Top Waste Disposal Stainless Steel Brushed Nickel On/Off Air Button Food and Waste Disposals Part by Etoolcity https://www.amazon.com/dp/B07PGLZS26?tag=atomicindus08-20

Keeps the outlet dumb and you can install the switch in a more convenient location. I used one of the holes in a steel over-the-
counter sink, with the other one for either a spray head or a soap dispenser (been a while).
 

Xti04

Well-known member
Joined
Nov 11, 2016
Messages
2,338
I've used one of these before, with good results: Garbage Disposal Air Switch Kit Sink Top Waste Disposal Stainless Steel Brushed Nickel On/Off Air Button Food and Waste Disposals Part by Etoolcity https://www.amazon.com/dp/B07PGLZS26?tag=atomicindus08-20

Keeps the outlet dumb and you can install the switch in a more convenient location. I used one of the holes in a steel over-the-
counter sink, with the other one for either a spray head or a soap dispenser (been a while).
Thats what we have and it makes using the disposal much easier than my old house where you had to open cabinet and switch it on under the sink.
 
OP
N

nicholam77

Well-known member
Joined
Dec 18, 2016
Messages
2,671
Location
Minneapolis, MN
@zanyad @Xti04 thanks guys. I have looked at those air switches... I would do that but the main thing I am trying to avoid here is any wall / counter / cabinet surgery. The sink is on an exterior wall and everything is buttoned up. The other thing is, I have an under mount sink, and a single-hole faucet through the quartz, and my counter doesn't have an extra spot drilled for that style of button switch.

I did find this remote switch, which claims it's for dish disposals and "Rated 120V, 5A/600W inductive load. disposer wireless control switch compatible with those Garbage Disposals Unit whose rated power under 1 HP , just like Waste King Series 1/3HP,1/2 HP ,3/4HP ; InSinkErator Badger series Series 1/3HP,1/2 HP ,3/4HP Food Waste Disposer"

So maybe that's more promising than a regular old smart plug? Otherwise I can keep an eye out for a used or refurbished Zooz ZEN15 heavy duty appliance smart plug like I have on my laundry. Because they are expensive.

I did have a slick idea with the smart plug to have a Sonos voice alert reminder when the kitchen motion sensor is activated and the dish disposal hasn't been run in X amount of time, but I guess I don't *need* that 🤣
 

jonshonda

Well-known member
Joined
Jul 17, 2017
Messages
4,747
Location
Wisconsin
I'm always impressed by your motivation to not only work on projects, but to take the time to document them! I get so caught up in what I'm doing and am usually trying to cram 10hrs of work into a 8hr day that taking in progress pics never ranks high in my priority list.

Regarding door hanging methods. Typically you see people placing the shims directly behind the hinges, then remove one of the hinge screws and replace it with a longer screw that goes through the shims gets screwed into the 2x4 stud.
 

Kriesel

Well-known member
Joined
Mar 25, 2014
Messages
138
Location
Afton, Minnesota
Another use for your color changing bulb: My brother-in-law has some door sensors hooked up to his smartthings that sense his kids' bedroom doors. So after bed time, the light in the living room changes color if the door opens for either kid (color coded for each kid).

I've recently been having tons of issues with presence sensing in smartthings. It seems like every time they update something, it breaks any of my routines that are looking for the presence of our phones that are connected to it for location based stuff. Rebuilding the routines every time this happens was getting old. So last week I changed those routines to look at a virtual switch for each of the people who come and go from our home, and I'm trying to use the alexa app for presence sensing instead, and turn on/off those virtual switches through an alexa routine. So far it's working. Hopefully it works better long term and I don't have to rebuild the smartthings routines anymore when they update something in the background.
 
OP
N

nicholam77

Well-known member
Joined
Dec 18, 2016
Messages
2,671
Location
Minneapolis, MN
I'm always impressed by your motivation to not only work on projects, but to take the time to document them! I get so caught up in what I'm doing and am usually trying to cram 10hrs of work into a 8hr day that taking in progress pics never ranks high in my priority list.

Thank you! I don't usually feel like I have the motivation, so that's nice to hear. In fact I was just about to make a post about how I've lost all motivation to continue on the baseboards...

Generally I have spurts of energy where I feel like I can do it, followed by periods of apathy and complaining. 🤣

The key is to be ready when inspiration strikes. If I only have a few hours, I need to be ready to just jump into something (have materials on hand, a plan, etc). I'm pretty big on planning things out ahead vs. winging it, so when it's go time, I don't have to think about how I'm going to do it as much.

As for the pictures, I do it for Garage Journal, which is some form of accountability and motivation in itself, but also just for my personal records. I find it very useful to reference how I did stuff in the future. And also sometimes I like to show people the work that went into it.

Regarding door hanging methods. Typically you see people placing the shims directly behind the hinges, then remove one of the hinge screws and replace it with a longer screw that goes through the shims gets screwed into the 2x4 stud.

Yes, great tip. I didn't have long screws that matched on hand, but I'll probably do that before the casing goes on. Or perhaps a trim head screw just behind the door stop.

Another use for your color changing bulb: My brother-in-law has some door sensors hooked up to his smartthings that sense his kids' bedroom doors. So after bed time, the light in the living room changes color if the door opens for either kid (color coded for each kid).

That is a great idea! It doesn't apply to me at the moment as my daughter insists on sleeping with her door open, and my son is still in his crib. But my daughter does come out a lot, and even sometimes upstairs to sleep on a mini-mattress next to our bed if she has a nightmare. Maybe I need some sort of James Bond Villain laser trip wire sensor on her doorway.

I've recently been having tons of issues with presence sensing in smartthings. It seems like every time they update something, it breaks any of my routines that are looking for the presence of our phones that are connected to it for location based stuff. Rebuilding the routines every time this happens was getting old. So last week I changed those routines to look at a virtual switch for each of the people who come and go from our home, and I'm trying to use the alexa app for presence sensing instead, and turn on/off those virtual switches through an alexa routine. So far it's working. Hopefully it works better long term and I don't have to rebuild the smartthings routines anymore when they update something in the background.

Presence via geofencing is one of the trickiest things, IMO. I don't use either of my home automation platforms' built-in presence. Instead I do a similar thing as you and use the iPhone built-in presence to trigger a virtual switch (or virtual presence sensor in my case). It's worked very reliably for over a year.


Speaking of smart home stuff, lately I have been very tempted to go all-in on Home Assistant. They've rolled out some changes recently that make the automation aspect more straightforward. One of my favorite things I just set up (that's been available for a long time), is actionable notifications.

IMG-5683.jpg


This one sends my phone a push notification when the basement TV is turned on, and when long pressed it gives me an option for my two lighting scenes. This way I don't even have to unlock my phone or open an app. And it pops up when I need it.

Yes... I could automate the lighting, but it's one of those scenarios where my wife and I have different lighting preferences (if I'm alone I like the lights darker), and sometimes we want it bright until we start playing something. Lot's of scenarios. This is a great solution if you want to be able to easily and contextually control something that can't be automated a certain way 100% of the time.

I can see many use cases for this, so it's something I want to explore more.
 

jonshonda

Well-known member
Joined
Jul 17, 2017
Messages
4,747
Location
Wisconsin
The key is to be ready when inspiration strikes. If I only have a few hours, I need to be ready to just jump into something (have materials on hand, a plan, etc). I'm pretty big on planning things out ahead vs. winging it, so when it's go time, I don't have to think about how I'm going to do it as much.


Yes, great tip. I didn't have long screws that matched on hand, but I'll probably do that before the casing goes on. Or perhaps a trim head screw just behind the door stop.

I've spent a lot of time and have put a lot of thought towards organization in my life. I'm always busy doing something, and have found I NEED to be able to easily access-->use-->and put away things I am frequently using with repeatability. This might sound conceded or as if I'm on a high horse, but I have better things to do then mess around with just finding the tool or spending half my time setting up a tool which might not even be the correct tool of the application. I also get unpleasantly frustrated when I don't have what I need, from simple things like screws or hardware, to charged batteries, etc.

I also justify tool purchases based on my trending history of benefitting from said tool, and how it might improve my experience or the finished product. I've learned that sometimes I'm just not happy with a cheap tool, and it bothers me every time I use it...how much fun is that?

Regarding fastening the door jamb, another thing you can do is remove the hinge on the jamb side, and drive a screw through the jamb into the stud, then fasten the hinge again and the screw is hidden behind the hinge.
 

big_bake

Well-known member
Joined
Mar 19, 2014
Messages
119
Location
VA
Give in and dive all in to Home Assistant. It's great. I have been running it since Jan 2017. It's much more polished and put together these days. So much can get done right in the frontend now. I just stick to reading release blogs and checking the breaking changes section for sure. They have been pretty good about deprecating things and adding a log message for those so things don't really sneak up on you.
 

sawduststeve

Well-known member
Joined
Oct 7, 2016
Messages
2,139
Location
Havering-Atte-Bower,London/Essex boarders, England
Or perhaps a trim head screw just behind the door stop.
Yes, always this. We always fix under the door and window loose stops, it’s unlikely you will need to do any thing else.

Good job with the doors and frames.
Steve 🍻

Ps. For the love of fingers, buy a hand saw.
1715191320410.jpeg
 
OP
N

nicholam77

Well-known member
Joined
Dec 18, 2016
Messages
2,671
Location
Minneapolis, MN
I've spent a lot of time and have put a lot of thought towards organization in my life. I'm always busy doing something, and have found I NEED to be able to easily access-->use-->and put away things I am frequently using with repeatability. This might sound conceded or as if I'm on a high horse, but I have better things to do then mess around with just finding the tool or spending half my time setting up a tool which might not even be the correct tool of the application. I also get unpleasantly frustrated when I don't have what I need, from simple things like screws or hardware, to charged batteries, etc.

I also justify tool purchases based on my trending history of benefitting from said tool, and how it might improve my experience or the finished product. I've learned that sometimes I'm just not happy with a cheap tool, and it bothers me every time I use it...how much fun is that?

I 100% agree with this and am of a similar mentality. I'm still working on the highly organized part 🤣

Getting there slowly...

Regarding fastening the door jamb, another thing you can do is remove the hinge on the jamb side, and drive a screw through the jamb into the stud, then fasten the hinge again and the screw is hidden behind the hinge.

That is a great idea, thanks!

Give in and dive all in to Home Assistant. It's great. I have been running it since Jan 2017. It's much more polished and put together these days. So much can get done right in the frontend now. I just stick to reading release blogs and checking the breaking changes section for sure. They have been pretty good about deprecating things and adding a log message for those so things don't really sneak up on you.

Wow, 2017 is quite awhile ago, I know there have been big changes since then.

I need it to be in the front end because I don't know Python or YAML. 🤣 I mean, I can follow YAML if given an example... but I can never remember it and it's kind of a pain IMO to look at the documentation for each thing (which sometimes is mediocre at best) to see what the options are. I am not a coder or in the IT sphere, but I do consider myself fairly techy.

I can see they are putting in hard work to make the project more user friendly and accessible. They are making great strides, but I think it's still far off from a commercial product (even though that seems to be their stated goal as of late?). Even all the awesome new features like labels, categories, and sections, are less-streamlined than they could be. In particular, I find the built-in automation platform to be hard on the eyes... once you start building up a complex automation it gets hard to look at from a top-down view.

I do currently use Home Assistant on more than a surface level. I have a handful of automations and scripts, integrations from HACS, and have been working on a customized mobile dashboard. Here's a few screens from it (homepage, lights, climate)... it's WIP so don't judge too harshly 😁

IMG-5713.jpg


Just the other day I set up remote access (Cloudflare tunnel) and made a simple dashboard for my wife.

So my goal is definitely to make the full transition.

What's holding me back is not necessarily that I am scared of Home Assistant, it's that I have ~80 automations in Hubitat (WebCoRE) to port over, and some of them are pretty complex with variables and expressions. I don't know JINJA at all, so that is a bit frustrating. Basically it boils down to a lot of time just to remake what I already have humming along nicely.

But having everything under one roof is a good thing. I'll probably do it a few automations at a time.
 
To avoid these ads, REGISTER NOW!
Top Bottom